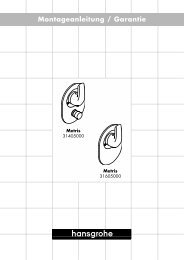
Montageanleitung - Hansgrohe
Montageanleitung - Hansgrohe
Montageanleitung - Hansgrohe

Create successful ePaper yourself
Turn your PDF publications into a flip-book with our unique Google optimized e-Paper software.
techNISche DateN Dg 3 KW<br />
Legende<br />
a Leerrohr 1 mit Innen-Ø 25 mm für<br />
Stromversorgung:<br />
Das mitgelieferte Stromversorgungskabel<br />
mit Kupplungsstecker für<br />
den Anschluß am Dampfgenerator<br />
ermöglicht die Installation der Stromversorgung<br />
bis zu maximal ca. 6 m<br />
entfernt vom Eckschrankmodul. Der<br />
Anschluss muss jederzeit zugänglich<br />
und im Trockenbereich (Schutzzone<br />
3) installiert werden.<br />
Anschlussdose mit Elektroanschluss<br />
230V/N/PE/50Hz für das Stromversorgungskabel<br />
vorsehen.<br />
Die Absicherung muss über eine<br />
Fehlerstrom-Schutzeinrichtung (RCD)<br />
mit einem Bemessungsdifferenz-strom<br />
≤ 30 mA erfolgen.<br />
b Leerrohr 2 mit Innen-Ø 25 mm für<br />
Trafokabel:<br />
Der mitgelieferte Trafo (Abmessung:<br />
120x80x80mm) muss im Trockenbereich<br />
(Schutzzone 3) installiert werden.<br />
Das Trafokabel ermöglicht die Installation<br />
des Trafos bis zu max. ca. 6 m<br />
entfernt vom Eckschrankmodul. Der<br />
Trafo muss jederzeit zugänglich sein.<br />
Ein beschädigter Anschluss kann nicht<br />
ersetzt werden. Der Trafo darf dann<br />
nicht mehr betrieben werden.<br />
Der Trafo wird an eine Steckdose<br />
230V/50Hz angeschlossen und muss<br />
über eine Fehlerstrom-Schutzeinrichtung<br />
(RCD) mit einem Bemessungsdifferenzstrom<br />
von ≤ 30 mA abgesichert<br />
werden.<br />
c Leerrohr 3 mit Innen-Ø 25 mm für Steuerleitung<br />
(12V~/40W) zum ansteuern<br />
einer externen Beleuchtung (Beleuchtung<br />
nicht im Lieferumfang).<br />
Das mitgelieferte Verlängerungs-kabel<br />
ermöglicht den Anschluss bis zu max.<br />
ca. 4 m entfernt vom Modul.<br />
D Anschluß (Anschlußmuffe DN15 ½“,<br />
bündig Fliesen) zum anschließen<br />
einer Deckenkopfbrause vorsehen<br />
(Deckenkopfbrause nicht im Lieferumfang)<br />
e TWW - Trinkwasser warm DN15 ½“<br />
F TWK - Trinkwasser kalt DN15 ½“<br />
(rechts)<br />
g TWW - Trinkwasser warm DN15 ½“<br />
(links)<br />
h Wasserablauf (Ø 50 mm) unterhalb<br />
der Dampfaustrittsdüse vorsehen.<br />
Anschluss für Wasserzulauf und der<br />
Wasserablauf sind nach den derzeit<br />
gültigen DIN 1988/EN 1717 / DIN 1986/<br />
EN 12056 und den örtlichen Vorschriften<br />
zu installieren (Anschlußmuffe DN15 ½“,<br />
bündig Fliesen).<br />
Die Leerrohre und Anschlüsse können<br />
wahlweise links oder rechts vorgesehen<br />
werden.<br />
12<br />
techNIcaL Data Dg 3 KW<br />
Legenda<br />
a Wiring conduit 1 with internal diameter<br />
of 25 mm for power supply:<br />
The Steam generator is supplied with<br />
a cable lead allowing for the mains<br />
connection to be made approx 6m<br />
from the corner of the cabin.<br />
The connection must be accessible<br />
at all times and must be installed in<br />
the dry area (protection zone 3).<br />
Plan socket with power supply connection<br />
230V/N/PE/50Hz.<br />
The connection must be fused via a<br />
2-pole RCCB with a residual current<br />
of ≤ 30 mA.<br />
b Wiring conduit 2 with internal diameter<br />
of 25 mm for transformer cable:<br />
The transformer (dimension:<br />
120x80x80mm) must be installed in<br />
the dry area (protection zone 3). The<br />
transformer cable allows the connection<br />
to be installed max. approx. 6 m<br />
from corner cabinet. The transformer<br />
must be accessible at all times. A damaged<br />
connection cable cannot be<br />
replaced, and the transformer must<br />
not be operated in this case.<br />
The transformer must be connected<br />
to a power outlet (230V/50Hz). The<br />
connection must be fused via a 2-pole<br />
RCCB with a residual current of ≤ 30<br />
mA.<br />
c Wiring conduit 3 with internal diameter<br />
of 25 mm for control cable (12V~/40W)<br />
for external lighting (the lighting isn't<br />
a component of the delivery):<br />
The enclosed extension cord allows<br />
the connection max. approx. 4 m from<br />
corner cabinet.<br />
D Plan connection (connection sleeve<br />
DN15 ½“, flush with tiles) for over<br />
head shower (the overhead shower<br />
isn't a component of the delivery).<br />
e TWW = hot water DN15 ½“<br />
F TWK = cold water DN15 ½“ (right)<br />
g TWW = hot water DN15 ½“ (left)<br />
h Plan waterdrainage (Ø 50 mm) under<br />
steam nozzle of the corner cabinet.<br />
Connections for water inlet and drain<br />
have to be installed according to the<br />
currently valid DIN 1988/EN 1717 / DIN<br />
1986/EN 12056 as well as local regulations<br />
(connection sleeve DN15 ½“, flush<br />
with tiles).<br />
DatI tecNIcI Dg 3 KW<br />
Legenda<br />
a Tubo vuoto di posa 1 con Ø interno 25<br />
mm per l‘alimentazione elettrica:<br />
Il cavo d’alimentazione di corrente elettrica<br />
in dotazione con spina di connettore<br />
per l’allacciamento di rete al generatore<br />
di vapore permette l’installazione<br />
dell’alimentazione elettrica fino ad una<br />
distanza massima di ca. 6 dal modulo<br />
armadietto angolare. L’installazione del<br />
collegamento deve essere eseguita in<br />
modo da essere accessibile in qualsiasi<br />
momento ed in zona asciutta (zona di<br />
protezione 3).<br />
Prevedere una scatola di collegamento<br />
con il collegamento elettrico 230V/N/<br />
PE/50Hz per il cavo d’alimentazione di<br />
corrente elettrica.<br />
La protezione deve essere eseguita<br />
attraverso un interruttore automatico a<br />
corrente residua (RCD) con una taratura<br />
della corrente differenziale pari a ≤ 30<br />
mA.<br />
b Tubo vuoto di posa 2 con Ø interno 25<br />
mm per cavo del trasformatore:<br />
Il trasformatore in dotazione (Dimensione:<br />
120x80x80mm) deve essere installato<br />
in zona asciutta (zona di protezione 3).<br />
Il cavo del trasformatore consente di<br />
installare il trasformatore fino ad una<br />
distanza massima di ca. 6m dal modulo<br />
armadietto angolare. Il trasformatore<br />
deve essere accessibile in qualsiasi<br />
momento. Non è possibile sostituire<br />
un collegamento danneggiato. In tal<br />
caso non è più permesso utilizzare il<br />
trasformatore.<br />
Il trasformatore viene collegato ad una<br />
presa di alimentazione 230V/50Hz e<br />
deve essere protetto attraverso un interruttore<br />
automatico a corrente residua<br />
(RCD) con una taratura della corrente<br />
differenziale pari a ≤ 30 mA.<br />
c Tubo vuoto di posa 3 con Ø interno<br />
25 mm per filo pilota (12V~/40W) per<br />
il controllo di un‘illuminazione esterna<br />
(illuminazione non compresa nel volume<br />
di fornitura).<br />
Il cavo di prolunga fornito in dotazione<br />
consente il collegamento fino ad una<br />
distanza massima di ca. 4m dal modulo.<br />
D Predisporre raccordo (manicotto di<br />
collegamento DN15 ½“, a filo con piastrelle)<br />
per eseguire il collegamento di<br />
un soffione doccia a soffitto (soffione<br />
doccia a soffitto non compreso nel<br />
volume di fornitura)<br />
e TWW - acqua potabile calda DN15<br />
½“<br />
F TWK - acqua potabile fredda DN15 ½“<br />
(lato destro)<br />
g TWW - acqua potabile calda DN15 ½“<br />
(lato sinistro)<br />
h Predisporre lo scarico a pavimento (Ø<br />
50mm) in corrispondenza del diffusore<br />
vapore.