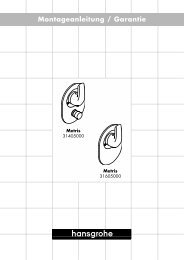
Montageanleitung - Hansgrohe
Montageanleitung - Hansgrohe
Montageanleitung - Hansgrohe

You also want an ePaper? Increase the reach of your titles
YUMPU automatically turns print PDFs into web optimized ePapers that Google loves.
MoNtage ecKSchraNK<br />
1. Trafokabel b durch das Leerrohr zum<br />
Eckschrank führen.<br />
Für Dg 3,0 kW gilt:<br />
Stromkabel 230V/50Hz e (im Lieferumfang)<br />
durch das Leerrohr vom Eckschrank<br />
zur Verteilerdose führen.<br />
Für Dg 4,5 kW gilt:<br />
Stromkabel 400V/50Hz e (im Lieferumfang)<br />
durch das Leerrohr vom Eckschrank<br />
zur Verteilerdose führen.<br />
26<br />
Gegebenenfalls Verlängerungskabel<br />
c für externe Beleuchtung durch das<br />
Leerrohr zum Eckschrank führen.<br />
2. Dübel für die Eckschrankmontage<br />
mit Silikon versiegeln.<br />
Den Eckschrank mit integriertem<br />
Dampfgenerator mit den Schrauben<br />
g (Holzschraube 6 x 45) und Unterlagscheiben<br />
h (A 6,4 x 18) anschrauben,<br />
die vier Schrauben dabei nur leicht<br />
anziehen.<br />
3. Den Druckschlauch I für den Dampfgenerator<br />
ans Eckventil K anschließen.<br />
Eckventil K öffnen.<br />
4. Das Stromkabel L (230V/50 Hz) in den<br />
Eckschrank führen und anschließen.<br />
corNer cabINet INStaLLatIoN<br />
1. Put the transformer cable b through<br />
wiring conduit (from outside to the<br />
corner cabinet).<br />
Dg 3,0 kW:<br />
Put the power supply cable (230V/50Hz<br />
e (included of scope of delivery)<br />
through wiring conduit (from corner<br />
cabinet to socket)<br />
Dg 4,5 kW:<br />
Put the power supply cable (400V/50Hz<br />
e (included of scope of delivery)<br />
through wiring conduit (from corner<br />
cabinet to socket)<br />
Possibly, put the control cable c<br />
through wiring conduit.<br />
2. Seal dowels for corner cabinet installation<br />
with silicone.<br />
Screw corner cabinet with integrated<br />
steam generator on with screws g<br />
(wood screw 6 x 45) and washers h (A<br />
6.4 x 18), only tighten the four screws<br />
lightly.<br />
3. Connect pressure hose I for the steam<br />
generator to corner valve K.<br />
Open corner valve K.<br />
4. Route power supply cable L (230<br />
V/50Hz) into corner cabinet and<br />
connect it.<br />
MoNtaggIo DeLL'arMaDIetto<br />
aNgoLare<br />
1. Far passare il cavo del trasformatore<br />
b attraverso il tubo vuoto di posa fino<br />
all’armadietto angolare.<br />
Dg 3,0 kW:<br />
Far passare il cavo della corrente<br />
230V/50Hz e (compreso nel volume<br />
di fornitura) attraverso il tubo vuoto<br />
di posa dall’armadietto angolare fino<br />
alla cassetta di distribuzione.<br />
Dg 4,5 kW:<br />
Far passare il cavo della corrente<br />
400V/50Hz e (compreso nel volume<br />
di fornitura) attraverso il tubo vuoto<br />
di posa dall’armadietto angolare fino<br />
alla cassetta di distribuzione.<br />
Se il caso, far passare il cavo di controllo<br />
c per illuminazione esterna<br />
attraverso il tubo vuoto di posa fino<br />
all‘armadietto angolare.<br />
2. Sigillare i tasselli per il montaggio<br />
dell'armadietto angolare utilizzando<br />
del silicone.<br />
Avvitare l'armadietto angolare con<br />
il generatore di vapore integrato<br />
utilizzando le viti g (vite per legno 6<br />
x 45) e rondelle piatte h (A 6,4 x 18)<br />
avendo cura di stringere le quattro<br />
viti solo leggermente.<br />
3. Collegare il tubo flessibile di pressione<br />
I per il generatore di vapore alla<br />
valvola angolare K.<br />
Aprire la valvola angolare K.<br />
4. Far passare il cavo della corrente L (230<br />
V / 50 Hz) nell‘armadietto angolare ed<br />
eseguire il collegamento.