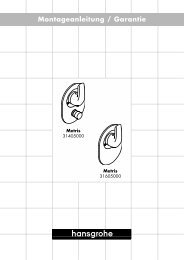
Montageanleitung - Hansgrohe
Montageanleitung - Hansgrohe
Montageanleitung - Hansgrohe

You also want an ePaper? Increase the reach of your titles
YUMPU automatically turns print PDFs into web optimized ePapers that Google loves.
FuNKtIoNSPrÜFuNg<br />
Nach erfolgreicher Funktionsprüfung<br />
die Glasscheibe der Revisionsöffnung<br />
mit Glasschutzhülse a, mit Flachdichtung<br />
b (11x6x1) und Schraube c (SW 4<br />
mm) montieren.<br />
Die Schrauben nicht über Kreuz festziehen<br />
sondern im Uhrzeigersinn. Stopfen<br />
D in Schraubenkopf einsetzen.<br />
40<br />
FINaL WorK<br />
After the performed functional check,<br />
install the glass panel of the inspection<br />
opening with glass protection sleeve a,<br />
flat seal b (11x6x1) and screw c (SW 4<br />
mm).<br />
Do not tighten the screws crosswise<br />
but clockwise. Do not overtighten the<br />
screws! Insert plug D in screw head.<br />
MoNtaggIo FINaLe<br />
Una volta eseguito con successo il<br />
controllo del funzionamento, montare<br />
il pannello di vetro dell‘apertura<br />
d'ispezione utilizzando la bussola di<br />
protezione per vetro a, la guarnizione<br />
piatta b (11x6x1) e la vite c (misura 4<br />
mm).<br />
Non avvitare le viti in maniera incrociata<br />
ma in senso orario. Applicare il tappo D<br />
nella testa della vite.