
Create successful ePaper yourself
Turn your PDF publications into a flip-book with our unique Google optimized e-Paper software.
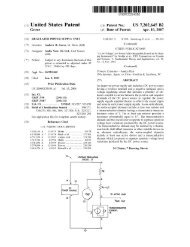
G<br />
lass<br />
W<br />
are<br />
AUDIO DESIGN<br />
Constant-Current-Draw Amplifier<br />
All-In-One Stereo PCB<br />
USER GUIDE<br />
Introduction<br />
Overview<br />
Schematics<br />
Recommended Configurations<br />
Power Supply Design<br />
Assembly Instructions<br />
APR 04 2011
DANGER!<br />
This PCB holds a high-voltage power supply; thus, a real—<br />
and possibly—lethal shock hazard exists.<br />
Ideally, a variac should be used to slowly power up the<br />
regulator, as it is better to have a mis-oriented electrolytic<br />
capacitor or a mis-located resistor blow at low voltages,<br />
rather than at high voltages. Remember that the danger<br />
increases by the square of the voltage; for example, 200<br />
volts is four times more dangerous than 100 volts and 400<br />
volts is sixteen times more dangerous.<br />
Once the power supply is powered up, be cautious at all<br />
times. In fact, even when the power supply is disconnected<br />
or shut down, assume that power-supply capacitors will have<br />
retained their charge and, thus, can still shock. If you are not<br />
an experienced electrical practitioner, before attaching the<br />
transformer windings to the board, have someone who is<br />
well-experienced in electronics review your work.<br />
There are too few tube-loving solder slingers left; we cannot<br />
afford to lose any more.<br />
GlassWare<br />
AUDIO DESIGN<br />
www.glass-ware.com<br />
www.tubecad.com<br />
sales@glass-ware.com<br />
Copyright © 2011<br />
All Rights Reserved
GlassWare Audio Design<br />
Warning!<br />
This PCB contains a high-voltage power supply; thus, a real and lethal shock hazard<br />
exists. Once the power transformer is attached, be cautious at all times. In fact, always<br />
assume that the high voltage capacitors will have retained their charge even after the<br />
power supply has been disconnected or shut down. If you are not an experienced<br />
electrical practitioner, before applying the AC voltage have someone who is<br />
experienced review your work. There are too few tube-loving solder slingers left; we<br />
cannot afford to lose any more.<br />
Overview<br />
Thank you for your purchase of the GlassWare <strong>12B4</strong> <strong>CCDA</strong> stereo PCB. This FR-4<br />
PCB is extra thick, 0.094 inches (inserting and pulling tubes from their sockets won’t<br />
bend or break this board), double-sided, with plated-through heavy 2oz copper traces.<br />
In addition, the PCB is lovingly and expensively made in the USA. The board is 7 by<br />
6 inches, with five mounting holes, which helps to prevent excessive PCB bending<br />
while inserting and pulling tubes from their sockets.<br />
Each PCB holds two <strong>12B4</strong> <strong>CCDA</strong> (constant-current-draw amplifier) line-stage<br />
amplifiers (four <strong>12B4</strong>s); thus, one board is all that is needed for stereo unbalanced us).<br />
By including the necessary components for the heater and high voltage B+ power<br />
supplies on the PCB, the <strong>12B4</strong> <strong>CCDA</strong> board makes building a standard-setting line<br />
stage amplifier a breeze.<br />
PCB Features<br />
B+ and Heater Power Supplies On the <strong>12B4</strong> <strong>CCDA</strong> board, two power supplies<br />
reside, one for the high-voltage B+ for the tubes and a low-voltage power supply for<br />
the heaters. The high-voltage power supply uses an RC filter to smooth away ripple,<br />
while the low-voltage power supply uses a voltage regulator to provide a stable and<br />
noise-free voltage output. The heater regulator is adjustable and can be set to 6V or<br />
12V. The power supplies require an external power transformer(s) with two secondary<br />
windings (120Vac to 260Vac and 12Vac to 12.6Vac).<br />
Redundant Solder Pads This board holds two sets of differently-spaced solder pads<br />
for each critical resistor, so that radial and axial resistors can easily be used (radial<br />
bulk-foil resistors and axial film resistors, for example).<br />
Dual Output Coupling Capacitors Select between two coupling capacitors at the<br />
output. In addition, most capacitor locations find many redundant solder pads, so<br />
wildly differing-sized coupling capacitors can be placed neatly on the board, without<br />
excessively bending their leads.<br />
Power-Supply-Decoupling Capacitors The <strong>12B4</strong> <strong>CCDA</strong> PCB provides space for two<br />
sets of capacitors to decouple both <strong>12B4</strong> <strong>CCDA</strong> gain stages from the B+ connection<br />
and each other. This arrangement allows a large-valued electrolytic capacitor and<br />
small-valued film capacitor to be used in parallel, while a series voltage-dropping<br />
resistor completes the RC filter. (As an option, in place of the R17 series resistor, an<br />
off-board choke can be used for each channel.)
GlassWare Audio Design<br />
Introduction to the <strong>CCDA</strong> Circuit<br />
The Constant-Current-Draw Amplifier is a compound circuit that holds a groundedcathode<br />
amplifier directly cascaded into a cathode follower. So what; what’s so special<br />
about this obvious pairing Its special status lies in the details. Each triode sees the<br />
same cathode to plate voltage and the same load resistance and same idle current<br />
draw. Each sees the same signal voltage swings. Both grounded-cathode amplifier and<br />
the cathode follower are in voltage phase, but not current phase. For example, as the<br />
grounded-cathode amplifier sees a positive going input signal, its plate current<br />
increases, which increases the voltage developed across the plate resistor, which in turn<br />
swings the plate voltage down. This downward voltage swing is then cascaded into the<br />
grid of the cathode follower, which decreases the plate current to the same degree that<br />
the previous stage's current increased. This results in the constant current draw feature<br />
of this topology (a highly desirable feature, as the signal amplification will not alter<br />
the amount of current being sourced from the power supply and consequently not<br />
perturb the power supply, thus greatly simplifying the design consideration of the<br />
power supply).<br />
R load<br />
B+<br />
B+<br />
2<br />
in<br />
1µF<br />
out<br />
1M<br />
Rk<br />
R load<br />
1M<br />
<strong>CCDA</strong> Topology<br />
A line stage is needed either to boast a weak signal voltage sufficient to drive a power<br />
amplifier to full output, or to deliver current sufficient to drive a high capacitance<br />
load (such as long stretches of interconnect). Just how much gain is needed for a line<br />
amplifier Let's begin the answer with the observation that most line amplifiers have<br />
too much gain. (After all, many audiophile run passive line-stage setups, which offer<br />
no voltage gain.) While this extra gain impresses the audio neophyte who marvels at<br />
the power implicit in the distorted thunder that a mere one quarter twist of the<br />
volume knob provokes, it ultimately only subtracts from the useful range of turn on<br />
the volume and usually only worsens the signal-to-noise ratio of the line stage. If 20 to<br />
30 dB of gain is too much, how much then is best The answer will depend on each<br />
system. A safe guess, however, would be 6 to 20 dB of gain, which translates into 2 to<br />
10 times the input signal.<br />
Calculating the gain from a <strong>CCDA</strong> amplifier is easy, when the cathode resistor is left<br />
un-bypassed, as the gain roughly equals half the mu of the input triode used. For<br />
example, the <strong>12B4</strong> presents a mu of 6.5, so the gain will equal about 3 (+9.5dB), not<br />
3.5 due to losses in the cathode follower.<br />
Gain = muRa / (rp + Ra + [mu +1]Rk)<br />
And since we wish to split the B+ voltage at the input tube's plate,<br />
Ra = rp + (mu + 1)Rk
Thus, the gain formula reduces to<br />
Gain = muRa / 2Ra<br />
which further reduces to<br />
Gain = mu/2<br />
GlassWare Audio Design<br />
<strong>12B4</strong> <strong>CCDA</strong> PCB Obviously, on this PCB many more components have been added<br />
to the basic <strong>CCDA</strong> circuit. R2 and R4 are grid-stopper resistors and are essential,<br />
particularly for the cathode follower output stage. The added diode is also essential, as<br />
it protects the second triode at startup, when the cathodes are cold and the cathode<br />
follower’s cathode sits at 0V and its grid sees the full B+ voltage— never a good idea,<br />
as the cathode can see portions of its surface ripped away by the huge voltage<br />
differential. C1 & C2 are the output coupling capacitors. C3 and C4 are power supply<br />
filtering capacitors which, with resistor R8, define a simple RC filter. R5 (the extra<br />
cathode resistor) is optional, although highly recommended, as it buffers the cathode<br />
follower’s output from heavily-capacitive loads and it increases the cathode follower’s<br />
linearity, but at the cost of increased output impedance.<br />
Super low output impedance is essential, isn't it In order to avoid insertion loss<br />
and frequency droop, a low output impedance is absolutely necessary isn't it Well, it<br />
depends. Consider that cheap OpAmps such as the LM741 have amazingly low output<br />
impedances because of the high feedback ratios they run; yet they can't drive low<br />
impedance loads because they are output current limited. Y et a discrete transistor line<br />
amplifier— with higher output impedance (because of less feedback) and a greater<br />
output current capability— may drive the same low impedance load extremely well. So<br />
which was the more crucial factor: low output impedance or high current output<br />
Of course, if the power amplifier presents an extremely-low load impedance, a low<br />
output impedance will be needed just to preserve signal level, but not necessarily to<br />
preserve bandwidth, as any cable capacitance would effectively be countervailed by the<br />
load's own low impedance. No, the real threat to bandwidth comes from high<br />
impedance loads, which are bogged down by the high capacitance (because of long<br />
interconnects and the power amplifier’s own input capacitance); and when this<br />
capacitance cannot be charged and discharged quickly enough, poor bandwidth results.<br />
The key words in the previous sentence were "charged" and "discharged." Charging a<br />
capacitor quickly requires current. The quicker the charging, the greater the current<br />
flow. The formula is a simple one: Current = Slew Rate x Capacitance or<br />
I = SR x C,<br />
where slew rate refers to the amount of voltage that must be developed within a<br />
certain amount of time. Therefore, in order to guarantee wide bandwidth, the line<br />
stage must be capable of delivering a fairly high current at its output.<br />
Isn't phase inversion bad The <strong>12B4</strong> <strong>CCDA</strong> inverts the signal polarity and phase<br />
inversion to be avoided at all costs...right No, unless you can't reverse the<br />
positive/negative connections of the speaker cable to the power amplifier. Line stage<br />
phase inversion just needs a screwdriver to fix. If the line amplifier inverts the phase<br />
and the power amplifier doesn't, then invert the speaker's phase. If the line amplifier<br />
inverts the phase and the power amplifier also inverts, then don't invert the speaker's<br />
phase.
GlassWare Audio Design<br />
Unlike the Aikido circuit, which delivers a perfect platform for tube rolling, as vastly<br />
different tubes can be swapped in and out of the board (6AQ8 or 6H30) without<br />
having to change the resistor values, the <strong>12B4</strong> <strong>CCDA</strong> requires more care in selecting<br />
resistor values. The problem is the daunting array of different possible B+ voltages<br />
and idle currents. For example, a <strong>12B4</strong> <strong>CCDA</strong> might run a B+ voltage of only 100Vdc<br />
or as much as 300Vdc. Moreover, the plate resistor cannot be the little 1/2W devices<br />
that the Aikido freely uses, but big 2W (or 3W) power resistors, which are hard to<br />
find and expensive. The solution the problem of too many resistor combinations is to<br />
let the idle current move, but lock the plate and cathode resistor values. A triode with<br />
a cathode and plate resistors acts like a resistor, not a perfect resistor, but a fairly<br />
good one.<br />
As the graph above reveals, a <strong>12B4</strong> triode with a 1000-ohm cathode resistor (no plate<br />
resistor) behaves much like a 9.4k resistor. (By the way, note the much improved<br />
linearity over the plate curve lines, albeit at the cost of greatly increased plate<br />
resistance and reduced transconductance.) Adding a plate resistor also makes the<br />
triode behave more like a good resistor. The formula for the effective resistance is:<br />
R = rp + Ra +(mu + 1)Rk.<br />
The upshot is that if we chose plate and cathode resistors values to work at the<br />
middle of possible B+ voltages, these same resistors will still split the B+ voltage<br />
across a wide range of B+ voltages. In other words, we can use a wide range of B+<br />
voltage with the same cathode and plate resistor values.<br />
In general, the following formula is a good starting point:<br />
Rk = (Ra – rp) / (mu + 1)
GlassWare Audio Design<br />
Input RCA Jacks<br />
Isolated with shoulder-washers from chassis<br />
Right<br />
Output RCA Jacks<br />
Isolated from chassis<br />
Right<br />
Left<br />
Left<br />
Bottom View<br />
Bottom View<br />
Volume Control
GlassWare Audio Design<br />
Configuring a <strong>12B4</strong> <strong>CCDA</strong> Line Amplifier<br />
The <strong>12B4</strong> <strong>CCDA</strong> topology makes a good line amplifier, as it offers low distortion<br />
and a fairly low output impedance. The following design examples are by no means<br />
exhaustive, as many more equally “correct” configurations are possible.<br />
R8b<br />
R6a<br />
R6b<br />
V2<br />
C4<br />
R8a<br />
C3<br />
B+<br />
R4<br />
C1<br />
Output<br />
Input<br />
R2<br />
V1<br />
D11<br />
R5<br />
C2<br />
R10<br />
C1<br />
G<br />
C2<br />
+<br />
G<br />
R1<br />
R3<br />
R7a R7b R9<br />
Typical Part Values<br />
B+ =<br />
(at tubes)<br />
R1,9,10 =<br />
R2,4 =<br />
R3,5 =<br />
R6,7 =<br />
() Parentheses denote recommended values<br />
100V 150V 200V 250V 300V<br />
1M 1M 1M 1M 1M<br />
100-1k (300) 100-1k (300) 100-1k (300) 100-1k (300) 100-1k (300)<br />
100 270 470 820 1150<br />
2.15k 2W 3.4k 2W 5k 3W 7.5k 3W 10k 3W<br />
Iq =<br />
23mA 22mA 20mA 17mA 15mA<br />
C1,2 =<br />
C3 =<br />
C4 =<br />
C7,8 =<br />
0.1 - 10µF* Same Same Same Same<br />
0.1 - 1µF* " " " "<br />
270µF/200V 270µF/200V 150µF/400V 150µF/400V 150µF/400V<br />
220µF/200V 220µF/200V 47µF/450V 47µF/450V 47µF/450V<br />
*Voltage rating must equal or exceed B+ voltage<br />
RC Power-Supply Filter<br />
The <strong>12B4</strong> <strong>CCDA</strong> kit supplies 24 resistors for R8 (R8a & R8b in parallel): six pairs of<br />
3W resistors for R8 use: 1.6k, 2k, 3k, 3.9k, 6.8k, 10k, and six pairs of 1W resistors, 100,<br />
200, 300, 470, 680, and 1k. The charts on the back inside cover show the<br />
voltage/current maximums for the resistors and the voltage drop across the resistors<br />
versus current flow. Remember each channel gets it own R8 resistor. For example, a<br />
<strong>12B4</strong> <strong>CCDA</strong> line- stage amplifier might run each tube with 20mA of idle current, for a<br />
total of 40mA per channel. So by looking up the 40mA column, we can see the resulting<br />
voltage drops. Thus, one 1k resistor will drop 40V; thus, a 290Vdc raw DC power<br />
supply with 1k R8 resistors would deliver 250Vdc to the tubes. To prevent risking<br />
damage to the resistors, avoid running resistors near the excessive current and voltage<br />
limits.
GlassWare Audio Design<br />
B-Plus Power Supply<br />
The high voltage B-plus power supply resides on the <strong>12B4</strong> <strong>CCDA</strong> PCB. It contains a<br />
full-wave bridge rectifier circuit and reservoir capacitor, which is then followed by an<br />
RC power-supply smoothing filter. The power transformer is external to the PCB and<br />
can be mounted in, or outside, the chassis that houses the PCB. The optimal B-plus<br />
voltage depends many factors. For example, the <strong>12B4</strong> can draw a good deal of current<br />
at relatively low plate voltages and can withstand much higher plate voltage than other<br />
small triodes, so a B+ range of 100V to 300V. The sky is not the limit here, as the<br />
power supply capacitors and the heater-to-cathode voltage set an upward limit of<br />
about 350V for the power supply voltage after the rectifiers and about 300V at the<br />
tubes after the RC filter.<br />
An analogy can be made between cars and a tube line-stage amplifier. A race car runs<br />
high revs and high horsepower and it is obscenely expensive, noisy, unreliable, and<br />
glorious to behold. A family’s commuter car is cheap, quiet, reliable, and boring.<br />
Running high voltage and high current will make for a short tube life and a<br />
wonderful sound. Running low voltage and low current will greatly extend tube life<br />
and save money on part cost. For example, a typical 200V capacitor is much more<br />
volumetrically efficient and cheaper than a 400V capacitor. Thus, running a lower B-<br />
plus voltage allows us to increase greatly the total capacitance in the power supply, at a<br />
lower cost, which will lower power-supply noise at the output. Unlike the Aikido<br />
circuit, which nulls its power-supply noise at its output, the <strong>CCDA</strong> circuit only offers<br />
a -6dB reduction of power-supply noise at its output.<br />
My recommendation is to use a 120Vac secondary that will establish a 165V to 170V<br />
raw DC voltage after the rectifiers, which will then fall to about 120V to 150V after<br />
the two RC filters; and to run the <strong>12B4</strong>s under a high idle current, say 23mA (Rk =<br />
220, B+ = 140V, Ra = 3k). Or use a 240Vac secondary that will establish a 330V to<br />
340V raw DC voltage, which will then fall to about 250V to 300V after the RC filters;<br />
and to run the <strong>12B4</strong>s under a lower idle current, say 15mA (Rk = 1150, B+ = 300V, Ra<br />
= 10k). Resistors R8a & R8b are in parallel and they form the series resistor in the RC<br />
power supply filter with capacitors C4 & C5. Resistor heat equals I² x R (and V²/R);<br />
for example, 20mA and 5k will dissipate 2W. See page 12 and the back inside cover<br />
for more information.<br />
R8b<br />
to left channel's R8a & R8b<br />
to right channel tubes<br />
R17<br />
B+<br />
to left B+<br />
R8a<br />
D2<br />
C21<br />
C22<br />
D1<br />
R18<br />
R18<br />
R14<br />
R13<br />
to Heater -<br />
J3<br />
C17<br />
R19<br />
C4<br />
C5<br />
C8<br />
C7<br />
R15<br />
D3<br />
AC<br />
C20 C19<br />
CT<br />
R16<br />
D4<br />
Chassis
GlassWare Audio Design<br />
Power Transformer(s)<br />
The <strong>12B4</strong> <strong>CCDA</strong> PCB requires a power transformer(s) to energize its two power<br />
supplies. The heater power supply power transformer must offer at least 1.8 times<br />
more current than the heaters will draw. For example, four <strong>12B4</strong>s will draw 1.2A<br />
@12.6v, so the heater power transformer must be able to sustain an AC 2.16A current<br />
draw (2.5A is good choice). In addition, with sine waves, the AC voltage equals the<br />
peak voltage divided by the square root of 2, i.e. 1.414. Thus, a 10Vac sine wave peaks<br />
at 14.14V; a 6.3Vac, 8.9V. In other words, a sine wave that peaks at 14.14V will<br />
produce the same amount of heat in a resistance as a 10Vdc voltage source would<br />
produce in the same resistance; thus, we label the 14.14Vpk sine wave as being 10Vac.<br />
Thus, in order to get the 16Vdc raw DC voltage that a 12.6V heater voltage regulator<br />
requires an input voltage equal to remainder of 16V minus the rectifier loss (about<br />
2V) divided by 1.414, which is roughly 12.6Vac.<br />
The high voltage power transformer must also follow the same rules. Thus, to achieve<br />
300V of raw DC voltage, the transformer primary must deliver (300V + 2V) / 1.414,<br />
or about 214Vac. And if 50mA is required, the power transformer must be rated for<br />
50mA x 1.8 (in a full-wave bridge rectifier circuit), or 90mA. Thus, such a transformer<br />
VA rating would be rated about 20VA, as 0.9 x 214 = 19.71.<br />
I out<br />
=<br />
V dc<br />
=<br />
I ac<br />
/ 1.8<br />
(V ac<br />
x 1.4) - 2V diode<br />
Full- Wave Bridge This is the most popular power supply configuration. The entire<br />
primary winding is used and four rectifiers are required. This configuration is seldom<br />
used with tube rectifiers, as the rectifier cathodes cannot be heated by just a single<br />
heater winding. The two solid-state diode voltage-drops count for little in a highvoltage<br />
power supply, but are a big liability in low-voltage power supplies. DO NOT<br />
USE CE NTER-T AP PAD.<br />
A center-tapped primary can be used as well; just leave D3, D4, R12, and R13 off the<br />
board, then attach the center-tap to D3 or D4’s bottom eyelet, where its label appears.<br />
B+<br />
C7<br />
R10<br />
D2<br />
R11<br />
D1<br />
J3<br />
AC<br />
Transformer<br />
Center-Tapped<br />
CT<br />
AC<br />
I out<br />
=<br />
V dc<br />
=<br />
I ac<br />
/ 1.27<br />
V ac<br />
* / 1.43 - V diode<br />
*entire primary
GlassWare Audio Design<br />
Heater Issues<br />
The <strong>12B4</strong> <strong>CCDA</strong> PCB holds the heater raw power supply and voltage regulator. The<br />
regulator uses the LD1085 low-dropout adjustable voltage regulator. The regulator<br />
must be set to an output voltage 12V or 12.6V, as all the tube heater elements are in<br />
parallel. Jumpers J1 & J2 must be used.<br />
AC Heaters An AC heater power supply (12Vac or 12.6Vac) can be used, if the heater<br />
rectifiers, power supply capacitors, and regulator are all left off the board. This is not<br />
in the least recommended, as the high-current AC voltage will introduce hum and<br />
compromise the bass reproduction.<br />
Heater +<br />
D6<br />
D5<br />
Out<br />
R20<br />
LD1085<br />
Adj<br />
In<br />
+<br />
+<br />
C14<br />
C10<br />
AC<br />
D8<br />
AC<br />
{<br />
D7<br />
C9<br />
Heater -<br />
C18<br />
C15<br />
R21<br />
C16<br />
+<br />
+<br />
C13<br />
C12<br />
D10<br />
CT<br />
D9<br />
C11<br />
to B+ heater<br />
bias voltage<br />
V1<br />
V3<br />
5 4<br />
4<br />
5<br />
+H<br />
J1<br />
J2<br />
C18<br />
5 4<br />
V2<br />
5 4<br />
V4<br />
-H<br />
Heater Regulator Typical Part Values<br />
Heater Voltage = 12V 12.6V<br />
R16 = 1.07k 1.13k<br />
R17 = 124 same<br />
D5 - D8 = MUR410G "<br />
D9, 10 = 1N4007 "<br />
C8 - C9 = 0.01µF - 50V "<br />
C12 = 10kµF - 16V "<br />
C13, C14 = 1kµF - 16V "<br />
C18 = 470µF - 3.3kµF 16v "<br />
Regulator = LD1085, LM317, LM350, LT1085<br />
Vac Input = 6.3Vac @ 5A for voltage doupler configuration<br />
12-12.6Vac @ 2.5A for 12Vdc or 12.6Vdc
GlassWare Audio Design<br />
Resistors R16 and R17 set the heater voltage regulator’s output voltage. The formula:<br />
V 0 = 1.25(1 + R 16 / R 17 )<br />
For example, using a 125-ohm resistor for R17 and a 1.07k resistor in R16 position,<br />
the output will climb to 12Vdc. See the values table above.<br />
Heater Reference Voltage Since one triode’s cathode sits close to ground potential<br />
and the other close to half the B+ voltage, the heater-to-cathode voltage experienced<br />
differs between triodes. The safest path is to reference the heater power supply to a<br />
voltage equal to one fourth the B+ voltage that appears after resistor R9; for example,<br />
75V, when using a final 300V B+ voltage. The ¼ B+ voltage ensures that both top and<br />
bottom triodes see the same magnitude of heater-to-cathode voltage. The easiest way to<br />
set this voltage relationship up is the following circuit:<br />
+<br />
[R] B+<br />
[L] B+<br />
Heater<br />
Elements<br />
DC<br />
Heater<br />
Regulator<br />
-<br />
AC<br />
R18<br />
300k<br />
1W<br />
R18<br />
300k 1W<br />
B+<br />
4<br />
C17<br />
R19<br />
47k 1W<br />
The target reference voltage for the heater’s power supply is one quarter of the B-plus<br />
voltage that the <strong>12B4</strong> <strong>CCDA</strong>, as the tubes see, not the initial raw B-plus voltage at C6.<br />
Alternatively, you might experiment with floating the heater power supply, by<br />
“grounding” the heater power supply via only a 0.1µF film or ceramic capacitor,<br />
leaving resistors R18 and R19 off the board. The capacitor will charge up through the<br />
leakage current between heater and cathodes. Not only is this method cheap, it is<br />
often quite effective in reducing hum with certain tubes.<br />
+<br />
[R] B+<br />
[L] B+<br />
Heater<br />
Elements<br />
DC<br />
Heater<br />
Regulator<br />
-<br />
AC<br />
R18<br />
R18<br />
B+<br />
<br />
C17<br />
R19
GlassWare Audio Design<br />
Grounding<br />
The <strong>12B4</strong> <strong>CCDA</strong> PCB holds a star ground at its center. Ideally, this will be the only<br />
central ground in the line-stage amplifier. Ground loops, however, are extremely easy<br />
to introduce. For example, if the RCA jacks are not isolated from the chassis, then the<br />
twisted pair of wires that connect the PCB to the jacks will each define a ground loop<br />
(as will jumper J3, which bridges the PCB’s ground to the chassis). The solution is<br />
either to isolate the jacks or use only a single hot wire from jack to PCB (the wire can<br />
be shielded, as long as the shield only attaches at one end). Thus, the best plan is to<br />
plan. Before assembling the line-stage amplifier, stop and decide how the grounding is<br />
going to be laid out, then solder.<br />
Three different schools of thought hold for grounding a piece of audio gear. The Old-<br />
School approach is to treat the chassis as the ground; period. E very ground connection<br />
is made at the closest screw and nut. This method is the easiest to follow and it<br />
produces the worst sonic results. Steel and aluminum are poor conductors.<br />
The Semi-Star ground method uses several ground “stars” that are often called spurs,<br />
which then terminate in a single star ground point, often a screw on the chassis. This<br />
system can work beautifully, if carefully executed. Unfortunately, often too much is<br />
included in each spur connection. For example, all the input and output RCA jacks<br />
share ground connection to a long run of bare wire, which more closely resembles a<br />
snake than a spur ground. In other words, the spurs should not be defined just physical<br />
proximity, but signal transference. Great care must be exercised not to double ground<br />
any spur point. For example, the volume control potentiometer can create a ground<br />
loop problem, if both of its ground tabs are soldered together at the potentiometer and<br />
twisted pairs, of hot and cold wires, arrive at and leave the potentiometer, as the two<br />
cold wires attaching to the PCB will define a ground loop.<br />
The Absolute-Star grounding scheme uses a lot of wire and is the most time consuming<br />
to execute, but it does yield the best sonic rewards. Here each input signal source and<br />
each output lead gets its own ground wire that attaches, ultimately, at one star ground<br />
point; each RCA jack is isolated from the chassis. The <strong>12B4</strong> <strong>CCDA</strong> PCB was designed<br />
to work with this approach, although it can be used with any approach.<br />
House Ground T he third prong on the wall outlet attaches to the house’s ground,<br />
usually the cold water pipe. T he line-stage amplifier can also attach to this ground<br />
connection, which is certainly the safest approach, as it provides a discharge path<br />
should the B+ short to the chassis. Unfortunately, this setup often produces a hum<br />
problem. Some simply float the ground, others use several solid-state rectifiers in<br />
parallel to attach the chassis ground to the house ground (NOT NEUT RAL) via the<br />
third prong, and others still use a 10-ohm resistor shunted by a small capacitor, say<br />
0.001µF to 0.1µF/250V.<br />
House<br />
Ground<br />
<br />
Chassis Signal<br />
0.01µF<br />
Ground Ground<br />
250V 10
GlassWare Audio Design<br />
A good test procedure is to detach all the signal inputs and all the output connection<br />
from the line-stage amplifier. Then measure the AC voltage between the line-stage<br />
amplifier’s chassis and the house’s ground. If it reads more than a few volts, try<br />
reversing the line-stage amplifier’s plug as it plugs into the wall socket. Use which ever<br />
orientation that results in the lowest AC voltage reading. Then measure the chassis<br />
ground to the first signal source’s ground (while the signal source is turned on). Once<br />
again flip the signal source’s plug until the lowest AC voltage setting is found. Then do<br />
the rest with the rest of the system. The results can prove far more satisfying than what<br />
would be yielded by buying thousand-dollar cables.<br />
RFI Radio frequency interference can be a hassle to track down and eliminate. First<br />
make sure that the source of the problem actually resides in the line-stage amplifier.<br />
For example, if only one signal source suffers from RFI noise, make sure that it is<br />
normally RFI free. In other words, attach it to another line-stage amplifier and see if<br />
the RFI persists. If it does pass this test, then try soldering small capacitors, say 100pF,<br />
from this signal source’s RCA jacks to the chassis, as close as possible to the jacks: if it<br />
fails, fix the source.<br />
Ferrite beads can also help; try using beads on the hot lead as it leaves the RCA jack<br />
and then again at the selector switch. Increasing the grid-stopper resistor’s (R2) value,<br />
say to 1k, can also work wonders (use a carbon-composition or bulk-foil resistor or<br />
some other non-inductive resistor type).<br />
Terminating Resistors Here’s a cheap trick to try: at each input RCA jack, place a<br />
100k to 1M resistor, bridging input hot and jack ground. Why The resistor provides a<br />
path for the AC signal present at the jack, so given a choice between radiating into the<br />
chassis or going through the relatively low-impedance resistor, the AC signal chooses<br />
the latter path, reducing crosstalk.<br />
Chassis Ground Jumper J3 connects the PCB’s ground to the chassis through the<br />
top leftmost mounting hole. If you wish to float the chassis or capacitor couple the<br />
chassis to ground, then either leave jumper J3 out or replace it with a small-valued<br />
capacitor (0.01 to 0.1µF). Warning: if rubber O-rings are used with PCB standoffs,<br />
then the ground connection to the chassis is not likely to be made; tubes, use metal<br />
washer in place of top O-ring.<br />
CATV Ground Attaching a line-stage amplifier to TV or VCR can cause huge hum<br />
problems, as the “ground” used by the connection CATV connection my introduce<br />
hum. Isolation transformers work supremely well in this application. In fact, an<br />
isolation transformer can be used on all the input signals only (one transformer per<br />
channel is required, if it is located after, rather than before the selector switch.) Look<br />
on the Web for more complicated solutions to the CATV hum problem.<br />
CATV<br />
to TV<br />
TV<br />
to selector switch
<strong>12B4</strong> Data<br />
GlassWare Audio Design<br />
The <strong>12B4</strong>-A is a miniaturelow-mutriode designedprimarily for service as a<br />
vertical-deflection amplifier in television receivers. The tube features high<br />
plate current at relatively low plate voltages and is capable of withstanding<br />
the high pulse voltages normally encountered in this application.
GlassWare Audio Design<br />
Coupling-Capacitor Values<br />
The bigger in value the coupling capacitor, the lower the -3dB high-pass corner<br />
frequency will be. The formula is as follows:<br />
Frequency = 159155/C/R<br />
where C is in µF. For example, with a 1µF coupling capacitor and a power amplifier<br />
with an input impedance of 47k, the corner frequency would be 3.5Hz. The higher the<br />
load impedance, the lower the corner frequency. The coupling capacitor voltage rating<br />
must at least equal the B+ voltage, for safety’s sake. Bypass capacitor (C15) for the<br />
coupling capacitors (C1) is optional. Many coupling capacitor benefit from the addition<br />
of small bypass capacitors that are one tenth to one hundredth the main coupling<br />
capacitor’s value. Do not be afraid to experiment. Try bypassing a film coupling<br />
capacitor with a PIO (or mica or wet-slug tantalum or Teflon) capacitor.<br />
Dual Coupling Capacitors<br />
The boards hold two coupling capacitors, each finding its own 1M resistor to ground.<br />
Why The idea here is that you can select (via a rotary switch) between C1 or C2 or<br />
both capacitors in parallel. Why again One coupling capacitor can be Teflon and the<br />
other oil or polypropylene or bee’s wax or wet-slug tantalum…. As they used to sing in<br />
a candy bar commercial: “Sometimes you feel like a nut; sometimes you don't.”<br />
Each type of capacitor has its virtues and failings. So use the one that best suits the<br />
music; for example, one type of coupling capacitors for old Frank Sinatra recordings<br />
and the other for Beethoven string quartets. Or the same flavor capacitor can fill both<br />
spots: one lower-valued capacitor would set a low-frequency cutoff of 80Hz for<br />
background or late night listening; the other higher-valued capacitor, 5Hz for full<br />
range listening. On the other hand, each coupling capacitor can feed its own output,<br />
for example, one for low-frequency-limited satellites and one for subwoofers. Or if you<br />
have found the perfect type of coupling capacitor or the perfect small bypass capacitor,<br />
the two coupling capacitor could be hardwired together on the PCB (via a jumper<br />
across the capacitor pads).<br />
GlassWare Capacitor Selector Switch<br />
The GlassWare Select-C selector switch and PCB makes wiring up a <strong>12B4</strong> board an easy<br />
task, as the two coupling capacitor outputs from each channel of the <strong>12B4</strong> <strong>CCDA</strong><br />
attach to the small PCB and the two outputs leaving the switch allow choosing between<br />
coupling capacitors C1 or C2 or both C1 and C2 in parallel.
GlassWare Audio Design<br />
Assembly & Testing<br />
Assembly Cleanliness is essential. Before soldering, be sure to clean both sides the<br />
PCB with 90% to 99% isopropyl alcohol. Do not use dull-looking solder; solder<br />
should shine. If it doesn’t, first clean away the outer oxidation with some steel wool or<br />
a copper scouring pad. If the resistor leads look in the least gray, clean away the<br />
oxidation with either steel wool or a wire sniper’s sharp edges. Admittedly, with new<br />
resistors and a fresh PCB, such metal dulling is rare; but if the parts have sat in your<br />
closet for a year or two, then expect a good amount of oxidation to have developed.<br />
First, solder all the small diodes in place, and then solder the resistors, rectifiers,<br />
capacitors, and heatsinks. Be consistent in orienting the resistors; keep all the tolerance<br />
bands on the resistor’s body at the right side as you face the resistor straight on. This<br />
will pay dividends later, if you need to locate a soldered a resistor in the wrong<br />
location. Because the board is double sided, with traces and pads on each side, it is<br />
easier to solder the resistors from their top side. It is often easier to attach the LD1085<br />
(heater regulator) to its heatsink first (using the heatsink hardware kit) and then to<br />
solder both the heatsink and regulator to the PCB at once. As the PCB is so overbuilt,<br />
it is extremely difficult to remove an incorrectly placed part. Be sure to confirm all the<br />
electrolytic capacitor orientations, as a reversed polarized capacitor can easily vent (or<br />
even explode) when presented with high-voltage. Confirm twice, solder once.<br />
Testing Before testing, visually inspect the PCB for breaks in symmetry between left<br />
and right sides. Wear safety eye goggles, which is not as pantywaist a counsel as it<br />
sounds, as a venting power-supply capacitor will spray hot caustic chemicals. Make a<br />
habit of using only one hand, with the other hand behind your back, while attaching<br />
probes or handling high- voltage gear, as a current flow across your chest can result in<br />
death. In addition, wear rubber-soled shoes and work in dry environment. Remember,<br />
safety first, second, and last.<br />
1. Attach only the heater power supply’s transformer winding, leaving the highvoltage<br />
transformer leads unattached and electrical tape shrouded, with no<br />
tubes in their sockets.<br />
2. Use a variac and slowly bring up the AC voltage, while looking for smoke or<br />
part discoloration or bulging.<br />
3. Measure the heater regulator’s output voltage without and with a load. If the<br />
heater regulator fails to regulate, try either lowering the heater voltage a tad,<br />
for example 12V instead of 12.6V, as the 0.6V difference might be enough to<br />
bring the regulator back into regulation.<br />
4. Next, power down the heater regulator and attach the high-voltage windings<br />
and insert the tubes in their sockets.<br />
5. Attach the transformer to a variac and slowly bring up the AC voltage.<br />
6. Measure the voltage across ground and B-plus pads in the center of the PCB;<br />
then measure the voltage across capacitors, C3 & C4. If the two channels<br />
differ by more than 10Vdc, try switching tubes from one channel to the<br />
other. If the imbalance does not follow the tubes, there is a problem,<br />
probably a misplaced part.<br />
Only after you are sure that both heater and B- plus power supplies are working well,<br />
should you attach the line-stage amplifier to a power amplifier.
GlassWare Audio Design<br />
Top Side PCB Mechanical Layout<br />
6.0 in<br />
D10<br />
D9<br />
C1<br />
Coupling<br />
Capacitor C1<br />
Coupling<br />
Capacitor C1<br />
5.5 in<br />
Coupling<br />
Capacitor C2<br />
Coupling<br />
Capacitor C2<br />
7.0"<br />
C4 Bypass<br />
Capacitor<br />
C4 Bypass<br />
Capacitor<br />
2.0"<br />
1.5 in<br />
Decoupling<br />
Capacitor<br />
Decoupling<br />
Capacitor<br />
1.8 in<br />
3.0 in 1.8 in<br />
5.5 in<br />
Let me know what you think<br />
If you would like to see some new audio PCB or kit or recommend a change to an<br />
existing product or if you need help figuring out the heater jumper settings or<br />
cathode resistor values, drop me a line by e-mail to the address on the back cover<br />
(begin the subject line with either “Aikido” or “tube” or the spam filters are sure to<br />
eat your message).
R9 Imax mA Vmax Wattage F3 150µF F3 270µF<br />
100 100mA 10V 1W 10.61Hz 5.89Hz<br />
200 70mA 14V 1W 5.31Hz 2.95Hz<br />
300 57mA 17V 1W 3.54Hz 1.96Hz<br />
470 46mA 21V 1W 2.26Hz 1.25Hz<br />
680 38mA 25V 1W 1.56Hz 0.87Hz<br />
1000 31mA 31V 1W 1.06Hz 0.59Hz<br />
1600 43mA 69V 3W 0.66Hz 0.37Hz<br />
2000 39mA 77V 3W 0.53Hz 0.29Hz<br />
3000 32mA 95V 3W 0.35Hz 0.2Hz<br />
3900 28mA 108V 3W 0.27Hz 0.15Hz<br />
6800 21mA 143V 3W 0.16Hz 0.09Hz<br />
10000 14mA 170V 3W 0.11Hz 0.06Hz<br />
R esistor<br />
V oltage D ro p Against C urrent<br />
100 0.10 0.20 0.30 0.40 0.50 0.60 0.70 0.80 0.90 1.00<br />
200 0.20 0.40 0.60 0.80 1.00 1.20 1.40 1.60 1.80 2.00<br />
300 0.30 0.60 0.90 1.20 1.50 1.80 2.10 2.40 2.70 3.00<br />
470 0.47 0.94 1.41 1.88 2.35 2.82 3.29 3.76 4.23 4.70<br />
680 0.68 1.36 2.04 2.72 3.40 4.08 4.76 5.44 6.12 6.80<br />
1000 1.00 2.00 3.00 4.00 5.00 6.00 7.00 8.00 9.00 10.00<br />
1600 1.6 3.2 4.8 6.4 8.0 9.6 11.2 12.8 14.4 16.0<br />
2000 2.0 4.0 6.0 8.0 10.0 12.0 14.0 16.0 18.0 20.0<br />
3000 3.0 6.0 9.0 12.0 15.0 18.0 21.0 24.0 27.0 30.0<br />
3900 3.9 7.8 11.7 15.6 19.5 23.4 27.3 31.2 35.1 39.0<br />
6800 6.8 13.6 20.4 27.2 34.0 40.8 47.6 54.4 61.2 68.0<br />
10000 10.0 20.0 30.0 40.0 50.0 60.0 70.0 80.0 90.0 100.0<br />
1 2 3 4 5 6 7 8 9 10<br />
C urre n t in m A<br />
R esistor<br />
V oltage D ro p Against C urrent<br />
100 1.10 1.20 1.30 1.40 1.50 1.60 1.70 1.80 1.90 2.00<br />
200 2.20 2.40 2.60 2.80 3.00 3.20 3.40 3.60 3.80 4.00<br />
300 3.30 3.60 3.90 4.20 4.50 4.80 5.10 5.40 5.70 6.00<br />
470 5.17 5.64 6.11 6.58 7.05 7.52 7.99 8.46 8.93 9.40<br />
680 7.48 8.16 8.84 9.52 10.20 10.88 11.56 12.24 12.92 13.60<br />
1000 11.00 12.00 13.00 14.00 15.00 16.00 17.00 18.00 19.00 20.00<br />
1600 17.60 19.20 20.80 22.40 24.00 25.60 27.20 28.80 30.40 32.00<br />
2000 22.00 24.00 26.00 28.00 30.00 32.00 34.00 36.00 38.00 40.00<br />
3000 33.00 36.00 39.00 42.00 45.00 48.00 51.00 54.00 57.00 60.00<br />
3900 42.90 46.80 50.70 54.60 58.50 62.40 66.30 70.20 74.10 78.00<br />
6800 74.80 81.60 88.40 95.20 102.00 108.80 115.60 122.40 129.20 136.00<br />
10000 110.00 120.00 130.00 * * * * * * *<br />
11 12 13 14 15 16 17 18 19 20<br />
C urre n t in m A<br />
R esistor<br />
V oltage D ro p Against C urrent<br />
100 2.10 2.20 2.30 2.40 2.50 2.60 2.70 2.80 2.90 3.00<br />
200 4.20 4.40 4.60 4.80 5.00 5.20 5.40 5.60 5.80 6.00<br />
300 6.30 6.60 6.90 7.20 7.50 7.80 8.10 8.40 8.70 9.00<br />
470 9.87 10.34 10.81 11.28 11.75 12.22 12.69 13.16 13.63 14.10<br />
680 14.28 14.96 15.64 16.32 17.00 17.68 18.36 19.04 19.72 20.40<br />
1000 21.00 22.00 23.00 24.00 25.00 26.00 27.00 28.00 29.00 30.00<br />
1600 33.60 35.20 36.80 38.40 40.00 41.60 43.20 44.80 46.40 48.00<br />
2000 42.00 44.00 46.00 48.00 50.00 52.00 54.00 56.00 58.00 60.00<br />
3000 63.00 66.00 69.00 72.00 75.00 78.00 81.00 84.00 87.00 90.00<br />
3900 81.90 85.80 89.70 93.60 97.50 101.40 105.30 109.20 * *<br />
6800 142.80 * * * * * * * * *<br />
10000 * * * * * * * * * *<br />
21 22 23 24 25 26 27 28 29 30<br />
C urre n t in m A<br />
* Ex ce e ds m ax im u m V oltage /Curre nt
G<br />
lass<br />
W<br />
are<br />
AUDIO DESIGN<br />
www.glass-ware.com<br />
www.tubecad.com<br />
sales@glass-ware.com<br />
Copyright © 2011<br />
All Rights Reserved