
Create successful ePaper yourself
Turn your PDF publications into a flip-book with our unique Google optimized e-Paper software.
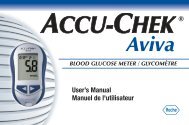
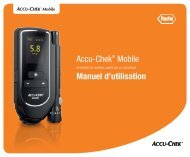
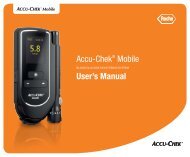
BLOOD GLUCOSE MONITORING SYSTEMMC©2010 Roche DiagnosticsACCU-CHEK, ACCU-CHEK MOBILE and FASTCLIXare trademarks of Roche.Roche Diagnostics201, Boulevard Armand-FrappierLaval, Québec (CANADA) H7V 4A2<strong>Accu</strong>-<strong>Chek</strong> Customer Care: 1-800-363-7949www.accu-chek.caRoche Diagnostics GmbHSandhofer Strasse 11668305 Mannheim, Germanywww.accu-chek.com0 5405327001(02) – 2010-12 M_Version04_Rev0User’s <strong>Manual</strong>
Keep the blood glucose monitoring system and all its components away from children under the age of 3.There is a risk of suffocation if small parts (e.g., covers, caps, or similar objects) are swallowed.2Last update: 2010-12
Intended useIntended use<strong>Accu</strong>‐<strong>Chek</strong> Mobile blood glucose meterMeter for quantitative determination of blood glucosevalues in fresh capillary blood using <strong>Accu</strong>-<strong>Chek</strong> Mobiletest cassettes.Suitable for self-testing only.The meter may only be used for blood glucosetesting by one person.There is a risk of infections being transmitted ifthe meter is used by other people, or if healthcareprofessionals use the same meter for testingblood glucose in more than one person. Thismeter is therefore not suitable for professionaluse in healthcare facilities or institutions.Visually impaired people should not test theirblood glucose without assistance from a sightedperson.WARNING: PATIeNTS ReCeIVING PeRIToNeALdIALySIS uSING SoLuTIoNS CoNTAININGICodexTRIN (e.g. extraneal, Icodial) should notuse the <strong>Accu</strong>-<strong>Chek</strong> Mobile test cassette. It couldcause an overestimation of glucose results.<strong>Accu</strong>‐<strong>Chek</strong> FastClix Mobile lancing device and ASTcapLancing device with adjustable penetration depthsetting for obtaining capillary blood from a fingertipwith <strong>Accu</strong>-<strong>Chek</strong> FastClix lancet drums and, when aspecial AST cap is used, also from alternate sites suchas the ball of the thumb.AST cap for obtaining capillary blood from alternativesites using the <strong>Accu</strong>-<strong>Chek</strong> FastClix Mobile lancingdevice.The lancing device and the AST cap are intendedfor personal use only!They may only be used by one person for obtainingblood. There is a risk of infections beingtransmitted if the lancing device or the AST capare used by other people, or if healthcare professionalsuse them to obtain blood from morethan one person. This lancing device and thisAST cap are therefore not suitable for professionaluse in healthcare facilities or institutions.3
About this user’s <strong>Manual</strong>About this User’s <strong>Manual</strong>Please read this user’s <strong>Manual</strong> carefully and completelybefore testing blood glucose for the first time. Ifyou have any questions, please contact <strong>Accu</strong>-<strong>Chek</strong>Customer Care at 1-800-363-7949 or visitaccu-chek.ca (see Chapter 20).This user’s <strong>Manual</strong> helps you get to know your meterand lancing device step by step. It provides you with allthe information you need to operate and care for yourmeter and lancing device and to deal with any errorsthat might occur. Remember that, in order to keep yourmeter and lancing device in good working condition,you need to follow the correct operating proceduresand also observe certain other instructions. The meterand lancing device are precision instruments andimproper handling can impair their operation.This user’s <strong>Manual</strong> features three symbols to drawyour attention to important information. Please readthese notes with special care.iThis symbol indicates a possible risk of injuryor of damage to your own health or to thehealth of others.This symbol draws attention to actions thatcould result in damage to the meter, the testcassette, the lancing device or the AST cap.This symbol draws your attention to importantinformation.All instructions describing specific operations areprinted on a colored background as shown in thefollowing example:1 Place your finger on the corrugated area on the tipcover and push it in the direction of the arrow asfar as it will go.4
About this user’s <strong>Manual</strong>Please note:All dates, times or results displayed in this user’s<strong>Manual</strong> are intended only as examples. They displayresults in mmol/l (e.g. 5.8 mmol/l), dates in the monthday format (e.g. Feb 26) and times in the 12-hour timeformat (e.g. 06:30pm). others formats can (and will) bedisplayed on your meter’s display. your meter can, forexample, display the time or date in a different format(depending on the setting you have chosen).We recommend that you start by getting to know all ofthe features of your meter and lancing device (seeChapter 1.1 and 1.2). Try out all the steps described inthis user’s <strong>Manual</strong>, and also practice using the meterand lancing device.5
ContentsContents1 Getting to know your meter and lancing device 131.1 overview of the meter ...........................................................................................................................141.2 overview of the lancing device ..............................................................................................................171.3 The blood glucose test in brief ..............................................................................................................181.4 The main features at a glance ...............................................................................................................201.5 description of menus and buttons .........................................................................................................23elements of the menus ...................................................................................................................24button (on/off button / enter button) .....................................................................................26button (down)............................................................................................................................28button (up) ................................................................................................................................291.6 Turning on the meter .............................................................................................................................301.7 Turning off the meter ............................................................................................................................321.8 opening menus .....................................................................................................................................341.9 entering information..............................................................................................................................37Changing numbers .........................................................................................................................37Activating or deactivating functions ................................................................................................382 Initial steps before testing 392.1 Checking the contents ..........................................................................................................................392.2 Checking the blood glucose unit ............................................................................................................406
Contents2.3 Inserting the first test cassette ..............................................................................................................41Validity of the test cassette .............................................................................................................462.4 Removing the protective film from the display .......................................................................................482.5 Removing the protective strip from the batteries ...................................................................................482.6 Setting the language .............................................................................................................................493 Testing blood glucose 543.1 Preparing the lancing device .................................................................................................................55Inserting a lancet drum ...................................................................................................................57Setting the penetration depth .........................................................................................................59Loading a new lancet .....................................................................................................................60Replacing a used lancet drum ........................................................................................................61undocking and docking the lancing device .....................................................................................623.2 Performing a blood glucose test ............................................................................................................64Starting a blood glucose test by opening the tip cover ...................................................................66Starting a blood glucose test via the Main menu .............................................................................69obtaining a blood drop ...................................................................................................................71Applying the blood drop to the test area..........................................................................................74Turning off the meter ......................................................................................................................76Alternate site testing.......................................................................................................................78Symbols which are displayed together with the result .....................................................................86Flagging results ..............................................................................................................................877
Contents3.3 evaluating results..................................................................................................................................93Measuring range ............................................................................................................................93Implausible results – possible sources of error ...............................................................................944 Adjust settings 954.1 Settings overview..................................................................................................................................954.2 opening the Settings menu ...................................................................................................................984.3 Setting the time and date, selecting the time format ...........................................................................100Setting the time ............................................................................................................................101Setting the date ............................................................................................................................104Selecting the time format .............................................................................................................1074.4 Setting tones .......................................................................................................................................109Turning the beeper, reminders and acoustic mode on and off ........................................................1114.5 Setting reminders ...............................................................................................................................113Setting a new reminder ................................................................................................................115editing an existing reminder (turn on/off, change, delete) ..............................................................118Setting a one-time reminder in 1 hour, 2 hours or 3 hours ............................................................124deleting a one-time reminder .......................................................................................................1264.6 Setting a target range .........................................................................................................................128Setting a target range ...................................................................................................................129editing an existing target range (turn on/off, change) ....................................................................1318
Contents4.7 Setting the volume ..............................................................................................................................1354.8 Setting the brightness .........................................................................................................................1374.9 Setting the language ...........................................................................................................................139Correcting a wrongly set language................................................................................................1415 Using the meter as a diary 1425.1 Retrieving saved results ......................................................................................................................143Via the Memory menu ..................................................................................................................144Via the button (down).............................................................................................................145Viewing all saved results ..............................................................................................................1465.2 Retrieving averages ............................................................................................................................1485.3 Transferring results .............................................................................................................................153Starting the transfer using the and buttons ......................................................................156Starting the transfer via the Memory menu ...................................................................................157Transferring results for further analysis .........................................................................................158Transferring results as a table.......................................................................................................160If the transfer is unsuccessful .......................................................................................................1645.4 Setting the display format for viewing saved results ............................................................................1656 Acoustic mode 1686.1 Beep tone when turning on .................................................................................................................1706.2 Beep tones during a test .....................................................................................................................1709
Contents13 Viewing the number of available tests 21114 Changing the batteries 21215 Testing and storage conditions 21715.1 Temperature and humidity ..................................................................................................................21715.2 Light conditions ..................................................................................................................................21915.3 Local sources of interference ..............................................................................................................21916 Symbols, messages, problems and error messages 22116.1 Symbols ..............................................................................................................................................22116.2 Messages ...........................................................................................................................................22216.3 Problems ............................................................................................................................................22816.4 error messages ...................................................................................................................................23017 Disposing of the meter 23618 Technical data 23819 System components 24111
Getting to know your meter and lancing device 11Getting to know your meter and lancing deviceThis chapter introduces you to the meter the lancing device the blood glucose test the main features of the meter and lancing deviceIt then describes what the menus look like how the meter is turned on and off how menus are opened how information is entered.You can only perform a blood glucose test or makesettings in the meter if you have performed theinitial steps before testing (see Chapter 2).13
1Getting to know your meter and lancing device1.1 Overview of the meter192 38475 614
Getting to know your meter and lancing device 11 Battery compartment cover (right: from above; farright: open)2 Infrared window (integrated interface for transferringresults to a computer, for example)3 Batteries [1.5 V, type AAA, alkaline-manganese orhigh energy batteries (2 batteries required)]4 Lancing device (docked)5 Tip cover (bottom right: open)6 Test area (at the tip of the cassette ready for a test)– this is where you apply the blood7 down/up buttons8 on/off and enter button9 display15
1Getting to know your meter and lancing device10 1110 Release button for undocking the lancing device11 Type plate12 Release button for opening the cassette compartmentcover13 Cassette compartment cover (bottom: open)14 Test cassette (in place in the meter)1213 1416
1Getting to know your meter and lancing device1.3 The blood glucose test in brief1 open tip cover2 Prime lancing device3 obtain blood18
Getting to know your meter and lancing device 14 Apply blood5 Read result6 Close tip cover19
Getting to know your meter and lancing device 1 Blood volume checkingThe meter checks whether you have applied sufficientblood before starting to test. Luminous displayAll information on the display appears yellow on ablack background. you can adjust the brightness tosuit the ambient conditions and make it easier toread. Text‐supported operationThe meter takes you through all the operations stepby step in the language you have selected. There are15 languages to choose from. Some of the text issupported by symbols and graphics. Menu‐driven operationThe settings and functions of the meter are sortedby topic into different menus. You will find an overviewof the menus at the end of the user’s <strong>Manual</strong>. Remindersyou can set reminder times, e.g. to remind you toperform a test. At the set time a beep will sound andthe reminder time will be displayed. Target range for resultsyou can enter your personal target range for bloodglucose values. The target range gives the bloodglucose values which should be achieved if thetreatment is optimal. If a result is above or belowthis range, a symbol on the display will draw yourattention to this.21
1Getting to know your meter and lancing device Flagging resultsYou can flag results with various symbols whichindicate particular situations during the test. MemoryThe meter automatically saves up to 500 resultswith the time and date of the test and all otherinformation that is important for the test. Integrated data analysisFrom the stored results, your meter can calculateyour averages for the last 7, 14 or 30 days.Data transferThe meter has an infrared window. This enables youto transfer stored results to a computer.22
Getting to know your meter and lancing device 11.5 Description of menus and buttonsThis chapter tells you how the menus are arranged,what the different symbols in them mean and how touse the buttons to navigate through the menus. you willfind a complete overview of the menus at the end ofthe user’s <strong>Manual</strong>.MenuWhen the meter is on, the selected menu is displayedin the language you have set.ButtonsThe three buttons below the display allow you to navigatethrough the menu.23
1Getting to know your meter and lancing deviceElements of the menus123The following illustrations show the main elements thatcan appear in a menu.1 Title of the display or menu (not in all displays).2 Selected item, highlighted with a yellow bar. If youpress the button, this item will be selected(command “Select” above the button). This willtake you to a higher- or lower-level menu, forexample, or open the display for entering a number.3 unselected item.24
Getting to know your meter and lancing device 1456784 The symbol indicates that the function (hereTones) is activated.5 The symbol indicates that the function (hereTarget range ) is deactivated.6 The command displayed here will be executed ifyou press the button. The particular commanddisplayed depends on the current display(see description of the on/off and enter button).7 The symbol means that there are further itemsabove the first item visible on the display.8 The symbol means that there are further itemsbelow the last item visible on the display.25
1Getting to know your meter and lancing devicebutton (On/Off button / Enter button)This button allows youto turn the meter on or off ( press and hold thebutton, see Chapter 1.6 and 1.7); as on/off button,this button is indicated in the user’s <strong>Manual</strong> by thesymbol ,or to execute the command displayed above the button(press and release the button); as enter button toexecute the command displayed, the button is indicatedby the symbol .26
Getting to know your meter and lancing device 1There are various commands, for example (see illustrationson left):Select selects the highlighted item. This will take youto a higher- or lower-level menu, for example, oropen the display for entering a number.Continue takes you from hours to minutes. OK confirms the displayed time.Off turns the beeper off.27
1Getting to know your meter and lancing devicebutton (down)This button allows you to navigate down in a menu or listor decrease to a smaller number.The button (down) is indicated by the symbol inthe user’s <strong>Manual</strong>.28
Getting to know your meter and lancing device 1button (up)This button allows you to navigate up in a menu or listor increase to a higher number.The button (up) is indicated by the symbol inthe user’s <strong>Manual</strong>.29
1Getting to know your meter and lancing device1.6 Turning on the meterWith the meter off, press and hold the on/off buttonuntil the meter turns on (longer than 2 seconds).In the remainder of the user’s <strong>Manual</strong>, this instructionwill appear in the following abbreviated form:1 Turn on the meter with .The meter first runs a display check in which a blackand yellow checkerboard pattern of small illuminateddots is displayed.2 Check that there are no irregularities in thecheckerboard pattern.Some examples of irregularities in the checkerboardpattern are shown in Chapter 9.30
Getting to know your meter and lancing device 1The meter automatically exits the display check afterabout 2 seconds.After the display check, the meter first displays thenumber of tests still available on the test cassette andthen opens the main menu.31
Getting to know your meter and lancing device 1Via the Main menu1 open the Main menu.2 use the or button to go to the item Turnoff.3 Press the button (Select).The meter displays the number of available tests andthen turns off.In the remainder of the user’s <strong>Manual</strong>, this way ofturning off the meter will appear in the followingabbreviated form:Turn off the meter via Turn off.33
1Getting to know your meter and lancing device1.8 Opening menus12The procedure for opening a menu is always the same.example: opening the Date menu1 Turn on the meter with .2 Wait until the Main menu is displayed.343 Press the button three times until the itemSettings is highlighted by the yellow bar.4 Press the button (Select) to open theSettings menu.34
Getting to know your meter and lancing device 15The Time/Date menu is highlighted.5 Press the button (Select) to open theTime/Date menu.676 use the or button to select the item Date.7 Press the button (Select) to set the date.The Date menu is now open.35
1Getting to know your meter and lancing deviceIn this user’s <strong>Manual</strong>, the steps for opening the Datemenu are summarized as follows:Turn on the meter with ,➔ wait for the Main menu,➔ use to select Settings,➔ press to open Settings,➔ use to select Time/Date,➔ press to open Time/Date,➔ use to select Date,➔ press to open Date.The procedure for opening other menus is described inthe same way.36
Getting to know your meter and lancing device 11.9 Entering information Changing numbersNumbers highlighted by a yellow background can bechanged.Press the button to decrease to a smaller number.If you press the button once, the number decreases by1. If you hold the button down, the number continues todecrease until you release the button.Press thebutton to increase to a higher number.If you press the button once, the number increases by1. If you hold the button down, the number continues toincrease until you release the button.37
1Getting to know your meter and lancing deviceActivating or deactivating functionsSome functions, e.g. the beeper and flagging resultscan only be activated or deactivated.you can recognize these functions by the fact thatthere is either a checkmark or a checkbox infront of them and the command above the buttonis Off or On (if there is a different command thismeans that the function can also be modified).A checkmark means that the function is activated.The command for the button is Off to allow youto deactivate the function.Press thefunction.button (Off) to deactivate the activatedA checkbox means that the function is deactivated.The command for the button is On to allow youto activate the function.Press thefunction.button (On) to activate a deactivated38
Initial steps before testing 22Initial steps before testing2.1 Checking the contentsCheck that the contents of the package are complete.The package contents are listed on the box. If anythingis missing, please contact <strong>Accu</strong>-<strong>Chek</strong> Customer Care at1-800-363-7949. You will find the address at the endof this user’s <strong>Manual</strong>.39
2Initial steps before testing2.2 Checking the blood glucose unitACCU-CHEK ® Mobilemmol/lBlood glucose results can be displayed in two differentunits of measurement (mmol/l and mg/dl). Consequently,two different versions of the same meter aresold. Check that your meter displays the unit of measurementyou are accustomed to, in Canada mmol/l. youcan find the unit of measurement that your meterdisplays on the type plate on the back of your meter. Ifyou do not know which is the right unit of measurementfor you, ask your healthcare professional.The unit of measurement that your meter displayscannot be changed. If the wrong unit isprinted on the type plate, ask your pharmacist tochange the meter or contact <strong>Accu</strong>-<strong>Chek</strong>Customer Care. using the wrong unit of measurementcan cause you to misinterpret the results.40
Initial steps before testing 22.3 Inserting the first test cassetteIf your meter is brand new and unused, it does notcontain a test cassette.Please read the test cassette package insert. Itcontains important information on storage andpossible causes of incorrect results, for example.If the foil-sealed packaging is damaged, youmust not use the test cassette. otherwise, thereis a risk that you might obtain incorrect results.Incorrect results can cause the wrong therapyrecommendation to be made and thus produceserious adverse health effects.only remove the test cassette from its packagingwhen you want to insert it into the meter.The unopened packaging protects the test cassetteagainst damage and moisture.iiInsert the very first test cassette in the meterbefore you remove the protective strip from thebatteries and start using the meter.A table is printed on the test cassette box whichshows the permitted results for control tests(checking the meter with glucose control solution).The meter automatically checks whetherthe result of a control test is correct. If you wishto check the result yourself as well, you can dothis with this table. Keep the test cassette box incase you need it for this purpose. Please notethat the table is only valid for the test cassettethat comes in this box. For test cassettes fromother boxes, other tables apply.41
2Initial steps before testing1 Place your finger on the corrugated area on the tipcover and push it in the direction of the arrow asfar as it will go. you must feel the tip cover clickinto place.2 Turn the meter over.42
Initial steps before testing 23 Push the release button for the cassette compartmentcover in the direction of the arrow. The coversprings open.4 open the cassette compartment cover all the way.The cassette compartment cover is fully opened whenit is at an angle of slightly more than ninety degrees –as shown in the illustration.43
2Initial steps before testing5 Remove the cassette from the foil-sealedpackaging.6 Insert the cassette in the meter with the silver sidefacing upwards.44
Initial steps before testing 27 Close the cassette compartment cover and pressit closed. you must hear an audible CLICK.CLICK8 Push the tip cover in the direction of the arrow asfar as it will go. you must feel the tip cover clickinto place.45
2Initial steps before testingValidity of the test cassetteWhen a test cassette is in the meter, the meter checksregularly when the cassette was inserted and calculatesthe use-by period from this. each test cassettemust be used up within 3 months (use-by period). Ifyou insert a partly used test cassette into the meter,the use-by period is calculated from the date when thecassette was placed in the meter for the first time. Thisdate is stored in the cassette.The meter also checks whether the expiry date of thecassette has been reached. The expiry date is shownon the box of the test cassette and on the lid film of thefoil-sealed packaging next to the symbol .If either of the two dates – use-by period or expiry date– is exceeded, the validity of the cassette has expired.you cannot perform any more tests with this test cassette.46
Initial steps before testing 2If you start a test and the validity of the cassette isabout to expire shortly or has already expired, themeter will inform you of this.The first notification appears 10 days before thevalidity of the cassette expires, then 5, 2 and 1 day(s)before expiry.Press thebutton (Continue) to start a test.If the validity of the test cassette has expired, themessage on the left appears.Turn off the meter withcassette.and insert a new test47
2Initial steps before testing2.4 Removing the protective film from thedisplayThe meter’s display is protected by a protective film.Peel this protective film off.2.5 Removing the protective strip from thebatteriesThe meter is supplied with batteries inserted. Thebattery contacts are covered with a protective strip toprevent premature loss of battery power. This protectivestrip must be removed before you can start usingthe meter.Pull the protective strip backwards out of the meter.iInstructions for changing the batteries are givenin Chapter 14.48
Initial steps before testing 22.6 Setting the languageWhen you have inserted a test cassette and removedthe protective film from the display and the protectivestrip from the batteries (see Chapter 2.3 to 2.5), youmust set the language in which text will be displayedon the meter. The meter automatically prompts you todo this the first time you turn it on.There are a total of 15 languages to choose from. english uS english uK Türkçe deutsch Português español Ελληνικά Italiano Norsk Français Suomi dansk Nederlands Svenska49
2Initial steps before testing1 With the meter off, press and hold the on/offbutton until the meter turns on (longer than2 seconds).When you turn on the meter for the first time, thelanguage selection menu is automatically displayed.The default language is English US. you can eitherselect this language or replace it by a different one.50
Initial steps before testing 22 Press the or button repeatedly until thedesired language is highlighted.3 Then press the button below the display toselect the highlighted language.The meter will then display the language you justselected.4 Confirm this information by pressing thebutton (OK).iIf you selected the wrong language by mistakeyou can change this setting later (see Chapter4.9). However, until you do so, the menu will bedisplayed in the language you selected.51
2Initial steps before testingThe meter then runs a display check in which a blackand yellow checkerboard pattern of small illuminateddots is displayed.5 Check whether there are any irregularities in thecheckerboard pattern.Some examples of irregularities in the checkerboardpattern are shown in Chapter 9.If there are irregularities in the checkerboardpattern, results might not be displayed correctly.In this case, ask your healthcare professional tochange the meter or contact <strong>Accu</strong>-<strong>Chek</strong>Customer Care.The meter automatically exits the display check afterabout 2 seconds and then displays the number of testsstill available on the test cassette.Afterwards the Main menu is displayed.52
Testing blood glucose 33.1 Preparing the lancing deviceyou can use the lancing device to obtain blood from afingertip or from alternate sites. You can choose one of11 different penetration depth settings to suit your ownskin type.you can use the lancing device either docked on to themeter or separately from the meter.AST capIf you wish to obtain blood from alternate sites (such asthe fleshy areas under the thumb and under the littlefinger, forearm, upper arm, calf or thigh), you mustreplace the black cap on the lancing device with aspecial AST cap (AST stands for alternate site testing).If there is no AST cap in the pack, you can order onefrom <strong>Accu</strong>-<strong>Chek</strong> Customer Care.Make sure you also read the instructions for use thatcome with the AST cap before using blood from alternatesites for a blood glucose test.55
3Testing blood glucoseThe lancing device is intended for personaluse only!It may only be used by one person for obtainingblood. There is a risk of infections being transmittedif the lancing device is used by otherpeople, or if healthcare professionals use thislancing device to obtain blood from more thanone person. This lancing device is therefore notsuitable for professional use in healthcare facilitiesor institutions.Wear can lead to material failure. In extremecases a lancet can protrude from the cap so thatinjury cannot be completely ruled out. youshould therefore handle the lancing device withparticular care once a lancet drum has beeninserted.only use the <strong>Accu</strong>-<strong>Chek</strong> FastClix Mobile lancingdevice with <strong>Accu</strong>-<strong>Chek</strong> FastClix lancet drums.using any other lancets or lancet drums maydamage the lancing device or impair its function.A lancet drum that has been taken out of thelancing device has a built-in safety feature thatstops you from using it again. This rules out apotential infection risk.56
Testing blood glucose 3Inserting a lancet drumTo use the lancing device to obtain blood, you mustfirst insert a lancet drum.red line1 Take a new lancet drum.you can tell that a lancet drum has been used becauseit has a red line visible on the white portion. you cannotinsert a used lancet drum again.new lancet drumused lancet drum2 Remove the cap from the lancing device.57
3Testing blood glucose3 Insert the new lancet drum – white end first – intothe lancing device.The lancet drum is properly inserted when it slots intoposition with an audible CLICK.4 Place the cap back on again.The cut-out section at the edge of the cap must fit overthe correspondingly, shaped curvature with the penetrationdepth indicator (silver line). you must hear andfeel the cap click into place. The window showing thenumber of available lancets shows 6, i.e. there are now6 lancets available.58
Testing blood glucose 3Setting the penetration depthHalf settingsdepth settingindicatoryou can set the penetration depth of the lancet to 1 of11 possible settings (0.5–5.5). The silver line (depthsetting indicator) on the lancing device indicates thecurrent penetration depth setting. The higher the numberthe deeper the penetration. The half settings for thepenetration depth are indicated by a dot. The penetrationdepth 1.5 is set when the line points to the dotbetween 1 and 2.If you have no experience of using this lancing device,we recommend that you start with a medium penetrationdepth setting such as 3.Rotate the cap of the lancing device until the desiredpenetration depth is level with the indicator.iDo not lance your finger until you are told to doso in the further course of the user’s <strong>Manual</strong>.59
3Testing blood glucoseLoading a new lancetyou do not need to load a new lancet if you just inserteda new lancet drum.If you have already used the lancing device to obtainblood, you will need a new lancet the next time youobtain blood. For this, the lancet drum must be rotatedin the lancing device.21Push the lever at the side of the lancing device to theright as far as it will go (1) and then back to the left (2).21The lancet drum rotates a little further and the nextlancet will be advanced to the correct position and isnow ready for use.The window on the side of the lancing device nowshows one less available lancet, e.g. 5 instead ofpreviously 6. When you have loaded the sixth and lastlancet, the window shows 1.If 1 appears in the window, the lever will beblocked by a locking mechanism. do not forcethe lever beyond this locking mechanism as thiswill damage the lancing device.60
Testing blood glucose 3Replacing a used lancet drumWhen you have used the sixth and last lancet, youneed to replace the used lancet drum with a new one.1 Remove the cap from the lancing device.2 Grasp the lancet drum at the cut-outs on thelancing device.3 Pull the lancet drum out of the lancing device.used lancet drums can be disposed of in householdwaste.4 Insert a new lancet drum (see section “Inserting alancet drum”).61
3Testing blood glucoseUndocking and docking the lancing deviceIf you wish to use the lancing device separately fromthe meter, detach it as follows:1 Push the release button for the lancing device (onthe back of the meter) in the direction of the arrowas far as it will go. Hold it in this position until youhave undocked the lancing device.2 Withdraw the lancing device by sliding it out in thedirection of the arrow.62
Testing blood glucose 3To dock the lancing device on to the meter again,proceed as follows:There are 2 guide tracks on the meter and the lancingdevice, respectively. When docking the lancing device,the tracks on the lancing device must fit into the tracksin the recess at the side of the meter.1 Position the lancing device at the lower end of therecess with the multifunction button at the top andthe writing “<strong>Accu</strong>-<strong>Chek</strong> FastClix Mobile” facing themeter.2 Slide the lancing device along the side of themeter in the direction of the arrow until it slots intoplace with an audible CLICK.63
3Testing blood glucose3.2 Performing a blood glucose testWhen you have inserted a lancet drum into the lancingdevice and set the penetration depth, you can nowstart to perform a blood glucose test.There are two ways of starting a blood glucose test. you can open the tip cover (with the meter on or off). you can turn on the meter using the buttonand select Test in the Main menu.After performing the test, you can flag the result if thetest was performed under special conditions and youwant to record this.NotesIncorrect results may cause the wrong therapyrecommendation to be made and thus produceadverse health effects.Therefore, refer to the following notes: Before you start the test, wash your hands withwarm water and soap and dry them well. This helpsremove any residues from the skin, e.g. from food,drinks or skin cream, which can disturb the testresult. This also stimulates blood flow and reducescontamination of the puncture site.64
Testing blood glucose 3 Create a blood drop that is large enough and wellformed.do not apply the blood drop if it has spread.Apply the drop at the centre of the cassette tip andnot at the edge.drop of blood that is well-formed drop of blood that has spread Apply blood at the centre do not apply blood at the edge Immediately apply the blood to the test area afteryou have created the drop and the meter displaysApply blood.do not touch the test area more than gently whenapplying blood. do not press the test area onto thefinger and do not spread the drop of blood. do not use one and the same drop for several tests.iAdditional informationAt a particular time, the meter prompts you to applyblood. you then have about 2 minutes to obtain a blooddrop and apply it to the test area. If you do not applyblood to the test area within this period, the meterturns off. The test area that had been made availablewill be lost as the meter will advance a new test areanext time.65
3Testing blood glucoseStarting a blood glucose test by opening the tip cover1 Place your finger on the corrugated area on the tipcover and push it in the direction of the arrow asfar as it will go.After overcoming a slight resistance, the tip coverclicks into place.Be careful not to touch the tape when doingthis as this could damage it.If the meter was turned off, it now turns on.A beep will sound (if Beeper is turned on) and thedisplay check will be displayed, followed by the numberof available tests.2 Check that there are no irregularities in thecheckerboard pattern.66
Testing blood glucose 3Then the meter will advance a test area to the tip ofthe cassette.Be careful not to touch the tape when doing thisas this could damage it.Shortly after the test area has been advanced to the tipof the cassette, the prompt Apply blood will appear anda beep will sound again (if Beeper is turned on).67
3Testing blood glucoseyou can also open the tip cover if the meter is alreadyturned on. In this case, the meter then switches to Test.It advances a test area to the tip of the cassette andthen the prompt Apply blood appears.The following are the exceptions:If you are in the Settings menu entering a number(e.g. to change the time) or in the selection list (e.g.to change the volume): in this case, when you openthe tip cover you will be asked whether you reallywant to perform a test (see Chapter 16.2). If you had turned on the meter using the orbutton (see Chapter 5.1 and 13): In this case, themeter does not switch to Test. You must first turn offthe meter. Then you can start the blood glucose testeither by opening the tip cover or via the Main menu(see next page).68
Testing blood glucose 3Starting a blood glucose test via the Main menuIf the meter is turned off:1a Turn on the meter with ,1b Wait for the Main menu.If the meter is already on:1 Switch from the currently displayed menu to theMain menu.2 use to select Test,3 Press to open Test.The prompt Open tip cover appears on the display.If you do not want to perform a test after all,i press the button (Cancel). In this case, notest area will be advanced and the number ofavailable tests remains the same. The meterreturns to the Main menu.69
3Testing blood glucose4 Place your finger on the corrugated area on the tipcover and push it in the direction of the arrow asfar as it will go.Be careful not to touch the tape when doing thisas this could damage it.When you have opened the tip cover, a beep sounds (ifBeeps tones is turned on) and the meter advances atest area to the tip of the cassette.Be careful not to touch the tape when doing thisas this could damage it.Shortly after the test area has been advanced to the tipof the cassette, the prompt Apply blood will appear anda beep will sound again (if Beeper is turned on).70
Testing blood glucose 3Obtaining a blood dropuse a new lancet each time you obtain blood.This reduces the risk of infection and helpsensure virtually pain-free blood sampling.In general, all the fingers are suitable for obtainingblood. Certain fingers can be unsuitable if, for example,a skin or fingernail infection is present. We recommendobtaining capillary blood from the side of a fingertip asthis registers the least pain (see black areas in theillustration on the left).The amount of blood that emerges at the puncture sitedepends on the penetration depth setting and thepressure used to hold the lancing device against theskin. If you find that the amount of blood for a test isinsufficient, press the lancing device more firmlyagainst the skin next time. If you still obtain insufficientblood, also increase the penetration depth onesetting at a time when you perform your next tests. If, on the other hand, you obtain too much blood,reduce the penetration depth next time.= Recommended sites for obtaining blood71
3Testing blood glucoseTo obtain blood with the lancing device, you first needto prime it.do not prime the lancing device until you areready to obtain blood. Storing the lancing devicein this primed state can cause parts to becomemisshapen through tension, impairing its operation.1 To prime the lancing device, press the multifunctionbutton down as far as it will go.When you release the button one third will come outagain. The lancing device is now primed.do not press the multifunction button again untilyou actually want to obtain blood. As the lancingdevice is now primed, this would trigger thelancet and could lead to accidental injury.72
Testing blood glucose 3The cap must be on the lancing device whenyou obtain blood. Without the cap, the lancetwould penetrate too deeply and you would feelmore pain than necessary.2 Press the lancing device firmly against the chosenpuncture site.you will feel a slightly raised ring against your skin; thisis the pin-hole through which the tip of the lancetemerges.3 Press the multifunction button all the way down.This triggers the lancet, which penetrates the skin tothe penetration depth set.4 If necessary, massage the finger in the direction ofthe fingertip to encourage a blood drop to form.The blood drop must be large enough and well-formed.73
3Testing blood glucoseApplying the blood drop to the test areado not hold the meter withthe test area pointing upwardsyou can hold the meter in your hand or lay it downwhile you apply blood to the test area.do not hold the meter with the test area pointingupwards. If you hold the meter with the test areapointing upwards, blood could enter the meterand soil it.When the prompt Apply blood is displayed:1 As soon as the blood drop has formed, bring ittowards the centre of the test area at the tip of thecassette.Touch the tape lightly with your finger. The blood dropis absorbed up by the test area.74
Testing blood glucose 32 Take your finger away from the test area as soonas Test in progress and the hourglass symbolappear on the display.The test area has then absorbed enough blood and abeep sounds (if Beeper is turned on). The hourglasssymbol indicates that the test is in progress.Testing is complete after approximately 5 seconds. Theresult appears on the display and the meter beeps (ifBeeper is turned on). At the same time the meterautomatically saves the result. The used test area istransported away from the tip of the cassette.If you want to flag the result do not turn the meter off.The procedure for flagging results is described under“Flagging results”.If you do not wish to flag the result you can now turnoff the meter (see next page).75
3Testing blood glucoseTurning off the meterTurning off via the tip coverClose the tip cover.The meter displays the number of available tests andthen turns off.The result will be displayed for at leasti 15 seconds. If you close the tip cover before theend of this time, the result will continue to bedisplayed. The number of available tests doesnot appear until the 15 seconds have elapsed.76
Testing blood glucose 3Turning off using the On/Off button1 Press and hold the on/off button until thebar on the display is filled (at least 2 seconds).Before the meter turns off, it prompts you to close thetip cover and then display the number of available testsfor your information.2 Close the tip cover.77
3Testing blood glucoseAlternate site testingCapillary blood for blood glucose testing can be obtained,not only from the fingertips, but also from othersites (the palm, the forearm, the upper arm, the calf orthe thigh), which is referred to as Alternate Site Testing(AST).The <strong>Accu</strong>-<strong>Chek</strong> FastClix Mobile AST cap is a specialcap that is used in conjunction with the <strong>Accu</strong>-<strong>Chek</strong>FastClix Mobile lancing device and enables you tocollect blood from these alternate sites.Blood obtained from a fingertip can be used atany time to test blood glucose. If blood fromalternate sites – the palm (both below thethumb and below the little finger) the forearm,the upper arm, the calf and the thigh– is used, there are certain times when testingis not appropriate (see the section “The rightmoment”). The results may differ from the resultstaken from the fingertips at these times.These differences can cause the wrong therapeuticdecision to be taken, thus leading toadverse health effects.The AST cap is intended for personal useonly!It may only be used by one person for obtainingblood. There is a risk of infections being transmittedif the AST cap is used by other people, orif healthcare professionals use this AST cap toobtain blood from more than one person. ThisAST cap is therefore not suitable for professionaluse in healthcare facilities or institutions.Please read this section before you use bloodfrom alternate sites to test blood glucose. onlyin this way can you choose the right blood collectionmethod. Before you decide to practicealternate site blood glucose testing, pleaseconsult your healthcare professional.use the AST cap to obtain blood from alternatesites only. If you use this AST cap to collectblood from a fingertip, the lancet penetrates toodeeply into the finger and could possibly causepainful injury.78
Testing blood glucose 3iIn rare instances bruising may occur followingcollection of blood from alternate sites.If the result obtained using blood taken from thepalm, forearm, the upper arm, the calf or thethigh produces a result that does not agree withthe way you feel, test again with blood collectedfrom a fingertip. If the test result still does notagree with the way you feel, please contact yourhealthcare professional.do not change your treatment based only on asingle result.only use the <strong>Accu</strong>-<strong>Chek</strong> FastClix Mobile AST capin conjunction with the <strong>Accu</strong>-<strong>Chek</strong> FastClixMobile lancing device.using the AST cap with a different lancing deviceor using a different AST cap with the lancingdevice can result in damage to the lancingdevice and/or the AST cap or prevent them fromfunctioning properly.The success of obtaining a suitably sized drop ofblood from alternate sites may differ from personto person and from site to site.The right momentBefore you test with blood collected from the palm,forearm, the upper arm, the calf or the thigh, be awareof the following limitations: Capillary blood in thefingertip responds more quickly to changes in bloodglucose levels than blood at alternate sites due tohigher concentration of blood vessels. Blood glucosevalues obtained from blood taken from alternate sitesmay therefore differ from values obtained from bloodtaken from the fingertip.do not test blood from the palm, forearm, the upperarm, the calf and the thigh: up to two hours following a meal, when blood glucosevalues can change quickly after exercise if you have a temperature or a medical conditionlimiting your mobility or if you are confined to bed if you suspect that your blood glucose is extremelylow (hypoglycemia) if you know that you sometimes do not notice whenyou are hypoglycemic during peak action time of short-acting insulin (up toapproximately 4 hours after the injection) or rapidactinginsulin analogues (up to approximately 2hours after the injection)79
3Testing blood glucoseAlternate Sites for Testing Palm of the hand belowthe thumb Palm of the hand belowthe little finger Inside of the forearm upper arm outside of the forearm Calf ThighPreferredalternatesites80
Testing blood glucose 3Obtaining blood and testing blood glucoseIn the following description blood is obtained with thelancing device still attached to the meter. you can alsodetach the lancing device from the meter before usingit to obtain blood.1 Remove the black cap from the lancing device.2 Place the grey AST cap on the device.The cut-out at the edge of the cap must fit over thecorrespondingly shaped curvature with the penetrationdepth indicator (silver line). you must hear and feel thecap click into place.81
3Testing blood glucose3 Rotate the AST cap until the desired penetrationdepth is level with the indicator.iTo obtain a sufficiently large drop of blood fromalternate sites, lancing must be deeper than onthe fingertips. However, these sites are usuallyless painful.4 Choose a fleshy area of the alternate site for bloodcollection and wash it with warm, soapy water.This ensures that the puncture site is clean. Allowthe skin to dry thoroughly.5 Prime the lancing device.6 Press the AST cap firmly against the selectedpuncture site. The AST cap has a large openingwhich forms the exit point for the lancet. As theedge of this opening is raised you can feel theposition of the exit point on your skin.82
Testing blood glucose 3only use the lancing device with the AST cap inplace. Without the cap the lancet will penetratetoo deeply and the puncture can be very painfuland result in bruising or prolonged bleeding.7 Press the multifunction button down as far as itwill go. This triggers the lancet, which penetratesthe skin.8 Take the lancing device away from the puncturesite.9 Remove the AST cap from the lancing device.10 open the tip cover of the meter. If the meter wasswitched off it will now switch on.11 Place the meter to one side.83
Testing blood glucose 313 Pick up the meter again.14 As soon as the drop of blood has formed, bring ittowards the middle of the test area at the tip of thecassette. The tape should lightly touch the puncturesite. The drop of blood will then be absorbed by thetest area.15 Take the puncture site away from the test area assoon as Test in progress and the hourglass symbolappear on the display.The test area has absorbed enough blood and a beepsounds (if Beeper ist turned on). The hourglass symbolindicates that the test is in progress.Testing is complete after approximately 5 seconds. Theresult appears on the display and the meter beeps (ifBeeper ist turned on).16 Replace one of the two caps on the lancing device.85
3Testing blood glucoseSymbols which are displayed together with the resultThe following symbols can be displayed together withthe result:The batteries are almost empty.The temperature during the test was outsidethe permitted range of +10 to +40 °C.despite a warning to this effect you decidedto go ahead with the test.you have turned on the target range. Theresult is either below the lower limit or abovethe upper limit of the target range set.In place of a result: The result is lower than0.6 mmol/l.may indicate that your bloodglucose is very low (possibly a severehypoglycemia). Follow the relevantinstructions given by your healthcareprofessional immediately and repeatthe test.In place of a result: The result is higher than33.3 mmol/l. Repeat the test.86
Testing blood glucose 3Flagging resultsYou can flag results to describe certain events connectedto the result or particular characteristics of theresult. You can only flag a result if you open the Setflag menu while the result is still displayed after a test.The Set flag menu offers you a choice of 4 flags: Control test (bottle symbol ) is intended for controltests in which you apply control solution to the testarea instead of blood. General (asterisk symbol ): You can define themeaning of this flag yourself. For example, you canuse it for results that you have obtained from alternatesites or after physical activities. Before meal (apple symbol ) is intended for resultsyou have obtained before your meals. After meal (bitten into apple symbol ) is intendedfor results you have obtained after your meals.In addition to the 4 flags, the last item in the Set flagmenu is Reminder. you can use this to go directly tothe Reminders menu after a test.87
3Testing blood glucoseYou can add the following flags together to a result:General and Before mealGeneral and After mealYou cannot flag a result with Before meal and Aftermeal together. If either of these flags is already set, itwill automatically be removed when you set the otherflag.You can change (add or remove) flags again as long asyou are still in the Set flag menu. As soon as you leavethis menu, either by going to the Main menu, selectingReminder or Control test or turning off the meter, theflags chosen will be saved and can no longer be subsequentlychanged.Reminder allows you to go directly from the Set flagmenu after a test to set a reminder if you would like tocheck your blood glucose again later. you do not needto go to the Main menu or turn the meter off and onagain but just select Reminder.If you want to flag a result and set a reminder, youhave to set the flag(s) first. Selecting Reminder takesyou out of the Set flag menu and opens the Remindersmenu.Selecting Control test also takes you out of the Set flagmenu and opens the Control solution menu.88
Testing blood glucose 3The following instructions start from the display of aresult after a test.General, Before meal and After meal1 Press (Set flag).This opens the Set flag menu. All flags are deactivated.A checkbox indicates that the flag is deactivated, acheckmark that it is activated.2 use to select General, Before meal or Aftermeal.3 Press the button (On).The symbol for the flag that has been activated isdisplayed to the right of the result.If you want to add a further flag to the result, repeatsteps 2 and 3.89
3Testing blood glucose3 symbols can be displayed to the right of the result. Ifa result is flagged with 4 symbols, the symbol willnot be displayed.example: If the temperature during a test was too highor too low and the test is outside the target range, theresult will automatically be flagged with the symbolsand (see Chapter 16.2 and 4.6). If you flag thisresult with General and Before meal, the symbolsand will be displayed next to the symbol , and thesymbol will no longer be displayed (however, theflag will not be removed).Removing a flag again:1 use to select the flag, General, for example.2 Press the button (Off).90
Testing blood glucose 3Leaving the Set flag menu:1a Turn off the meter with .oror1b use to select Main menu and press(Select).2 Close the tip cover.91
3Testing blood glucoseReminder1 Press (Set flag).2 use to select Reminder.3 Press (Select).This opens the Reminders menu. You will find all theinformation about this menu in Chapter 4.5.Control test1 Press (Set flag).2 use to select Control test.3 Press (Select).The rest of the procedure for performing a control test(test with control solution) is described in Chapter 7.2.92
Testing blood glucose 33.3 Evaluating resultsIf the displayed result agrees with the way youfeel, follow the instructions given by yourhealthcare professional. If the displayed resultdoes not agree with the way you feel, perform acontrol test with an <strong>Accu</strong>-<strong>Chek</strong> Mobile controlsolution (see Chapter 7). Then repeat the bloodglucose test. If the new result still does notagree with the way you feel, contact yourhealthcare professional.do not change your treatment based on just oneresult.Measuring rangeThe meter measures blood glucose results in the rangefrom 0.6 to 33.3 mmol/l.If the result is lower than0.6 mmol/l, is displayed insteadof a result.may indicate that your blood glucose isvery low (possibly a severe hypoglycemia).Follow the relevant instructions given by yourhealthcare professional immediately and repeatthe test.If the result is higher than33.3 mmol/l, is displayed insteadof a result. Repeat the test.93
3Testing blood glucoseImplausible results – possible sources of errorIf your meter repeatedly displays implausible results orerror messages, please check the points listed below.If any of your responses to the questions listed differfrom those given, make the respective correctionswhen you perform the next test. If you have taken all ofthese points into account and still obtain implausibleresults or error messages, contact <strong>Accu</strong>-<strong>Chek</strong>Customer Care.did you perform the blood glucose testaccording to the user’s <strong>Manual</strong>?did you wash your hands with warm waterand soap? did you dry your hands well?did you wait for the application prompt to bedisplayed before applying blood?did you apply the blood drop to the test areaimmediately after it had formed?yesyesyesyesdid you apply a well-formed blood drop?Did you press the test area onto the finger orspread the blood drop while applying it?did you use the same blood drop for severaltests?did you perform the test within the correcttemperature range (10–40 °C)?did you observe the proper storage conditionsfor the meter and the test cassette (see Chapter15 and the test cassette package insert)?Have you paid attention to the sources of errorstated in the test cassette package insert?yesnonoyesyesyesIf your meter has been dropped, that can also lead toimplausible results or error messages. In this case, youshould also call <strong>Accu</strong>-<strong>Chek</strong> Customer Care at 1-800-363-7949.94
Adjust settings 44Adjust settings4.1 Settings overviewThe meter has several features which you can only useafter making the appropriate settings. Most of thesefeatures are intended primarily to enable you to adaptthe meter to your personal needs (e.g. beeper andacoustic reminders).An overview of the settings is given on the following2 pages. The respective default settings with which themeter is delivered are shown in each case.you can perform blood glucose tests without adjustingany of the settings on the meter. In this case, all thesettings are the default settings.95
4Adjust settingsMenu Setting Available options Default settingTime/date Time eastern Standard Time(eST)dateCurrent dateTime format hh:mm * dd.MM.yy ** hh:mm am/pm Month dd(format for time hh:mm day dd.MM.and date) hh:mm dd Monthhh:mm am/pm MM/dd/yyhh:mm am/pm MM/ddhh:mm am/pm Month ddhh:mm am/pm dd Monthhh:mmyy/MM/dd* hh = hours, mm = minutes; e.g. 09:45 (hh:mm)** dd = day, MM = month, yy = year; e.g. 25.11.09 (dd.MM.yy) or 11/25/09 (MM/dd/yy)96
Adjust settings 4Menu Setting Available options Default settingTones Beeper on or off onReminders Beeper on or off onAcoustic mode on or off offReminders10 times – freely selectable daily reminders Noneand/or a one-time reminder after a specifiedlength of time (1, 2 or 3 hours)Target range Lower and upper limit value / on or off None / offVolume 5 levels Level 3Brightness 3 levels Level 2Language 15 different languages english uS97
4Adjust settings4.2 Opening the Settings menuTurn on the meter with ,➔ wait for the Main menu,➔ use to select Settings,➔ press to open Settings.The buttons you use to make or change the settingsare described in Chapters 1.5 and 1.9.You will find a complete overview of the menus at theend of the user’s <strong>Manual</strong>.98
Adjust settings 4The following options are available in the Settingsmenu: Main menu: takes you to the Main menu Time/Date: set the time and date, select the timeformat Tones: turn the beeper, reminders and acousticmode on or off Reminders: set the reminder times Target range: set the upper and lower limits for thetarget range Volume: set the volume for the beeper Brightness: set the brightness for the display Language: select the language used for display texts99
4Adjust settings4.3 Setting the time and date, selecting the time formatThe time and date are already set in the meter. If youwant to use reminders or analyse your results with acomputer, for example, you should check the time anddate and correct them if they deviate from the currenttime or date. All results are saved together with the time and date.If the time and date are not correctly set, the resultscannot be analysed properly as a function of time. If the time is not correctly set and you use reminders,you will be reminded to perform a test at thewrong time.The following options are available in the Time/Datemenu:Main menu: takes you to the main menuBack: takes you to the Settings menuTime: set the timeDate: set the dateTime format: select the time format100
Adjust settings 4Setting the time1 Turn on the meter with ,➔ wait for the Main menu,➔ use to select Settings,➔ press to open Settings,➔ use to select Time/Date,➔ press to open Time/Date,➔ use to select Time,➔ press to open Time.The hours are highlighted.If you have chosen one of the 12-hour time formats,am (morning) or pm (afternoon) is also displayed afterthe time.101
4Adjust settings24-hour time format12-hour time format2 use to set the hour.3 Press (Continue).The minutes are now highlighted.4 use to set the minutes.5 Press (OK or Continue).102
Adjust settings 424-hour format 12-hour format only for times in 12-hour format:The suffix am or pm is highlighted.5a use5b Pressto select am or pm.(OK).The meter will then display the time you just set.6 Press (OK).The meter returns to the Time/Date menu.103
4Adjust settingsSetting the date1 2 3The sequence in which you set the day, month andyear while setting the date depends on the time formatyou have set. Apart from the sequence, the procedureis the same in all cases.The following sequences are possible:1 Month – day – year2 day – Month – year3 year – Month – day1 Turn on the meter with ,➔ wait for Main menu,➔ use to select Settings,➔ press to open Settings,➔ use to select Time/Date,➔ press to open Time/Date,➔ use to select Date,➔ press to open Date.104
Adjust settings 4The following example describes the procedure forsetting the date in the case of sequence (Month –day – year) 1 .The month is highlighted.2 use to set the month.3 Press (Continue).The day is now highlighted.4 use to set the day.5 Press (Continue).The year is now highlighted.6 use to set the year.7 Press (OK).105
4Adjust settingsororThe meter will then display the date you just set. Thedate will be displayed according to the time format youhave set (see examples on left).8 Press (OK).The meter returns to the Time/Date menu.iIf the date you have set does not exist(e.g. April 31), the meter returns to the firstsetting position when you confirm the last entrywith OK (step 7). you must correct the datebefore the meter will accept it.106
Adjust settings 4Selecting the time format1 Turn on the meter with ,➔ wait for Main menu,➔ use to select Settings,➔ press to open Settings,➔ use to select Time/Date,➔ press to open Time/Date,➔ use to select Time format,➔ press to open Time format.The currently set time format is highlighted.107
4Adjust settings2 use to select the desired time format.3 Press (Select).The meter will then display the time format you justset.4 Press (OK).The meter returns to the Time/Date menu.108
Adjust settings 44.4 Setting tonesThe following options are available in the Tones menu:Main menu: takes you to the Main menuBack: takes you to the Settings menuBeeper: turn the beeper on or offReminders: turn the beep tone for reminders on oroffAcoustic mode: turn the acoustic mode on or offBeeper: If Beeper is turned on (default setting), abeep will sound at the following times during a test: when the meter advances a test area to the tip ofthe cassette,when the prompt Apply blood is displayed and youcan apply blood or control solution to the test area,when Test in progress is displayed and the testbegins, when the result is displayed, when an error message is displayed (a double beep4 times in succession).109
4Adjust settingsReminders: Here you can set whether or not you wantreminders to be accompanied by beeps (see Chapter4.5). If Reminders is turned on (default setting), thebeeps will sound.Acoustic mode: If the acoustic mode is turned on(default setting: off), the meter guides you through theblood glucose test with the beeps described above. Atthe end of the test, the meter also announces the resultin the form of a sequence of beeps. The acoustic modeis described in Chapter 6.Visually impaired people should only use theacoustic mode if they have familiarized themselvesfully with the assistance of a sightedperson and have demonstrated that they areable to understand results correctly withoutexception using the acoustic mode. The acousticmode should always be used with great care.otherwise there is a risk that the results will bemisinterpreted by the person performing thetest. An incorrect insulin dose resulting from amisinterpreted result can cause considerablehealth damage and can even be fatal. especiallyif unexpected and abnormal blood glucose valuesare obtained using the acoustic mode, theresult must be checked by repeating the testtogether with a sighted person.Visually impaired people should not test theirblood glucose without assistance from a sightedperson.110
Adjust settings 4Turning the beeper, reminders and acoustic mode on and offBeeper, Reminders and Acoustic mode can only beturned on and off. The procedure is always the sameand is therefore only described here for Beeper.1 Turn on the meter with ,➔ wait for Main menu,➔ use to select Settings,➔ press to open Settings,➔ use to select Tones,➔ press to open Tones,➔ use to select Beeper (or anotherfunction).111
4Adjust settingsA checkmarkmeans that the function is activated A checkbox means that it is deactivated2 Press (On or Off) to turn the beeper on or off.The meter remains in the Tones menu.iIf you wish to use the acoustic mode, you mustturn both Acoustic mode and Beeper on.112
Adjust settings 44.5 Setting remindersyou can set up to 10 reminder times.If the meter is turned off, “Reminder” and the time ofthe reminder will be displayed daily at the time youhave set. If you have turned on Reminders in the Tonesmenu, beeps will also sound.you can turn off the reminder and the beeps by pressingany button. If you do not press a button, the meterturns off automatically after 20 seconds. The reminderwill not be repeated.If you perform a blood glucose test 10 minutes or lessbefore a reminder, the reminder will not be given.113
4Adjust settingsThe following options are available in the Remindersmenu:Main menu: takes you to the main menuBack: takes you to the Settings menuNew: set a new time for a daily reminder Edit: edit an existing reminder time (is only displayedif at least one time has been set)In 1 hour: set a one-time reminder in 1 hourIn 2 hours: set a one-time reminder in 2 hoursIn 3 hours: set a one-time reminder in 3 hoursReminders menu when10 reminders have alreadybeen set.New, In 1 hour, In 2 hours and In 3 hours are not displayedif 10 reminder times have already been set.114
Adjust settings 4Setting a new reminder1 Turn on the meter with ,➔ wait for Main menu,➔ use to select Settings,➔ press to open Settings,➔ use to select Reminders.The checkbox to the left of Reminders means thatno reminders have been set or that all reminders sethave been turned off. A checkmark means that atleast one reminder has been set and is turned on.2 Press to open Reminders,➔ use to select New,➔ press to open New.As you are about to set a new reminder time, onlydashes are displayed for the hours and minutes.If you decide you do not want to set a reminderi time after all, press the button (Cancel) toreturn to the Reminders menu.115
4Adjust settings24-hour format 12-hour format The hours are highlighted.3 use to set the hour.The first time you press the button, the time will go to00:00 (24-hour format) or 01:00 am (12-hour format).4 Press (Continue).The minutes are now highlighted.5 use to set the minutes.6 Press (OK or Continue).116
Adjust settings 424-hour format 12-hour format only for times in 12-hour format:The suffix am or pm is highlighted.6a use6b Pressto select am or pm.(OK).The meter will then display the reminder time you justset. The reminder is also turned on.7 Press (OK).The meter returns to the Edit reminders menu.117
4Adjust settingsEditing an existing reminder (turn on/off, change, delete)1 Turn on the meter with ,➔ wait for the Main menu,➔ use to select Settings,➔ press to open Settings,➔ use to select Reminders,➔ press to open Reminders,➔ use to select Edit,➔ press to open Edit.A list with the reminders that have already been setappears on the display.A checkbox indicates that the reminder is turnedoff, a checkmark that it is turned on.2 use to select the reminder time you wishto edit.3 Press (Select).118
Adjust settings 4you will then see the following options below the time: Turn off, to turn off a reminder that is turned on (thetime remains unchanged), or Turn on to turn on areminder that has been turned off. Change, to change the reminder time. Delete, to delete this reminder. Cancel, if you do not wish to edit this reminder.In the following examples, only times in the 12-hourformat are shown and described.119
4Adjust settingsTurning a reminder on or off1 use to select Turn on (Turn off).2 Press (Select).The meter will then display the reminder time you justturned on or off.3 Press (OK).The reminder is now turned on or off.The meter returns to the Edit reminders menu.120
Adjust settings 4Changing a reminder1 use to select Change.2 Press (Select).3 Set the new reminder time (see “Setting a newreminder” for how to do this).The meter will then display the reminder time you justchanged.4 Press (OK).The reminder time has now been changed and thereminder is also turned on.The meter returns to the Edit reminders menu.121
4Adjust settingsDeleting a reminder1 use to select Delete.2 Press (Select).The meter will then display the reminder time you justdeleted.3 Press (OK).The reminder time has now been deleted.The meter returns to the Edit reminders menu or to theReminders menu if you have deleted the last reminder.122
Adjust settings 4Cancel – Not editing a reminderIf you do not want to edit a selected reminder after all,you can cancel the editing procedure as follows.1 use to select Cancel.2 Press (Select).The meter returns to the Edit reminders menu withoutchanging the reminder.123
4Adjust settingsSetting a one‐time reminder in 1 hour, 2 hours or 3 hoursThe meter can give you a one-time reminder to performa test in 1 hour, 2 hours or 3 hours. you do notneed to set a time for this. These reminders can beuseful if you wish to check a result you just obtained,for example. When the reminder has been given, it isautomatically deleted.1 Turn on the meter with ,➔ wait for the Main menu,➔ use to select Settings,➔ press to open Settings,➔ use to select Reminders,➔ press to open Reminders,➔ use to select In 1 hour ( or In 2 hoursor In 3 hours).2 Press (Select).124
Adjust settings 4The meter displays that it will give you a reminder in1 hour (or in 2 or 3 hours).3 Press (OK).The meter returns to the Edit reminders menu.The one-time reminder will be displayed in the list ofreminders in the same way as any other reminder, i.e.the time will be displayed there and not “In 1 hour”, forexample.125
4Adjust settingsDeleting a one‐time reminder1 Turn on the meter with ,➔ wait for the Main menu,➔ use to select Settings,➔ press to open Settings,➔ use to select Reminders,➔ press to open Reminders,➔ use to select Edit,➔ press to open Edit.A list with the reminders that have already been setappears on the display.A checkbox indicates that the reminder is turnedoff, a checkmark that it is turned on.2 use to select the reminder time you wishto delete.3 Press (Select).126
Adjust settings 4In the case of a one-time reminder, only the followingoptions are displayed below the time: Delete, to delete this reminder Cancel, if you do not wish to delete this reminderunlike the daily reminders, you cannot turn one-timereminders on or off or change their time.4 use to select Delete.5 Press (Select).The meter will then display the reminder time you justdeleted.6 Press (OK).The reminder time has now been deleted.The meter returns to the Edit reminders menu or to theReminders menu if you have deleted the last reminder.127
4Adjust settings4.6 Setting a target rangeyou can enter your personal target range for bloodglucose values (default setting: off). Results aboveor below this target range will be flagged with thesymbol .The target range gives the blood glucose values whichshould be achieved if the treatment is optimal. discusswith your healthcare professional what target rangeyou should set.you set the target range by entering the lower andupper limits. The lower limit can be set to between2.8 and 5.5 mmol/l. The upper limit can be set tobetween 5.5 and 11.1 mmol/l. Both limits can be set inincrements of 0.1 mmol/l.If you wish to use the lower limit of the targetrange as an indicator of a possible hypo, it isimportant to remember this: The indicator willonly be reliable if the limit has been properlyselected. We therefore strongly recommend thatyou talk to your healthcare professional beforeyou set the limit. This function is no substitutefor hypoglycaemia training by your healthcareprofessional or diabetes team.128
Adjust settings 4Setting a target range1 Turn on the meter with ,➔ wait for the Main menu,➔ use to select Settings,➔ press to open Settings,➔ use to select Target range,➔ press to open Target range.A checkbox indicates that the target range is turnedoff, a checkmark that it is turned on.If you have not yet set a target range, the meter willtake you directly to the display for entering the upperand lower limits. The two limits are indicated by dashesonly.If you decide you do not want to set a targeti range after all, press the button (Cancel)to return to the Settings menu.129
4Adjust settings2 use to set the lower limit.The first time you press a button, the default setting of3.9 mmol/l will be entered.3 Press (Continue).The default setting of 7.8 mmol/l will be entered for theupper limit.4 use to set the upper limit.5 Press (OK).The meter will then display the target range you justset. It is also turned on.6 Press (OK).The meter returns to the Settings menu.130
Adjust settings 4Editing an existing target range (turn on/off, change)Turn on the meter with ,➔ wait for the Main menu,➔ use to select Settings,➔ press to open Settings,➔ use to select Target range,➔ press to open Target range.once you have set a target range, the Target rangemenu will offer you the following options: Turn off, to turn off the target range (the upper andlower limits you have entered remain unchanged), orTurn on to turn on the target range. Change, to change the upper and lower limits of thetarget range. Cancel, if you do not wish to edit the target range.131
4Adjust settingsTurning the target range on or off1 use to select Turn off (Turn on).2 Press (Select).The meter displays that the target range is now turnedoff (turned on).3 Press (OK).The meter returns to the Settings menu.132
Adjust settings 4Changing a target range1 use to select Change.2 Press (Select).3 Set the new target range (see “Setting a targetrange” for how to do this).The meter will then display the target range you justchanged.4 Press (OK).The target range has now been changed and is alsoturned on.The meter returns to the Settings menu.133
4Adjust settingsCancel – Not editing the target rangeIf you do not want to change the target range after all,you can cancel the editing procedure as follows:1 use to select Cancel.2 Press (Select).The meter returns to the Settings menu withoutchanging the target range.134
Adjust settings 44.7 Setting the volumeyou can set the volume for the beeper to one of 5different levels.1 Turn on the meter with ,➔ wait for the Main menu,➔ use to select Settings,➔ press to open Settings,➔ use to select Volume,➔ press to open Volume.The more bars are filled in on the display, the louderthe volume. The default setting is 3.2 use to set the volume.each time you press the button, a beep sounds in thenew volume selected.3 Press (Select).135
4Adjust settingsThe meter will then display the volume level you justset.4 Press (OK).The meter returns to the Settings menu.136
Adjust settings 44.8 Setting the brightnessyou can set the brightness of the texts and symbolsappearing on the display to one of 3 different levels.1 Turn on the meter with ,➔ wait for the Main menu,➔ use to select Settings,➔ press to open Settings,➔ use to select Brightness,➔ press to open Brightness.The more bars are filled in on the display, the brighterthe display. The default setting is 2.2 use to set the desired brightness.The brightness of the display will be adjusted to thelevel you have selected.3 Press (Select).137
4Adjust settingsThe meter will then display the brightness level youjust set.4 Press (OK).The meter returns to the Settings menu.138
Adjust settings 44.9 Setting the languageyou can choose from a total of 15 languages for thetext appearing on the display. you will already have setthe language when you turned on the meter for thefirst time.If you want to change this selection at a later date, youcan set any of the following languages: english uS english uK Türkçe deutsch Português español Ελληνικά Italiano Norsk Français Suomi dansk Nederlands Svenska139
4Adjust settings1 Turn on the meter with ,➔ wait for the Main menu,➔ use to select Settings,➔ press to open Settings,➔ use to select Language,➔ press to open Language.The currently set language is highlighted.2 use to select the desired language.3 Press .The meter will then display the language you justselected.4 Press (OK).The meter returns to the Settings menu.140
Adjust settings 4Correcting a wrongly set languageIf you have set the wrong language by mistake, youmay not be able to read the menus any more. you canstill change the language with the help of the followinginstructions.1 Turn on the meter with .3 Press 3 times.The “Settings” menu is now highlighted.4 Press .5 Press 6 times.The “Language” menu (the last item) is now highlighted.6 Press .The “Language” menu is now open.7 use to select the desired language.8 Press .2 Wait until the display sequence shown above hasbeen displayed and the display does not changeanymore.The last (right-hand) display is the main menu, but withthe text displayed in the wrongly set language.The meter will then display the language you justselected.9 Press .The meter returns to the “Settings” menu.141
55using the meter as a diaryUsing the meter as a diaryThe meter has a 500-value memory for saving resultswith the time and date. you do not need to save theresults manually since the meter saves them automatically.If all the memory locations are occupied, theoldest test result is deleted to create space for the newone when you perform a new test.In addition to the result, the time and the date, yourmeter also saves all other information that is relevantto the test. This includes all symbols displayed with theresult after a test (except the battery symbol) and theflags you added to the results.The following options are available in the Memorymenu: Main menu: takes you to the Main menu All results: display all the saved results Averages: view the averages for the last 7, 14 or 30days Transfer data: transfer the saved results (to a computer,PdA (handheld computer) or special analysissystems) Display format: select how the saved results are tobe displayed142
using the meter as a diary 55.1 Retrieving saved resultsThere are two different ways of retrieving all savedresults:via the Memory menu using the buttonThe button takes you directly to the saved results.In this case, the options offered in the Memory menuare not available. If you want to use all the options inthe Memory menu, you must open it from the mainmenu.display formatSingle valuedisplay formatListThere are two display formats available for the savedresults. Single value and List. The default setting isSingle value. The procedure for changing the displayformat is described in Chapter 5.4.Symbols saved together with the result appear to theright of the result. In the display format Single value,4 symbols can be displayed, in the display format Listonly 3. If the result is flagged with 4 symbols, thesymbol (result outside the target range) is not displayedin the display format List.143
5using the meter as a diaryVia the Memory menuViewing saved results via the Memory menu:Turn on the meter with ,➔ wait for the Main menu,➔ use to select Memory,➔ press to open Memory,➔ use to select All results,➔ press to open All results.display formatSingle valuedisplay formatListThe last saved result will be displayed, as either Singlevalue or List, depending which display format has beenset.The command for the button is OK.The procedure for viewing all saved results is describedunder “Viewing all saved results”.Leaving the saved results:Press(OK).The meter returns to the Memory menu.144
using the meter as a diary 5Via thebutton (down)Viewing saved results using theWith the meter off:button:Press and holdthan 2 seconds).until the meter turns on (longerdisplay formatSingle valuedisplay formatListThe last saved result will be displayed, as either Singlevalue or List, depending which display format has beenset.The command for the button is Off.The procedure for viewing all saved results is describedunder “Viewing all saved results”.Leaving the saved results:Press(Off).The meter turns off.145
5using the meter as a diaryViewing all saved resultsIrrespective of the procedure you use to view the savedresults (via the Memory menu or using the button),you go to all saved results in the same way.Single valueViewing older results:1 Press to go to the next older result.If you then want to return to the more recent results:2 Press to go to the next more recent result.ListIf you hold the buttons down, the results will be displayedin rapid succession, first slowly, then morequickly. The display stops when the oldest and themost recent (last) results are reached.146
using the meter as a diary 5display formatSingle valuedisplay formatListXX.X or X.X as the last result in the memoryIf the last (most recent) result in the memory is displayedas xx.x or x.x with dashes instead of the timeand date, the last test did not deliver any result. In thiscase, an error message was displayed during the lasttest or you did not apply blood (or control solution) afterthe prompt Apply blood was displayed. After the nexttest that delivers a result, the result displayed as x willbe deleted from the memory.No results in the memoryIf no results have been saved, only All results and OKwill be displayed.display formatSingle valuedisplay formatList147
5using the meter as a diary5.2 Retrieving averagesThe meter can calculate averages from the savedresults.you can choose which results are used for calculationof the averages. all resultsonly results flagged Before mealonly results flagged After mealWhen you have made this selection, you can choosethe period of time in which the results were obtained. the last 7 days the last 14 days the last 30 daysThe average will be calculated from all results correspondingto your choice. However, the following resultswill not be included in the calculation: control tests (flagged with ), results you have flagged with (General), results displayed as or , results of tests performed outside the permittedtemperature range of +10 to +40 °C (flaggedwith ).148
5using the meter as a diary2 use to select All results, Before meal orAfter meal.3 Press (Select).4 use to choose the period in which theresults were obtained: 7, 14 or 30 days.Selecting the time period only determines which averagewill be displayed first. You can later switch directlyfrom one time period to the others.5 Press (Select).The selected average is displayed, together with thenumber of results (called tests) from which the averagewas calculated.150
using the meter as a diary 56 Press to switch from the 7-day average to the14-day average and then to the 30-day average.7 Press to switch from the 30-day average backto the 14-day average and then to the 7-day average.8 Press (OK).The meter returns to the Averages menu.Averages Before meal are marked with the symbol .Averages After meal are marked with the symbol .151
5using the meter as a diaryiiThe meter calculates the average for a timeperiod even if the saved results cover a shorterperiod. example: tests were only performed inthe last 5 days. In this case, the averages for allthree periods (7, 14 and 30 days) are calculatedfrom the results of the last 5 days.If no average can be calculated, x.x is displayedinstead of a value and the number of results(tests) is given as zero. This is the case if eitherno results or only results which are not used forcalculation of averages were saved in the specifiedperiod.iIn the event that you changed the date or time,then performed a test and afterwards re-set thedate or time, the meter only calculates the averagefrom the results which the meter saved inuninterrupted chronological order. If the chronologicalorder was interrupted, the earlier resultsare ignored. If you have not performed any testssince you made the change, x.x is displayedinstead of a value and the number of results(tests) is given as zero.152
using the meter as a diary 55.3 Transferring resultsThe meter has an inbuilt IrdA (Infrared data Association)standard infrared window permitting wirelesstransfer of the results to a suitably equipped computer,PdA (handheld computer) or to special analysis systems.The infrared window is located in the battery compartmentcover of the meter.There are two ways of transferring the results: with special products from Roche diagnostics whichcan also analyse results, in the form of a table which you can then processwith a spreadsheet program, for example.Roche diagnostics offers a variety of special hardwareand software products for analysis which extend theintegrated notebook functions of your meter. Theseproducts enable you and your healthcare professionalto manage your data more effectively and, throughtheir graph and table views, make it easier for you tounderstand your results.Infrared window153
5using the meter as a diarydepending on the type of analysis you intend to perform,you will require a special software product and/orspecial hardware products. For further information,please contact <strong>Accu</strong>-<strong>Chek</strong> Customer Care.If you already have a hardware or software productfrom Roche diagnostics to enable you to transfer andanalyse results, it may not recognize more recentmeters, so the results will not be transferred. you mayneed a more recent software version for your hardwareor software product. In this case, contact <strong>Accu</strong>-<strong>Chek</strong>Customer Care.The results remain in the meter’s memory after transfer.you cannot perform a test while results are beingtransferred.There are two ways of opening the Transfer data menu: using the and buttonsvia the Memory menuIn the Transfer data menu, you can choose how youwish to transfer the results.154
using the meter as a diary 5The following options are available in the Transfer datamenu: Main menu: takes you to the Main menu (only if youopened the menu from the Memory menu) Back: takes you to the Memory menu (only if youopened the menu from the Memory menu) For analysis: transfer the results with hardware orsoftware products from Roche diagnostics Table to PC: transfer the results to a computer in theform of a table155
5using the meter as a diaryStarting the transfer using the and buttonsWith the meter off:Press and hold the and buttons simultaneouslyuntil the meter turns on (longer than 2 seconds).After the display check and the number of availabletests, the Transfer data menu is displayed.156
using the meter as a diary 5Starting the transfer via the Memory menuTurn on the meter with ,➔ wait for Main menu,➔ use to select Memory,➔ press to open Memory,➔ use to select Transfer data,➔ press to open Transfer data.157
5using the meter as a diaryTransferring results for further analysis1 Please read the instructions supplied with thesoftware or hardware you are using. These willinclude instructions on how to transfer data.2 Make the receiving end (software product or hardware)ready to transfer the results.3 Position the meter 5–20 cm away from the infraredwindow of the receiving end. Point the twoinfrared windows towards one another.5–20 cm4 In the Transfer data menu: use to selectFor analysis.5 Press (Select) to start transferring the results.158
using the meter as a diary 56 If necessary, start the transfer of the results at thereceiving end (software product or hardware).during the transfer, you will be informed of theprogress on the display.iIf you do not want to transfer the results afterall, you can abort the transfer using thebutton (Cancel). The meter returns to the Memorymenu (if you came from the Memory menu)or turns off (if you turned on the meter using thebuttons).When the transfer of the results is finished, the meterturns off automatically about 2 seconds later.159
5using the meter as a diaryTransferring results as a tableThe meter can transfer the results to a computerwithout any special hardware or software. The onlyprerequisite is that the computer has an infrared windowaccording to the IrdA standard (Infrared dataAssociation).The results are transferred as a CSV file. The file extensionCSV in this case stands for Comma SeparatedValues.CSV files can be opened with a text editor or spreadsheetprogram, for example.Where you find the CSV file on your computer dependson the settings in your operating system for wirelesstransmission of files via the infrared window.The CSV file always contains all the results saved inyour meter. Results already transferred at an earlierdate are transferred again.The CSV file contains the following information: Serial number: the serial number of the meter Download Date (DD.MM.YYYY), Download Time(hh:mm): the date and time when the meter transferredthe results to the computer. date (dd.MM.yyyy), time (hh:mm), result and unit ofthe results saved in the meter. Flags added to the results, indicated by an “x”.The data (date, time, test result etc.) in this CSV file isseparated by semicolon.In the CSV file, the date is always displayed in theformat dd.MM.yyyy and the time always in the 24-hour format (hh:mm). The time format set in the meterhas no influence on the format of the date and time inthe CSV file.160
using the meter as a diary 5CSV file opened in a text editorSerial number;download date;download Time123456789;10.05.2009;09:18date;Time;Result;unit;Temperature warning;Beyond target range;General;Before meal;After meal;Control test10.05.2009;08:21;6.5;mmol/l; ; ; ; ; ;09.05.2009;18:05;7.1;mmol/l; ; ; ; ; ;09.05.2009;12:37;7.5;mmol/l; ;x; ; ; ;09.05.2009;08:16;6.2;mmol/l; ; ; ;x; ;08.05.2009;18:39;3.2;mmol/l; ; ; ; ; ;xCSV file opened in a spreadsheet program (example)Serial number download date download Time123456789 10.05.2009 09:18date Time Result unit Temperature warning Beyond target range General Before meal After meal Control test10.05.2009 08:21 6.5 mmol/l09.05.2009 18:05 7.1 mmol/l09.05.2009 12:37 7.5 mmol/l x09.05.2009 08:16 6.2 mmol/l x08.05.2009 18:39 3.2 mmol/l x161
5using the meter as a diary1 Turn on the computer.2 Position the meter 5–20 cm away from the infraredwindow of the computer. Point the two infraredwindows towards one another.5–20 cm3 In the Transfer data menu: use to selectTable to PC.4 Press the (Select) to start transferring theresults.162
using the meter as a diary 5during the transfer, you will be informed of theprogress on the display.If you do not want to transfer the results afteri all, you can abort the transfer using thebutton (Cancel). The meter returns to the Memorymenu (if you came from the Memory menu)or turns off (if you turned on the meter using thebuttons).When the transfer of the results is finished, the meterturns off automatically about 2 seconds later.163
5using the meter as a diaryIf the transfer is unsuccessfulIf the results are not transferred, the meter turns offautomatically after about 60 seconds.Possible reasons for an unsuccessful transfer are: A transfer error occurred.Start the transfer of the results again. The infrared windows are too far apart or not properlyfacing each other.Reduce the distance between the two infraredwindows to 5–20 cm and position them so they arepointing towards one another. Start the transfer ofthe results again. Another device with an infrared source turned on ora strong light source is too close to one of the twoinfrared windows.Remove the device or light source and start thetransfer of the results again. There is some object, for example, blocking communicationbetween the two infrared windows.Remove the object and start the transfer of theresults again. An error occurred at the receiving end or either thesoftware or hardware.Please read the relevant instructions for use.164
using the meter as a diary 55.4 Setting the display format for viewing saved resultsThere are two different formats available for displayingthe saved results (Memory menu – All results): Singlevalue and List.display format Single valuedisplay format Single value (default setting):In this format, just one result is displayed on the display.The time and date on which the result was obtainedare displayed above the result (in this case 7.2mmol/l).display format Listdisplay format List:In this format, three results are available on the display.The selected value is between the two horizontal lines.This is the only actual result displayed. The time anddate are displayed below the result. For the other tworesults, only the time and date are displayed. The morerecent results are above the selected result, the olderresults below.165
5using the meter as a diary1 Turn on the meter with ,➔ wait for the Main menu,➔ use to select Memory,➔ press to open Memory,➔ use to select Display format,➔ press to open Display format.2 use to select the desired display format.3 Press (Select).An example of the display format you selected is displayed.4 Press the (Continue).166
using the meter as a diary 5The meter will then display the display format you justset.or5 Press (OK).The meter returns to the Memory menu.orIf no results have been saved, x will be displayedinstead of the result and dashes instead of the timeand date.167
66Acoustic modeAcoustic modeThe procedure for turning on the acoustic mode isdescribed in Chapter 4.4.When the acoustic mode is turned on, the meter guidesyou through the blood glucose test using beeps andannounces the result as a series of beeps. The meterbeeps additionally when the batteries are almost empty,the test cassette is empty or an error message isdisplayed.An intimate knowledge of how results are announcedas beeps and how to distinguish results from otherbeeps is crucial to reliably recognizing the result.The sections below explain the beeps in detail. Inaddition, training software (the BeepLearn program) tohelp you interpret results announced in the form ofbeeps is available on Cd from <strong>Accu</strong>-<strong>Chek</strong> CustomerCare at 1-800-363-7949.Visually impaired people should only use theacoustic mode if they have familiarizedthemselves fully with the acoustic modewith the assistance of a sighted person andhave demonstrated that they are able tounderstand results correctly without exceptionusing the acoustic mode. The acousticmode should always be used with great care.Otherwise there is a risk that the results willbe misinterpreted by the person performingthe test. An incorrect insulin dose resultingfrom a misinterpreted result can cause considerablehealth damage and can even befatal. Especially if unexpected and abnormalblood glucose values are obtained using theacoustic mode, the result must be checkedby repeating the test together with a sightedperson.Visually impaired people should not test theirblood glucose without assistance from asighted person.The meter must be regularly checked by asighted person for outwardly visible contamination.168
Acoustic mode 6There are two types of beeps, differing in pitch. Warningshave a higher pitch (Tone 2, represented belowas ) than the other beeps (Tone 1, represented belowas ). The following table shows which tone soundsfor which event.Tone 1:Turning on Chapter 6.1Test area is advanced to the tip of Chapter 6.2the cassettePrompt to apply blood Chapter 6.2Start of test Chapter 6.2Announcement of the result Chapter 6.3, 6.4Tone 2:(warning)Signal that results are about to beannouncedAnnouncement of an errormessageNotification that the batteries arealmost emptyNotification that the cassette isemptyChapter 6.3Chapter 6.2, 6.5Chapter 6.5Chapter 6.5169
6Acoustic mode6.1 Beep tone when turning onWhen the acoustic mode is turned on, you hear a beep( ) when you turn the meter on.This is irrespective of how you turn on the meter: by opening the tip cover to perform a test (seeChapter 3.2) using the button (see Chapter 1.6) using the button to view saved results (seeChapter 5.1) using the and buttons to transfer data (seeChapter 5.3)6.2 Beep tones during a testAfter the power-on beep, you will hear the followingwhile you test a beep tone when the meter advances a test area tothe tip of the cassette, a beep when you can apply blood or control solution, a beep when the test starts, the result which is composed of different beeps (seeChapter 6.3), several beeps if the meter displays an error message(see Chapter 6.5).170
Acoustic mode 66.3 Announcement of the result after a testIn the acoustic mode, whenever the meter displays aresult following a blood glucose test, it also announcesthe result as a series of beeps. The result is not treatedas an entity, but is broken down into individual digits.example: The result 7.6 mmol/l is announced as 0 – 7 –decimal point – 6.each digit is represented by the corresponding numberof beeps, e.g. 4 beeps for the number 4 ( ).Zero is represented by a long beep ( ).Results which are lower than 0.6 mmol/l and aredisplayed as are announced acoustically as0 – 0 – decimal point – 0.Results which are higher than 33.3 mmol/l and aredisplayed as are announced acoustically as 9 – 9– decimal point – 9.The result is announced three times in succession.each announcement is preceded by 2 short beeps( ). Altogether, therefore, you hear: resultresult result.Symbols, such as or , which are displayed togetherwith the result are not announced acoustically.If you turn off the meter using the on/off buttonwhile the result is being announced acoustically, theannouncement will be interrupted and 2 short beepswill sound four times in succession ( ).171
6Acoustic modeFirst the tens are announced, then the units, then thedecimal point and finally the tenths. There is a shortpause between each group of beeps. The tens arealways announced, even when the result is below 10.The tens in this case are represented by 1 long beep,signifying zero. The decimal point is represented by1 very short beep ( ). 13.8 mmol/l:1 beep – pause – 3 beeps – pause – 1 very shortbeep – pause – 8 beeps= 4.0 mmol/l:1 long beep (for 0 tens) – pause – 4 beeps –pause – 1 very short beep – pause –1 long beep =172
Acoustic mode 66.4 Announcement of saved test resultsonly the last (most recent) of the saved test results isannounced acoustically.The result is announced three times in succession. Theannouncement follows the same pattern as the announcementof a result immediately after the test. youwill hear: result result result.If you directly retrieve saved results using the button, you will at first hear the power-on beep and immediatelyafterwards the result:result result result.Flags are not acoustically announced. If you flag thelast saved result with (General), (Before food) or(After food), this result will be announced like anon-flagged result.If xx.x or x.x is displayed as the last (most recent)result, the last test did not deliver any result (seeChapter 5.1). In this case, the sounded beeps areidentical to those for an error message (see next page).There is no acoustic announcement when the last saved result is a control test flagged with , no results are saved, you retrieve an average.173
6Acoustic mode6.5 Announcements of warnings and error messagesWarningsWhen the batteries will soon be empty or the testcassette has been used up, the meter issues an acousticwarning. This consists of two short beeps soundedthree times in succession ( ).The warning is given at different times. Batteries almost empty:The acoustic warning sounds after you have turnedthe meter on, together with the corresponding messageon the display (see Chapter 14). Test cassette empty:The acoustic warning sounds when the number ofavailable tests is displayed as zero when turning offthe meter.Error messagesIf error messages appear on the display (see Chapter16.4), these are announced by two short beeps soundedfour times in succession (). Thissequence is sounded only once and is not repeated.The same sequence of beeps is sounded for all errormessages, i.e. they are not differentiated acoustically.174
Checking the meter 77Checking the meteryou can check whether the meter delivers correctresults. To perform this control test, a glucose controlsolution is applied to the test area instead of blood. Atthe end of the test, the meter automatically checkswhether the result obtained with glucose control solutionis correct and informs you of the result.Always perform a control test using <strong>Accu</strong>-<strong>Chek</strong> Mobilecontrol solutions: after you have inserted a new test cassette, after you have changed the batteries, after you have cleaned the cassette and the inside ofthe meter, if you are in doubt about a result.Please ask <strong>Accu</strong>-<strong>Chek</strong> Customer Care where you canobtain the control solutions.different control solutions are sold in different countries.The control solutions have different colored labels(red, blue or white). At the end of the control test, themeter asks you to enter the color of the label on thecontrol solution you have used (see Chapter 7.2). Themeter offers you a choice of all three colors, even ifyou only have one or two control solution(s) to choosefrom.Visually impaired people should not carry out acontrol test without assistance from a sightedperson.175
7Checking the meter7.1 Preparing for a control testFor a control test you need: the meter with inserted test cassette, an unopened applicator of <strong>Accu</strong>-<strong>Chek</strong> Mobile controlsolution; the solution in each applicator is for oneapplication only.A control test in its main steps is the same as a normaltest except that you apply control solution to the testarea instead of blood.Please read the package insert provided with thecontrol solutions.176
Checking the meter 77.2 Performing a control testStart as for a blood glucose test: either open the tipcover or select Test in the Main menu.The following description assumes that you start thetest by opening the tip cover.1 Place your finger on the corrugated area on the tipcover and push in the direction of the arrow as faras it will go.After overcoming a slight resistance, the tip coverclicks into place.Be careful not to touch the tape when doing thisas this could damage it.If the meter was turned off, it now turns on.177
7Checking the meterA beep will sound (if Beeper is turned on) and thedisplay check will be displayed, followed by the numberof available tests.2 Check that there are no irregularities in thecheckerboard pattern.Then the meter advances a test area to the tip of thecassette.Shortly after the test area has been advanced to the tipof the cassette, the prompt Apply blood will appear anda beep will sound (if Beeper is turned on). The promptalso applies to control solution.178
Checking the meter 73 Twist the cap off the applicator. Be careful not tosqueeze the applicator too hard while doing this soas to not lose any control solution.4 Hold the applicator at a slight angle with the brushpointing downwards.5 Squeeze the applicator gently until you see a smalldrop appear at the end of the brush.6 Then stop squeezing.The drop will then be absorbed back into the brush.The brush is now ready to use.you can hold the meter in your hand or lay it downwhile you apply control solution to the test area.do not hold the meter with the test area pointingupwards. If you hold the meter with the test areapointing upwards, control solution could enterthe meter and soil it.179
7Checking the meteryou can hold the meter in your hand or lay it downwhile you apply control solution to the test area.do not hold the meter with the test area pointingupwards. If you hold the meter with the test areapointing upwards, control solution could enterthe meter and soil it.7 Apply the control solution to the center of the testarea at the tip of the cassette using the tip of thebrush.As soon as control solution touches the test area it isabsorbed.8 Take the brush away from the test area as soon asTest in progress and the hourglass symbol appearon the display.180
Checking the meter 7The test area has then absorbed enough control solutionand a beep sounds (if Beeper is turned on). Thehourglass symbol indicates that the test is in progress.Testing is complete after approximately 5 seconds andthe result appears on the display.The meter cannot distinguish between bloodi and control solution. If you have set a targetrange and the result obtained with control solutionis outside this range, the symbol will bedisplayed together with the result. The symbolwill be deleted automatically when you flag theresult as a control test.To distinguish the control test later from blood glucoseresults, you need to flag it as a control test.9 Press (Set flag ).181
7Checking the meter10 use to select Control test.11 Press (Select).The meter then prompts you to enter the color of theapplicator label. entering the correct color is importantso that the meter can check whether the result iscorrect.12 use to select the color.13 Press (Select).The result is then displayed again, this time with theflag Control test (symbol ).14 Press (Continue).182
Checking the meter 7The meter displays the upper and lower limits of theconcentration range. The concentration range displayeddepends on the color of control solution selected.15 Press (Continue).Values are only examplesThe meter automatically checks whether the result iswithin the concentration range displayed.orIf the result is within the concentration range displayed,Control test OK is displayed.If the result is not within the concentration rangedisplayed, Control test not OK ... Repeat control testwill be displayed (see Chapter “Control test not oK –possible sources of error”).16 Press (OK).183
7Checking the meterThe meter returns to the Main menu.17 Turn off the meter with or via Turn off.18 Close the tip cover.19 dispose of the applicator in your household waste.184
Checking the meter 7you can also check yourself whether the result iswithin the right concentration range.To do this, compare the result with the concentrationtable on the test cassette box.The result must be within the printed concentrationrange.Make sure you compare the result with the concentrationrange that corresponds to the control solution youused (1 or 2).<strong>Accu</strong>‐<strong>Chek</strong> ® Mobile Controlmmol/l1 1,9–4,22 6,4–8,6Values are onlyexamplesunit ofmeasurementControl solution used185
7Checking the meterControl test not OK – possible sources of errorIf Control test not OK ... Repeat control test is displayed,the result obtained is not within the concentrationrange displayed. Check the points listed on thenext page. If your answer is different from the answergiven, make the respective corrections and repeat thetest. If you have taken all of these points into accountand Control test not OK is still displayed, contact<strong>Accu</strong>-<strong>Chek</strong> Customer Care.If Control test not OK Repeat control test isdisplayed, it is no longer certain that the meterand test cassette are functioning properly. Bloodglucose tests may then deliver incorrect results.Incorrect results can cause the wrong therapyrecommendation to be made and thus produceserious adverse health effects.186
Checking the meter 7did you perform the control test according tothe user’s <strong>Manual</strong>?did you wait for the application prompt to bedisplayed before applying control solution?did you apply the control solution immediatelyafter opening the applicator?did you enter the correct color?did you perform the test within the correcttemperature range (10–40 °C)?yesyesyesyesyesHas the expiry date for the control solutionbeen reached (see label on the bottom of thevial next to the symbol )?did you read the section “Storage and stabilityof control solutions” in the package insertfor the control solution?did you observe the proper storage conditionsfor the meter, test cassette and controlsolutions (see Chapter 15 and the test cassetteand control solution package inserts)?noyesyesIf your meter has been dropped, that can also lead tocontrol test results which are not within the concentrationrange displayed and for which Control test not OKis displayed. In this case, you should also call<strong>Accu</strong>-<strong>Chek</strong> Customer Care.187
8 Tools menu8 Tools menuThe Tools menu on the one hand offers you some extrameans of checking the meter. on the other hand, youmust also use this menu to prepare for cleaning themeter and changing a test cassette that has not beenused up.The following options are available in the Tools menu: Main menu: takes you to the Main menu Display check: perform a separate display check(see Chapter 9) Validity: displays the validity of the test cassette (seeChapter 10) Clean: prepare the meter for cleaning (see Chapter11) Change cass.: prepare the meter for removing a testcassette which still has unused test areas (seeChapter 12)188
Performing a display check 99Performing a display checkIf you wish to check whether the display is workingproperly, in addition to turning on the meter, you canalso do this via the display check in the Tools menu. Inthis case, the display check is shown until you cancel it(for no longer than 1 minute).1 Turn on the meter with ,➔ wait for the Main menu,➔ use to select Tools,➔ press to open Tools,➔ use to select Display check,➔ press to open Display check.2 Press (OK).189
9Performing a display check3 Check whether there are any irregularities in thecheckerboard pattern.If there are irregularities in the checkerboardpattern, results might not be displayed correctly.In this case contact <strong>Accu</strong>-<strong>Chek</strong> Customer Care.4 Press the button (Continue).display check without irregularitiesThe meter returns to the Tools menu.If you do not press the button, the meter showsthe display check for about 1 minute. Then it displaysthe number of available tests and turns off automatically.display check with irregularities (examples)190
Viewing the validity of the test cassette 1010Viewing the validity of the test cassetteTo find out when the test cassette in the meter expires:1 Turn on the meter with ,➔ wait for the Main menu,➔ use to select Tools,➔ press to open Tools,➔ use to select Validity,➔ press to open Validity.The validity is displayed.2 Press (Continue).The meter returns to the Tools menu.191
11 Cleaning the meter and lancing device11 Cleaning the meter and lancing device11.1 Cleaning the meterThe mode of operation of the meter with the test cassettemeans that the meter will not normally come intocontact with blood or control solution. Regular cleaningis therefore not necessary. In the event the meterbecoming soiled through improper use, cleaning it maybecome necessary.use only cold water or 70 % ethanol for cleaning.Any other cleaning agents may damage themeter or impair its measuring function.use a lightly moistened cloth or a lightly moistenedcotton swab. do not spray anything ontothe meter and do not immerse it in the cleaningfluid. Doing so may damage its internal componentsand stop it from working properly.The outsideIf the casing of the meter or the display is visibly soiled:Wipe with a cloth lightly moistened with cold water or70 % ethanol.192
Cleaning the meter and lancing device 11The insideyou only need to clean the inside of the meter if: the area around the tip of the cassette is visiblysoiled, the error message e-4 with the text “See user’s<strong>Manual</strong>” is displayed; the error message might becaused by fluff, crumbs, etc. inside the tip of thecassette.To enable you to clean the inside of the meter, youhave to open Clean in the Tools menu and then removethe test cassette (see next page).If the error message e-4 was displayed, a testi area is lost when you later reinsert the testcassette.193
11Cleaning the meter and lancing device1 Turn on the meter with ,➔ wait for the Main menu,➔ use to select Tools,➔ press to open Tools,➔ use to select Clean,➔ press to open Clean.The meter now prompts you to open the tip cover.If you do not want to clean the meter now, pressi the button (Cancel).194
Cleaning the meter and lancing device 112 Place your finger on the corrugated area on the tipcover and push it in the direction of the arrow asfar as it will go.The meter then prompts you to remove the test cassette.About 2 seconds later, it turns off automatically.3 Turn the meter over.195
Cleaning the meter and lancing device 116 Remove the cassette from the cassette compartment.7 Check whether you can see any fluff, crumbs, etc.inside the tip of the cassette.8 If so, remove these carefully.197
11Cleaning the meter and lancing deviceIf the measuring optics are visibly soiled, clean theinside of the meter as follows:9 Carefully wipe the measuring optics and the frontopening of the meter with a lightly moistened clothor cotton swab.10 Leave the cassette compartment cover open andclose the tip cover.198
Cleaning the meter and lancing device 1111 Carefully wipe the interior of the tip cover with alightly moistened cloth or cotton swab.Make sure that no liquid enters the meter. Avoidscratching the measuring optics. Scratchescould interfere with tests.12 Remove any fluff or lint that may remain.13 Allow the meter time to dry thoroughly.199
11Cleaning the meter and lancing device14 open the tip cover again.The meter now turns on and displays error messagee-2. The error message at this point is not relevantsince you had to remove the cassette to clean themeter. you can ignore the message. The meter turns offagain automatically. Simply continue with step 15.15 Insert the cassette in the meter again with thesilver side facing upwards.200
Cleaning the meter and lancing device 1116 Close the cassette compartment cover and press itclosed. you must hear an audible CLICK.CLICK17 Close the tip cover.201
11Cleaning the meter and lancing device11.2 Cleaning the lancing deviceTo ensure proper functioning of your lancing deviceand the used cap, you should clean them regularly andif there is any blood on them. If you want to clean thelancing device, first detach it from the meter (seeChapter “undocking and docking the lancing device”).Clean the outside of the lancing device only. Wipe itonce a week with a cloth moistened with 70 % ethanolor 70 % isopropanol (available from your pharmacy).Also clean the inside of the cap with a cotton swabmoistened with one of the two cleaning fluids.Allow the lancing device and cap time to dry thoroughly.Never dip the lancing device in the cleaningfluid. Doing so may damage its internal componentsand stop it from working properly.Never dip the AST cap in the cleaning fluid.Cleaning fluid left in contact with the AST capfor too long can attack the material from whichit is made, stopping it from functioning properly.use only 70 % ethanol or 70 % isopropanol toclean the lancing device or the AST cap. othercleaning agents may attack the plastic and stopthem from operating properly.202
Replacing the test cassette 1212Replacing the test cassetteIf you want to replace an empty test cassette or anexpired test cassette, please continue reading in Chapter12.2.If you want to remove a partly used test cassette whichstill has unused test areas, you must first perform thepreliminary steps described in Chapter 12.1.you can reinsert a partly used cassette into the meterat a later date. In the mean time, store this cassette ina dry place protected from light.If you reinsert the partly used cassette into thei meter and there was another cassette in themeter before this, the partly used cassette losesa test area. If you reinsert the started test cassetteinto the meter immediately, it does notlose a test area.203
12Replacing the test cassette12.1 Preparing cassette replacementTurn on the meter with ,➔ wait for the Main menu,➔ use to select Tools,➔ press to open Tools,➔ use to select Change cass.,➔ press to open Change cass.The meter now prompts you to open the tip cover.If you do not want to change the cassette now,i press the button (Cancel).204
Replacing the test cassette 1212.2 Replacing the cassette1 Place your finger on the corrugated area on the tipcover and push it in the direction of the arrow asfar as it will go.If you have prepared for the cassette replacement viaChange cass. the meter prompts you to replace thetest cassette. Shortly after this, it turns off automatically.ororIf the cassette in the meter is empty or has a problemor has expired, the appropriate message or errormessage e-1 appears after the display check and thenumber of available tests (see also Chapter 16.2 and16.4). Shortly after this, the meter turns off automatically.205
12Replacing the test cassette2 Turn the meter over.3 Push the release button for the cassette compartmentcover in the direction of the arrow. The coversprings open.206
Replacing the test cassette 124 open the cassette compartment cover all the way.The cassette compartment cover is fully opened whenit is at an angle of slightly more than ninety degrees –as shown in the illustration.5 Remove the cassette from the cassette compartment.used test cassettes can be disposed of in householdwaste.207
12Replacing the test cassette6 Remove a new cassette from the foil-sealedpackaging.7 Insert the cassette in the meter with the silver sidefacing upwards.208
Replacing the test cassette 128 Close the cassette compartment cover and press itclosed. you must hear an audible CLICK.CLICKWhen you have closed the cassette compartmentcover, the meter turns on again and runs the displaycheck.9 Press the button (Continue).209
12Replacing the test cassetteThe validity of the cassette is displayed.10 Press the button (Continue).The meter displays the number of available tests.11 Press the button (Continue).The meter opens the Main menu.12 Close the tip cover.If the test cassette you removed still has unused testsand has not yet expired, you can reinsert the cassetteinto the meter at a later date. The meter recognizes thecassette, the number of available tests and the validity.210
Viewing the number of available tests 1313Viewing the number of available testsyou can view the number of tests still available on theinserted cassette by one press of a button.With the meter off:Press and hold the button until the meter turns on(longer than 2 seconds).The number of tests available on the cassette will bedisplayed. The meter turns off again automatically ashort time later.211
14 Changing the batteries14 Changing the batteriesThis message appears when the batteries are almostempty. It appears every time you turn the meter offuntil you change the batteries. The first time the messageappears, you can still perform about 50 tests.However, we recommend that you replace the batteriesas soon as possible. By then the batteries will havebeen heavily drained and changeable conditions (e.g.cold outside temperatures) can affect their performanceeven further.you need 2 alkaline-manganese or high-energy batteriestype AAA, LR 03, AM4 or micro (1.5 V). Alwaysreplace both batteries at the same time.do not use rechargeable batteries as these have aconsiderably shorter life than normal batteries.With a new set of batteries, you can perform at least500 tests or test for about 1 year.212
Changing the batteries 14Results and settings remain saved in the meter whileyou change the batteries or if you store the meterwithout batteries.The meter has an built-in back-up battery. This providesthe power when there are no batteries inserted.The back-up battery lasts about 5 years. It cannot bereplaced if it is empty. An empty back-up battery hasno influence on the functioning of the meter.If the back-up battery is empty, you still have 10 minutesto change the batteries. only if more time than thiselapses does the meter forget the time and date anddashes appear on the display instead of the time anddate. In this case, set the time and date again.iiNever throw batteries into a fire. This is dangerous,because they may explode.Please dispose of used batteries in an environmentallyfriendly way such as at a collectiondepot.Remove the batteries if you will not be usingyour meter for any length of time. The time anddate still remain saved in the meter.213
14Changing the batteries1 Push the battery compartment cover in the directionof the arrow as far as it will go to unlock it.you will have to overcome a slight resistance. Thecover is properly unlocked when it slides over thisresistance with a CLICK.2 Raise the battery compartment cover as illustrated.214
Changing the batteries 143 Turn the meter so that the battery compartmentfaces downwards. The batteries fall out.4 Insert two new batteries in the battery compartment.Pay attention to the symbols and in thebattery compartment. The corresponding end of thebattery must be facing upwards.215
14Changing the batteries5 Close the battery compartment cover again.6 Push the battery compartment cover in the directionof the arrow as far as it will go to lock it. Itlocks into place with a CLICK.216
Testing and storage conditions 1515Testing and storage conditionsMake sure that the conditions listed on the followingpages are met, so that the meter and lancing devicework reliably and you obtain accurate results.15.1 Temperature and humidity Without batteries and without a test cassette, themeter should be stored at between -25 and +70 °C. With batteries and without a test cassette, themeter should be stored at between -10 and +50 °C.At temperatures above +50 °C, the batteriescould leak and damage the meter.At temperatures below -10 °C, the batteriesdo not have enough power to keep theinternal clock functioning. With batteries and with a test cassette, the metershould be stored at between +2 and +30 °C. Store the meter in a place with a relative humiditybetween 15 and 93 %. The temperature and humidity conditions underwhich the meter can operate are +10 to 32 °C at15 to 85 % relative humidity, including the followingexteme conditions: +32 °C at 85 % relative humidityand +40 °C at 45 % relative humidity.Sudden changes in temperature can causecondensation to form in or on the meter. If thishappens, do not turn the meter on. Make surethat it returns to ambient temperature slowly.Never store the meter in a room that is likely toharbour condensation (e.g. bathroom). If the temperature is between +8 and +10 °C orbetween +40 and +42 °C, the meter will still allowyou to perform a test. However, the following warningwill appear (see also Chapter 16.2).217
15Testing and storage conditionsdo not use blood glucose results obtainedfollowing these warnings as a basis for makingtherapeutic decisions. These results maybe incorrect. Incorrect results can cause thewrong therapy recommendation to be madeand thus produce serious adverse healtheffects. Tests cannot be performed at temperatures below+8 °C and above +42 °C. In this event, the followingerror message appears:do not store the lancing device in a primed state anddo not store it for any length of time in a placewhere the temperature is very low or high, e.g. in ahot car. This can cause parts of the lancing device tobecome warped, so impairing its operation.Never try to speed up the cooling or warmingof your meter, e.g. by placing it in the refrigeratoror on a radiator. doing so can damagethe meter and cause it to deliver incorrectresults. Incorrect results can cause the wrongtherapy recommendation to be made andthus produce serious adverse health effects.218
Testing and storage conditions 1515.2 Light conditionsdisplayed text, numbers and symbols appear yellow.Bright light shining on the display may make themdifficult to read. Shield the meter if necessary, withyour body, for example.Keep the meter away from very strong lightsources (e.g. direct sunlight, spot lights). Thesemay interfere with the proper functioning of themeter and lead to error messages.15.3 Local sources of interferenceStrong electromagnetic fields may interfere withthe proper operation of the meter. do not usethe meter close to sources of strong electromagneticradiation.To avoid electrostatic discharge, do not use themeter in a very dry environment, particularlyone in which synthetic materials are present.NOTICE:This device complies with Part 15 of the FCC Rules andwith RSS-210 of Industry Canada.operation is subject to the following two conditions:(1) this device may not cause harmful interference,and(2) this device must accept any interference received,including interference that may cause undesiredoperation.219
15Testing and storage conditionsNOTICE:Changes or modifications made to this equipment notexpressly approved by Roche diagnostics GmbH,Germany may void the FCC authorization to operatethis equipment.Classification with respect to U.S. telecommunicationrequirements (47CFR §15.105)NOTE:This equipment has been tested and found to complywith the limits for a Class B digital device, pursuant toPart 15 of the FCC Rules. These limits are designed toprovide reasonable protection against harmful interferencein a residential installation. This equipment generates,uses and can radiate radio frequency energyand, if not installed and used in accordance with theinstructions, may cause harmful interference to radiocommunications. However, there is no guarantee thatinterference will not occur in a particular installation. Ifthis equipment does cause harmful interference toradio or television reception, which can be determinedby turning the equipment off and on, the user is encouragedto try to correct the interference by one ormore of the following measures: Reorient or relocate the receiving antenna. Increase the separation between the equipment andreceiver. Connect the equipment into an outlet on a circuitdifferent from that to which the receiver is connected. Consult the dealer or an experienced radio/TV technicianfor help.Classification with respect to the Canadian telecommunicationrequirementsNOTICE:This Class B digital apparatus complies with CanadianICeS-003.220
Symbols, messages, problems and error messages 1616Symbols, messages, problems and error messages16.1 SymbolsThe meter presents most of the information as text. Inaddition, results are displayed – both after a test and inthe memory – together with further information in theform of symbols.The batteries are almost empty.This is the result of a control test.The temperature during the test was outsidethe permitted range of +10 to +40 °C. despitea warning to this effect you decided to goahead with the test.you have turned on a target range. The resultis either below the lower limit or above theupper limit of the target range set.In place of a result: The result is lower than0.6 mmol/l.may indicate that your blood glucoseis very low (possibly a severehypoglycemia). Follow the relevantinstructions given by your healthcareprofessional immediately and repeatthe test.In place of a result: The result is higher than33.3 mmol/l. Repeat the test.You have flagged the result with the flagGeneral.You have flagged the result with the flagBefore meal.You have flagged the result with the flag Aftermeal.221
Symbols, messages, problems and error messages 16Batteries low: This message appears when the batteriesare almost empty. It appears every time you turnthe meter off until you change the batteries. The firsttime the message appears, you can still perform about50 tests.Change the batteries as soon as possible.Close tip cover: This prompt appears if you turn offthe meter and the tip cover is still open.Close the tip cover.223
16Symbols, messages, problems and error messagesTip cover open: This message appears if you are inthe process of changing a setting (e.g. the date) orentering a new setting (e.g. a reminder) and open thetip cover.Close the tip cover again if you wish to continue withthe setting.oruse to select whether you wish to Continuewith settings or Test.Continue with settings: in this case, the meterprompts you to close the tip cover. Test: in this case, the setting procedure will beinterrupted (any changes you have already made willbe lost) and a test area will be advanced.224
Symbols, messages, problems and error messages 16Tip cover closed: This message appears if you closethe tip cover after the meter has advanced a test area.open the tip cover again if you wish to continue withthe test.oruse to select Do not test or Test. Do not test: in this case, the meter returns to theMain menu. you can no longer use the test area,because the meter will advance the tape again. Thisreduces the number of available tests. Test: in this case, the meter prompts you to open thetip cover.225
16Symbols, messages, problems and error messagesTemperature too low / too high: This message appearsat the start of a test if the ambient temperatureor the temperature of the meter is between +8 and+10 °C or between +40 and +42 °C.use , to select whether you wish to Test or Quit. Test: in this case, the meter advances a test area. Quit: in this case, the meter returns to the Mainmenu. Close the tip cover.If you decide to perform the test in spite of the warning,the result will be flagged and saved with the symbol.do not use blood glucose results obtained followingthese warnings as a basis for making therapeuticdecisions. These results may be incorrect.Incorrect results can cause the wrong therapyrecommendation to be made and thus produceserious adverse health effects. Move to a placewhere the temperature is between +10 and+40 °C and wait for the temperature of the meterto adjust to this temperature.226
Symbols, messages, problems and error messages 16Reminder: If you have set reminders, this messageappears at the set time. If you have also turned onReminders in the Settings/Tones menu, beeps will alsosound.To turn off the reminder:Press any button.227
16Symbols, messages, problems and error messages16.3 ProblemsThe meter will not turn on. The batteries are empty or none are inserted.Insert new batteries. you have inserted the batteries the wrong wayround.Remove the batteries and reinsert them as shown inthe battery compartment. Condensation has affected the electronics.Allow the meter time to dry slowly. The meter is defective.Contact <strong>Accu</strong>-<strong>Chek</strong> Customer Care at1-800-363-7949. The ambient temperature is low and the batteriesare almost empty.Move to a place where the temperature is between+10 and +40 °C and wait for the temperature of themeter to adjust to this temperature. Insert newbatteries.228
Symbols, messages, problems and error messages 16The meter only displays dashes instead of the timeand date.The meter has forgotten the time and date.you have changed the batteries or stored the meterwithout batteries and the built-in back-up battery isempty. The back-up battery normally ensures that themeter remembers the time and date even if no batteriesare inserted.The meter is turned on, but the display remainsblank.The display is defective.Contact <strong>Accu</strong>-<strong>Chek</strong> Customer Care.Reset the time and date.Results which are saved without the time and datecannot be analysed after transfer to a computer or onlyin a limited way.If the back-up battery is empty you still have 10 minutesto change the batteries before the meter forgetsthe time and date. If more than 10 minutes elapse, onlydashes are displayed instead of the time and date.229
16Symbols, messages, problems and error messages16.4 Error messagesE‐1The following pages describe all error messagestogether with the cause and how they can be remedied.If an error message is displayed, turn the meter off:Press and hold the on/off button until the bar inthe display is filled (at least 2 seconds).If error messages occur frequently, contact <strong>Accu</strong>-<strong>Chek</strong>Customer Care.If your meter has been dropped, that can also lead toerror messages. In this case, you should also call<strong>Accu</strong>-<strong>Chek</strong> Customer Care. The test cassette or the meter may be defective.Remove the cassette from the meter and reinsert it. If the error message reappears:Insert a new test cassette in the meter. If the error message still appears, the meter isdefective.Contact <strong>Accu</strong>-<strong>Chek</strong> Customer Care.230
Symbols, messages, problems and error messages 16E‐2E‐3 There is no test cassette in the meter.Insert a new test cassette. The RFId sensor in the meter is defective.Contact <strong>Accu</strong>-<strong>Chek</strong> Customer Care. The RFId chip on the cassette is damaged or missing.The cassette cannot be used.Insert a new test cassette. your blood glucose value may be very low.If the way you feel agrees with a very low bloodglucose value, immediately follow the relevantinstructions given by your doctor. Repeat the testafterwards. A meter error occurred.If the error message reappears after turning on themeter:Contact <strong>Accu</strong>-<strong>Chek</strong> Customer Care.231
16Symbols, messages, problems and error messagesE‐4 Fluff, crumbs, etc. are inside the tip of the cassette.Remove these. To do this, follow the instructions inChapter 11.1.you can go directly from here to the Cleani menu without having to turn the meter offfirst. To do this, press the button (Continue). The cassette is not properly inserted into the meter.Remove the cassette and reinsert it. The test area has absorbed too little blood or controlsolution.Repeat the test with a larger amount of blood orcontrol solution. you did not apply the blood drop or the controlsolution to the center of the test area.Repeat the test. Apply the blood drop or the controlsolution exactly to the center of the test area at thetip of the cassette.232
Symbols, messages, problems and error messages 16E‐6during the test, bright light, e.g. sunlight, fell on themeter and has interfered with the test.Move into the shade or shield the meter with yourbody, for example. Repeat the test.you applied blood or control solution to the test areatoo soon, i.e. before the prompt Apply blood was displayed.Repeat the test. do not apply blood or control solutionto the test area until the prompt Apply blood is displayed.233
16Symbols, messages, problems and error messagesE‐7E‐8A meter error occurred.If the error message reappears after turning on themeter:Contact <strong>Accu</strong>-<strong>Chek</strong> Customer Care.The ambient temperature or the temperature of themeter is too low (under +8 °C) or too high (above+42 °C) for a test.Move to a place where the temperature is between+10 and +40 °C and wait for the temperature of themeter to adjust to this temperature.234
Symbols, messages, problems and error messages 16E‐9If the batteries are so low that no more tests can beperformed, this message will appear. Then the meterturns off (after a maximum of 1 minute).Insert two new batteries.235
1717disposing of the meterDisposing of the meterduring blood glucose testing, the meter may come intocontact with blood. used meters therefore carry a riskof infection. Please dispose of your used meter, afterremoving the batteries, according to the regulationsapplicable in your country. Also remove the back-upbattery (see next page).For information about correct disposal, please contactyour local council or authority.The meter falls outside the scope of the europeandirective 2002/96/eC (directive on waste electrical andelectronic equipment).iPlease dispose of the batteries in an environmentallyfriendly way such as a collection depot.236
disposing of the meter 17Removing the back‐up batteryApart from the two batteries in the battery compartment,there is also a third battery in the side of thebattery compartment, the back-up battery.you must also remove this battery before disposing ofthe meter.Remove the back-up battery as follows:1 use a small screwdriver or similar implement tobreak out the partition wall in front of the battery.The battery then drops into the battery compartment.2 Turn the meter over so that the back-up batteryfalls out.237
1818Technical dataTechnical dataMeter typeCatalogue No./Serial No.Test principleMeasuring rangeSample sizeMeasuring timePower supply<strong>Accu</strong>-<strong>Chek</strong> MobileSee back of the meterDetermination of glucose in fresh capillary blood by reflectance photometry.When using different specimen material, please refer to the package insert that camewith the <strong>Accu</strong>-<strong>Chek</strong> Mobile test cassette.Although you always apply whole blood to the test area, the blood glucose resultsdisplayed by your meter correspond to those in plasma.You will find information on how the system works, on the test principle and on referencemethods in the <strong>Accu</strong>-<strong>Chek</strong> Mobile test cassette package insert.0,6–33,3 mmol/lsee the <strong>Accu</strong>-<strong>Chek</strong> Mobile test cassette package insertapprox. 5 seconds (depending on the concentration)2 alkaline-manganese or high energy batteries (1.5 V, type AAA, LR 03, AM 4 or micro),back-up battery: 3V lithium button cell type CR1025Battery life at least 500 tests or approx. 1 year (less if the brightness of the display is set to level 3or the volume is set to level 4 or 5 or in acoustic mode due to the higher power consumption)Automatic power‐off after 1 or 2 minute(s), depending on the operating status238
Technical data 18Temperatureand humidityduring testing+10 to +32 °C at 15 to 85 % relative humidity, including the following extremeconditions:+32 °C at 85 % relative humidity and +40 °C at 45 % relative humidity.during storage 15 to 93 % relative humidityMeter without batteries and without test cassette: -25 to +70 °C” with batteries and without test cassette: -10 to +50 °C” with batteries and with test cassette: +2 to +30 °CAltitudeSea level to 4000 mMemory500 results with time and date, averages for 7, 14 and 30 daysDimensions123 × 66 × 28 mm with lancing deviceWeightapprox. 150 g with lancing device, batteries, test cassette and lancet drumDisplayoLed (organic Light emitting diode) displayInterfaceInfrared windowSafety class IIILED/IRED Class 1239
18Technical dataElectromagneticcompatibilityPerformanceevaluationThis instrument meets the electromagnetic immunity requirements according toeN ISo 15197 Annex A. The chosen basis for the immunity tests (on electrostaticdischarge) was basic standard IeC 61000-4-2.In addition, the instrument meets the electromagnetic emissions requirements accordingto eN 61326. Its electromagnetic emission is thus low. Interference on otherelectrically-driven equipment is not anticipated.The performance data for the <strong>Accu</strong>-<strong>Chek</strong> Mobile system (<strong>Accu</strong>-<strong>Chek</strong> Mobile meter with<strong>Accu</strong>-<strong>Chek</strong> Mobile test cassette) were determined using capillary blood from patientswith diabetes (method comparison, accuracy), venous blood (repeatability) and controlsolutions (reproducibility). The system is calibrated with venous blood containingvarious levels of glucose. The reference values are obtained using the hexokinasemethod. The reference method is traceable to a NIST standard using the Id-GCMSmethod, which is the method of the highest metrological quality. The method comparisonwas conducted by comparing the results from the system with those of thehexokinase method with deproteinization using an automatic analyzer.The <strong>Accu</strong>-<strong>Chek</strong> Mobile blood glucose monitoring system complies with the requirements of eN ISo 15197.Roche diagnostics hereby declares that the <strong>Accu</strong>-<strong>Chek</strong> Mobile blood glucose meter conforms with the basic requirementsand other relevant regulations of the european directive 1999/5/eC. The conformity declaration may befound at the following Internet address: http://mobile.accu-chek.com.240
System components 1919System componentsThe following components belong to the <strong>Accu</strong>-<strong>Chek</strong>Mobile meter: <strong>Accu</strong>-<strong>Chek</strong> Mobile test cassettesuse only these test cassettes when you test with the<strong>Accu</strong>-<strong>Chek</strong> Mobile meter. <strong>Accu</strong>-<strong>Chek</strong> Mobile control solutionsuse only these control solutions when you performcontrol tests with the <strong>Accu</strong>-<strong>Chek</strong> Mobile meter andthe <strong>Accu</strong>-<strong>Chek</strong> Mobile test cassettes.The following components belong to the <strong>Accu</strong>-<strong>Chek</strong>FastClix Mobile lancing device: <strong>Accu</strong>-<strong>Chek</strong> FastClix lancet drumsuse only these lancet drums when you obtain bloodwith the <strong>Accu</strong>-<strong>Chek</strong> FastClix Mobile lancing device. <strong>Accu</strong>-<strong>Chek</strong> FastClix Mobile AST capIf you wish to use blood from alternate sites (such asthe palm, the ball of the thumb, forearm, upper arm,calf or thigh) for blood glucose testing, you will needa special AST cap (gray cap with transparent base)to obtain blood with the <strong>Accu</strong>-<strong>Chek</strong> FastClix Mobilelancing device.241
20 <strong>Accu</strong>-<strong>Chek</strong> Customer Care20 <strong>Accu</strong>‐<strong>Chek</strong> Customer Care20.1 Advice and troubleshootingIf you need advice on how to operate the <strong>Accu</strong>-<strong>Chek</strong>Mobile meter or the <strong>Accu</strong>-<strong>Chek</strong> FastClix Mobile lancingdevice, if you seem to be obtaining implausible results,or if you suspect that the meter, test cassette, lancingdevice or lancet drum might be defective, pleasecontact <strong>Accu</strong>-<strong>Chek</strong> Customer Care. do not attempt torepair or modify the meter or lancing device yourself.our staff will help solve any problems you might beexperiencing with the meter, test cassette, lancingdevice or lancet drum from Roche diagnostics. Theaddress of the <strong>Accu</strong>-<strong>Chek</strong> Customer Care is listed inthe next section.20.2 AddressRoche diagnostics201, Boulevard Armand-FrappierLaval, Québec (CANAdA) H7V 4A2<strong>Accu</strong>-<strong>Chek</strong> Customer Care: 1-800-363-7949242
Alphabetical index 2121Alphabetical indexA<strong>Accu</strong>-<strong>Chek</strong> Customer Care 242acoustic mode 109, 110, 168turning on, turning off 111After meal (flag) 87, 89alternate sites 55apple (symbol) 87, 151, 221apple, bitten into (symbol) 87, 151, 221AST cap 55asterisk (symbol) 87, 221available tests 31, 32viewing 211averages 148Bbatterychanging 212disposing 213, 236life 212, 238removing the protective strip 48symbol 86, 221type 212, 238battery compartment 14, 215beeper 109announcement of results via ~ 171during testing 109turning off 111turning on 111with reminders 109Before meal (flag) 87, 89bloodapplying to the test area 65, 74too little applied 232volume 238blood glucose test 54bottle (symbol) 87, 182, 221brightness, display 137buttonon/off 15, 26enter ~ 15, 26down 15, 28, 145up 15, 29, 211243
21Alphabetical indexCchecking, meter 175cleaninglancing device 202meter 192concentration range 183concentration table 41, 185control solution 175disposing 184validity 187control test 87, 175flag 87flagging 92, 181performing 177sources of error 186CSV file 160Ddata transfer 153date, setting 104display 15, 239brightness, setting 137symbols on the ~ 221display check 30performing 189display format, saved results 143setting 165disposalbatteries 213, 236meter 236test cassette 207Eelectromagnetic compatibility 240electromagnetic interference, sources of 219enter button 15, 26error messages 230in acoustic mode 174expiry datecontrol solution 187test cassette 46Fflagging, result 87flagsAfter meal 87, 89Before meal 87, 89control test 87, 92, 181general 87, 89244
Alphabetical index 21Ggeneral (flag) 87, 89HHI (display) 86, 93, 221hourglass (symbol) 75humidity 217, 239Iinfrared window 15, 153intended uselancing device 3meter 3Llancet drum 17, 57changing 61disposing 61inserting 57lancet, loading a new 60lancing devicecleaning 202docking 63obtaining blood with the ~ 71overview 17priming 72undocking 62light conditions 219Lo (display) 86, 93, 221Mmeasuring conditions 217measuring range 93, 238measuring time 75, 238memory 142display format 143, 165memory, results 142menudescription 23opening 34overview 250245
21Alphabetical indexmeterchecking 176cleaning 192disposing 236overview 14storing 217turning off 32after a test 76, 77turning on 30opening the memory 135performing a test 64transferring results 153multifunction button, lancing device 17, 72, 73Nnumber of available lancets 17, 60number of available tests 31, 211Oon/off button 15, 26one-time reminder 124overviewlancing device components 17menus 250meter components 14symbols 221, 252Ppenetration depthindicator 17, 59setting 59performance evaluation 240problems 228Rrelease buttonopening cassette compartment cover 16, 43, 206undocking lancing device 16, 62reminder 113beep tones for ~ 109changing 118, 121deleting 118, 122editing 118setting after a test 92setting new ~ 115turning off 118, 120turning on 118, 120246
Alphabetical index 21resultaverages 148flagging 87transferring 153retrieving results from memory 143Ssettingsacoustic mode 109beeper 109brightness 137date 104default settings 96language 139menu 99overview 96reminders 113beep tones for ~ 109target range 128time 101time format 107tones 109volume 135sources of errorblood glucose test 94control test 186transferring results 164sources of interferenceelectromagnetic 219light 219storage conditions 217symbols 221during testing 86system components 241Ttarget range 128changing 131, 132editing 131setting 129symbol 86, 128, 221turning off 131, 132turning on 131, 132technical data 238temperature 217, 239247
21Alphabetical indextestperforming 64sources of error 94test area 15test cassette 16changing 203disposing 207expiry date 46inserting first ~ 41use-by period 46validity 46, 191, 222test principle 238tests (test areas) 20display of available ~ 31, 32, 211thermometer (symbol) 86, 221, 226time format, selecting 107time, setting 101tip cover 15, 66, 69tones, setting 109Tools menu 188transferring results 153as table (CSV file) 160for analysis 158sources of error 164turning off, meter 32after a test 76, 77turning on, meter 30opening the memory 143performing a test 64transferring results 153type plate 16, 40Uunit of measurement, result (mmol/l) 5, 40use-by period, test cassette 46Vvalidity, test cassette 46, 222displaying 191248
Alphabetical index 21249
22 Menu overview22 Menu overviewMain menuTest Turn off Memory SettingsResultSet flag All results Time/dateControl test Color Averages TimeGeneral onoff All results 7 days dateBefore meal onoff Before meal 14 days Time formatAfter meal onoff After meal 30 daysReminder Reminders Transfer dataFor analysisTable to PCdisplay formatSingle valueListSelect withopen or set with250
Menu overview 22Tones Reminders Target range VolumeBeeper New Turn onTurn offReminders edit Change BrightnessAcoustic mode In 1 hour Turn onTurn off CancelIn 2 hours Change LanguageIn 3 hoursdeleteCancelMain menuToolsdisplay check Validity Clean Change cass.251
2522323explanation of symbolson the packaging, on the back of the meter and on the lancing device, you may encounter the symbols shownbelow. They have the following meanings:IVDExplanation of symbolsConsult instructions for useCaution (refer to accompanying documents)!Please refer to safety relatednotes in the instructions for use accompanyingthis instrument.Store atuse by / expiry dateuse only onceSterilized using irradiationManufacturerCatalogue numberLot numberFor in vitro diagnostic use0088008800880088N20091Blood glucose meter: This product fulfilsthe requirements of the european directive98/79/eC on in vitro diagnostic medicaldevices.Blood glucose meter: This product fulfilsthe requirements of the european directive1999/5/eC on radio and telecommunicationsterminal equipment (R&TTe).Lancing device and lancet drum: Theseproducts fulfil the requirements of theeuropean directive 93/42/eeC on medicaldevices.AST cap: This product fulfils the requirementsof the european directive 93/42/eeCon medical devices.This device complies with Part 15 of theFCC Rules and with RSS-210 of IndustryCanada.The compliance mark indicates that theproduct complies with the applicablestandard and establishes a traceable linkbetween the equipment and the manufacturer,importer or their agent responsiblefor compliance and for placing it on theAustralian and New Zealand market.
explanation of symbols 23The explanation of any other symbols can be found in the instructions for use and inserts accompanying componentswithin the packaging.253