AccuâChek® Mobile User's Manual
AccuâChek® Mobile User's Manual
AccuâChek® Mobile User's Manual
- No tags were found...

You also want an ePaper? Increase the reach of your titles
YUMPU automatically turns print PDFs into web optimized ePapers that Google loves.
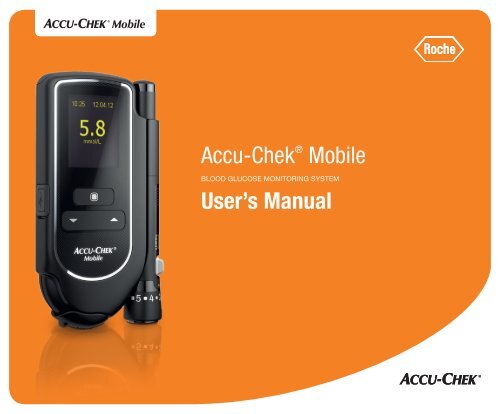
Accu‐Chek ® <strong>Mobile</strong>BLOOD GLUCOSE MONITORING SYSTEMUser’s <strong>Manual</strong>
This User’s <strong>Manual</strong> features three types of warning:WThis symbol indicates a possible risk of injury orof damage to your own health or to the health ofothers.HThis symbol draws attention to actions that couldresult in damage to the meter, the test cassette,the lancing device or the AST cap.iThis symbol draws your attention to importantinformation.WKeep the blood glucose monitoring system and allits components away from children under the ageof 3. There is a risk of suffocation if small parts (e.g.covers, caps, or similar objects) are swallowed.Last update: 2012-01
Intended useAccu‐Chek <strong>Mobile</strong> blood glucose meterMeter for quantitative determination of blood glucosevalues in fresh capillary blood using Accu‐Chek <strong>Mobile</strong>maltose-independent chemistry test cassettes that arelabeled with a green symbol N.Suitable for self-testing only.WThe Accu-Chek <strong>Mobile</strong> meter may only beused by one and the same person for obtainingblood.There is a risk of infections being transmitted ifthe meter is used by other people, or if healthcareprofessionals use the same meter for testing bloodglucose in more than one person, even familymembers. This meter is therefore not suitablefor professional use in healthcare facilities orinstitutions.Visually impaired people should not test their bloodglucose without assistance from a sighted person.Accu‐Chek FastClix lancing device and AST capLancing device with adjustable penetration depthsetting for obtaining capillary blood from a fingertipwith Accu‐Chek FastClix lancet drums and, when aspecial AST cap is used, also from alternate sites suchas the ball of the thumb.WThe Accu-Chek FastClix lancing device and theAST cap are intended for personal use only!They may only be used by one and the same personfor obtaining blood.There is a risk of infections being transmitted ifthe lancing device or the AST cap is used by otherpeople, or if healthcare professionals use this lancingdevice or the AST cap to obtain blood from morethan one person, even family members. This lancingdevice and this AST cap are therefore not suitable forprofessional use in healthcare facilities or institutions.1
ContentsThe major features . . . . . . . . . . . . . . . . . . . . . . . 4About this User’s <strong>Manual</strong>. . . . . . . . . . . . . . . . . . . 51 Getting to know your meter and lancingdevice 61.1 Your meter at a glance . . . . . . . . . . . . . . . . 61.2 Overview of the lancing device. . . . . . . . . . 81.3 Using the buttons and navigating throughthe menus . . . . . . . . . . . . . . . . . . . . . . . . . 92 Initial steps before testing 172.1 Checking the unit of measurement. . . . . . 172.2 Inserting the first test cassette . . . . . . . . . 182.3 Removing protective film and strip . . . . . . 222.4 Setting the language . . . . . . . . . . . . . . . . 233 Preparing the lancing device 253.1 Inserting a lancet drum . . . . . . . . . . . . . . 263.2 Setting the penetration depth. . . . . . . . . . 283.3 Loading a new lancet. . . . . . . . . . . . . . . . 293.4 Replacing the lancet drum . . . . . . . . . . . . 303.5 Undocking the lancing device. . . . . . . . . . 313.6 Docking the lancing device . . . . . . . . . . . 314 Performing a blood glucose test 324.1 Performing a blood glucose test . . . . . . . . 334.2 Obtaining a blood drop. . . . . . . . . . . . . . . 364.3 Applying the blood drop . . . . . . . . . . . . . . 374.4 Alternate site testing . . . . . . . . . . . . . . . . 384.5 Symbols in connection with test results . . 444.6 Symbols instead of test results. . . . . . . . . 444.7 Flagging results . . . . . . . . . . . . . . . . . . . . 454.8 Setting reminders . . . . . . . . . . . . . . . . . . 474.9 Evaluating test results . . . . . . . . . . . . . . . 495 Making settings 515.1 Settings overview. . . . . . . . . . . . . . . . . . . 515.2 Setting the language . . . . . . . . . . . . . . . . 525.3 Setting the volume. . . . . . . . . . . . . . . . . . 535.4 Setting tones . . . . . . . . . . . . . . . . . . . . . . 545.5 Setting reminders . . . . . . . . . . . . . . . . . . 555.6 Setting the time, date and time format . . . 585.7 Setting the target range . . . . . . . . . . . . . 615.8 Setting the brightness . . . . . . . . . . . . . . . 646 Using the meter as a diary 656.1 Retrieving saved results. . . . . . . . . . . . . . 656.2 Retrieving averages . . . . . . . . . . . . . . . . . 677 Analysing test results on the PC 707.1 Defining the default . . . . . . . . . . . . . . . . . 717.2 Connecting the meter to the PC . . . . . . . . 727.3 Data transfer . . . . . . . . . . . . . . . . . . . . . . 737.4 Displaying reports . . . . . . . . . . . . . . . . . . 747.5 Reports . . . . . . . . . . . . . . . . . . . . . . . . . . 758 Acoustic mode 878.1 Beep tone when turning on . . . . . . . . . . . 892
Contents8.2 Beep tones during a test . . . . . . . . . . . . . 898.3 Test result announcement after a test . . . 908.4 Announcement of saved test results . . . . 928.5 Announcements of warnings and errormessages . . . . . . . . . . . . . . . . . . . . . . . . 939 Checking the meter 949.1 Preparing for a control test. . . . . . . . . . . . 959.2 Performing a control test . . . . . . . . . . . . . 959.3 Possible sources of error . . . . . . . . . . . . . 9910 Menu Tools 10110.1 Performing a display check . . . . . . . . . . 10110.2 Viewing the validity of the testcassette. . . . . . . . . . . . . . . . . . . . . . . . . 10210.3 Viewing the number of available tests . . 10310.4 Replacing the test cassette . . . . . . . . . . 10311 Cleaning the meter and lancing device 10711.1 Cleaning the meter. . . . . . . . . . . . . . . . . 10711.2 Cleaning the lancing device . . . . . . . . . . 11212 Changing the batteries 11313 Measurement and storage conditions 11613.1 Temperature . . . . . . . . . . . . . . . . . . . . . 11613.2 Atmospheric humidity . . . . . . . . . . . . . . 11713.3 Light conditions . . . . . . . . . . . . . . . . . . . 11813.4 Sources of interference . . . . . . . . . . . . . 11814 Messages and problems 12014.1 Messages . . . . . . . . . . . . . . . . . . . . . . . 12014.2 Problems . . . . . . . . . . . . . . . . . . . . . . . . 12414.3 Error messages . . . . . . . . . . . . . . . . . . . 12615 Disposing of the meter 13016 Technical data 13117 System components 13418 Accu-Chek Customer Care 13518.1 Advice and troubleshooting . . . . . . . . . . 13518.2 Addresses . . . . . . . . . . . . . . . . . . . . . . . 13519 Index 13620 Explanation of symbols 14021 Appendix 1423
The major featuresTest cassette instead of test strips50 test areas on a continuous tapeEasy testingTest starts by opening the tip coverShort measuring timeAbout 5 seconds for a test, depending on the bloodglucose concentrationDocked lancing deviceUse the lancing device in its docked or undockedstateLancing device with lancet supply6 sterile lancets in a lancet drumNo codingMeter is automatically codedBlood volume checkingMeter detects the amount of blood that is necessaryLuminous displayYellow display on black backgroundText-supported operationMeter takes you through all operation stepsMenu-driven operationMenu-driven settings and functionsReminderA total of 11 remindersTarget range for test resultsPersonal target range for blood glucose test resultsFlagging of resultsFlagging results with symbolsMemory2000 memory locations availableData analysis on the PCDisplay and analysis of data on the PCData transferUSB port for data transfer4
About this User’s <strong>Manual</strong>Please read this User’s <strong>Manual</strong> carefully and completelybefore testing blood glucose for the first time. If youhave any questions, please contact your Accu-ChekCustomer Care (see page 135).These instructions for use provide you with the informationyou need to operate and care for your meterand lancing device, and to deal with errors that mightoccur. Please be sure to operate the meter and thelancing device correctly as well as to observe theoperating instructions.Please note:All dates, times or results displayed in this User’s<strong>Manual</strong> are intended only as examples.Results are displayed in the unit mmol/L, data in theformat Day.Month.Year and times in the 24-hour format.You can only hear the beep tones of the meter whenthey are turned on and the volume is not set to level1 (Mute). This User’s <strong>Manual</strong> presumes that the beeptones are turned on.All instructions appear in a grey frame as shown below.Sometimes they are combined with pictures.1 Place your finger on the corrugated area onthe tip cover and push it in the direction of thearrow as far as it will go.Instructions to open the menus (➮menu name) presumethat the meter is turned on and the main menu isopen. Example:1 Open ➮Settings.5
1Getting to know your meter and lancing device1 Getting to know your meter and lancing device1.1 Your meter at a glance12 34567896
mmol/Lmanual_0070 10111213 14Getting to know your meter and lancing device1 Battery compartment cover (left: from above, open)2 Batteries [1.5 V, type AAA, alkaline-manganeseor high energy batteries (2 batteries required)] orNiMH batteries (type AAA)3 Display4 Lancing device (docked)5 USB port – interface to be used for data evaluationon a computer (left: open USB port compartment)6 Power and Enter button7 Down/Up buttons8 Tip cover (bottom right: open)9 Test area (at the tip of the cassette ready for atest) – this is where you apply the blood10 Slide button to release the lancing device11 Type plate12 Slide button to open the cassette compartmentcover13 Cassette compartment cover (right: open)14 Test cassette (in place in the meter)17
1Getting to know your meter and lancing device1.2 Overview of the lancing device 15 Release button (priming and lance)16 Lever for loading a new lancet17 Lancet drum containing 6 lancets18 Number values for penetration depth (11 settings)1519 Rotatable cap for setting the penetration depth20 Pin-hole opening for lancet21 Penetration depth indicator22 Window showing number of available lancets222116171918208
1.3 Using the buttons and navigating through the menusGetting to know your meter and lancing deviceThis chapter tells you how to use the buttons to operate the meter and navigate through the menus, how themenus are arranged and what the different symbols in them mean.Meter buttons1Button Name Symbol Function1Power button,Enter buttonDown buttonThis button allows you to:Turn the meter on or off; to do so, press and hold the button(for approx. 2 seconds)Execute the command displayed above the button (press thebutton briefly)Example: Thecommand selects the item highlightedin the menu.1 This button allows you to:Navigate down in a menu or listDecrease number values2Up button2 This button allows you to:Navigate up in a menu or listIncrease number values9
1Getting to know your meter and lancing deviceMenu structure of the meter1234Menu5678 910
Getting to know your meter and lancing device1Key Display Explanation1 Title Title of the display or menu (e.g. Settings)2The items of the main menu and the Language item of the Settings menu have asymbol on their left-hand side.3 Item Unselected item of the menu.4 The symbol indicates that the function (e.g. Tones) is deactivated.5 The symbol indicates that the function (e.g. Reminder) is on.6789SelecteditemA selected item is highlighted with a yellow bar.If you press the button, this item will be selected (Select command).The symbol means that there are further items below the last item visible on thedisplay.The command displayed here (e.g. Select ) will be executed if you press thebutton. The command that is shown depends on the current display.The symbol means that there are further items above the first item visible on thedisplay.11
1Getting to know your meter and lancing deviceExampleOperation1Turning the meter on1 Pressing the button (for approx. 2 seconds) turns themeter on.After the display check, the meter first displays the numberof tests still available on the test cassette and then opens themain menu.23Turning the meter off2 Select selects the highlighted Turn off command (symbol) (press the button briefly). The meter turns off afterdisplaying the number of the tests still available.or3 Pressing the button until all bars in the display are filled(approx. 2 seconds) turns the meter off.12
Getting to know your meter and lancing device1ExampleOperation4Opening the menu4 Select (press the button), selects the highlighted Time/Date item from the Settings menu. The lower-level Time/Datemenu opens.5Returning to a higher-level menu5 Back (press the button) opens the higher-level menu ofthe currently displayed menu.13
1Getting to know your meter and lancing deviceExampleOperationConfirming settings or operations66 OK (press the button) confirms the setting you made.( ) Confirm is highlighted.Cancelling settings or operations7 OK (press the button) cancels the setting you made.( ) Cancel is highlighted.7 88 Cancel (press the button) cancels the operation (datatransfer).14
Getting to know your meter and lancing device1ExampleOperationNavigating between input fields99 Continue (press the button) switches from month toyear.Changing numbers1010 Pressing the button increases the number value.Pressing the button decreases the number value.If you press the button once, the number increases by 1. If youhold the button down, the number continues to increase untilyou release the button.15
1Getting to know your meter and lancing deviceExampleOperation1112Activating or de-activating functions11 A tick in front of an item means that the function isactivated.12 A checkbox in front of an item means that the functionis deactivated.Select (press the button) sets (= on) or removes (= off) thetick.16
2 Initial steps before testingW2.1 Checking the unit of measurementmmol/L1Initial steps before testingThe unit of measurement that your meter displayscannot be changed. If the wrong unit is printed onthe type plate, ask your healthcare professionalto change the meter or contact your Accu-ChekCustomer Care. An incorrect unit of measurement cancause the test results to be misinterpreted and thewrong therapy recommendation to be made and thusresult in serious adverse health effects.2Blood glucose results can be 1 displayed in twodifferent units (mg/dL or mmol/L). Consequently, twodifferent versions of the same meter are sold. Checkthat your meter displays the unit of measurement youare accustomed to. You can find the unit of measurementthat your meter displays on the type plate on theback of your meter. If you do not know which is theright unit of measurement for you, ask your healthcareprofessional.17
2Initial steps before testing2.2 Inserting the first test cassetteBefore using your meter for the first time, you mustinsert a test cassette.Insert the very first test cassette in the meter beforeyou remove the protective strip from the batteries andstart using the meter.WPlease read the test cassette package insert. Itcontains important information, e.g. on storage andpossible causes of incorrect test results.If the foil-sealed plastic container or the foil isdamaged, you must not use the test cassette.Otherwise, there is a risk that you might obtainincorrect test results. Incorrect test results cancause the wrong therapy recommendation tobe made and so result in serious adverse healtheffects.Only open the foil-sealed plastic container whenyou want to insert the test cassette into the meter.The unopened foil-sealed plastic containerprotects the test cassette against damage andmoisture.iA table is printed on the test cassette box whichshows the permitted results for control tests (checkingthe meter with glucose control solution). Themeter automatically checks whether the result of acontrol test is correct. If you wish to check the controlresult yourself as well, you can do this with this table.Keep the test cassette box in case you need it forthis purpose. Please note that the table is only validfor the test cassette that comes in this box. For testcassettes from other boxes, other tables apply.18
nual_0090kim_manual_0240Initial steps before testing201 Push the tip cover in the direction of the arrow.3 Push the slide button in the direction of thearrow so that the cassette compartment coversprings open.2 Turn the meter over.The cassette compartment cover is fully opened asshown in the illustration.19
2kim_manual_0270Initial steps before testingkim_manual_0290kim_manual_0300ual_02804 Remove the test cassette from the foil-sealedplastic container.6 Close the cassette compartment cover.CLICK5 Insert the test cassette in the meter with thesilver side facing upwards.7 Press the cassette compartment cover closed.You must hear an audible CLICK.20
Initial steps before testing28 Push the tip cover in the direction of the arrowas far as it will go.Validity of the test cassetteThe validity of the test cassette depends on the use byperiod and the use by date.Use by period: A period of 90 days in which the testcassette must be used up after having been insertedfor the first time.Use by date: Date up to which a test cassette storedin a closed plastic container is valid. The use by dateis shown on the box of the test cassette/foil-sealedplastic container next to the symbol .If either of the two dates – use by period or use bydate – is exceeded, you will not be able to perform anymore tests with this test cassette.21
2Initial steps before testingIf you start a test and the validity of the cassette isabout to expire shortly or has already expired, thekim_manual_0320_no screenmeter will inform you of this.The first notification appears 10 days before the validityof the cassette expires, the following appear 5, 2and 1 day(s) before expiry (see page 126).If the validity of the test cassette has expired, a messageappears (see page 126).2.3 Removing protective film and stripThe meter’s battery contacts are covered with a protectivestrip and the display with a protective film.kim_manual_0330Remove the protective film from the display.Pull the protective strip of the batteries backwardsout of the meter.22
2.4 Setting the languageThe meter automatically prompts you to set the languagethe first time you turn it on.When you turn the meter on for the first time, thelanguage selection menu is automatically displayed.You can either select the default language or replace itwith a different one.1 Press or repeatedly until the desiredlanguage is highlighted.2 Then press below the display to select thehighlighted language.The meter will then display the language you justselected.Initial steps before testing3 Confirm the selection with (OK).iIf you selected the wrong language by mistake youcan change this setting later (see page 53). The Languagemenu is marked with the symbol . It will,however, be displayed in the language you selecteduntil you change it.The meter then runs a display check.223
2Initial steps before testingAfterwards the main menu is shown. Now you canchoose what you want to do (e.g. turn the meter off,perform a blood glucose test or make settings).CheckerboardpatternCheck if there are any irregularities in the checkerboardpattern (see also Performing a display check,page 101).WIf there are irregularities in the checkerboard pattern,results might not be displayed correctly. In this case,ask your healthcare professional to change the meteror contact your Accu-Chek Customer Care.The meter automatically exits the display check afterabout 2 seconds and then displays the number of testsstill available on the test cassette.24
3 Preparing the lancing deviceYou can use the lancing device to obtain blood from afingertip. You can choose one of 11 different penetrationdepth settings to suit your own skin type.You insert a lancet drum with 6 lancets into the lancingdevice. You can lance 6 times, using a new sterile lanceteach time, before the lancet drum needs changing.You can use the lancing device either docked on to themeter or separately from the meter.You can also use the lancing device to obtain bloodfrom other (alternate) sites. For this purpose, you needa special AST cap, which enables you to collect capillaryblood from alternate sites.If you want to order an AST cap, please contact yourAccu‐Chek Customer Care.WPreparing the lancing deviceThe Accu-Chek FastClix lancing device and theAST cap are intended for personal use only!They may only be used by one and the sameperson for obtaining blood.There is a risk of infections being transmitted ifthe lancing device or the AST cap is used by otherpeople, or if healthcare professionals use thislancing device or this AST cap to obtain blood frommore than one person, even family members. Thislancing device and this AST cap are therefore notsuitable for professional use in healthcare facilitiesor institutions.Wear and tear can lead to material failure. Inextreme cases a lancet can protrude from thecap so that injury cannot be completely ruled out.You should therefore handle the lancing devicewith particular care once a lancet drum has beeninserted.325
3HPreparing the lancing deviceOnly use the Accu‐Chek FastClix lancing devicewith Accu‐Chek FastClix lancet drums. Using anyother lancets or lancet drums may damage thelancing device or impair its function.A used lancet drum has a built-in locking mechanism.You cannot reinsert a lancet drum that hasonce been removed. Used lancet drums must notbe reused.Black cap forobtaining blood fromthe fingertipGrey AST cap forobtaining blood fromalternate siteskim_manual_03903.1 Inserting a lancet drumnewlancet drumusedlancet drum1 Take a new lancet drum.redlineLancet exit points2 Remove the cap from the lancing device.26
kim_manual_0400kim_manual_0410Preparing the lancing device3CLICK3 Insert the new lancet drum – white end first –into the lancing device.4 Place the cap back on again.The lancet drum is properly inserted when it slots intoposition with an audible CLICK.WYou must not insert the lancet drum into the lancingdevice and simultaneously press the release buttonor hold the lancing device with the release buttonresting on a surface such as a table top. This couldrelease a lancet and inadvertently cause injury.27
3Preparing the lancing device3.2 Setting the penetration depthYou can set the penetration depth of the lancet to1 of 11 possible settings (0.5–5.5). Choosing your individualpenetration depth allows least painful collectionof blood and control of the amount of blood needed.The penetration depth indicator on the lancing device(silver square) indicates the current penetration depthsetting. The higher the number, the deeper the penetrationdepth. The half-settings are located betweenthe numbers.If you have no experience with using this lancingdevice, we recommend that you start with a mediumpenetration depth setting such as 3.Rotate the cap of the lancing device until the desiredpenetration depth is level with the indicator.PenetrationdepthindicatorHalf-settings28
3.3 Loading a new lancetYou do not need to load a new lancet if you just inserteda new lancet drum.If you have already used the lancing device to obtainblood, you will need a new lancet the next time youobtain blood.Preparing the lancing deviceThe window on the sideof the lancing device nowshows one less availablelancet (e.g. 5 instead ofpreviously 6).HIf 1 appears in the window, the lever will be blockedby a locking mechanism. Do not force the leverbeyond this locking mechanism as this will damagethe lancing device.321Push the lever at the side of the lancing device asfar as it will go in direction 1 and then back indirection 2 .29
03Preparing the lancing device3.4 Replacing the lancet drumWhen you have used the sixth and last lancet, youneed to replace the used lancet drum with a new one.HA used lancet drum has a built-in locking mechanism.Used lancet drums must not be used again.kim_manual_0400iUsed lancet drums can be disposed of in householdwaste. However, it is recommended to consult localregulations concerning disposal beforehand.2 Pull the lancet drum out of the lancing device.1 Remove the rotatable cap from the lancingdevice.3 Insert a new lancet drum. Place the cap backon again.30
3.5 Undocking the lancing devicekim_manual_0490Preparing the lancing devicekim_manual_0520 3.6 Docking the lancing device3kim_manual_0512kim_manual_05121 Push the slide button for the lancing device inkim_manual_0500the direction of the arrow as far as it will go.Slide the lancing device along the side of the meterin the direction of the arrow until it slots into place.2 Remove the lancing device by sliding it out inthe direction of the arrow.When docking the lancing device, the tracks of thelancing device and the meter must fit into each other.31
4Performing a blood glucose test4 Performing a blood glucose test Create a blood drop that is large enough and wellformed.Do not apply the blood drop if it has spread.When you have inserted a lancet drum into the lancingdevice and set the penetration depth, you can nowstart to perform a blood glucose test.WIncorrect test results can cause the wrong therapyrecommendation to be made and so result in seriousadverse health effects.Therefore, please follow the following instructions tometiculously perform a blood glucose test:Wash your hands with warm water and soap. Dryyour hands well before obtaining blood. This helpsensure that the puncture site is clean and stimulatesblood flow.Blood drop that is well-formedBlood drop that has spreadImmediately apply the blood to the test area afteryou have created the blood drop.Touch the blood drop to the test area gently. Do notpress the test area onto the finger and do not spreadthe blood drop.Do not hold the meter with the test area pointingupwards. If you hold the meter with the test areapointing upwards, blood could enter the meter andsoil it.32
Apply the blood drop at the centre of the cassettetip and not at the edge.kim_manual_0090_mit_KassettePerforming a blood glucose test4.1 Performing a blood glucose test4 Do not use one and the same blood drop for severaltests.WVisually impaired people should not apply a blooddrop without assistance from a sighted person.iWhen the meter prompts you to apply a blood drop,you have about 2 minutes time to apply blood to thetest area. If you do not apply blood during this time,the meter will turn off and the test area will be lost.Place your finger on the corrugated area on the tipcover and push it in the direction of the arrow as faras it will go.If the meter was turned off, it now turns on.33
4Performing a blood glucose testA beep sounds and the meter runs a display check.Check that there are no irregularities in the checkerboardpattern (see also Performing a displaycheck, page 101).The number of available tests and the instruction towash your hands are shown in succession.In doing so, the meter advances a test area to the tip ofthe cassette.HDo not touch the tape while a test area is advancingand do not approach the band with any objects.Shortly after the test area has been advanced, theprompt Apply drop will appear and a beep will sound.You can also open the tip cover if the meter is alreadyturned on. In this case, the meter then switches to Test.There are the following exceptions:If you are in the Settings menu entering a number(e.g. to change the time) or in the selection list (e.g.to change the volume): In this case, when you openthe tip cover you will be asked whether you reallywant to perform a test (see page 121).If you had turned the meter on using the orbutton (see page 66 or page 103): In this case, the meterdoes not switch toTest. You must first turn the meteroff. Then you can start the blood glucose test.34
You can also start testing blood glucose using the Mainmenu.With the meter off:1a Turn the meter on with .1b Wait for the Main menu.With the meter on:Performing a blood glucose testIf the tip cover is closed, the prompt Open tip coverappears on the display.4If you do not want to perform a test after all, press thebutton (Cancel).4 Open the tip cover all the way.1 Switch from the currently displayed menu to theMain menu.2 Use to select Test ( symbol).3 Use to open the Test menu.After the instruction to wash your hands, a new testarea is advanced and the prompt “Apply drop” appearson the display. You can now begin testing.35
4Performing a blood glucose test4.2 Obtaining a blood dropIn general, you can obtain blood from each finger.Certain fingers can be unsuitable if, for example, askin or fingernail infection is present. We recommendobtaining capillary blood from the side of a fingertip, asthis registers the least pain.WUse a new lancet each time you obtain blood. Thisdecreases the risk of infection and blood collectionremains virtually pain free.Only use the lancing device when the cap is attached.If the cap is not attached, the lancet penetratestoo deep and may cause discomfort.Using the release button, you can prime the lancingdevice and trigger the lancet in one step. When beingtriggered, the lancet penetrates the skin.1 Press the lancing device firmly against theselected puncture site.2 Press the release button all the way down.This triggers the lancet, which penetrates the skin.3 Massage the finger in the direction of the fingertipto encourage a blood drop to form.The amount of blood that emerges at the puncture sitedepends on the penetration depth and the pressureused to hold the lancing device against the skin.36
Performing a blood glucose test4If the amount of blood you obtain is too small, applymore pressure the next time you obtain blood. If youstill obtain insufficient blood, repeat the procedure withprogressively deeper penetration depths.If too much blood emerges, reduce the penetrationdepth.The blood drop must be large enough and well formed.1 As soon as the blood drop has formed, bring ittowards the centre of the test area at the tip ofthe cassette.Touch the blood drop to the tape gently.H4.3 Applying the blood dropYou can hold the meter in your hand or lay it downwhile you apply blood to the test area.Do not hold the meter with the test area pointingupwards.The blood drop is drawn up by the test area.37
4Performing a blood glucose test2 Take your finger away from the test area assoon as Test in progress and the hourglasssymbol appear on the display.The test area has then drawn up enough blood and abeep sounds. The hourglass symbol indicates that thetest is in progress.Testing is complete after approx. 5 seconds, dependingon the blood glucose concentration. The test resultappears on the display and the meter beeps. At thesame time, the meter automatically saves the testresult. The used test area is transported away from thetip of the cassette.If you want to flag the test result, do not turn the meteroff (see section Flagging results, page 45).3 Close the tip cover to turn the meter off.4.4 Alternate site testingCapillary blood for blood glucose testing can beobtained, not only from the fingertips, but also fromother sites - the palm (below the thumb and below thelittle finger), the forearm, the upper arm, the calf andthe thigh - which is referred to as Alternate Site Testing(AST). The Accu-Chek FastClix M1 AST cap is a specialcap for the Accu-Chek FastClix M1 lancing deviceenabling you to obtain capillary blood from alternatesites.WPlease read these User’s manual before you performan alternate site test.Before you decide to perform an alternate sitetest, please consult your healthcare professional.If the test result for blood taken from alternatesites does not reflect how you feel, you shouldperform a test with blood taken from the fingertip.If this test result also does not reflect how you feel,please contact your healthcare professional.38
WBlood obtained from a fingertip can be used at anytime to test blood glucose. If blood from alternatesites is used, there are certain times when testingis not appropriate (see the section “The rightmoment”). The results may differ from the resultstaken from the fingertips at these times. These differencescan cause the wrong therapeutic decisionto be taken, thus leading to adverse health effects.The Accu-Chek FastClix M1 lancing device andthe AST cap are intended for personal use only!They must not be used for obtaining blood on morethan one person.There is a risk of infections being transmitted if thelancing device and the AST cap are used by otherpeople, or if healthcare professionals use this lancingdevice and the AST cap to obtain blood frommore than one person. The Accu-Chek FastClix M1lancing device and the AST cap are therefore notsuitable for professional use in healthcare facilitiesand institutions.WPerforming a blood glucose testUse the AST cap only to obtain blood from alternatesites. If you use the AST cap to obtain bloodfrom the fingertip, the lancet penetrates too deepand could possibly cause very painful injuries.Keep the lancing device with all its componentsout of reach of children under 3 years. There isa risk of suffocation if small parts (e.g. caps orsimilar objects) are swallowed.HUse the Accu-Chek FastClix M1 AST cap only togetherwith the Accu-Chek FastClix M1 lancing device.439
4Performing a blood glucose testThe right momentDo not perform an alternate site test,AST_TIM_Abb_2up to two hours following a meal, when blood glucosevalues can rise quickly,after having administered bolus insulin, when bloodglucose values can fall quickly,after exercise,if you are ill,if you suspect that your blood glucose is extremelylow (hypoglycemia),if you know that you sometimes do not notice whenyou are hypoglycemic.1 Remove the black cap from the lancing device.2 Place the grey AST cap on the lancing device.The cut-out section at the edge of the cap mustfit over the correspondingly shaped curvaturewith the penetration depth indicator (squaremark). You must hear and feel the cap click intoplace.A40
Performing a blood glucose testWOnly use the lancing device when the AST capis attached. If the cap is not attached, the lancetpenetrates too deep and could possibly cause verypainful injuries.4AST_TIM_Abb_43 Rotate the AST cap of the lancing device untilthe desired penetration depth is level with theindicator.iTo obtain a sufficiently large blood drop from alternatesites, lancing must be deeper than on the fingertips.However, these sites are usually less painful.5 Press the lancing device firmly against theselected puncture site.4 Choose a fleshy area of the alternate site andwash it with warm, soapy water. Allow the skindry thoroughly afterwards.6 Press the release button all the way down. Thistriggers the lancet, which penetrates the skin.41
4Performing a blood glucose test7 Remove the lancing device from the puncturesite.8 Remove the AST cap from the lancing device.9 Open the tip cover of the meter. If the meterwas turned off, it now turns on.10 Put the meter aside.11 Take the AST cap and press it against thepuncture site.The lancet exit point on the AST cap must be inthe same position on the skin as during puncture.This ensures that a proper blood drop canform and prevents the AST cap from cominginto contact with the blood.The blood drop should be approximately this size: •If the drop is smaller, release the pressure for a fewseconds, without removing the AST cap from the puncturesite. Then re-apply pressure on the AST cap untilyou get a sufficiently large blood drop.42
Performing a blood glucose test412 Pick up your meter again.15 Take the puncture site away from the test areaas soon as Test in progress and the hourglasssymbol appear on the display.The test area has then drawn up enough blood and abeep sounds (if Beep tones is turned on). The hourglasssymbol indicates that the test is in progress.Testing is complete after approx. 5 seconds, dependingon the blood glucose concentration. The result appearson the display and the meter beeps (if Beep tones isturned on).13 As soon as the blood drop has formed, bring ittowards the centre of the test area at the tip ofthe cassette.Touch the puncture site lightly with the tape.The blood drop is drawn up by the test area.14 Do not press the test area onto the puncturesite and do not spread the blood drop.16 Replace one of the two caps on the lancingdevice.43
4Performing a blood glucose test4.5 Symbols in connection with test resultsThe following symbols can be displayed together withthe test result:SymbolMeaning4.6 Symbols instead of test resultsThe meter measures blood glucose test results in therange from 0.6–33.3 mmol/L. If the test result is outsidethis range, one of the following symbols will bedisplayed:The batteries are almost empty.The temperature during the testwas outside the permitted range of+10 to +40 °C.The test result is higher than the upperlimit of the target range set.SymbolMeaningThe test result is lower than0.6 mmol/L.The test result is higher than33.3 mmol/L.The test result is lower than the lowerlimit of the target range set.44
WThe display may indicate that your blood glucoseis very low (possibly a severe hypoglycemia). Thedisplay may indicate that your blood glucose isvery high (possibly a severe hyperglycemia).Follow the relevant instructions given by your healthcareprofessional immediately and repeat the test.Performing a blood glucose test4.7 Flagging resultsYou can flag results to describe certain events connectedto the result, or particular characteristics of theresult. You can only flag a result if you open the Setflag menu while the result is still displayed after a test.Selecting Set flag with the test result displayed,opens the Set flag menu that allows you to set thedesired flags.141 The test result in the above example is marked withthe symbol Other.45
4Performing a blood glucose testThe Set flag menu offers you a choice of 4 flags:SymbolMeaningBefore meal (apple symbol):For test results that you have testedbefore your meals.After meal (apple core symbol):For test results that you have tested afteryour meals.Other (asterisk symbol):You can define the meaning of this flagyourself.Control test (applicator symbol):For control tests in which you applycontrol solution to the test area insteadof blood.You can add the following flags to a test result together:Other and Before mealOther and After mealYou cannot flag a test result with Before meal and Aftermeal together.You can change (add or remove) flags again as long asyou are still in the Set flag menu. As soon as you leavethe menu, the flags chosen will be saved and can nolonger be subsequently changed.Selecting Control test also takes you out of the Set flagmenu and opens the Control solution menu.The symbol for the flag that has been activated isdisplayed to the right above the test result.46
Other, Before meal and After mealPerforming a blood glucose testIf you want to add a further flag to the test result,repeat steps 2 and 3.Removing a flag again:41 Press (Set flag).2 Use to select Before meal, After meal orOther.3 Press the button (Select).1 Use to select the flag, Other, for example.2 Press to delete the flag.Leaving the Set flag menu:1 Turn the meter off with .or2 Use to select Main menu and press .3 Close the tip cover.47
4Performing a blood glucose test4.8 Setting remindersThe Reminder item allows you to directly set a reminderfrom the Set flag menu after a test if you would liketo check your blood glucose again later.The meter can give you a one-time reminder to performa test in 1 hour, in 1.5 hours, in 2 hours or in3 hours. You do not need to set a time for this. Thesereminders can be useful if you wish to check a testresult you just obtained, for example. When the reminderhas been given, it is automatically deleted.When the test result is displayed:1 Press Set flag.2 Open ➮Reminder.3 Use to select a reminder time (e.g. In1 hour ).4 Press .The meter returns to the Set flag menu.For information on the options you have when the setreminder appears, see page 122.48
Control testWhen the control result is displayed:1 Press Set flag.2 Use to select Control test.3 Press .The further procedure for performing a control test(test with control solution) is described in the Checkingthe meter chapter (page 94)Performing a blood glucose test4.9 Evaluating test resultsThe test results depend on factors such as food intake,medication, health situation, stress and physical activity.WIf the displayed test result does agree with howyou feel, continue as instructed by your healthcareprofessional. If the displayed test result does notagree with how you feel, perform a control test.Then repeat the blood glucose test. If the new testresult still does not agree with how you feel, contactyour healthcare professional.Do not change your treatment based only on asingle test result.The display may indicate that your bloodglucose is very low (possibly a severe hypoglycemia).The display may indicate that your bloodglucose is very high (possibly a severe hyperglycemia).Follow the instructions given by your healthcareprofessional immediately and repeat the test.449
4Performing a blood glucose testSources of error for implausible test resultsIf your meter repeatedly displays implausible test resultsor error messages, please check the points listedbelow. If any of your responses to the questions in thetable differ from those given, make the respective correctionswhen you perform the next test.If you have taken all of these points into account andstill obtain implausible test results or error messages,contact your Accu-Chek Customer Care.Did you perform the blood glucose test accordingto the User’s <strong>Manual</strong>?Did you wash your hands with warm waterand soap and dry them well?Did you wait for the application prompt to bedisplayed before applying blood?Did you apply the blood drop to the test areaimmediately?Did you apply a well-formed blood drop?yesyesyesyesyesDid you press the test area onto the finger orspread the blood drop while applying it?Did you use the same blood drop for severaltests?Did you test within the correct temperaturerange (+10 to +40 °C)?Did you observe the proper storage conditionsfor the meter and test cassette?Have you paid attention to the sources of errorstated in the test cassette package insert?nonoyesyesyesIf your meter has been dropped while Apply drop appears,perform a control test.WIf your meter has been dropped, that can also leadto implausible test results or error messages. In thiscase, you should also call your Accu-Chek CustomerCare.50
5 Making settings5.1 Settings overviewMaking settings5MenuLanguageVolumeTonesRemindersTime/DateTarget rangeBrightnessAvailable optionsDifferent languages5 levels (Mute and 4 volume levels)Beep tones: Turns the beep tones on or offReminders: Turns the beep tone for reminders on or offAcoustic mode: Turns the acoustic mode on or off7 times – freely selectable daily remindersTime: Sets the timeDate: Sets the dateTime format: Sets the time format (8 time formats)(format for time and date)Sets the upper and lower limitsTurns the target range on/off3 levels51
5Making settingsThe meter has several features which you can only useafter making the appropriate settings. Most of thesefeatures are intended primarily to enable you to adaptthe meter to your personal needs (e.g. beep tones andacoustic reminders).5.2 Setting the languageYou can choose a language from the list for the textappearing on the display.You can perform blood glucose tests without adjustingany of the settings on the meter.To open the Settings menu:1 Open ➮Settings, ➮Language (symbol ).The currently set language is highlighted.2 Use to select the desired language.1 Use in the Main menu to select Settings(symbol ).2 Press .3 Press .The selected language is displayed.4 Press (OK ).52
Making settings5Correcting a wrongly-set languageYou can change the language if you selected the wronglanguage by mistake:1 Turn the meter on with .2 Wait until the display does not change anymore.3 Press 2 times.5.3 Setting the volumeYou can set the volume for the beep tones to one of5 different levels.The longer the bar on the display is, the louder the volumeis. At volume level 1 Mute no beep tone is audible.The “Settings”menu is now highlighted.4 Press .The “Language”menu is now highlighted.5 Press .The “Language” menu is now open.6 Use to select the desired language.7 Press .The selected language is displayed.1 Open ➮Settings, ➮Volume.2 Use to set the volume.Each time you press the button, a beep sounds in thenew volume selected.3 Press .8 Press (OK).The meter returns to the “Settings” menu.53
5Making settings5.4 Setting tonesIn the Tones menu you can turn the beep tones, theacoustic reminders and the acoustic mode on or off.Beep tones: If Beep tones is turned on and the volumeis not set to 1 (Mute), a beep will sound during a test,when the meter advances a test area to the tip ofthe cassette,when the prompt Apply drop is displayed and youcan apply blood or control solution to the test area,when Test in progress is displayed and the testbegins,when the result is displayed,when an error message is displayed (a double beep4 times in succession).Reminders: If Reminders is turned on, the beeps willsound.Acoustic mode: If the acoustic mode is turned on,the meter guides you through performing a test withthe previously mentioned beeps (see Chapter Acousticmode, page 87).Turning tones on or offBeep tones, reminders and acoustic mode can only beturned on and off.Procedure using the example of Beep tones:1 Open ➮Settings, ➮Tones.2 Use the to select Beep tones.3 Press to turn the beep tones on ( ) or off( ).iIf you wish to use the acoustic mode, you must turnboth Acoustic mode and Beep tones on.54
Making settings55.5 Setting remindersYou can set up to 7 reminder times.If the meter is turned off, Reminder and the time of thereminder will be displayed daily at the time you haveset. If you have turned Reminders in the Tones menuon, beeps will also sound (see page 122).Setting a new reminder1 21 Open ➮Settings, ➮Reminders.2 Use to select New.3 Use to open New.When the message with the reminder appears, you canturn off the beeps by pressing any button. If you do notpress a button, the meter turns off automatically after20 seconds. The reminder will not be repeated.If you perform a blood glucose test 10 minutes or lessbefore a reminder, the reminder will not be given.4 Use to set the hour 1 .5 Press (Continue).6 Use to set the minutes 2 .7 Press (Continue).55
5Making settingsPress .The meter returns to the Reminders menu.Only for times in 12-hour time format:The suffix am (morning) or pm (afternoon) is highlighted.7a Use7b Pressto select am or pm.(Continue).24-hour time 12-hour timeformatformatThe set reminder time is displayed.24-hour timeformat12-hour timeformatThe meter shows you the set reminder time. The reminderis also turned on.56
Turning a reminder on or offA list with the reminders that have already been setappears on the display.1 Open ➮Settings, ➮Reminders.2 Use to select the reminder time you wishto turn on or off.3 Press .4 Use to select On.5 Press to turn the reminder on or off.A test reminder that reminds you once to check yourblood glucose value is not displayed in the list (see alsopage 48).Changing a reminderMaking settings1 Open ➮Settings, ➮Reminders.2 Use to select the reminder time you wishto change.3 Press .4 Use to select Edit.5 Press .6 Set the new reminder time.The reminder time has now been changed.Deleting a reminder1 Open ➮Settings, ➮Reminders.2 Use to select the reminder time you wishto delete.3 Press .4 Use to select Delete.5 Press .The reminder time has now been deleted.557
5Making settings5.6 Setting the time, date and time formatThe time and date are already set in the meter. If youwant to use reminders or analyse your test results witha computer, for example, you should check the timeand date and correct them if they deviate from thecurrent time or date.All test results are saved together with the time anddate. Only when the time and date are correctly set,can the test results be analysed properly as a functionof time.Setting the time1 21 Open ➮Settings, ➮Time/Date, ➮Time.2 Use to set the hour 1 .3 Press (Continue).4 Use to set the minutes 2 .5 Press (Continue).58
Making settings53Setting the dateThe sequence in which you set the day, month andyear while setting the date depends on the time formatyou have set. Apart from the sequence, the procedureis the same in all cases. The following sequences arepossible:Day.Month.Year Month/Day/Year Year/Month/DayOnly for times in 12-hour time format:The suffix am or pm 3 is highlighted.5a Use5b Pressto select am orpm.(Continue).1 2 36 Press (OK).The set time is displayed.1 Open ➮Settings, ➮Time/Date, ➮Date.59
5Making settings2 Use to set the day 1 .3 Press (Continue).4 Use to set the month 2 .5 Press (Continue).6 Use to set the year 3 .7 Press (Continue).Setting the time format1 Open ➮Settings, ➮Time/Date, ➮Time format.The currently set time format is highlighted.2 Use to select the desired time format.3 Press .The set date is displayed.8 Press (OK).iIf the date you have set does not exist (e.g. 31 April),the meter returns to the first setting position whenyou confirm the last entry with Continue (step 7).The selected time format is displayed.4 Press (OK) to confirm the selected timeformat.60
If you do not want to set the selected time format,choose Cancel. Press the button (OK) to return to theTime/Date menu.Making settings5.7 Setting the target rangeYou can enter your personal target range for bloodglucose values (default setting: Off). Test results abovethis target range will be flagged with the symbol .Test results below this target range will be flagged withthe symbol .The target range gives the blood glucose values whichshould be achieved if the treatment is optimal. Discusswith your healthcare professional what target rangeyou should set.You set the target range by entering the lower andupper limits. The lower limit can be set to between2.8 and 5.5 mmol/L. The upper limit can be set tobetween 5.5 and 11.1 mmol/L. Both limits can be setin steps of 0.1 mmol/L.561
5Making settingsWIf you wish to use the lower limit of the target rangeas an indicator of a possible hypoglycemia (low bloodglucose), it is important to remember the following:The indicator will only be reliable if the limit has beenproperly selected. We therefore strongly recommendthat you talk to your healthcare professional beforeyou set the limit. This function is no substitute for hypoglycemiatraining by your healthcare professionalor healthcare team.Setting a target range1 21 Open ➮Settings, ➮Target range.2 Use to select Edit.3 Press .4 Use to set the lower limit 1 .5 Press (Continue).6 Use to set the upper limit 2 .7 Press (Continue).8 Press (OK) to confirm the set target range.62
If you do not want to set a target range, use toselect Cancel and then press the button (OK) toreturn to the Settings menu.Turning the existing target range on/off1 Open ➮Settings, ➮Target range.Making settings5The set target range is displayed. It is also turned on.9 Use to select Back.10 Press .The meter returns to the Settings menu.2 Use to select On.3 Press to turn the target range on or off.A checkbox indicates that the target range is turnedoff, a tick that it is turned on.63
5Making settingsChanging a target range1 Open ➮Settings, ➮Target range.5.8 Setting the brightnessYou can set the brightness of the texts and symbolsappearing on the display to one of 3 different levels.The longer the bar on the display is, the brighter thedisplay is.2 Use to select Edit.3 Press .4 Set the new target range.5 Press (OK) to confirm the set target range.The changed target range is displayed. It is also turnedon.1 Open ➮Settings, ➮Brightness.2 Use to set the desired brightness.3 Press .64
6 Using the meter as a diaryThe meter has a 2000-value memory for saving resultstogether with the time and date. You do not need tosave the results manually. All results, all symbols thatare displayed together with the result and all flags areautomatically saved by the meter. If all the memorylocations are occupied, the oldest test result is deletedto create space for the new one when you perform anew test.The following options are available in the My datamenu:All results: Display all the saved test resultsAverages: View the averages for the last 7, 14, 30or 90 daysPC analysis: Display and analyse the saved testresults on the computer (see page 70)Using the meter as a diary6.1 Retrieving saved resultsYou have the option of retrieving all saved test resultsvia the My data menu or by using the button.Symbols saved together with the test result appear tothe right above the test result.To retrieve saved test results via the My data menu,proceed as follows:Open ➮My data (symbol ), ➮All results.The last saved test result is displayed.665
6Using the meter as a diaryTo retrieve saved test results using the button,proceed as follows:With the meter off:Press and hold until the meter turns on (longerthan 2 seconds).The last saved test result is displayed.Retrieving older test results:Press to go to the next older test result.Press to go to the next newer test result.XX.X is also displayed when no test results are savedin the meter.If you keep the buttons pressed, the test results aredisplayed in quick succession, starting with a slowspeed and becoming faster. When the oldest or newest(latest) test result is achieved, the display stops.If the last (most recent) test result in the memory isdisplayed as XX.X with dashes instead of the time anddate, the last test did not deliver any test result. In thiscase, an error message was displayed during the lasttest, or you did not apply blood (or control solution) afterthe prompt Apply drop was displayed. After the nexttest that delivers a test result, the test result displayedas XX.X will be deleted from the memory.66
Using the meter as a diary66.2 Retrieving averagesThe meter can calculate averages from the saved testresults.You can choose which test results are used for calculationof the averages:The average will be calculated from all test results correspondingto your choice. However, the following testresults will not be included in the calculation:Control tests (flagged with ),Test results displayed as or .123All results 1Only test results that were flagged with Before meal2Only test results that were flagged with After meal3When you have made this selection, you can choosethe period of time in which the test results were obtained.The last 7, 14, 30 or 90 days.67
6Using the meter as a diarySelecting the time period 1 only determines whichaverage will be displayed first. You can use thebuttons to switch directly from one time period to theothers.11 Open ➮My data, ➮Averages.2 Use to select All results, Before meal orAfter meal.3 Press .4 Use to select the period in which the testresults were obtained: 7, 14, 30 or 90 days.5 Press .3The selected average 2 is displayed, together withthe number of test results (called Tests) from which theaverage was calculated. 3268
Averages Before meal are marked with the symbol .Averages After meal are marked with the symbol .iUsing the meter as a diaryThe meter calculates the average for a period evenwhen the saved test results cover a shorter period(e.g. only 5 days).If no average can be calculated, XX.X (mmol/L) isdisplayed instead of a value and the number of testresults (tests) is given as zero. This is the case ifeither no test results or only test results which arenot used for calculation of averages were saved inthe specified period.669
7Analysing test results on the PC7 Analysing test results on the PCThe meter has a built-in USB (Universal Serial Bus) portfor transferring saved results to a computer (PC) beingequipped accordingly.The USB port 1 is located on the left side of themeter.1The supplied USB cable has two different connectors:The Micro B connector 2 is intended to establish aconnection to the meter, the USB A connector 3 isintended to establish a connection to the computer.There are two ways of displaying the results on thecomputer via the PC analysis menu:Data transfer transfers the results to the computer.Using special software products for diabetesmanagement (e.g. Accu‐Chek 360° software byRoche Diagnostics), you can display and analyse thedata.Reports allows you to display and analyse the resultson the computer by means of the meter’s built-indiary function software and an Internet browser.With these analysis options, you and your healthcareprofessional can manage your data more effectivelyand, using the graph and table views, you can betterunderstand your test results.2370
Analysing test results on the PC77.1 Defining the defaultYou can define how the meter will react after beingturned on when it is connected to the computer.1 Open ➮My data, ➮PC analysis, ➮Default.2 Use to select Data transfer or Reports.3 Press .need a more recent version of your software. In thiscase, contact your Accu-Chek Customer Care.You cannot perform a test while test results are beingtransferred.iYou only need special diabetes management softwareto analyse saved test results if you would like to usethe data transfer function.Viewing a report (Accu-Chek 360° report) with yourInternet browser does not require any additionalsoftware.Depending on the default you select, the analysis of thetest results is started with Data transfer or Reports. Toanalyse the data by means of Data transfer, you needa special software product for your computer (e.g.Accu‐Chek 360° software by Roche Diagnostics). Forfurther information, please contact your Accu-ChekCustomer Care.If you already have a software product from RocheDiagnostics for transferring and analysing results, thesoftware may not recognize more recent meters andthe results will therefore not be downloaded. You may71
7Analysing test results on the PC7.2 Connecting the meter to the PCIf you connect the meter to the computer while a test isin progress, the test is aborted and the following messageappears:1 Plug the USB connector (Micro B connector) intothe USB port on your meter.2 Connect the other end of the USB cable to yourcomputer.With the meter off:The meter turns on. Depending on the selected default(see section Defining the default), the analysis of thetest results is started with Data transfer or Reports.With the meter on:The meter opens the PC analysis menu. Other runningoperations are aborted.Press(Continue).The meter starts data analysis via Data transfer orReports, depending on the default.iIf you disconnect the cable between meter and PC,the meter turns off.Remove the USB cable after analysing the testresults on the PC so that the meter batteries arenot consumed unnecessarily.It is not possible to perform a test while the meteris connected to the PC.72
7.3 Data transferConnect the meter to the PC.Analysing test results on the PCIf necessary, start the software product for testresult analysis on the computer.When transfer of the results is finished, the meter turnsoff automatically.If the meter connected to the computer is off, proceedas follows:7While the connection is being established and data isbeing transferred, you will be informed of the progressthese operations on the display.iTo analyse the data by means of Data transfer, youneed additional software (e.g. Accu‐Chek 360°software by Roche Diagnostics).If you do not want to transfer the results after all,you can abort the transfer using the button. Themeter returns to the My data menu (if you camefrom the My data menu) or turns off (if you turnedthe meter on using the and buttons).1. Turn the meter on with .2. Open ➮My data ➮PC analysis.3. Use to select Data transfer.4. Press to start transferring the results.5. Follow the information in the left column.73
7Analysing test results on the PC7.4 Displaying reports1 Connect the meter to the PC.The Internet browser (e.g. Mozilla Firefox) is openedand shows you the default reports.If the meter connected to the computer is off, proceedas follows:While the connection is being established, you areinformed of the progress on the display. The PC symbolon the meter’s display flashes when the connection tothe computer is successful.2 Open the file manager (e.g. Microsoft WindowsExplorer) on your computer.The meter is displayed as a drive (USB storage device)in the file manager.3 Open the drive symbol (ACCU‐CHEK) with adouble-click.4 Open “Start.html” with a double-click.1a Turn the meter on with .2a Open ➮My data, ➮PC analysis.3a Use to select Reports.4a Press to establish the connection to thecomputer.5a Follow steps 2 to 4.74
Analysing test results on the PC77.5 ReportsReports are used to easily and automatically analyzesaved blood glucose results from your Accu‐Chek<strong>Mobile</strong> meter.OverviewThe reports can be displayed on a computer using anInternet browser and can be output to a printer. You donot need an Internet connection to display the reports.The report data is saved in the meter and is retrievedfrom there.iThe license agreement for using the meter’s built-indiary function software can be found at the end ofUser’s <strong>Manual</strong>.When connection between the meter and the computeris successfully established, the following reports aredisplayed on a page of the Internet browser:Trend ReportThis report shows the trend for several test resultsover the selected period.Standard Day ReportThis report shows all data in a 24-hour grid.Standard Week ReportThis report shows all blood glucose values accordingto the time when the test was performed and therespective day of the week.List reportThe list report (record list) shows the test resultssorted by date and time of the test.75
7Analysing test results on the PCUser interface1245367876
1 Window of the Internet browser2 Drop-down menu for selecting the period3 Period4 Save file button5 Print reports buttonDisplay panes:6 Chart (graphic representation of the report)7 Statistics on test results analysis8 Legend for symbol explanationiThe test results are represented in the unit mg/dL ormmol/L, depending on the version of the meter.Analysing test results on the PCSymbolsWithin the report charts, the test results are plotted intothe analysis by means of different symbols.The symbols and graphic elements in the charts havethe following meaning:MeasurementBlood glucose result of a testMultiple measurementsBlood glucose results of several testsAverageAverage of the blood glucose results in theselected periodBlood glucose target rangePersonal blood glucose target range (representedon the monitor as a green bar)Result(s) above graphThe blood glucose value cannot be representedbecause it is outside the chartNon-work dayUsually, non-working days (weekends)777
7Analysing test results on the PCReport periodsReports can be created for the following periods:Past 3 daysPast 7 daysPast 14 daysPast 30 daysPast 90 daysPrinting reportsAll the reports displayed on the screen can also beprinted out together.Do not use the integrated print function of the browserto print the reports, instead use the Print report buttonon the user interface.1 Click the button on the user interface.The print dialog box of your Internet browser opens.2 Select the desired printer from the print dialogbox of the Internet browser.Select the desired period in the drop-down menu(e.g. Past 14 days).In the print settings dialog box, you have the option ofmaking further settings for the print process.3 Select whether the report is to be printed inportrait or landscape format.4 Start the printing process.78
Analysing test results on the PC7Depending on operating system and system configuration,the procedure for selecting the print settings onyour computer may vary.Analysed dataThe following data is not included in the statisticalanalysis:Test results outside the period selectedTest results without date and timeTests with control solutionTests outside the measuring range (marked withHI or LO)The following settings made in the blood glucose meterare accepted for data analysis:Language (see page 52)Date format (see page 59)Time format (see page 60)79
7Analysing test results on the PCTrend ReportThe Trend Report shows you the trend of several bloodglucose values over the selected period.You will find the days and months along the horizontalx-axis and the blood glucose test results along the verticaly-axis. The values are connected by a thin blackline in chronological order.For further guidance, you can see the set blood glucosetarget range as a green bar in the background of thechart. Days that are usually non-working days (weekends)are marked with an additional shading on thehorizontal x-axis.The individual blood glucose values are connectedthrough thin lines.The trend of the day-to-day average blood glucosevalue is represented by a thick black line.80
Standard Day ReportAnalysing test results on the PC7The Standard Day Report is used to make it easier torecognise patterns repeated daily. For this purpose, allthe data is placed on a 24-hour grid. As a result all thetests performed at (approximately) the same time ofday are shown at the same position on the time axis.All the blood glucose values are plotted at the relevanttime of day according to the time when the test wasperformed. The values are connected by a thin blackline in chronological order. A thick black line representsthe development of the mean level (in intervals of onehour if a test result falls in each interval).81
7Analysing test results on the PCStandard Week ReportThe Standard Week Report is used to make it easierto recognise repeated patterns depending on the dayof the week. For example, it is possible to recognisechanges in the metabolic situation brought about byyour occupation.All the blood glucose values are plotted on the chartaccording to the time when the test was performedand the respective day of the week. The values areconnected by a thin black line in chronological order.A thick black line represents the development of themean level on the different days of the week.Below the chart, the number of tests and the averagefor the respective day of the week are listed.82
List reportAnalysing test results on the PC7The list report shows the test results sorted by dateand time of the test. All blood glucose values are representedin a chronological way and together with additionalinformation on the events (see Chapter Flaggingresults, page 45).The list contains the following columns:Date and TimeBlood Glucose (mmol/L)EventsEvent that is connected to this test result83
7Analysing test results on the PCStatisticsBelow the chart of a report, you will find a statisticalanalysis of all test results plotted with the followinginformation:Number of testsAverage (mmol/L)Standard deviation (mmol/L)The standard deviation is the variance of the analysedresults.Highest value (mmol/L)Lowest value (mmol/L)Average tests per dayAverage number of blood glucose tests per dayHI or LOBlood glucose values outside the measuring rangeLow blood glucose index or High blood glucoseindexFurther information can be found in the appendix(see page 142).Above target rangeBlood glucose values above the target rangeWithin target rangeBlood glucose values within the target rangeBelow target rangeBlood glucose values below the target range84
Analysing test results on the PC7Analysing data in external applicationsIf you want to analyse the test results using externalsoftware, you can save the data as a CSV file. The fileextension CSV stands for Comma Separated Values.CSV files can be opened with a text editor or spreadsheetprogram, for example.The CSV file always contains all the test results savedin your meter. Test results already transferred at anearlier date are transferred again.1 Press the Save file button on the userinterface.Depending on the configuration of your computer,the CSV file may be directly opened in a spreadsheetprogram. In this case, you can save the table using thesave function of the spreadsheet program.The CSV file contains the following information:Serial number: Serial number of the meterDownload date, download time, data and time whenthe meter transferred the test results to the computer.Date, time, result and unit of the results saved in themeter.Flags added to the results, indicated by an “X”.In the CSV file, the date is always displayed in the formatDD.MM.YYYY and the time always in the 24-hourtime format (hh:mm). The time format set in the meterhas no influence on the format of the date and time inthe CSV file.2 In the dialog box that opens, select the option tosave the file.Where you find the CSV file on your computer dependson the settings in your operating system for datadownload.85
7Analysing test results on the PCSecurity settings within the Internet browserThe settings of your Internet browser can have aninfluence on working with reports.The reports use pages with so-called “active content”(JavaScript). This active content can be suppressed bymaking appropriate security settings in the browser,causing warnings to be issued or functionality to berestricted. If this happens, check the relevant Internetbrowser settings in order to ensure smooth operation.In many cases, you can create different security settingsfor using the Internet and working with reports(e.g. at user login to the PC or by defining user profilesin the browser).If you choose the Internet browser security settingsappropriately (e.g. “Allow active content to run in fileson My Computer” or similar), you can work with reportswithout any restrictions.Error signals and troubleshootingThe ACCU‐CHEK drive symbol with the “start.html” filedoes not appear on the PC:Check whether Reports is selected in the defaultsfor PC analysis (see page 71).Check whether your PC or operating system supportsdata transfer via USB.Check to make sure the USB connector is firmlyplugged into the correct socket on the PC.If the meter is still not detected as a drive:Plug the meter into a different USB socket onyour computer (you may be able to use a USBhub or choose between USB sockets on the frontand rear of your PC).Please refer to your Accu-Chek Customer Care, if theproblem persists.86
8 Acoustic modeThe procedure for turning the acoustic mode on isdescribed in Chapter Setting tones (see page 54).When the acoustic mode is turned on, the meter guidesyou through the blood glucose test using beeps andannounces the test result as a series of beeps. Themeter beeps additionally when the batteries are almostempty, the test cassette is empty or an error messageis displayed.An intimate knowledge of how test results are announcedas beeps and how to distinguish test resultsfrom other beeps is crucial to reliably recognising thetest result.The sections below explain the beeps in detail. Inaddition, training software (the BeepLearn program)to help you interpret test results announced in theform of beeps is available on CD from your Accu-ChekCustomer Care.Acoustic modeWVisually impaired people should only use theacoustic mode if they have familiarize themselvesfully with the acoustic mode with the assistanceof a sighted person and have demonstrated thatthey are able to understand test results correctlywithout exception, using the acoustic mode.The acoustic mode should always be used withgreat care. Otherwise, there is a risk that the testresults will be misinterpreted by the person performingthe test. An incorrect insulin dose resultingfrom a misinterpreted test result can causeconsiderable health damage and can even be fatal.Especially if unexpected and abnormal bloodglucose values are obtained using the acousticmode, the test result must be checked by repeatingthe test together with a sighted person.887
8Acoustic modeWVisually impaired people should not test theirblood glucose without assistance from a sightedperson.The meter must be regularly checked by a sightedperson for outwardly visible contamination.There are two types of beep tones, differing in pitch.Warnings have a higher pitch (Tone 2, representedherein as ) than the other beep tones (Tone 1, representedherein as ). The following table shows whichtone sounds for which event.88
Tone 1:Turning onTest area is advanced to the tip of the cassettePrompt to apply blood or control solutionStart of testAnnouncement of the test resultTone 2: (warning)Signal that test results are about to be announcedAnnouncement of an error messageNotification that the batteries are almost emptyNotification that the cassette is emptyAcoustic mode8.1 Beep tone when turning onWhen the acoustic mode is turned on, you hear a beep( ) when you turn the meter on.This is irrespective of how you turn the meter on:By opening the tip cover (see page 33)Using the Power button (see page 35)Via the button (see page 65)8.2 Beep tones during a testAfter the power-on beep, you will hear the followingbeep while you test when:The meter advances a test area to the tip of thecassette,You can apply blood or control solution,The test begins.You will hear the test result, which is composed ofdifferent beep tones.You will hear several beep tones when the meter displaysan error message.889
8Acoustic mode8.3 Test result announcement after a testIn the acoustic mode, whenever the meter displays atest result following a blood glucose test, it also announcesthe test result as a series of beeps. The testresult is not treated as an entity, but is broken downinto individual digits.Examples:The test result 7.6 mmol/L is announced as0 – 7 – decimal point – 6.Each digit is represented by the corresponding numberof beeps, e.g. 4 beeps for the number 4 ( ).Zero is represented by a long beep ( ).Test results which are lower than 0.6 mmol/L and aredisplayed as are announced acoustically as 0 – 0– 0 or 0 – 0 – decimal point – 0.Test results which are higher than 33.3 mmol/L andare displayed as are announced acoustically as 9 –9 – 9 or 9 – 9 – decimal point – 9.The meaning of the symbols and is explainedin Chapter 4.5 on page 44.The test result is announced three times in succession.Each announcement is preceded by 2 short beeps( ). Altogether, therefore, you hear:test result test result test result.Symbols, such as or , which are displayed togetherwith the test result are not announced acoustically.If you turn the meter off using the Power buttonwhile the test result is being announced acoustically,the announcement will be interrupted and 2 shortbeeps will sound four times in succession ().90
mmol/L meters: First the tens are announced, thenthe units followed by the decimal point and finally thetenth. There is a short pause between each group ofbeeps. The tens are always announced, even when thetest result is below 10. The tens in this case are representedby 1 long beep, signifying zero. The decimalpoint is announced by a very short beep ( ).13.8 mmol/L:1 beep – pause – 3 beeps – pause – 1 very shortbeep – pause – 8 beeps=Acoustic mode84.0 mmol/L:1 long beep (for 0 tens) – pause – 4 beeps –pause – 1 very short beep – pause – 1 long beep=91
8Acoustic mode8.4 Announcement of saved test resultsOnly the last (most recent) of the saved test results isannounced acoustically.The test result is announced three times in succession.The announcement follows the same pattern as theannouncement of a test result immediately after thetest. You will hear:test result test result test result.If you directly retrieve saved test result using thebutton , you will at first hear the power-on beep andimmediately afterwards the test result:test result test result test result.Flags are not acoustically announced (e.g. Beforemeal ).If XX.X is displayed as the last (most recent) test result,the last test did not deliver any test result (see page 66).In this case, the sounded beeps are identical to thosefor an error message.There is no acoustic announcement when the lastsaved result is a control test flagged with , when noresult is saved or when you retrieve an average.92
8.5 Announcements of warnings and errormessagesWhen the batteries will soon be empty or the test cassettehas been used up, the meter issues an acousticwarning. This consists of two short beeps soundedthree times in succession ( ).The warning is given at different times.Batteries almost empty:The acoustic warning sounds after you have turnedthe meter on, together with the corresponding messageon the display (see page 113).Test cassette empty:The acoustic warning sounds when the number ofavailable tests is displayed as zero when turning themeter off.Acoustic modeIf error messages appear on the display (see page 126),these are announced by two short beeps sounded fourtimes in succession (). This sequenceis sounded only once and is not repeated. The samesequence of beeps is sounded for all error messages,i.e. they are not differentiated acoustically.893
9Checking the meter9 Checking the meterYou can check whether the meter delivers correct testresults. To perform this control test, a glucose controlsolution is applied to the test area instead of blood.At the end of the test, the meter automatically checkswhether the control result obtained with glucose controlsolution is correct and informs you of the controlresult.Always perform a control test using Accu‐Chek <strong>Mobile</strong>control solutions:After you have inserted a new test cassette,After you have changed the batteries,After you have cleaned the cassette and the insideof the meter,If you are in doubt about a test result.Please contact your Accu-Chek Customer Care onwhere you can obtain the control solutions.Different control solutions are sold in different countries.The control solutions have labels with differenttext colors (blue, red or grey).Text colours:Control1 = blueControl2 = redControl3 = greyAt the end of the control test, the meter asks you toenter the colors of the text on the control solution youhave used (see page 97). The meter offers you a choiceof all three colors, even if you only have one or twocontrol solution(s) to choose from.WVisually impaired people should not perform a controltest without assistance from a sighted person.94
Checking the meter99.1 Preparing for a control testFor a control test, you need the meter with inserted testcassette and an unopened applicator with Accu‐Chek<strong>Mobile</strong> control solution.9.2 Performing a control testEither open the tip cover or select Test in the Mainmenu.Shortly after the test area has been advanced to the tipof the cassette, the prompt Apply drop will appear anda beep will sound.kim_manual_0640kim_manual_0650The solution in the applicators is for one-time use only.A control test in its main steps is the same as a normaltest except that you apply control solution to the testarea instead of blood.Please read the package insert provided with thecontrol solutions.1 Twist the cap off the applicator.2 Hold the applicator at a slight angle with thebrush pointing downwards.3 Squeeze the applicator gently until you see asmall drop appear at the end of the brush.4 Then stop squeezing.95
06609Checking the meterHDo not hold the meter with the test area pointingupwards while you apply control solution because thesolution could enter the meter and soil it.6 Take the brush away from the test area as soonas Test in progress appears on the display.7 Press (Set flag ).5 Apply the control solution to the centre of thetest area at the tip of the cassette using the tipof the brush.The test area drew up sufficient control solution, thebeep sounds and the control result is displayed.To distinguish control results from blood glucoseresults at a later date, you need to flag it as a controltest.iIf you have set a target range and the control resultobtained with control solution is outside this range,the symbols or will be displayed together withthe control result. The symbols will be deleted automaticallywhen you flag the control result as a controltest.96
Checking the meter9Values are onlyexamples8 Use to select Control test.9 Press .10 Use to select the colour of the text on theapplicator label (see page 94).11 Press .1The meter displays the upper and lower limits ofthe concentration range. The concentration rangedisplayed depends on the color of control solutionselected.13 Press (Continue ).The meter automatically checks whether the controlresult is within the concentration range displayed.orThe control result flagged asdisplayed.12 Press (Continue ).1 for Control test isIf the control result is within the concentration rangedisplayed, Control test OK is displayed.97
9Checking the meterIf the control result is not within the concentrationrange displayed, Control test not OK Repeat controltest is displayed (see Chapter Possible sources of error,page 99).14 Press (Continue ).The meter returns to the Main menu.15 Turn the meter off and close the tip cover.16 Dispose of the applicator in your householdwaste.You can also check yourself whether the control resultis within the right concentration range.Accu‐Chek ® <strong>Mobile</strong> Controlmg/dLmmol/L1 35–75 1,9–4,22 115–155 6,4–8,6Unit ofmeasurementValues areonly examplesControl solution usedTo do this, compare the control result with theconcentration table on the test cassette box.The control result must be within the printed concentrationrange.98
Checking the meter99.3 Possible sources of errorIf Control test not OK Repeat control test is displayed,the control result obtained is not within the concentrationrange displayed. Check the points listed on thefollowing overview. If your answer is different from theanswer given, make the respective corrections andrepeat the test. If you have taken all of these pointsinto account and Control test not OK is still displayed,contact your Accu-Chek Customer Care.WIf Control test not OK Repeat control test is displayed,it is no longer certain that the meter and test cassetteare functioning properly. Blood glucose testsmay then deliver incorrect test results. Incorrect testresults can cause the wrong therapy recommendationto be made and so result in serious adversehealth effects.Did you perform the control test according tothe User’s <strong>Manual</strong>?Did you wait for the application prompt to bedisplayed before applying control solution?Did you apply the control solution immediatelyafter opening the applicator?Did you enter the correct color?Did you test within the correct temperaturerange (+10 to +40 °C)?Has the use by date for the control solutionbeen reached (see label on the bottom of thebottle next to the symbol )?Did you read the section Treating the controlsolutions properly in the package insert forthe control solution?yesyesyesyesyesnoyes99
9Checking the meterDid you observe the proper storage conditionsfor the meter, test cassette and controlsolutions (see Chapter 13 Measurement andstorage conditions, page 116 and the test cassetteand control solution package inserts)?yesIf your meter has been dropped, that can also lead tocontrol results which are not within the concentrationrange displayed and for which Control test not OK isdisplayed. In this case, you should also contact yourAccu-Chek Customer Care.100
10 Menu ToolsThe Tools menu on the one hand offers you some extrameans of checking the meter. On the other hand, youmust also use this menu to prepare for cleaning themeter and changing a test cassette that has not beenused up.The following options are available in the Tools menu:Display check: Performs a separate display checkValidity: Displays the validity of the test cassetteChange cass.: Prepares the meter for removing atest cassette which still has unused test areasMenu Tools10.1 Performing a display checkIf you wish to check whether the display is workingproperly, you can also do this, in addition to after turningthe meter on, via the display check in the Toolsmenu. In this case, the display check is displayed notonly for about 2 seconds, but until you cancel it (butnot longer than 1 minute).101 Open ➮Tools (symbol ), ➮Display check.2 Press (Continue).The meter runs the display check in which a black andyellow checkerboard pattern of small illuminated dotsis displayed.101
10Menu Tools10.2 Viewing the validity of the test cassetteYou can check how long the test cassette in the meteris valid as follows:Irregularity on thedisplay (example)3 Check whether there are any irregularities inthe checkerboard pattern.After pressing (Continue), the meter returns to theTools menu.If you do not press the button, the meter displays thedisplay check for about 1 minute. Then it displays thenumber of available tests and turns off automatically.WIf there are irregularities in the checkerboard pattern,results might not be displayed correctly. In this case,ask your healthcare professional to change the meteror contact your Accu-Chek Customer Care.1 Open ➮Tools , ➮Validity.The validity is displayed.2 Press (Back).The meter returns to the Tools menu.102
10.3 Viewing the number of available testsWith the meter off:Press and hold until the meter turns on (longerthan 2 seconds).The number of available tests is displayed. The meterturns off again a short time later.10.4 Replacing the test cassetteIf you want to replace an empty test cassette or anexpired test cassette, please continue reading in sectionReplacing the cassette.If you want to remove a partly used test cassette whichstill has unused test areas, you must first perform thepreliminary steps described in the section Preparingcassette replacement.iIf you re-insert the partly used cassette into themeter and there was another cassette in the meterbefore this, the partly used cassette loses a test area.Menu ToolsPreparing cassette replacementThe preliminary steps for cassette replacement areonly necessary if you want to remove a partly used testcassette which still has unused test areas:1 Open ➮Tools.2 Use to select Change cass..The meter now prompts you to open the tip cover. Ifyou do not want to replace the cassette after all, youcan cancel the operation with .You can re-insert a partly used cassette into the meterat a later date. In the meantime, store this cassette in adry place protected from light.10103
10Menu ToolsReplacing the cassetteIf the cassette in the meter is empty 1 or defective2 or has expired 3 , the appropriate message orerror message appears after the display check and thenumber of available tests (see also page 120 andpage 126). Shortly after this, the meter turns off automatically.kim_manual_0680kim_manual_0690 1 2 3If you have prepared for the cassette replacement viaChange cass. the meter prompts you to replace thetest cassette 4 . Shortly after this, it turns off automatically.1 Place your finger on the corrugated area onthe tip cover and push it in the direction of thekim_manual_0700arrow as far as it will go. 42 Turn the meter over.104
kim_manual_0270Menu Tools103 Push the slide button in the direction of thearrow so that the cassette compartment coversprings opens.kim_manual_08105 Remove the new test cassette from the foilsealedplastic container.4 Remove the cassette from the cassette compartment.6 Insert the test cassette in the meter with thesilver side facing upwards.105
10Menu ToolsCLICK7 Close the cassette compartment cover andpress it closed.When you have closed the cassette compartmentcover, the meter turns on again and first runs the displaycheck. Afterwards the validity of the cassette andthe number of available tests are displayed.The meter then returns to the Main menu.iUsed test cassettes can be disposed of in householdwaste. However, it is recommended to consult localregulations concerning disposal beforehand.106
11 Cleaning the meter and lancingdevice11.1 Cleaning the meterThe mode of operation of the meter with the test cassettemeans that the meter will not normally come intocontact with blood or control solution. Regular cleaningis therefore not necessary. In the event of the meterbecoming soiled through improper use, cleaning it maybecome necessary.WVisually impaired people should not clean the meterwithout assistance from a sighted person.HUse only cold water or 70 % isopropanol for cleaning.Any other cleaning agents may damage the meter orimpair its measuring function.Use a lightly moistened cloth or a lightly moistenedcotton swab. Do not spray anything onto the meterand do not immerse it in the cleaning fluid.Cleaning the meter and lancing deviceThe outsideIf the casing of the meter or the display is visibly soiled:Wipe these with a cloth lightly moistened with coldwater or 70 % isopropanol.The insideYou only need to clean the inside of the meter or testcassette when the message with the text Cassettedirty: Clean per user's manual (E-4) is displayed. Theerror message might be caused by fluff, crumbs or thelike inside the tip of the cassette.11107
11Cleaning the meter and lancing deviceCleaning as a result of an error messageIf you are prompted to clean the meter by the messageCassette dirty: Clean per user's manual (E-4), proceedas follows:Cleaning procedureIf you notice that the area around the tip of the cassetteis visibly soiled and you want to clean the meter,proceed as follows:1 Press (Continue).2 Open the tip cover all the way.3 Follow the instructions (steps 3 to 17) for cleaningthe meter in section Cleaning procedure(page 108-111).iIf the error message E-4 was displayed, a test area islost when you later re-insert the test cassette.1 Open ➮Tools, ➮Change cass.The meter now prompts you to open the tip cover.2 Open the tip cover all the way.If you do not want to clean the meter now, press thebutton (Cancel).108
The meter then prompts you to remove the test cassette.About 2 seconds later, it turns off automatically.The steps 3 to 6 that follow below are identical to thesteps 2 to 5 in Chapter 10, section Replacing the cassette,which are accompanied by pictures(see page 104/105).3 Turn the meter over.4 Push the slide button for the cassette compartmentcover upwards so that it springs open.5 Open the cassette compartment cover all theway.6 Remove the cassette from the cassette compartment.Cleaning the meter and lancing device7 Check whether you can see any fluff, crumbs orthe like inside the tip of the cassette.8 If so, remove these carefully.If the measuring optics are visibly soiled, clean theinside of the meter:HMake sure that no liquid enters the meter. Avoidscratching the measuring optics.11109
11Cleaning the meter and lancing device9 Carefully wipe the measuring optics and thefront opening of the meter with a lightly moistenedcotton swab.11 Carefully wipe the interior of the tip cover with alightly moistened cotton swab.12 Remove any fluff or lint that may remain.13 Allow the meter time to dry thoroughly.10 Leave the cassette compartment cover openand close the tip cover.110
Cleaning the meter and lancing device11CLICKkim_manual_031014 Open the tip cover again.16 Close the cassette compartment cover andpress it closed.15 Re-insert the test cassette into the meter.17 Close the tip cover.111
11Cleaning the meter and lancing device11.2 Cleaning the lancing deviceClean the lancing device regularly, and when there isblood on it, to keep it working properly and prevent apotential infection risk. If you want to clean the lancingdevice, detach it from the meter.Clean the outside of the lancing device only. Wipe itonce a week with a cloth moistened with 70 % isopropanol(available from your pharmacy).Also clean the inside of the rotatable cap and the ASTcap with a moistened cotton swab.Allow the lancing device, the rotatable cap and the ASTcap time to dry thoroughly.HVisually impaired people should not clean thelancing device without assistance from a sightedperson.Never dip the lancing device or the AST cap incleaning fluid.Use only 70 % isopropanol as a cleaning agent.112
12 Changing the batteriesThis message appears when the batteries are almostempty. It appears every time you turn the meter off ifyou have not yet changed the batteries. The first timethe message appears, you can still perform about50 tests.Change the batteries as soon as possible.You need 2 alkaline-manganese or high-energy batteriestype AAA, LR 03, AM4 or micro (1.5 V) or 2 rechargeableNiMH batteries (type AAA). Always replaceboth batteries at the same time.With a new set of batteries, you can perform approximately500 tests or test for about 1 year.When you use rechargeable batteries, please observethe following:Changing the batteriesThe number of tests that can be performed perbattery charge is much smaller than with regularbatteries.When the prompt to change the batteries is displayedfor the first time, considerably fewer than50 tests can be performed; with old and used upbatteries, no more test might be possible.Results and settings remain saved in the meter whileyou change the batteries or if you store the meterwithout batteries.The meter has an inbuilt backup battery. This providesthe power when there are no batteries inserted. Thebackup battery has a life expectancy of about 2 years.It cannot be replaced if it is empty.If the backup battery is empty, the meter loses theset time and date and dashes appear on the displayinstead of the time and date. In this case, set the timeand date again.12113
12Changing the batteriesWVisually impaired people should not change thebatteries without assistance from a sighted person.Never throw batteries into a fire. This is dangerous,because they may explode.iOnly remove the batteries when the meter isturned off.Remove the batteries if you will not be using themeter for a longer period of time.Please dispose of used batteries in an environmentallyfriendly way at a collection depot orthrough your dealer.kim_manual_0890kim_manual_09001 Push the battery compartment cover in thedirection of the arrow as far as it will go.2 Raise the battery compartment cover as illustrated.114
kim_manual_0910kim_manual_0940Changing the batteries123 Turn the meter so that the batteries fall downwardsout of the battery compartment.kim_manual_09505 Close the battery compartment cover again.4 Insert two new batteries in the battery compartment.Ensure that the polarity ( and ) of thebatteries is correct.6 Push the battery compartment cover in thedirection of the arrow as far as it will go.115
13Measurement and storage conditions13 Measurement and storageconditions13.1 TemperatureSo that the meter and lancing device work reliably andyou obtain accurate results, make sure that the followingconditions are met.Storagewithout batteries, withoutcassetteTemperature-25 to +70 °Cwith batteries, without cassette -10 to +50 °Cwith batteries, with cassette +2 to +30 °CHAt temperatures above +50 °C, the batteries couldleak and damage the meter.For blood glucose tests and control tests, the permittedtemperature range is between +10 and +40 °C.If the temperature is between +8 and +10 °C or between+40 and +42 °C, the meter will still allow youto perform a test. However, the following warning willappear (see also page 128).WDo not use blood glucose results obtained despitethis warning as a basis for making therapeutic decisions.These test results may be incorrect. Incorrecttest results can cause the wrong therapy recommendationto be made and so result in serious adversehealth effects.116
Tests cannot be performed at temperatures below+8 and above +42 °C. In this event, the followingerror message appears:WNever try to speed up the cooling or warming of yourmeter, e.g. by placing it in the refrigerator or on aradiator. Doing so can damage the meter and cause itto deliver incorrect test results. Incorrect test resultscan cause the wrong therapy recommendation to bemade and so result in serious adverse health effects.Never keep the lancing device at very low or hightemperatures, e.g. in a hot car.Measurement and storage conditions13.2 Atmospheric humidityOnly perform blood glucose tests at a relative humiditybetween 15 and 85 %.Store the meter in a place with a relative humiditybetween 15 and 93 %.WSudden changes in temperature cause condensationto form in or on the meter. If this happens, do not turnthe meter on. Make sure that it returns to ambienttemperature slowly. Never store the meter in a roomthat is likely to harbour condensation (e.g. bathroom).13117
Measurement and storage conditions13.3 Light conditionsDisplayed text, numbers and symbols appear yellow.Bright light shining on the display may make them difficultto read. Shield the meter if necessary, with yourbody, for example.HKeep the meter away from very strong light sources(e.g. direct sunlight). These may interfere with theproper functioning of the meter and lead to errormessages.13.4 Sources of interferenceWStrong electromagnetic fields may interfere withthe proper operation of the meter. Do not use themeter close to sources of strong electromagneticradiation.To avoid electrostatic discharge, do not use themeter in a very dry environment, especially one inwhich synthetic materials are present.NOTICE:This device complies with Part 15 of the FCC Rules andwith RSS-210 of Industry Canada.Operation is subject to the following two conditions:(1) this device may not cause harmful interference,and(2) this device must accept any interference received,including interference that may cause undesiredoperation.118
Measurement and storage conditionsNOTICE:Changes or modifications made to this equipmentnot expressly approved by Roche Diagnostics GmbH,Germany may void the FCC authorization to operatethis equipment.Classification with respect to U.S. telecommunicationrequirements (47CFR §15.105)NOTE:This equipment has been tested and found tocomply with the limits for a Class B digital device,pursuant to Part 15 of the FCC Rules. These limits aredesigned to provide reasonable protection againstharmful interference in a residential installation. Thisequipment generates, uses and can radiate radiofrequency energy and, if not installed and used inaccordance with the instructions, may cause harmfulinterference to radio communications. However, thereis no guarantee that interference will not occur in aparticular installation. If this equipment does causeharmful interference to radio or television reception,which can be determined by turning the equipmentoff and on, the user is encouraged to try to correct theinterference by one or more of the following measures:Reorient or relocate the receiving antenna.Increase the separation between the equipment andreceiver.Connect the equipment into an outlet on a circuitdifferent from that to which the receiver isconnected.Consult the dealer or an experienced radio/TV technicianfor help.Classification with respect to the Canadian telecommunicationrequirementsNOTICE:This Class B digital apparatus complies with CanadianICES-003.119
14Messages and problems14 Messages and problems14.1 MessagesThis message appears at thestart of a test if the test cassetteis only valid for 10 more days.The message is repeated whenthe test cassette is only valid for5, 2 and 1 more day(s).Press the button (Continue)to start a test.This message appears when thebatteries are almost empty. Itappears every time you turn themeter off and if you have not yetchanged the batteries. The firsttime the message appears, youcan still perform about 50 tests.Change the batteries as soonas possible.120
This prompt appears if you turnthe meter off and the tip cover isstill open.Close the tip cover.Messages and problemsThis message appears if you arein the process of changing a setting(e.g. the date) or entering anew setting (e.g. a reminder) andopen the tip cover.orClose the tip cover again ifyou wish to continue with thesetting.Use to select whetheryou wish to Continue with settingsor Test.Continue with settings: In thiscase, the meter prompts youto close the tip cover.Test: The setting procedurewill be interrupted (any changesyou have already made willbe lost) and a test area will beadvanced.14121
14Messages and problemsThis message appears if youclose the tip cover while themeter is advancing a test area.orOpen the tip cover again if youwish to continue with the test.Useor Test.to select Do not testIf you have set reminders, thismessage appears at the set time.orIf you want to perform a test,use to select Test.If you want to be remindedagain in 15 minutes, useto select Snooze.Do not test: The meter opensthe Main menu. A test areais lost.Test: The meter prompts youto open the tip cover.orTo delete the reminder andturn the meter off, useselect Cancel.Then press .to122
1This message appears at thestart of a test if the ambienttemperature or the temperatureof the meter is between +8 and+10 °C 1 or between +40 and+42 °C. 2Use to select whetheryou wish to Test or Quit.Test: The meter advances atest area.Quit: The meter opens theMain menu. Close the tipcover.If you decide to perform the testin spite of the warning, the testresults will be flagged and savedwith the symbol .Messages and problemsWDo not use blood glucose results obtained despitethis warning as a basis for making therapeutic decisions.These test results may be incorrect. Incorrecttest results can cause the wrong therapy recommendationto be made and so result in seriousadverse health effects. Move to a place where thetemperature is between +10 and +40 °C and waitfor the temperature of the meter to adjust to thistemperature.142123
14Messages and problems14.2 ProblemsProblem/Cause of problemThe meter will not turn on.The batteries are empty or none are inserted.You have inserted the batteries the wrong way round.The ambient temperature is low and the batteries arealmost empty.Condensation has affected the electronics.The meter is defective.Solution to the problemInsert new batteries.Remove the batteries and re-insert them as shownin the battery compartment.Move to a place where the ambient temperature isbetween +10 and +40 °C and wait for the temperatureof the meter to adjust to this temperature. Insertnew batteries.Allow the meter time to dry slowly.Contact your Accu-Chek Customer Care.The meter only displays dashes instead of the timeand date.The meter has lost the time and date.You have changed the batteries or stored the meter withoutbatteries and the built-in backup battery is empty.Reset the time and date.124
Messages and problems14Problem/Cause of problemThe meter is turned on, but the display remainsblank.The display is defective.Solution to the problemContact your Accu-Chek Customer Care.125
14Messages and problems14.3 Error messagesThe following pages describe all error messages andhow they can be remedied.If an error message appears, follow the instructions onthe display.If error messages occur frequently, contact yourAccu-Chek Customer Care.If your meter has been dropped, that can also lead toerror messages. In this case, you should also contactyour Accu-Chek Customer Care.The use by period or use by dateof the test cassette is exeeded.Insert a new test cassette inthe meter.This message appears if youstart a test and all test areasin the test cassette have beenused.Insert a new test cassette inthe meter.orRemove the test cassette fromthe meter and re-insert it.Insert a new test cassette inthe meter.126
Insert a test cassette suitablefor this meter type.There is no test cassette in themeter.Insert a new test cassette inthe meter.Messages and problemsYour blood glucose value maybe very low.If the way you feel agreeswith a very low blood glucosevalue, immediately follow therelevant instructions given byyour healthcare professional.Repeat the test afterwards.A meter error has occurred.If the error message is stilldisplayed after turning themeter on again, please contactyour Accu-Chek CustomerCare.14The test area has drawn up toolittle blood or control solution.Repeat the test with a largeramount of blood or controlsolution.127
14Messages and problemsRemove the dirt from the insideof the cassette tip.Press (Continue) if you wantto go directly to the Cleanmenu.If the error message is displayedafter turning the meter on again:Contact your Accu-ChekCustomer Care.Move into the shade or shieldthe meter with your body, forexample.Repeat the test.Move to a place where theambient temperature is atleast +10 °C and wait for thetemperature of the meter toadjust to this temperature.Do not apply blood or controlsolution to the test area until theprompt Apply drop is displayed.Repeat the test.Move to a place where theambient temperature is nothigher than +40 °C and waitfor the temperature of themeter to adjust to this temperature.128
Messages and problems14Insert two new batteries.129
15Disposing of the meter15 Disposing of the meterDuring blood glucose testing, the meter may come intocontact with blood. Therefore used meters carry a riskof infection. Please dispose of your used meter, afterremoving the batteries, according to the regulationsapplicable in your local council or authority.The meter falls outside the scope of the EuropeanDirective 2002/96/EC (Directive on waste electrical andelectronic equipment).Please dispose of the batteries in an environmentallyfriendly way at a collection depot orthrough your dealer.Used test cassettes can be disposed of in householdwaste.Removing the backup batteryApart from the two batteries in the battery compartment,there is also a third battery in the side of the batterycompartment, the backup battery. You must alsoremove this battery before disposing of the meter.Remove the backup battery as follows:kim_manual_09801 Use a small screwdriver to break out the partitionwall in front of the battery.kim_manual_0990The battery then drops into the battery compartment.2 Turn the meter over so that the backup batteryfalls out.130
16 Technical dataTechnical data16Meter typeCatalogue no./serial no.Test principleMeasuring rangeSample sizeMeasuring timePower supplyBattery lifeAccu‐Chek <strong>Mobile</strong>, Model U1See type plate on the back of the meterDetermination of glucose in fresh capillary blood by reflectance photometry.When using different specimen material, please refer to the package insert that camewith the Accu‐Chek <strong>Mobile</strong> test cassette.Although you always apply whole blood to the test area, the blood glucose resultsdisplayed by your meter correspond to those in plasma.You will find information on how the system works, on the test principle and on referencemethods in the Accu‐Chek <strong>Mobile</strong> test cassette package insert.See the Accu‐Chek <strong>Mobile</strong> test cassette package insertSee the Accu‐Chek <strong>Mobile</strong> test cassette package insertSee the Accu‐Chek <strong>Mobile</strong> test cassette package insert2 alkaline-manganese or high energy batteries (1.5 V, type AAA, LR 03, AM 4 or micro),backup battery: 3V lithium button cell type CR1025Approximately 500 tests or approximately 1 year (less if the brightness of the display isset to level 3 or the volume is set to level 4 or 5 or in acoustic mode due to the higherpower consumption)131
16Technical dataAutomatic power-offTemperatureDuring testingDuring storageHumidityDuring testingDuring storageAltitudeMemoryDimensionsWeightDisplayAfter 1 or 2 minute(s), depending on the operating statusSee the Accu‐Chek <strong>Mobile</strong> test cassette package insertMeter without batteries and without test cassette: -25 to +70 °CMeter with batteries and without test cassette: -10 to +50 °CMeter with batteries and with test cassette: +2 to +30 °CSee the Accu‐Chek <strong>Mobile</strong> test cassette package insertSee the Accu‐Chek <strong>Mobile</strong> test cassette package insertSea level to 4000 m2000 results with time and date, averages for 7, 14, 30 and 90 days121 × 63 × 20 mm with lancing deviceApprox. 129 g with lancing device, batteries, test cassette and lancet drumOLED (Organic Light Emitting Diode) displayInterface USB (Micro B)132
Technical data16ElectromagneticcompatibilityPerformanceevaluationThis instrument meets the electromagnetic immunity requirements according toEN ISO 15197 Annex A. The chosen basis for the immunity tests (on electrostatic discharge)was basic standard IEC 61000-4-2.In addition, the instrument meets the electromagnetic emissions requirements accordingto EN 61326. Its electromagnetic emission is thus low. Interference on otherelectrically-driven equipment is not anticipated.The performance data for the Accu‐Chek <strong>Mobile</strong> system (Accu‐Chek <strong>Mobile</strong> meter withAccu‐Chek <strong>Mobile</strong> test cassette) were determined using capillary blood from patientswith diabetes (method comparison, accuracy), venous blood (repeatability) and controlsolutions (reproducibility). The system is calibrated with venous blood containing variouslevels of glucose. The reference values are obtained using the hexokinase method.The reference method is traceable to a NIST standard using the ID-GCMS method,which is the method of the highest metrological quality. The method comparison wasconducted by comparing the results from the system with those of the hexokinasemethod with deproteinization using an automatic analyzer.The Accu‐Chek <strong>Mobile</strong> blood glucose monitoring system complies with the requirements of EN ISO 15197.Roche Diagnostics hereby declares that the Accu‐Chek <strong>Mobile</strong> blood glucose meter conforms with the basic requirementsand other relevant regulations of the European Directive 1999/5/EC. The conformity declaration may befound at the following Internet address:http://mobile.accu‐chek.com.133
17System components17 System componentsAccu‐Chek <strong>Mobile</strong> meter (Model U1):Accu‐Chek <strong>Mobile</strong> test cassettesUse only test cassettes that are labeled with asymbol N when you test blood glucose using theAccu‐Chek <strong>Mobile</strong> meter.These test cassettes are labeled with a symbol Nto distinguish them from earlier test cassettes thatwere subject to a clinically relevant maltose interference.The symbol can be found on the cardboardbox (green) and on the foil of the foil-sealed plasticcontainer (white).Accu‐Chek <strong>Mobile</strong> control solutionsUse only these control solutions when you performcontrol tests using the Accu‐Chek <strong>Mobile</strong> meter andthe respective test cassette.Accu‐Chek FastClix M1 lancing device:Accu‐Chek FastClix lancet drumsUse only these lancet drums when you obtain bloodwith the Accu‐Chek FastClix M1 lancing device.Accu-Chek FastClix M1 AST capUse only this AST cap when you obtain blood fromalternate sites with the Accu-Chek FastClix M1lancing device.If you want to order the Accu-Chek FastClix M1 ASTcap, please contact your Accu-Chek Customer Care(see section “Accu-Chek Customer Care”).134
18 Accu-Chek Customer Care18.1 Advice and troubleshootingIf you need advice on how to operate the Accu‐Chek<strong>Mobile</strong> meter or the Accu‐Chek FastClix lancing device,if you seem to be obtaining implausible test results,or if you suspect that the meter, test cassette, lancingdevice or lancet drum might be defective, please contactyour local Roche Diagnostics Accu-Chek CustomerCare. Do not attempt to repair or modify the meter orlancing device yourself. Our staff will help solve anyproblems you might be experiencing with the meter,test cassette, lancing device or lancet drum fromRoche Diagnostics. The address of your Accu-ChekCustomer Care is listed in the next section.Accu-Chek Customer Care18.2 AddressesRoche Diagnostics201 Armand-Frappier Blvd.Laval, Quebec H7V 4A2, CanadaAccu-Chek Customer Care: 1-800-363-7949www.accu-chek.ca18135
1919 IndexAAccu-Chek Customer Care 135acoustic mode 54, 87After meal (flag) 45apple (symbol) 45, 69applicator (Symbol) 45, 97applying blood 32, 37AST cap 25, 38asterisk (Symbol) 45available tests. See testsaverages 67Bbatterychanging 113disposing 114, 130life expectancy 113, 120, 131symbol 44type 113, 131battery compartment cover 7, 114beep tones 54result announcement (acoustic mode) 90turning on/off 54Before meal (flag) 45, 46brightness, display 64buttondown 15, 65power/enter 7, 9, 12up 15, 103Cchecking, meter 94cleaningAST cap 112lancing device 112meter 107concentration range 97, 98connecting, to computer 72control solution 94control test 94flag 46, 96performing 95Ddata transfer 70default 71, 72data transfer 71reports 71display 7, 132setting the brightness 64136
19symbols shown in the ~ 44display check 23, 101disposal ofbatteries 114, 130meter 130meter, test cassette 130down button 9Eelectromagneticcompatibility 133enter button 7, 9error messages 126in acoustic mode 93FflagAfter meal 45Before meal 45control 45, 97other 45flagging, result 45HHI (display) 44, 49humidity 117Iintended use 1Llancet drum 8, 26disposing 30inserting 26replacing 30lancet, loading 29lancing devicecleaning 112collecting blood with ~ 36docking 31overview 8undocking 31light conditions 118list report 83LO (display) 44, 49Mmaking settings 51measurement conditions 116measuring range 44, 131measuring time 38, 131memory 65, 132memory, results 65menudescription of menu overview 10opening 13137
19meterchecking 94cleaning 107disposing 130overview 6storing. See storage conditionsturning off. See turning offturning on. See turning onmicro B connector 72Nnumber of lancets 8, 29number of tests 12, 103Oone-time reminder 48overviewlancing device 8meter 6setting options 51PPC analysis 70penetration depthflag 8, 28setting 28performance evaluation 133Performing a blood glucose test 32power button 7, 9problems 124Rreminder 48, 122changing 57deleting 57setting 55turning on/off 57reportsdisplaying 74printing 78resultaverages 67flagging 45retrieving from memory 66transferring 73retrieving results from memory 66Ssetting the date 59setting the time 58setting the time format 60setting tones 54slide button 8, 36sources of errorcontrol test 99test 50sources of interference 118Standard Day 81138
19Standard Week 82storage conditions 116symbols 140during testing 44system components 134Ttarget range 61changing 63setting 62symbols 44, 61turning on/off 63technical data 131temperature 116, 132testperforming 32sources of error 50test area 7test cassette 7disposing 106, 130inserting first ~ 18replacing 103use by date 21validity 102, 120test principle 131tests (test areas)display of available ~ 24, 103thermometer (symbol) 44, 123tip cover 7, 33tools, menu 101transferring, results 73turning off, meter 9, 12turning on, meter 12connecting to PC 72retrieving test results from memory 66starting a test 33type plate 7, 17Uunit of measurement (mmol/L) 5, 17up button 9USB A connector 70USB port 7, 70, 72use by datecontrol solution 99use by period, test cassette 21Vvalidity, test cassette 21, 120displaying 102139
20Explanation of symbols20 Explanation of symbolsOn the packaging, on the type plate of the meter and on the lancing device, you may encounter the symbols shownbelow. They have the following meanings:B Consult instructions for useCaution (refer to accompanying documents)!Refer to safety-related notes inCw the instructions for use accompanyingthis instrument.Temperature limitation (Store at)2 cE Use byD Use only onceCS Sterilised using irradiationMManufacturerRcCatalogue numberLBatch codeI In vitro diagnostic medical device140Blood glucose meter: This product fulfilsthe requirements of the European Directive98/79/EC on in vitro diagnosticmedical devices.Blood glucose meter: This product fulfilsthe requirements of the European Directive1999/5/EC on radio and telecommunicationsterminal equipment (R&TTE).Lancing device and lancet drum:These products fulfil the requirementsof the European Directive 93/42/EEC onmedical devices.AST cap:This product fulfils the requirements ofthe European Directive 93/42/EEC onmedical devices.
Explanation of symbols20FThis device complies with Part 15 of theFCC Rules and with RSS-210 of IndustryCanada.The compliance mark indicates that theproduct complies with the applicablestandard and establishes a traceable linkN20091 between the equipment and the manufacturer,importer or their agent responsiblefor compliance and for placing it onthe Australian and New Zealand market.The explanation of any other symbols can be found inthe instructions for use/inserts accompanying componentswithin the packaging.141
21Appendix21 AppendixLow blood glucose index or High bloodglucose indexThese figures represent the frequency and the resultingrisk of blood glucose values being too low or toohigh. Figures should be as low as possible.The following table provides an overview to assess therisk of blood glucose values being too low or too high:RiskLow blood High bloodglucose index glucose indexminimal ≤1.1 ≤5.0low 1.1 – 2.5 5.0 – 10.0medium 2.5 – 5.0 10.0 – 15.0high >5.0 >15.0WThe index values for Low BG or High BG in the tableare not blood glucose values. Ask your healthcareprofessional, if you want to change your therapybased on the index values.Literary referencesLow BG index / high BG indexBoris P. Kovatchev, Martin Straume, Daniel J. Cox,Leon S. Farhy (2001)'Risk analysis of blood glucose data: a quantitativeapproach to optimizing the control of insulin dependentdiabetes.'Journal of Theoretical Medicine, 3: pp 1-10.Boris P. Kovatchev, Daniel J. Cox, Anand Kumar,Linda Gonder-Frederick, William L. Clarke (2003)'Algorithmic Evaluation of Metabolic Control and Riskof Severe Hypoglycemia in Type 1 and Type 2 DiabetesUsing Self-Monitoring Blood Glucose Data'Diabetes Technology & Therapeutics, 5(5): pp 817-828Boris P. Kovatchev (2006)'Is Glycemic Variability Important to Assessing AntidiabetesTherapies?'Current Diabetes Reports, 6: pp 350-356142
ACCU‐CHEK ® 360° reports LicenseACCU‐CHEK ® 360° reports LicenseBy using this software, you, or the entity on whosebehalf you are using the software (here in after“Licensee”) agree to be legally bound to the followingprovisions.1 License1.1 Roche Diagnostics GmbH, Sandhofer Strasse 116,68305 Mannheim, Germany (“Roche Diagnostics”)grants to Licensee, a non-exclusive, perpetualand worldwide license to use the ACCU‐CHEK360° reports software, here in after referred toas SOFTWARE, upon the terms and conditionscontained in this Software License Agreement.1.2 Licensee may use the SOFTWARE on all computersystems owned, leased or otherwise controlled byLicensee. Licensee may use the SOFTWARE only tomanage the ACCU‐CHEK 360° reports.1.3 Due to Roche Diagnostics being obliged to commitmarket observations, Licensee shall notify RocheDiagnostics of name and address of the receivingparty in case of any transfer of the SOFTWAREproduct and shall oblige the receiving party toenter into an equivalent agreement with RocheDiagnostics.Appendix1.4 Except as expressly permitted by Swiss law,Licensee may not: Copy the SOFTWARE in wholeor in part except as expressly provided in thisSoftware License Agreement or for purposes ofbackup; rent, license or sublicense the SOFTWARE;create derivative works based on SOFTWARE;modify, adapt, translate, reverse engineer,decompile or disassemble the SOFTWARE, separatethe SOFTWARE into its component parts, or in anyway reverse engineer or attempt to reconstructor discover any source code or algorithms of theSOFTWARE by any means whatsoever unless anduntil Licensee has first requested the requiredinformation from Roche Diagnostics in writing,and Roche Diagnostics, at its sole discretion, hasnot complied with Licensee’s request within acommercially reasonable period of time; removeany product identification, trademark, copyright,confidentiality, proprietary or other noticescontained on or within the SOFTWARE.1.5 If Licensee is an entity, then License shall causeLicensee’s employees, if any, to comply with theterms and conditions of the Software LicenseAgreement.1.6 Licensee shall cooperate with Roche Diagnostics,and shall render all reasonable assistancerequested by Roche Diagnostics, to assist Roche14321
21AppendixDiagnostics in preventing and identifying any useof, or access to, the SOFTWARE in violation of theSoftware License Agreement.1.7 Licensee acknowledges and agrees to the termsand conditions of any open source software licensecontained in or referred to in the software includingrelevant copyright notices.2 Proprietary RightsAll right, title and interest including, but not limitedto, copyright, trademarks and other intellectualproperty rights in and to the SOFTWARE are ownedby Roche Diagnostics and its licensors, if any. Suchrights are protected by the Urheberrechtsgesetz(URG), Markenschutzgesetz (MSchG) and otherlaws. Roche Diagnostics retains all rights notexpressly granted herein.3 Warranty3.1 Roche Diagnostics warrants that the SOFTWARElicensed under this Software License Agreementwill substantially provide the key functionsdescribed in its product specification in effect onthe date of conclusion of this Software LicenseAgreement and that the SOFTWARE will be free ofdefects for a period of one year from shipment.3.2 During the warranty period Roche Diagnosticsshall, at Roche Diagnostics’ sole discretion correct144ACCU‐CHEK ® 360° reports Licenseerrors detected in licensed software or provide areasonable workaround SOFTWARE, after receivingnotification from Licensee of such errors. Errorcorrections will if technically possible be providedby way of a patch or update to the SOFTWARE.The warranties set out herein are exclusive ofand in lieu of all other conditions and warranties,either express or implied, statutory or otherwise.Notwithstanding this, Roche Diagnostics may fromtime to time provide proactively updates (includingservice releases).3.3 This warranty is void if failure is the result ofaccident, abuse, misuse, alteration, use withunauthorized software or hardware or not havinginstalled latest updates of the SOFTWARE providedby Roche Diagnostics according to Sec. 3.2.4 Limitation of Liability4.1 Irrespective of the cause of action, RocheDiagnostics liability shall be limited to damagescaused by Roche Diagnostics, its employees orsubcontractors due to wilful misconduct, grossnegligence or, in case of a violation of an essentialcontractual duty, simple negligence.4.2 If Roche Diagnostics is held liable for simplenegligence under Section 4.1, Roche Diagnostics’liability shall be limited to those typical damages
ACCU‐CHEK ® 360° reports Licensethat were reasonably foreseeable at the time theAgreement was concluded or, at the latest at thetime of the violation of the relevant contractual duty.4.3 Roche Diagnostics’ liability for any damages causedby the breach of a specific warranty (Garantie) orfor damages to be compensated under the ProductLiability Act and for damages due to loss of life,injury or prejudice to health remains unaffected.4.4 The Licensee is obliged to carry out regular backups.In case of any loss of data Roche Diagnostics is onlyliable for the costs to restore such backups.5 Miscellaneous5.1 Changes to this Software License Agreementrequire written form to be effective. This alsoapplies for any amendment or rescinding of thiswritten form clause.5.2 This Software License Agreement is subject toSwiss law, to the exclusion of the UN Conventionon the International Sale of Goods as well as to theexclusion of the regulations of international civil lawthat are alterable subject to mutual agreement.5.3 For disputes arising from or in connection withthis contract, the courts of Basel, Switzerland havejurisdiction internationally and locally.Appendix5.4 Should individual clauses of the Software LicenseAgreement be ineffective, the effectiveness of thecontract remains unaffected otherwise. Ineffectiveclauses shall be replaced by the legal regulation.21145
C06597025001(01) – 2012-01 M_Version01_Rev05©2012 Roche DiagnosticsMACCU‐CHEK, ACCU‐CHEK <strong>Mobile</strong>, Fastclix andACCU-CHEK 360° are trademarks of Roche.Roche Diagnostics GmbHSandhofer Strasse 11668305 Mannheim, Germanywww.accu‐chek.com