Verifone VX670 Manual
Verifone VX670 Manual
Verifone VX670 Manual

Create successful ePaper yourself
Turn your PDF publications into a flip-book with our unique Google optimized e-Paper software.
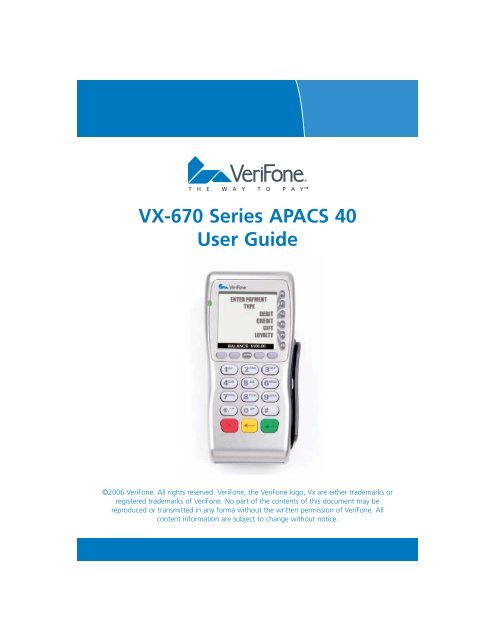
VX-670 Series APACS 40<br />
User Guide<br />
©2006 VeriFone. All rights reserved. VeriFone, the VeriFone logo, Vx are either trademarks or<br />
registered trademarks of VeriFone. No part of the contents of this document may be<br />
reproduced or transmitted in any forma without the written permission of VeriFone. All<br />
content information are subject to change without notice.
The information contained in this document is subject to change without notice. Although<br />
VeriFone has attempted to ensure the accuracy of the contents of this document, this<br />
document may include errors or omissions.<br />
VeriFone and the VeriFone logo are registered trademarks of VeriFone. Other brand names or<br />
trademarks associated with VeriFone’s products and services are trademarks of VeriFone Inc.<br />
All other brand names and trademarks appearing in this manual are the property of their<br />
respective holders.<br />
Table of Contents<br />
1 Introduction – Vx-670 terminals..................................................................................4<br />
Terminal Features.....................................................................................................4<br />
2 Using Your Terminal .....................................................................................................5<br />
Transaction Types.....................................................................................................5<br />
Card Acceptance .....................................................................................................5<br />
3 Training Mode...............................................................................................................6<br />
Chip and PIN Training Transaction............................................................................7<br />
Financial Transactions ..........................................................................................................9<br />
Sale – Swiped..........................................................................................................9<br />
Referral..................................................................................................................10<br />
Keyed (CNP) Transactions ......................................................................................12<br />
CNP Acceptance Recommendations ......................................................................14<br />
Sale with Cashback ...............................................................................................15<br />
Refund Transaction................................................................................................17<br />
Chip and PIN Transactions .....................................................................................18<br />
Sale .......................................................................................................................19<br />
Refund ..................................................................................................................20<br />
Incorrect PIN..........................................................................................................21<br />
Sales and Gratuity (Tips) ........................................................................................22<br />
X and Z Reports.....................................................................................................24<br />
X and Z Reports Explained.....................................................................................26<br />
Reconciliation Report.............................................................................................27<br />
Reconciliation Report Explained .............................................................................29<br />
General Troubleshooting Guidelines.......................................................................30<br />
Specific Troubleshooting Guidelines.......................................................................31<br />
Diagnostic Codes...................................................................................................32<br />
VeriFone Apacs 40 User Guide 3
1. Introduction<br />
VX-670 Terminal<br />
This manual covers the Vx-670 mobile and portable terminal operating via Gprs or Wi Fi<br />
connectivity. Although the terminal can communicate in a variety of formats the software that<br />
it runs is designed in the same way, therefore all user interfaces will look the same<br />
Terminal Features<br />
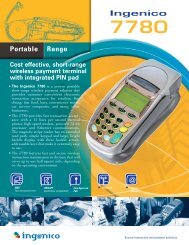
The illustration below highlights the features of the terminal. The descriptions are detailed<br />
below to help you navigate your way around and there will be references to various buttons<br />
on this terminal throughout the manual. Please note that the chip card insertion slot can be<br />
found at the front of the terminal and the multi-directional magnetic card reader is located<br />
on the right hand side of the device.<br />
4 VeriFone Apacs 40 User Guide
2. Using Your Terminal<br />
At this point you will need to refer to the Quick Installation Guide which will have been<br />
included with this manual and the terminal. This document will guide you through setting up<br />
the terminal. Once this has been successfully completed you will be ready to start using the<br />
machine.<br />
Transaction Types<br />
The Vx terminals support Credit and Debit transactions. Your terminal software will be<br />
configured to support the following transaction types;<br />
1. Sale – Chip, PIN and Swiped<br />
2. Refund – Chip, PIN and Swiped<br />
3. Customer Not Present (CNP)<br />
4. Reversal<br />
5. Referrals<br />
6. Sale + Cash (optional)<br />
7. Restaurant/TipPINg (optional)<br />
8. Hotel Pre-Authorisation and Completion (optional)<br />
9. E Top-Up (optional)<br />
All transactions that are stated as optional will be configured upon your request, this can be<br />
done at the sign up phase or when you have received the terminal. Please contact your<br />
Merchant Services Helpline to request this.<br />
Card Acceptance<br />
Your terminal will be configured with a default set of cards that it can process.<br />
These are:-<br />
Visa, Mastercard, Maestro/Switch, Visa Delta, Visa Electron, Solo<br />
American Express and Diners Club Card can also be accepted on this terminal, however<br />
these are not configured unless requested.<br />
VeriFone Apacs 40 User Guide 5
3. Training Mode<br />
Before using the terminal for live transactions we advise that you take 5 minutes to familiarise<br />
yourself by processing some transactions in Training Mode. Please follow the instructions<br />
below to switch the terminal in/out of Training Mode;<br />
2/2/6 Sale<br />
Refund<br />
Reports<br />
Services<br />
Reversal<br />
Duplicate<br />
Password:<br />
Supervisor<br />
Configuration<br />
Supervisor<br />
Training<br />
About<br />
Lock Kbd<br />
Date/Time<br />
Reset Mac<br />
Training On<br />
Off<br />
From the idle screen (opposite) press the left hand purple<br />
Programmable Function key. There is a down arrow on the screen<br />
above.<br />
Select the Supervisor Mode by pressing F0<br />
Now key in the password 999999 and press Enter<br />
Please select F1 for Training.<br />
Please press F0 and the terminal will enter training mode. When you<br />
need to exit Training Mode repeat this process and select F1. Now return<br />
the terminal to the Sales screen by pressing the Cancel button.<br />
Now that Training Mode is switched on it is possible to conduct Sale and Refund transactions.<br />
The main screen will display Demo down the left hand side and all receipts will have<br />
TRAINING printed on them. Please complete the transaction described over page, you can use<br />
any card for practicing transactions in this mode.<br />
6 VeriFone Apacs 40 User Guide
Chip & PIN Training Transaction<br />
/2/2/6 Sale<br />
Refund<br />
Reports<br />
Services<br />
Reversal<br />
Duplicate<br />
Visa Training<br />
Acct #<br />
45442065000<br />
Amount<br />
£0.00<br />
Visa Training<br />
Amount<br />
£8.00<br />
Enter Pin<br />
Visa Training<br />
Print Customer<br />
Copy?<br />
Yes<br />
No<br />
To start press F0 to select Sale<br />
Please insert the chip card, chip end first facing up.<br />
Now key in the value of the transaction in pence. E.g. £8.00 = 800.<br />
Once correct, press the green ENTER key to continue.<br />
If a mistake is made press the yellow back space key to delete<br />
the amount and try again.<br />
The terminal now requires a pin to be entered. Any 4 digit PIN number<br />
can be entered. Now press Enter.<br />
Select F0 to ensure the customer’s copy is printed and then remove the<br />
card as requested. The terminal has now returned to the main screen<br />
and the transaction is complete.<br />
VeriFone Apacs 40 User Guide 7
Receipt<br />
C’s Shop<br />
York Place<br />
Baker Street<br />
London<br />
10:44:4822/11/05 TXN 1234<br />
MID:540436500056789 TID:12345678<br />
TRAINING<br />
MAESTRO UK<br />
1234 5687 9654 2558 ICC<br />
Start: 12/04 Expiry: 12/08<br />
PAN Seq. No. 02<br />
AID: 1234567896542<br />
SALE £8.00<br />
PIN Verified<br />
Please debit my account with total shown<br />
APPROVED<br />
AUTH CODE: 8888<br />
1234567890ABCDEF 40<br />
Diag: 41<br />
xxxx<br />
V1.0.0.2<br />
Session: 4<br />
Above is an example of a receipt, in this instance a Training Transaction has just been<br />
completed. Throughout this manual there will be examples of various receipts representing<br />
the different types of transactions possible.<br />
The descriptions attached to the right are displayed to help familiarise yourself with all the<br />
important information contained on a Sales Voucher and should be referred to whenever<br />
required.<br />
8 VeriFone Apacs 40 User Guide<br />
Company Name<br />
Address<br />
Address<br />
Address<br />
Time, Date and Transaction No.<br />
Merchant Id and Terminal Id.<br />
Description to Identify Receipt.<br />
Card Scheme.<br />
Card Number.<br />
Start and Expiry date of card.<br />
Transaction Type and amount.<br />
How the card was processed.<br />
Outcome of transaction.<br />
Transaction response<br />
Diagnostic Code
4. Financial Transactions<br />
This section describes all the different types of transactions it is possible to process.<br />
Sale Transaction – Swiped<br />
2/2/6 Sale<br />
Refund<br />
Reports<br />
Services<br />
Reversal<br />
Duplicate<br />
Sale<br />
Insert Swipe<br />
Or Enter<br />
Account #<br />
Maestro<br />
Enter CSC<br />
Code<br />
Maestro Sale<br />
Acct #<br />
1234567890<br />
Amount £0.00<br />
Acct #<br />
1234567890<br />
Amount £0.00<br />
Connecting to<br />
Primary<br />
Sale Yes<br />
Signature No<br />
Valid<br />
Auth:1234<br />
Press F0 to select Sale<br />
Swipe the card with the magnetic stripe facing inwards.<br />
The terminal is now requesting for the CSC (Card Security Code) to be<br />
entered. This is a 3 digit number located on the back of the card on the<br />
right hand side of the signature strip.<br />
Key in the value of the transaction and press the ENTER key .<br />
If a mistake is made press the yellow back space key to delete the<br />
amount and try again.<br />
The terminal will now communicate with the Bank’s Host system and<br />
obtain an Authorisation Code. Once complete a receipt will be printed.<br />
Tear off the receipt and hand to the customer to sign. Compare the<br />
signature on the back of the card with the signature on the receipt. If<br />
you are satisfied it is correct, press the F0 key and the transaction is<br />
complete. If you are not satisfied, press F1 and the transaction will be<br />
void.<br />
VeriFone Apacs 40 User Guide 9
Referred (Referral) Transactions<br />
A Referred Transaction is where the terminal has been unable to obtain Authorisation from<br />
the Host (bank) and is now requesting for an Authorisation Code to be obtained manually<br />
over the phone. This process applies to Swiped and Chip with Signature transactions.<br />
2/2/6 Sale<br />
Refund<br />
Reports<br />
Services<br />
Reversal<br />
Duplicate<br />
Sale<br />
Insert Swipe<br />
Or Enter<br />
Account #<br />
Maestro<br />
Enter CSC<br />
Code<br />
Maestro Sale<br />
Acct #<br />
1234567890<br />
Amount £0.00<br />
Meastro<br />
Please wait<br />
Call 0148...<br />
Maestro<br />
1234567890<br />
Amt. £10<br />
Authorised<br />
Declined<br />
Press F0 to select Sale<br />
Swipe the card with the magnetic stripe facing inwards.<br />
The terminal is now requesting for the CSC (Card Security Code) to be<br />
entered. This is a 3 digit number located on the back of the card on the<br />
right hand side of the signature strip.<br />
Key in the value of the transaction and press the ENTER key .<br />
If a mistake is made press the yellow back space key to delete the<br />
amount and try again.<br />
The terminal will now communicate with the Host system and then<br />
request that you call the Card Clearing Centre to obtain a manual<br />
authorisation.<br />
The operator you speak to will require your merchant number.<br />
Select F2 if you have successfully obtained the Authorisation Code. If<br />
no Authorisation was possible select F3 and the transaction will be<br />
Declined.<br />
10 VeriFone Apacs 40 User Guide
Maestro<br />
1234567890<br />
Amt. £10<br />
Authorised<br />
Declined<br />
Key in the Authorisation Code and press ENTER. The transaction is now<br />
stored in the terminal’s memory. Select F0 to print the customer’s copy.<br />
VeriFone Apacs 40 User Guide 11
Keyed Transactions / Customer Not Present (CNP) Transactions<br />
Press F0 to select SALE.<br />
2/2/6 Sale<br />
Refund<br />
Reports<br />
Services<br />
Reversal<br />
Duplicate<br />
Sale<br />
Insert Swipe<br />
Or Enter<br />
Account #<br />
Maestro Sale<br />
Acct #<br />
1234567890<br />
Amount £0.00<br />
Maetsro<br />
Customer<br />
Present<br />
Maestro<br />
Enter CSC<br />
Code<br />
Key in the card number using the key pad on the terminal and press<br />
ENTER. The terminal will now request for the expiration date of the<br />
card. Please key this and press ENTER.<br />
Key in the amount and press ENTER.<br />
The terminal now asks if the customer is present. Select F1 for<br />
Customer Not Present and F0 for Customer Present. The following<br />
procedure is now dependent on what option you have selected. If it<br />
was F0 Customer Present some of the following steps will be omitted.<br />
The CSC numbers now need to be entered. This is a three digit number<br />
located on the back of the card on the right hand side of the signature<br />
strip. When complete press ENTER.<br />
12 VeriFone Apacs 40 User Guide
Maestro<br />
Address Nos;<br />
Maestro<br />
Postcode Nos;<br />
You are now being requested to enter the numerical part of the<br />
customer’s street address. E.g. 23 Baker Street you would key in 23 and<br />
press ENTER.<br />
The Post Code numerics of the customer’s address are now required.<br />
E.g. for a postcode of GU22 4NN you would key 224 and press ENTER.<br />
The screen below displays the responses from the Host (bank). There are three possible<br />
responses: Matched, Not Matched or Not Checked. The host may still authorise the<br />
transaction even if one or more of the responses are negative. The decision to proceed with<br />
the transaction is up to you the Merchant. Please establish a policy for such events. See the<br />
Customer Not Present – AVS and CVV2 Acceptance Recommendations that follow.<br />
VeriFone also recommend that the AVS and CVV2 guidelines distributed by your Acquirer’s<br />
Merchant Services Department is read and fully understood. CNP transactions due to their<br />
nature are higher in risk than Chip and PIN transactions.<br />
Maestro<br />
CSC Match<br />
Address Match<br />
Postcode Match<br />
Press any key to continue. The terminal will prompt if a customer’s copy<br />
of the receipt is required. F0 for Yes, F1 for No. The transaction is now<br />
complete.<br />
VeriFone Apacs 40 User Guide 13
Customer Not Present Acceptance Recommendations<br />
Displayed Comments Actions<br />
CSC - matched All match As long as you have been given an authorisation code, and you are<br />
Postcode - matched satisfied that the transaction is genuine, unless there are other<br />
Address - matched suspicious circumstances that concern you, you are likely to want to go<br />
ahead with the transaction. However as with all CNP transactions,<br />
payment is not guaranteed and you bear the risk if the transaction is<br />
disputed at a later date.<br />
CSC – not checked Data not checked This could be because the card-issuing bank doesn’t support either of<br />
Postcode - not checked the services, or their system is down. If this happens then you will have<br />
Address - not checked to make a decision based on information you have, as you do now. We<br />
would recommend you make further checks before going ahead with<br />
the sale.<br />
CSC – not checked Address match only There is a possibility that this is a fraudulent transaction. However it<br />
Postcode - matched could be that the cardholder has given you an incorrect CSC number by<br />
Address - matched mistake. It could also be that a member of staff has noted down the<br />
number incorrectly. Therefore, before taking any further action, you may<br />
want to verify the CSC again with the cardholder.<br />
CSC – not checked No data matches There is a possibility that this is a fraudulent transaction. Further<br />
Postcode - matched enquiries with the cardholder should be made. It could be that the<br />
Address - not checked member of staff has noted down the details incorrectly.<br />
CSC – not checked No data matches There is a possibility that this is a fraudulent transaction. Further<br />
Postcode - not matched enquiries with the cardholder should be made. It could be that the<br />
Address - matched member of staff has noted down the details incorrectly.<br />
CSC – not checked No data matches There is a possibility that this is a fraudulent transaction. Further<br />
Postcode - not matched enquiries with the cardholder should be made. It could be that the<br />
Address - not matched member of staff has noted down the details incorrectly.<br />
CSC – matched Security code The address given must match the address recorded by the card-issuing<br />
Postcode - not checked match only bank, so in this case there is a possibility that the transaction is<br />
Address - not checked fraudulent. However, it could be possible that the cardholder has<br />
changed address without notifying the card issuing bank or the card<br />
issuer does not support AVS. Another possibility is that the member of<br />
staff may have noted the details incorrectly. Therefore you would<br />
probably want to verify the address again with the cardholder.<br />
14 VeriFone Apacs 40 User Guide
Sale with Cashback<br />
You will need to be authorised to accept the cashback facility on your terminal. It is not a<br />
standard configuration on the terminal. Please remember Cashback is only available on Debit<br />
cards and it must be a Customer Present transaction.<br />
2/2/6 Sale<br />
Refund<br />
Reports<br />
Services<br />
Reversal<br />
Duplicate<br />
Maestro Sale<br />
Acct# 123456<br />
Amount £10<br />
Cash £5<br />
Acct# 123456<br />
Amount £15<br />
Connecting<br />
To access the Cashback facility press the left hand purple function<br />
button until the option appears. If Cashback has been requested from<br />
the outset the Cashback button could be on the first screen.<br />
The transaction flow does not alter from a SALE. The card is processed<br />
and the amount is requested, after this point the terminal will request<br />
for the Cash amount to be entered. Enter the amount that the<br />
customer has requested as Cashback and press ENTER.<br />
Authorisation will be obtained and the transaction is complete.<br />
Please see the Sale + Cashback receipt that follows. This shows how<br />
the Sale amount then the Cash amount is displayed with a cumulative<br />
amount for the total.<br />
VeriFone Apacs 40 User Guide 15
Sale with Cashback Receipt<br />
Merchant Name<br />
Address 1<br />
Address 2<br />
Address 3<br />
VAT number: 123456789<br />
VAT Rate: 17.50&<br />
HH:MM:SS<br />
DD/MM/YY<br />
MID: 123456789<br />
12345678<br />
MERCHANT COPY<br />
MASTERCARD<br />
1234 5687 9654 2558<br />
ICC<br />
Start: MM/YY<br />
Expiry: MM/YY<br />
PAN Seq. No. 02<br />
AID: 1234567896542<br />
SALE £22.50<br />
CASH BACK £10.00<br />
TOTAL £32.50<br />
PIN VERIFIED<br />
Please debit my account with total shown<br />
APPROVED<br />
AUTH CODE: ABC120<br />
1234567890ABCDEF 40<br />
16 VeriFone Apacs 40 User Guide
Refund Transaction Swiped<br />
2/2/6 Sale<br />
Refund<br />
Reports<br />
Services<br />
Reversal<br />
Duplicate<br />
Refund<br />
Insert Swipe<br />
Or Enter<br />
Account#<br />
Maestro<br />
Enter CSC<br />
Code<br />
Maestro Sale<br />
Acct #<br />
1234567890<br />
Amount £0.00<br />
Acct #<br />
1234567890<br />
Amount £0.00<br />
Connecting to<br />
Primary<br />
Sale Yes<br />
Signature No<br />
Valid<br />
Auth:1234<br />
Press F1 to select Refund<br />
Swipe the card with the magnetic card facing inwards.<br />
The terminal is now requesting for the CSC (Card security Code) to be<br />
entered. This is a 3 digit number located on the back of the card on the<br />
right hand side of the signature strip.<br />
Now key in the value of the transaction and press the ENTER key<br />
. If a mistake is made press the yellow back space key to<br />
delete the amount and try again.<br />
The terminal will now communicate with the Bank’s Host system and<br />
obtain an Authorisation code. Once complete a receipt will be printed.<br />
Tear off the receipt and hand to the customer to sign. Compare the<br />
signature on the back of the card with the signature on the receipt. If<br />
you are satisfied it is correct press the F0 key and the transaction is<br />
complete. If you are not satisfied press F1 and the transaction will be<br />
void.<br />
Customer Not Present Refund transactions are also possible. Please refer to the Customer Not<br />
Present section on Page 12. You need to initiate the transaction by selecting Refund – F1 – after this<br />
step the transaction flow does not alter from what is already stated on Pages 12 and 13.<br />
VeriFone Apacs 40 User Guide 17
Chip and PIN Transactions<br />
Transaction processing in the UK is predominantly Chip and PIN. Using this method of<br />
payment it is possible to utilise technology to provide major security enhancements helPINg in<br />
the fight against fraud. You the merchant should always endeavour to process a transaction<br />
via Chip and PIN whenever and wherever possible.<br />
Due to the nature of the processing the Card has a much greater say in the processing and<br />
ultimately authorisation of the transaction, please be aware that it is not just the Host (bank)<br />
as before with Swiped and Keyed transactions that is controlling the process. The Chip on the<br />
customer’s card holds vital information and is an integral part of all Chip and PIN transactions.<br />
Chip and Pin Sale<br />
2/2/6 Sale<br />
Refund<br />
Reports<br />
Services<br />
Reversal<br />
Duplicate<br />
Sale<br />
Insert Swipe<br />
Or Enter<br />
Account#<br />
Maestro Sale<br />
Acct #<br />
1234567890<br />
Amount £0.00<br />
Maestro<br />
Amount:<br />
£10<br />
Enter Pin<br />
Acct #<br />
1234567890<br />
Amount £0.00<br />
Connecting to<br />
Primary<br />
Press F0 to select SALE.<br />
For all chip transactions the card is inserted into the device chip end<br />
first and facing upwards.<br />
Now key in the value of the transaction and press the ENTER key<br />
. If a mistake is made press the yellow back space key to<br />
delete the amount and try again.<br />
Request the customer to key in their PIN and press ENTER. The terminal<br />
should now be returned to the merchant.<br />
The terminal will now communicate with the Bank’s Host system and<br />
obtain an Authorisation Code. Once complete a receipt will be printed.<br />
18 VeriFone Apacs 40 User Guide
Sale Yes<br />
Signature No<br />
Valid<br />
Auth:1234<br />
ICC PIN Verified Sale Receipt<br />
Tear off the receipt and select F0 to print the customer’s copy. The card<br />
can now be removed from the terminal. The transaction is now<br />
complete.<br />
Merchant Name<br />
Address 1<br />
Address 2<br />
Address 3<br />
VAT number: 123456789<br />
VAT Rate: 17.50&<br />
HH:MM:SSDD/MM/YY<br />
MID: 123456789 12345678<br />
MERCHANT COPY<br />
MASTERCARD<br />
1234 5687 9654 2558 ICC<br />
Start: MM/YYExpiry: MM/YY<br />
PAN Seq. No. 02<br />
AID: 1234567896542<br />
SALE £10.00<br />
PIN Verified<br />
Please debit my account with total shown<br />
APPROVED<br />
AUTH CODE: ABC120<br />
1234567890ABCDEF 40<br />
Diag: 41<br />
xx<br />
V1.0.0.2<br />
Session: 4<br />
VeriFone Apacs 40 User Guide 19
Refund<br />
2/2/6 Sale<br />
Refund<br />
Reports<br />
Services<br />
Reversal<br />
Duplicate<br />
Refund<br />
Insert Swipe<br />
Or Enter<br />
Account#<br />
Maestro<br />
Refund<br />
Acct #<br />
1234567890<br />
Amount £0.00<br />
Acct #<br />
1234567890<br />
Amount £0.00<br />
Connecting to<br />
Primary<br />
Refund Yes<br />
Signature No<br />
Valid<br />
Auth: 1234<br />
Press F1 to select Refund.<br />
For all chip transactions the card is inserted into the device chip end<br />
first and facing upwards<br />
.<br />
Now key in the value of the transaction and press the ENTER key<br />
. If a mistake is made press the yellow back space key to<br />
delete the amount and try again.<br />
The terminal will now communicate with the Bank’s Host system and<br />
obtain an Authorisation Code. Once complete a receipt will be printed.<br />
Tear off the receipt and hand to the customer to sign. Compare the<br />
signature on the back of the card with the signature on the receipt. If<br />
you are satisfied it is correct, press the F0 key and the transaction is<br />
complete. If you are not satisfied, press F1 and the transaction will be<br />
cancelled.<br />
20 VeriFone Apacs 40 User Guide
Incorrect PIN is Entered<br />
2/2/6 Sale<br />
Refund<br />
Reports<br />
Services<br />
Reversal<br />
Duplicate<br />
Sale<br />
Insert Swipe<br />
Or Enter<br />
Account#<br />
Maestro<br />
Sale<br />
Acct #<br />
1234567890<br />
Amount £0.00<br />
Maestro<br />
Amount:<br />
£10<br />
Enter Pin<br />
Wrong Pin<br />
Maestro<br />
Amount:<br />
£10<br />
Enter Pin<br />
Wrong Pin<br />
Press F0 to select Sale or F1 to select Refund.<br />
For all chip transactions the card is inserted into the device chip end<br />
first and facing upwards.<br />
Now key in the value of the transaction and press the ENTER key<br />
. If a mistake is made press the yellow back space key to<br />
delete the amount and try again.<br />
Request the customer to enter their PIN. If the incorrect PIN is entered<br />
the terminal display will flash up Wrong PIN in the bottom left hand<br />
corner and request the PIN to be entered again.<br />
If the customer keys in the wrong PIN twice the terminal will allow one<br />
last attempt and the screen will read Last PIN Try. Entering an incorrect<br />
PIN here will lock the card and the customer has to contact their card<br />
issuer. Enter a correct PIN and the transaction will continue as per the<br />
instructions for Chip and PIN Sales.<br />
The terminal will not allow a PIN Encrypted card to be processed without a PIN being entered.<br />
If the customer cannot remember their PIN request another card on which they can or request<br />
an alternative means of payment. The terminal will not allow PIN cards to be swiped.<br />
VeriFone Apacs 40 User Guide 21
Sale and Gratuity (Tips) – Restaurant Mode<br />
The terminal can be configured upon request to accommodate a ‘Restaurant Mode’. This<br />
enables the TipPINg facility on the terminal.<br />
2/2/6 Sale<br />
Refund<br />
Reports<br />
Services<br />
Reversal<br />
Duplicate<br />
Sale<br />
Insert Swipe<br />
Or Enter<br />
Account#<br />
Maestro<br />
Sale<br />
Acct #<br />
1234567890<br />
Amount £0.00<br />
Pass To<br />
Customer<br />
£10<br />
Sale<br />
Do you want to<br />
add a Gratuity?<br />
Please Select<br />
Gratuity<br />
Amounbt 5%<br />
10%<br />
15%<br />
Other<br />
Press F0 to select SALE.<br />
For all chip transactions the card is inserted into the device chip end<br />
first and facing upwards.<br />
Now key in the value of the transaction and press the ENTER key<br />
. If a mistake is made press the yellow back space key to<br />
delete the amount and try again.<br />
The terminal can now be passed to the customer. Request that any key<br />
should be pressed when they are ready to continue.<br />
The customer is asked if they wish to add a Gratuity. Selecting F0 – Yes<br />
– will take them to the next step, F1 – No – will take them to the point<br />
of PIN entry.<br />
4 Options are now available. Three will calculate a tip amount<br />
automatically of 5%, 10% or 15%. Please press F0, F1 or F2<br />
respectively to select these amounts. Select F3 and the customer is then<br />
allowed to enter a tip for whatever amount they wish.<br />
22 VeriFone Apacs 40 User Guide
This Step is only Applicable if the ‘Other’ option is chosen.<br />
Acct 123456<br />
Sale £10.00<br />
Gratuity £1.00<br />
Sale £10.00<br />
Gratuity £1.00<br />
Total £11.00<br />
is this correct<br />
Maestro<br />
Amount<br />
£11.00<br />
Enter Pin<br />
Acct 123456<br />
Amount<br />
£11.00<br />
Connecting<br />
Maestro Yes<br />
No<br />
Print Copy<br />
Auth Code<br />
123456<br />
A tip of the customer’s choosing can now be entered. Please note that<br />
the tip amount must be smaller than that of the Sale.<br />
The terminal displays the Sale amount, the Tip amount and the Total<br />
amount and request for confirmation. Use F0 for Yes or F1 for No. If No<br />
is selected the terminal will return to the previous screen where the<br />
customer can choose their gratuity amount again.<br />
Request the customer to key in their PIN and press ENTER. The terminal<br />
should now be returned to the merchant.<br />
The terminal will now communicate with the Bank’s Host system and<br />
obtain an Authorisation code.<br />
Tear off the receipt and select F0 to print the customer’s copy. The card<br />
can now be removed from the terminal. The transaction is now<br />
complete.<br />
VeriFone Apacs 40 User Guide 23
X and Z Reports<br />
X and Z reports are available as part of this terminal’s software functionality. These reports are<br />
designed to enable you, the merchant to view transactions and help understand what data<br />
has been processed. Please bear in mind that these are Offline reports generated direct from<br />
the terminal’s memory and in no way does the terminal communicate with the Host (Bank).<br />
The X report shows the total number and value of transactions performed for each Acquirer<br />
since the last Z report. An X report does not reset the totals it is a running report which can<br />
be used as many times as necessary to detail the transactions processed through the terminal<br />
in any given shift.<br />
The Z report will show the total number of transactions performed for each Acquirer since<br />
the last Z report and will reset the totals. This report is usually run once a day at the close of<br />
trading however, it can be used to determine other desired trading patterns if multiple shifts<br />
are run each day, or if a trading session were to last a period of days, weeks or months.<br />
However you choose to use it a cumulative total since the last Z will be shown.<br />
Please note that if you have experienced problems with your terminal and a software re-load<br />
or re-configuration was necessary these totals can be affected.<br />
2/2/6 Sale<br />
Refund<br />
Reports<br />
Services<br />
Reversal<br />
Duplicate<br />
Password<br />
******<br />
Reconcil..<br />
X report<br />
Z report<br />
Print X Report<br />
Press F2 to select Reports.<br />
Key in the Password of 123456 and press ENTER.<br />
The terminal now displays the available reports. For the X report please<br />
select F2 and for the Z Report please select F3.<br />
The selected report is now printed.<br />
Press the cancel to return to the default screen.<br />
24 VeriFone Apacs 40 User Guide
Z Report<br />
Totals Reset<br />
Card CNT Total Net<br />
Visa DR 1 10.00<br />
CR 0 0.00<br />
Cash 0 0.00 10.00<br />
Card CNT Total Net<br />
Mastercard DR 2 20.00<br />
CR 0 0.00<br />
Cash 0 0.00 20.00<br />
Card CNT Total Net<br />
Visa Delta DR 1 10.00<br />
CR 1 10.00<br />
Cash 0 0.00 0.00<br />
Card CNT Total Net<br />
Maestro DR 2 20.00<br />
CR 0 0.00<br />
Cash 0 0.00 20.00<br />
Card CNT Total Net<br />
Solo DR 1 10.00<br />
CR 0 0.00<br />
Cash 0 0.00 10.00<br />
Card CNT Total Net<br />
Electron DR 2 20.00<br />
CR 0 0.00<br />
Cash 0 0.00 20.00<br />
Card CNT Total Net<br />
Amex DR 0 0.00<br />
CR 0 0.00<br />
Cash 0 0.00 0.00<br />
CNT Total Net<br />
Gratuities 1 5.00 5.00<br />
End of Report<br />
VeriFone Apacs 40 User Guide 25
X and Z Reports Explained<br />
The following descriptions refer to the sample Z Report on the previous page.<br />
Card Type. The left hand column details the Card Type e.g. Visa<br />
Debit. DR = Debit. This is a Sale<br />
Credit. CR = Credit this is a Refund<br />
Cash = Cash advance Transaction. Only applicable in specific retail environment.<br />
CNT = Amount of transactions processed. E.g. for Visa there are 1 for Mastercard there are 2.<br />
Total = Lists the total for each of the three transaction types. E.g. for Visa it is £10 for<br />
Mastercard it is £20.<br />
Net = Net amount processed. E.g. for Mastercard it is £20 as 2 Sales totalling that amount<br />
have been processed. Visa Delta its £0 as there have been two transactions 1 Sale at £10 and<br />
1 Refund at £10.<br />
Gratuities = The number of Gratuities processed through the terminal and their cumulative<br />
total.<br />
26 VeriFone Apacs 40 User Guide
Reconciliation Report<br />
At the end of each trading day you need to perform a Reconciliation. This process is<br />
important and should be completed every day that the terminal is used. If you have not used<br />
the terminal on any one particular trading day you do not need to run this report. This<br />
procedure checks your terminal totals balance with the banks host system totals, the<br />
information is compared and the reconciliation report will highlight if all transactions have<br />
been agreed upon or if there are any Discrepancies. The terminal will also print out the totals<br />
of the days transactions. Please ensure that you have enough paper left required to complete<br />
this report before starting.<br />
2/2/6 Sale<br />
Refund<br />
Reports<br />
Services<br />
Reversal<br />
Duplicate<br />
Password<br />
******<br />
Reconcil..<br />
X report<br />
Z report<br />
Reconcil..<br />
Reconcile<br />
Select Acq.<br />
Ltsb<br />
Amex<br />
One<br />
All<br />
Press F2 to select Reports.<br />
Key in the Password of 123456 and press ENTER.<br />
The terminal now displays the available reports. Please select F1 for<br />
Reconciliation.<br />
When have more than one Acquirer configured on the terminal e.g.<br />
LTSB and Amex the terminal offers you the option to reconcile to a<br />
particular one, if so select F0 or to reconcile to all Acquirers select F1.<br />
If you have selected to reconcile one Acquirer the terminal now<br />
requests you select the desired one. This is done by using the two left<br />
hand programmable function keys below the Up and Down arrows on<br />
the screen. Press Enter when you have selected the required Acquirer.<br />
VeriFone Apacs 40 User Guide 27
Reconcil..<br />
X report<br />
Z report<br />
The Reconciliation report is now complete.<br />
Press the Cancel button to return to the default screen.<br />
Merchant name 28/01/04 23023333<br />
Merchant Address<br />
MID: 123456789012345<br />
12:55:32<br />
0024<br />
RECONCILIATION ISSUER TOTALS<br />
VISA<br />
Current DR 2 5.20<br />
CR 0 0.00<br />
Previous DR 0 0.00<br />
MASTERCARD<br />
CR 0 0.00<br />
Current DR 1 10.76<br />
CR 0 0.00<br />
Previous DR 0 0.00<br />
MAESTRO<br />
CR 0 0.00<br />
Current DR 0 0.00<br />
CR 1 7.00<br />
Previous DR 0 0.00<br />
CR 0 0.00<br />
RECONCILIATION TOTALS<br />
S: 5 Diag. Code 70<br />
Current DR 3 15.96<br />
FROM 0003 TO 0006<br />
CR 1 7.00<br />
Previous DR 0 0.00<br />
FROM 0000 TO 0000<br />
CR 0 0.00<br />
CANNOT CONFIRM<br />
END OF REPORT<br />
28 VeriFone Apacs 40 User Guide
Reconciliation Report Explained<br />
The following descriptions refer to the Reconciliation report on the previous page.<br />
Report Header. The header of the report will detail your merchant information, Merchant<br />
Number, Name and Address. On the same line as the Merchant ID is an 8 digit number, this is<br />
the terminal’s TID and can be used as a means of identifying your terminal whenever you<br />
have a query with the bank or Terminal Support desk.<br />
Date and Time. Below the header is the Date and Time the report was completed.<br />
Card Types. The transactions are listed in card type. On this report Visa is first. There are two<br />
sections for each card type, Current and Previous. The Current section will show the<br />
transactions that have been completed in the last session. These are the transactions the Bank<br />
will see and will be Reconciling against. The Previous section will detail the transactions from<br />
the previous Reconciliation.<br />
Debits and Credits. For each card type it states the amount of Debits (Sales) and Credits<br />
(Refunds) with their associated values. For Visa there are two sales totalling £5.20 for<br />
Mastercard there is one Sale at £10.76 and for Maestro there is one refund at £7.00.<br />
Reconciliation Totals. Here you can see the cumulative total of Credits and Debits. The<br />
numbers 0003 and 0006 refer to the transaction numbers applicable to these transactions.<br />
These are printed on the receipt.<br />
Also the code ‘S: 5’ and ‘Diag. Code 70’. These maybe requested by the Bank if a query is<br />
raised.<br />
Online Responses. At the end of the report you will see the message ‘CANNOT CONFIRM’.<br />
This is one of the four responses that will be printed on every reconciliation report.<br />
– Totals Agree. The terminal and Host have reconciled and all totals are correct.<br />
– Totals Disagree. There is a discrepancy between the totals the terminal has and the<br />
totals on the Host system. The Diag Code of 73 will be on the report to confirm this. It<br />
is now necessary to phone the relevant Reconciliation department and understand<br />
where the error has occurred. It is advisable that you have all receipts at hand.<br />
– Totals Unconfirmed. The terminal was unable to communicate with the Host. Please<br />
try again. If failures continue contact terminal support.<br />
– Cannot Confirm. The terminal cannot gain confirmation from the Host. It will be<br />
communicating with the system however it cannot obtain a correct response. The<br />
reason for failure will be shown on the screen while the terminal is attempting the<br />
Reconciliation. You will need to contact terminal support to rectify the issue.<br />
VeriFone Apacs 40 User Guide 29
General Troubleshooting Guidelines<br />
The troubleshooting guidelines provided in the following section are included to assist the<br />
user. If the problem persists after you have followed the guidelines or if the problem does not<br />
appear to be covered by these guidelines, call the Helpdesk.<br />
Blank Display<br />
When the terminal LCD screen does not show correct or clear readable information:<br />
• Check the terminal batter level. Ensure it is not empty, if so please charge it.<br />
Printer Does Not Print<br />
If the printer does not work properly:<br />
• The internal thermal printer receives power directly from the terminal. The green poweron<br />
indicator light must be ON.<br />
• Check to make sure the paper roll cover is properly latched.<br />
• If the green power-on indicator is blinking or the light is red this is an indication there is<br />
a problem. Open the paper roll cover and install a new roll of printer paper.<br />
• If the problem persists, call your Helpdesk.<br />
Printer Paper Jam<br />
If paper jams inside the printer:<br />
• Press the latch underneath the terminal to open the paper roll cover.<br />
• Remove the damaged paper from the paper roll and clear the feed mechanism.<br />
• Re-install the roll of printer paper, as described in Changing the Paper Roll.<br />
• Check the paper loading instructions on the Installation guide.<br />
• If the problem persists, contact the Helpdesk.<br />
Keypad Does Not Respond<br />
If the keypad does not respond properly:<br />
• Check the LCD screen. If it displays the wrong character or nothing at all when you<br />
press a key, reboot the terminal.<br />
• If pressing a function key does not perform the expected action, refer to the usual<br />
transactions section of this <strong>Manual</strong> to ensure that you are entering the data for that<br />
application correctly.<br />
• Has the keypad had any spillages recently, and are the keys sticking at all? If so please<br />
try cleaning the keypad with a damp cloth as this could help.<br />
• If the problem persists, call your Helpdesk<br />
30 VeriFone Apacs 40 User Guide
Vx 670 GPRS Communication Problems<br />
The Vx 670 Mobile terminal communicates over the GPRS network using the same networks<br />
as a mobile phone.<br />
Signal Gauge. In the bottom left hand side of the terminal display there is a signal gauge<br />
which shows the strength of the signal. If this is on 1 or 2 bars it is possible that the terminal<br />
will have problems trying to transact. If possible move to an area where the signal is stronger.<br />
Transactions on the Move. If you use the terminal while on the move it is possible that you<br />
can loose connection with the GPRS network and the transaction will have difficulties in<br />
completing as a result.<br />
Enclosed Spaces. If you use the terminal in enclosed spaces such as basements, office<br />
complexes etc you may experience difficulty in obtaining a GPRS connection and processing<br />
transactions. The strength of the GPRS signal in such environments can be limited. Try to<br />
ascertain these problem areas and not use the terminal here.<br />
Vx 670 Gprs Battery Information<br />
The Lithium Ion Battery used to power the Vx-670 terminal is not sent out fully charged.<br />
Please charge this battery for 3 hours prior to use. Whenever the terminal is not in use it is<br />
advisable that the power lead is connected so the battery is re-charged whenever possible.<br />
Life. With the battery fully charged the terminal can complete approx. 200 simultaneous<br />
transactions subject to network signal strength and condition of the battery pack. Note that if<br />
the terminal is in an idle state battery power is still required.<br />
Power Save. If the terminal is not used for a certain period of time the software will put the<br />
terminal into a Power Save mode to conserve battery energy. The terminal can be re-activated<br />
by pressing the Enter key twice.<br />
Car Charger. If you use the terminal in a car or it can be based in a car, Car Chargers are<br />
available. These can be purchased from VeriFone.<br />
Extra Battery. If you find that the terminal is being used at Conferences, Shows etc where<br />
there is little or no access to a power source it is worth considering purchasing an extra<br />
battery.<br />
Vx-670 Wi-Fi<br />
If you experience any Communication issues or have any Wi-Fi Network related issues you<br />
should direct your enquiries to the VeriFone partner providing this support. These details will<br />
have been made available during the installation of the Wi-Fi Router and/or Access Point.<br />
Alternatively please call the VeriFone support desk and your call will be directed accordingly.<br />
If you are experiencing any terminal related or transactional problems please contact the<br />
relevant helpdesks.<br />
VeriFone Apacs 40 User Guide 31
Diagnostic Codes<br />
The numbers listed in the table below and their corresponding description help to explain<br />
why a transaction will have failed and what action to take.<br />
Code Description Comments/Action<br />
19 TXN failed due to power failure<br />
20 Connection lost with host computer before the end of the transaction Call Helpdesk to ensure<br />
transaction processed/not<br />
processed correctly<br />
21 No connection to host detected after dialling Call Helpdesk for assistance if<br />
problem persists. Ensure<br />
phone line works correctly<br />
30 Transaction failed after redialling Attempt to process the<br />
transaction again, or call<br />
Helpdesk<br />
31 Line busy Ensure telephone line is<br />
working correctly. If problem<br />
persists call Helpdesk<br />
40 No response from host computer Call Helpdesk<br />
41 Cannot connect to host computer Call Helpdesk<br />
42 No response from Card company Call Helpdesk<br />
44 Transaction terminated before completion Call Helpdesk<br />
45 Message cannot be sent Check phone line. If problem<br />
persists call Helpdesk<br />
46 Terminal has received an invalid message from host Retry transaction. If problem<br />
persists call Helpdesk<br />
49 Invalid message contents Retry transaction. If problem<br />
persists call Helpdesk<br />
53 Offline store full Retry transaction. If problem<br />
persists call Helpdesk<br />
70 Security error If problem persists call<br />
Helpdesk.<br />
72 Retailer has indicated an invalid signature<br />
73 Totals out of balance Generally no action required,<br />
terminal and host should<br />
rebalance totals after<br />
reconciliation. If problem<br />
persists call Helpdesk<br />
76 Terminal has performed an online reconciliation No action required.<br />
32 VeriFone Apacs 40 User Guide
VeriFone Apacs 40 User Guide 33
34 VeriFone Apacs 40 User Guide
VeriFone Apacs 40 User Guide 35
Helpdesk Number<br />
Enter Merchant ID for future reference