Download PDF - Fine Woodworking
Download PDF - Fine Woodworking
Download PDF - Fine Woodworking

You also want an ePaper? Increase the reach of your titles
YUMPU automatically turns print PDFs into web optimized ePapers that Google loves.
Compliments of <strong>Fine</strong> <strong>Woodworking</strong><br />
38<br />
F I N E w o o d w o r k I N g
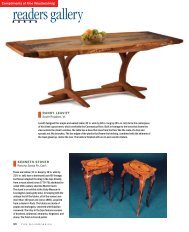
The Versatile Huntboard<br />
This sideboard variation is just as comfortable<br />
in a hallway or a living room<br />
The huntboard is a wonderful furniture<br />
form, a relaxed country cousin<br />
to the more formal and high-style<br />
sideboard. It’s essentially a tall serving<br />
table, with drawers and doors for storage<br />
of dinnerware. I’ve long admired the form,<br />
so for this year’s annual auction of the New<br />
Hampshire Furniture Masters, I decided to<br />
design and build a cherry huntboard.<br />
Typically, when designing furniture, my<br />
first thoughts are about form, proportion,<br />
shape, and detail. But versatility also can<br />
be an influence, especially for speculative<br />
work. I want potential bidders to see what<br />
they need—a sideboard in this case—but I<br />
also think my work could have many lives<br />
Start with the legs<br />
Upper<br />
portion<br />
tapers from<br />
the base of<br />
the apron<br />
to the cuff.<br />
Secondary<br />
taper begins<br />
just below<br />
the cuff.<br />
The foot of each leg<br />
is highlighted with a<br />
cuff-banding inlay and<br />
a secondary taper<br />
that give the piece a<br />
light, elegant appearance.<br />
After cutting<br />
the primary tapers on<br />
the bandsaw, miter<br />
and glue in the cuffbanding<br />
sections (1).<br />
Cut the secondary<br />
taper on all four<br />
sides, staying well<br />
clear of the cuff.<br />
Refine the taper with<br />
a handplane. Make<br />
guide marks just below<br />
the cuff (2) and<br />
at the toe of the foot,<br />
and plane until both<br />
marks are gone (3).<br />
B y G a r r e t t H a c k<br />
beyond the one I design for. This piece<br />
would be at home serving as a desk or a<br />
display table in a foyer or hallway.<br />
The focus of my design is the three central<br />
drawers, with flanking doors adding a<br />
sense of balance. The case itself is deep<br />
and tall, and is engineered to withstand<br />
the weight of a collection of flatware and<br />
dinnerware. It’s also designed to withstand<br />
seasonal wood movement.<br />
Shape the legs and add the banding<br />
In designing the legs of the huntboard, I<br />
used a full-size mock-up to help me gauge<br />
1<br />
2<br />
3<br />
where they needed refining. After all, visual<br />
strength is just as important as actual<br />
strength. once I completed the mock-up,<br />
I used it to lay out and cut the real legs,<br />
as well as to lay out the cuff banding and<br />
mortises. Cut the legs on the bandsaw and<br />
refine the shape with handplanes.<br />
After cutting all of the mortises and the<br />
primary taper in the legs, install the cuff<br />
banding. Although you can make your<br />
own custom banding (see FWW #166,<br />
pp. 116-120), ready-made banding is available<br />
(www.vandykes.com, www.woodcraft<br />
.com, and www.rockler.com). Cut the<br />
assembly note<br />
The huntboard glue-up is complex. It’s easiest to start<br />
by assembling the side aprons and the legs. But glue<br />
only the front legs in place at this stage—you’ll need<br />
to remove the rear legs for a later step (see p. 42).<br />
www.<strong>Fine</strong>Woodwor k i n g.com N o V E M B E r / d E C E M B E r 2 0 0 6 39
Stylish huntboard<br />
For a calm appearance, the primary wood is quartersawn<br />
cherry. to add interest and contrast, the door panels are flame<br />
birch, with african-blackwood pulls and Gabon-ebony beading.<br />
Panel tenon, 3 ⁄8 in.<br />
thick by 1 ⁄4 in. long<br />
Splines,<br />
3 ⁄16 in. thick<br />
by 1 ⁄2 in.<br />
wide, float<br />
in their<br />
grooves.<br />
Bead,<br />
3 ⁄16 in.<br />
dia.<br />
Groove<br />
for bottom<br />
board,<br />
1 ⁄4 in. deep<br />
by 5 ⁄8 in.<br />
wide<br />
Top and bottom rear<br />
rails, 13 ⁄16 in. thick<br />
by 3 1 ⁄8 in. wide<br />
Back panel,<br />
13 ⁄16 in. thick by<br />
7 1 ⁄4 in. wide<br />
Side panels,<br />
13 ⁄16 in. thick<br />
by 7 1 ⁄4 in.<br />
wide<br />
Top and bottom<br />
side rails, 13 ⁄16 in.<br />
thick by 3 1 ⁄8 in.<br />
wide<br />
Side<br />
panel<br />
Spline<br />
Bottom<br />
side rail<br />
bottom side rail<br />
Partitions connect to<br />
the bottom board with<br />
sliding dovetails, 5 ⁄8 in.<br />
wide by 5 ⁄16 in. long.<br />
Bottom<br />
board<br />
Tongue, 5 ⁄8 in.<br />
thick by 1 ⁄4 in. long<br />
Rail tenons,<br />
3 ⁄8 in. thick<br />
by 1 in.<br />
long<br />
Bottom board,<br />
white pine,<br />
7 ⁄8 in. thick<br />
Legs, 39 3 ⁄16 in.<br />
long, taper from<br />
1 7 ⁄16 in. at top to<br />
9 ⁄16 in. at bottom.<br />
Top kicker,<br />
1 ⁄2 in. thick by<br />
1 1 ⁄8 in. wide<br />
Guide,<br />
1 ⁄4 in. thick by<br />
13 ⁄16 in. wide<br />
Runner,<br />
1 ⁄2 in. thick by<br />
1 1 ⁄8 in. wide<br />
Divider<br />
Partitions,<br />
3 ⁄4 in. thick<br />
Front rail<br />
(see detail on<br />
facing page)<br />
Shelf, 5 ⁄8 in. thick by<br />
9 in. wide, sits in<br />
1 ⁄4-in.-deep groove.<br />
Stiles, 7 ⁄8 in.<br />
thick by<br />
1 1 ⁄16 in. wide<br />
Dividers, 1 ⁄2 in.<br />
thick by 2 in. wide<br />
Wedge<br />
Tenon,<br />
3 ⁄8 in. thick<br />
by 1 ⁄2 in. long<br />
Stile<br />
Tenon,<br />
1 ⁄4 in. thick<br />
by 3 ⁄16 in.<br />
long, fits<br />
into divider.<br />
Tenon,<br />
3 ⁄8 in. thick<br />
by 3 ⁄4 in.<br />
long, fits<br />
into stile.<br />
Case interior<br />
40 F I N E w o o d w o r k I N g<br />
Photos: Thomas Mckenna
40 in.<br />
Sides,<br />
3 ⁄8 in. thick<br />
12 1 ⁄8 in.<br />
drawings: Bob La Pointe<br />
Stretcher, 1 ⁄2 in. thick<br />
by 2 7 ⁄16 in. wide by<br />
45 1 ⁄8 in. long<br />
Bottom board<br />
1 ⁄8 in.<br />
Spline, 3 ⁄16 in.<br />
thick by 1 ⁄2 in.<br />
wide<br />
Front rail<br />
Bottom, 5 ⁄16 in. thick, is<br />
beveled around the edges<br />
and screwed to the back.<br />
Front<br />
rail<br />
Drawer fronts, 5 ⁄8 in. thick,<br />
with 1 ⁄8-in.-dia. bead on<br />
top and bottom edges<br />
52 1 ⁄2 in.<br />
46 in.<br />
11 1 ⁄2 in. 18 in.<br />
43 1 ⁄8 in.<br />
<strong>Fine</strong><strong>Woodworking</strong>.com<br />
Bead,<br />
3 ⁄16 in. dia.<br />
3 in.<br />
3 3 ⁄8 in.<br />
4 1 ⁄4 in.<br />
2 1 ⁄4 in.<br />
in a video tour, Hack explores the construction and<br />
design considerations of his huntboard. Plus: an audio<br />
slide show of cutting tapered sliding dovetails.<br />
11 5 ⁄8 in.<br />
1 3 ⁄8 in.<br />
Taper begins<br />
13 3 ⁄4 in. from<br />
top of leg.<br />
7 ⁄8 in. sq.<br />
9 ⁄16 in. sq.<br />
f i t t i n g<br />
A c r i t i c A l<br />
j o i n t<br />
The front stretcher is<br />
rabbetted and dovetailed<br />
to the legs and<br />
side aprons to help stabilize<br />
the case against<br />
racking forces. Begin by<br />
marking the shoulders<br />
of the rabbet with the<br />
case dry-assembled<br />
(top). Cut the stepped<br />
rabbet using a backsaw<br />
and chisels, then saw<br />
the dovetails (center).<br />
Set the stretcher in<br />
place and scribe for the<br />
dovetail housings in the<br />
leg and apron (bottom).<br />
4 1 ⁄2 in.<br />
18 1 ⁄4 in.<br />
15 7 ⁄8 in.<br />
13 in.<br />
3 1 ⁄8 in.<br />
7 1 ⁄4 in.<br />
3 1 ⁄8 in.<br />
Cuff,<br />
5 ⁄8 in.<br />
wide<br />
N o V E M B E r / d E C E M B E r 2 0 0 6 41
Glue up the case in stages<br />
Attach the front rail to the bottom. Glue<br />
the spline into the bottom board, then add<br />
the front rail. Be sure all of the joinery lines<br />
up before clamping.<br />
Attach the case to<br />
the rear assembly.<br />
After gluing the front<br />
legs and side aprons<br />
to the case, slide the<br />
shelf into position,<br />
and drop the carcase<br />
into place.<br />
42<br />
F I N E w o o d w o r k I N g<br />
Glue the drawer stiles and dividers to the<br />
front rail. Assemble the stiles and dividers,<br />
then fit them into the front rail as a unit.<br />
Slide in the interior partitions from the<br />
back. Glue will help the tapered pins slide.<br />
Clamp the partitions, then let the glue dry<br />
before going any further.
dadoes that house the banding using either<br />
a router or hand tools (for more on<br />
this process, see FWW #180, p. 106). Each<br />
section of banding is mitered using a 45°<br />
guide block and chisel; the block also is<br />
used to miter the door beading (see top<br />
right photo, p. 45). After the banding is<br />
glued in place, level the sections with a<br />
block plane, then plane a tapered toe from<br />
the cuff to the floor (see photos, p. 39).<br />
Assemble the side and rear aprons<br />
one of the most challenging aspects of<br />
this design is planning for the inevitable<br />
seasonal movement of the 13 1 ⁄2-in.-wide<br />
aprons. Cherry boards that wide will move<br />
significantly, increasing the potential for<br />
cracking the case, opening a gap where<br />
they meet the top, and pinching a drawer<br />
or a door.<br />
A simple and attractive solution is to make<br />
each apron in three parts: a top and bottom<br />
rail and a center panel, joined with cherry<br />
splines but no glue. The tenons of the rails<br />
are glued into the legs, while the stub tenons<br />
of the panel float in their mortises. As<br />
a decorative element, and to disguise small<br />
gaps that will open during the dry winter<br />
months, I cut beads in the center panel<br />
where it meets the rails (see bottom side<br />
rail detail, p. 40).<br />
The most accurate way to cut the tenons<br />
and shoulders on the three parts of each<br />
apron is to dry-assemble them with the<br />
splines and cut them all at once, holding<br />
the pieces together with masking tape.<br />
Clean up the shoulders with a shoulder<br />
plane, then take apart the assembly and<br />
trim the center panel tenons down to 1 ⁄4 in.<br />
long. Now, cut the miters and haunches in<br />
the longer tenons of the rails. Finally, cut<br />
a groove in the bottom rail to accept the<br />
tongue of the bottom board.<br />
Fit the front rail and stretcher<br />
when the aprons have been fitted, it’s time<br />
to cut, shape, and fit the bottom front rail.<br />
Also, cut the slot in the rail for the spline<br />
that connects it to the bottom board, and<br />
scratch the bead along the bottom edge.<br />
The front stretcher is dovetailed into the<br />
top of the front legs, and into the top of<br />
both side aprons just behind the legs (see<br />
photos, p. 41). For accuracy, dry-assemble<br />
the case and place the rail in position.<br />
Lay out the location of the shoulders and<br />
dovetails, and then cut them. Place the<br />
rail back in position, mark the dovetail<br />
www.<strong>Fine</strong>Woodwor k i n g.com<br />
Add the top stretcher and kickers<br />
With the case upright on the floor,<br />
install the stretcher. This is tricky because<br />
you have to glue in the kickers for the top<br />
drawer at the same time. The stiles of<br />
the drawer frame are tenoned into the<br />
stretcher. Drive wedges into the tenons, then<br />
screw the stretcher to the interior partitions.<br />
housings, then rout and chop them out.<br />
Finally, cut the mortises for the two kickers<br />
of the top drawer into the back edge of<br />
the stretcher. Also, cut the mortises for the<br />
knife hinges in the stretcher and the bottom<br />
front rail (for more on installing knife<br />
hinges, see FWW #152, pp. 108-110).<br />
Thick stock and solid joinery<br />
create a stiff structure<br />
with a huntboard, it’s possible that many<br />
heavy items will be stored in the drawers<br />
and compartments. To make the case quite<br />
stiff and sturdy, the bottom board and the<br />
N o V E M B E r / d E C E M B E r 2 0 0 6 43
Top rail and outside<br />
stiles, 1 3 ⁄8 in. wide<br />
44<br />
Wood peg<br />
F I N E w o o d w o r k I N g<br />
Beading, 3 ⁄32 in.<br />
thick by 5 ⁄16 in.<br />
wide<br />
Center stile,<br />
7 ⁄8 in. wide<br />
Tenons, 3 ⁄8 in.<br />
thick by 1 in. long<br />
Rabbet, 1 ⁄8 in. deep<br />
by 1 ⁄4 in. long<br />
Doors feature contrasting beading<br />
Jig creates perfect bead stock. The jig is a piece of 1 ⁄2-in.-thick plywood with two<br />
fences spaced the width of a block plane. The plane rides on identical shims, ensuring<br />
uniform thickness. A brad in front of the beading holds it in place.<br />
Bevel,<br />
1 1 ⁄4 in. wide<br />
Panel,<br />
1 ⁄2 in. thick<br />
Frame<br />
stock,<br />
3 ⁄4 in.<br />
thick<br />
Bottom rail,<br />
2 1 ⁄8 in. wide<br />
Panel groove,<br />
1 ⁄4 in. deep<br />
by 1 ⁄4 in. wide<br />
top are thick, and strong joinery in the face<br />
frame and interior partitions helps tie the<br />
top and bottom together.<br />
The face frame and the drawer runners<br />
and dividers are joined with mortises and<br />
tenons while the interior partitions connect<br />
to the bottom board with sliding tapered<br />
dovetails (the slots and pins are wider at<br />
the back and narrower toward the front).<br />
Tapered dovetails ease assembly but still<br />
provide a strong mechanical joint.<br />
To cut the dovetail slots in the bottom<br />
board, dry-fit the face-frame assembly<br />
and the bottom rail. Connect the bottom<br />
board with the spline and mark out the<br />
dovetail-slot locations. remove the bottom<br />
board and cut the slots. Clamp a fence to<br />
the board and remove most of the waste<br />
with a straight bit. Then finish with a 5 ⁄8-in.<br />
dovetail bit. Taper the slot by shifting one<br />
end of the fence over by about 1 ⁄16 in. and<br />
then running the dovetail bit through the<br />
cut again.<br />
Use a router table when cutting the dovetail<br />
pins in the partitions. Be sure to leave<br />
the partitions long for now, as trial and<br />
error is the only way to set the pin cut for<br />
a perfect sliding fit. I use a side rabbeting<br />
plane to taper the pins to fit, though you<br />
also could use a paring chisel.<br />
Build doors and drawers after glue-up<br />
when all the partitions have been cut and<br />
fitted, dry-assemble the piece, then lay out<br />
and cut the slots in the partition and side
Glue the beading to the frame. The beading<br />
should be proud of the outside of the frame.<br />
Use plenty of clamps and a caul to ensure a<br />
good bond.<br />
apron for the shelf that’s tucked behind<br />
one door. Also, lay out and cut all the mortises<br />
for the buttons that secure the top, as<br />
well as the mortises in the rear apron for<br />
the two top-drawer kickers. once you’re<br />
sure everything is fitting nicely, get ready<br />
for the glue-up.<br />
There are a lot of pieces to put together<br />
here, so to make the job easier, assemble<br />
the case in steps (see photos, pp. 42-43).<br />
After the case is glued up, cut the top to<br />
final dimensions, shape the underbeveled<br />
edge, and secure it in place with buttons<br />
and screws.<br />
Finally, after building the doors (see<br />
photos and drawings, this spread), assembling<br />
the drawers, and turning and<br />
installing the knobs, the piece is ready for<br />
finishing.<br />
Nothing beats the dazzle of shellac<br />
To bring out the rich color of the cherry,<br />
I started with a light coat of oil/varnish.<br />
once dry, I padded on many layers of<br />
orange shellac (1-lb. cut) using a clean<br />
cotton rubber, rubbing it out between<br />
coats with 0000 steel wool. A final “ghosting”<br />
with a rag with just vapors of alcohol<br />
leaves a beautifully smooth finish. A<br />
topcoat of wax is the final and renewable<br />
protective finish. M<br />
Garrett Hack is a contributing editor.<br />
Past articles and full-size plans are available at<br />
<strong>Fine</strong><strong>Woodworking</strong>.com.<br />
www.<strong>Fine</strong>Woodwor k i n g.com<br />
Simple jig for perfect miters. Clamp a 45° guide block to the frame members<br />
and chop the beading to length.<br />
Cutter<br />
fence<br />
Cutter<br />
Scratch the bead. Run a<br />
simple scratch stock along the<br />
beading. You’re done when the<br />
cutter just starts to bite into the<br />
frame.<br />
Cut the panel<br />
grooves, then assemble<br />
the door.<br />
Cutting the grooves<br />
after the beading<br />
is applied ensures<br />
a flush fit between<br />
panel and beading.<br />
Trim the horns after<br />
the glue dries.<br />
N o V E M B E r / d E C E M B E r 2 0 0 6 45