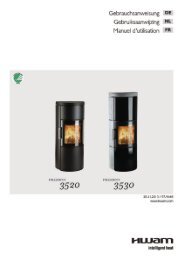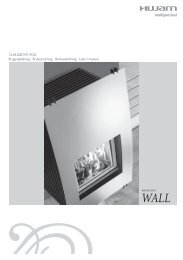
Figaro - Hwam
Figaro - Hwam
Figaro - Hwam

You also want an ePaper? Increase the reach of your titles
YUMPU automatically turns print PDFs into web optimized ePapers that Google loves.
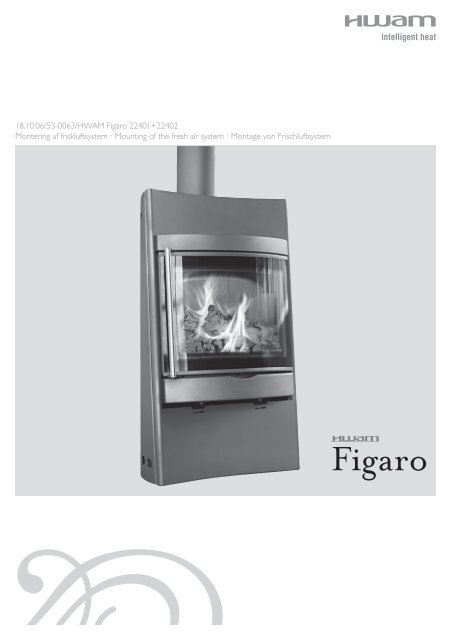
18.10.06/53-0063/HWAM <strong>Figaro</strong> 22401+22402Montering af friskluftsystem · Mounting of the fresh air system · Montage von Frischluftsystem<strong>Figaro</strong>
4315296978
Monteringsvejledning for friskluftsystem til automatik,gældende for:HWAM <strong>Figaro</strong>1. Afmonter brændeovnens bagplade (1).2. Vip pladen (2) i frisklufthullet, i bagpladen eller på brændeovnen, ud.3. Automatikkassettens monteringsmøtrikker skrues af enkeltvis, og erstattes med de medfølgendeafstandsbøsninger (3) med indvendig gevind. En af gangen for at undgå, at pakningen mellemautomatik og brændeovn skrider.4. Monter luftboksen (4) ind over automatikken, så hullerne er lige ud for afstandsbøsningerne.5. Monter luftboksen (4) med medfølgende 4 stk. M6x10 skruer (5).6. Flexslangen Ø63 (6) mm afpasses i længden fra tilslutningsstudsen til reduktionsstudsen.7. Husk at trække isoleringsstrømpen (7) ind på flexslangen inden monteringen.8. Reduktionsstuds Ø101/Ø63 mm (8) sættes på friskluftrør udefra.9. Monter flexrøret, og sikre den i begge ender med medfølgende spændebånd (9).10. Bagpladen (1) monteres på brændeovnen.StyklisteEksisterende automatikregulering(3) 4 stk. afstandsstykker(4) 1. stk. luftboks til HWAM <strong>Figaro</strong>(5) 4 stk. skruer M6x10(6) 1 stk. flexslange Ø63 mm(7) 1 stk. isoleringsstrømpe Ø76 mm(8) 1 stk. reduktion Ø101/Ø63 mm(9) 2 stk. spændringe
Instructions for fitting a fresh air system to the automatic control unit,applies to:HWAM <strong>Figaro</strong>1. Remove the rear plate (1) from the stove.2. Tip out the plate (2) in the fresh air aperture, at the bottom of the rear plate or at the bottomof the stove.3. Screw the fitting nuts off the automatic cassette individually an replace them with the spacerbushes (3) with internal thread supplied. One at a time to makes sure that the seal betweenthe automatic control unit and the stove does not slip.4. Fit the air box (4) over the automatic control unit so the holes are right by the spacer bushes.5. Fit the air box with the 4 M6 x 10 screws (5) supplied.6. Adjust the length of the 63 mm dia. flexi-hose to fit between the connector and the reducerbush.7. Remember to pull the insulation sleeve (7) into the flexi-hose before fitting.8. Reducer bush 101/63 mm dia. (8) on the fresh air pipe outside.9. Fit the flexi-hose and secure it at both ends with the hose clips (9) supplied.10. Remember to refit the rear plate (1) on the stove.Parts list:Existing automatic control unit(3) 4 spacer bushes(4) 1 airbox for HWAM <strong>Figaro</strong>(5) 4 M6 x 10 mm screws(6) 1 flexi-hose 63 mm dia.(7) 1 insulation sleeve 76 mm dia.(8) 1 reducer bush 101/63 mm(9) 2 hose clips
Montageanleitung für das Frischluftsystem der Automatik,gültig für:HWAM <strong>Figaro</strong>1. Rückwärtige Platte (1) des Kaminofens abnehmen.2. Die Platte (2) in der Frischluftöffnung, unten in der Rückwand oder unten am Kaminofen, herausklappen.3. Die Befestigungsmuttern der Automatikkassette einzeln abschrauben und durch die mitgeliefertenAbstandsbuchsen (3) mit Innengewinde ersetzen. Eine Mutter nach der anderen, damit dieDichtung zwischen Automatik und Kaminofen nicht verrutscht.4. Die Luftbox (4) nach innen der Automatik anbringen, damit die Löcher direkt vor den Abstandsbuchsensind.5. Die Luftbox mit den beiliegenden 4 Stck. M6x10 Schrauben (5) befestigen.6. Flexschlauch Ø63 mm (6) ablängen, vom Anschluss-Stutzen bis zum Reduzierstutzen.7. Den Isolierungsstrumpf (7) vor der Montage über den Flexschlauch ziehen.8. Reduzierstutzen Ø101/Ø63 mm (8) an Frischluftrohr, aussen.9. Flexrohr montieren und an beiden Enden mit den beiliegenden Schlauchschellen (9) sichern.10. Rückwärtige Platte (1) des Kaminofens montieren.StücklisteVorhandene Automatikkassette(3) 4 stk. Abstandsbuchsen(4) 1. stk. Luftbox für HWAM <strong>Figaro</strong>(5) 4 stk. Schrauben M6x10(6) 1 stk. Flexschlauch Ø63 mm(7) 1 stk. Isolierungsstrumpf Ø76 mm(8) 1 stk. Reduzierung Ø101/Ø63 mm(9) 2 stk. Schlauchschellen
DK-8362 Hørningheatdesign@hwam.comwww.hwam.com