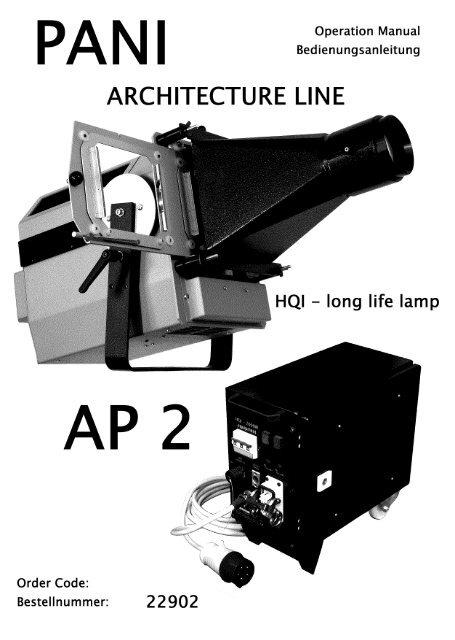
HQI - Architekturprojektor AP2 - Pani Projection and Lighting
HQI - Architekturprojektor AP2 - Pani Projection and Lighting
HQI - Architekturprojektor AP2 - Pani Projection and Lighting

Erfolgreiche ePaper selbst erstellen
Machen Sie aus Ihren PDF Publikationen ein blätterbares Flipbook mit unserer einzigartigen Google optimierten e-Paper Software.
AP 2 /<strong>Architekturprojektor</strong> / Architecture Projector PANI <strong>Projection</strong> <strong>and</strong> Stage <strong>Lighting</strong> Vertriebs GmbH<br />
Inhaltsverzeichnis / contents St<strong>and</strong> von / Status of November 2008<br />
Seite / page<br />
1) Lieferumfang 2 unit as delivered<br />
2) Technische Daten 2 technical data<br />
3) Zubehör 2 accessories<br />
4) Montage des Projektors 3 mounting the projector<br />
4.1) Bügelverstellung 3 yoke adjustment<br />
4.2) Projektorneigungswinkel 3 projector angle of inclination<br />
4) Elektrische Verbindungen 3 electrical connections<br />
5) Frontlinse 3 front condenser lens<br />
6) Elemente am Projektor 3 elements on the projector<br />
7) Bedienung am Vorschaltgerät 3 operation of the ballast<br />
8) Sicherheitshinweise 4 safety remarks<br />
9) Wartungstätigkeiten 5 maintainance activities<br />
9.1) Abnehmen des Projektordeckels 5 removing the projector lid<br />
9.2) Wechsel der <strong>HQI</strong>- Lampe 5 change of the <strong>HQI</strong>- lamp<br />
9.3) Kondensorreinigung 5 cleaning the condenser<br />
11) Kondensoraufbau 5 condenser layout<br />
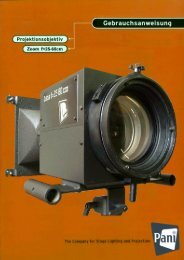
12) Projektionsobjektive 6 projection lenses<br />
12.1) Projektionsobjektive 6 projection objective lenses<br />
12.2) Effekt- und Varioobjektive 6 effect <strong>and</strong> vario objective lenses<br />
13) Projektionsdiagramm 7 projection diagram<br />
14) Stromlaufplan 8 circuit diagram<br />
15) Maß- und Positionszeichnungen 9 dimension <strong>and</strong> position<br />
drawings<br />
15.1) Projektor 9 projector<br />
15.2) Vorschaltgerät 10 ballast<br />
16) Lichtwerte 11 light output values<br />
<strong>Pani</strong> <strong>Projection</strong> <strong>and</strong> <strong>Lighting</strong> Vertriebs GmbH<br />
K<strong>and</strong>lgasse 23, A-1070 Wien / Vienna<br />
Österreich / Austria<br />
Ä + 43 / 1 521 08 – 0<br />
Fax + 43 / 1 526 42 87<br />
www.pani.com<br />
light@pani.com<br />
1
AP 2 /<strong>Architekturprojektor</strong> / Architecture Projector PANI <strong>Projection</strong> <strong>and</strong> Stage <strong>Lighting</strong> Vertriebs GmbH<br />
1) Lieferumfang / unit as delivered<br />
Stk./pcs. Best. Nr. / Order Code<br />
1 <strong>HQI</strong> - Projektor AP 2 <strong>HQI</strong> -projector AP 2<br />
inkl. 1 Frontlinse nach Wahl incl. 1 front condenser lens<br />
(G 503, G505/II, G 505) as selected (G503,G505/II,G505)<br />
mit 5m Kabel zum Vorschaltgerät 12901 with 5m ballast power cable<br />
1 Testdia mit Raster 18 x 18 cm 12805 test slide with raster 18 x 18cm<br />
1 Diaschieber für 2 Dias 18x18cm 12513 slide carrier for 2 slides 18x 18 cm<br />
1 Lampe <strong>HQI</strong>- TS 2000 W/ D/ S 37601 lamp <strong>HQI</strong>- TS 2000 W/ D/ S<br />
1 Normzapfen DIN 15560 Ø 28 mm 16201 TV-Spigot DIN 15560 Ø 28 mm<br />
1 Vorschaltgerät für AP 2 mit 19215 ballast for AP 2 with<br />
5m Anschlusskabel inkl. 5m connection cable including<br />
5pol. CEE-Stecker 0,15-6/16A 5pol. CEE-plug 0,15-6/16A<br />
2) Technische Daten / technical data<br />
Spannung 400 V/ 230 V/ 50 Hz voltage<br />
Eingangsleistung 2000 W input wattage<br />
Phasenstrom 7,5 A phase current<br />
Vorsicherung 16 A prefusing<br />
Neigungswinkel zu waagrecht max. ± 90° angle from horizontal projection<br />
Gewichte: Projektor 31 kg weights: projector<br />
Vorschaltgerät 33 kg ballast<br />
Lampentype <strong>HQI</strong>- TS 2000 W/ D/ S lamp type<br />
Diaformat (aussen) 18x18 cm slide format (outside)<br />
Umgebungstemperatur Projektor 0 bis 40°C ambient temperature projector<br />
Umgebungstemperatur Vorschaltgerät -5 bis +35°C ambient temperature ballast<br />
Schutzklasse (Projektor und Vorschaltg.) IP20 safety class (projector <strong>and</strong> ballast)<br />
Für nähere Details, bitte kontaktieren Sie unsere Mitarbeiter:<br />
For more details, please contact our staff members:<br />
Telefon / phone:+(43 1) 521 08 0, E-mail: light@pani.com<br />
Kaussell Diawechsler<br />
für 12 Dias 18x18cm, Automatik- Modus,<br />
DMX-512 oder analog ansteuerbar<br />
Fahrbarer Montagerahmen für <strong>AP2</strong><br />
(inklusive Horizontalverstellung)<br />
Außengehäuse für <strong>AP2</strong> mit Diawechsler<br />
Beispiele für allgemeines Projektionszubehör:<br />
Diaspannrahmen für 18x18cm Film<br />
Filmstanzwerkzeug für Diarahmen 18x18cm<br />
Gehärtete Glasplatte 18x18cm<br />
Set mit Reprolux Projektionsfarben<br />
(16 Farben in Flaschen zu 35g)<br />
Für mehr Details und Ersatzteilanfragen<br />
kontaktieren Sie bitte unsere Mitarbeiter:<br />
3) Zubehör / Accessories<br />
12517<br />
12049<br />
12048<br />
12802<br />
SET<br />
12811<br />
12803<br />
32801<br />
2<br />
Carousell – Slidechanger<br />
for 12 slides18x18cm, Auto Mode,<br />
DMX-512 or analog controlable<br />
Mobile Mounting Base for AP 2<br />
(including horizontal adjustment)<br />
Outdoor Housing f. AP 2 with Slide Changer<br />
Examples of general projection accessories:<br />
Filmholder for 18x18 cm Slide Film<br />
Punching Machine for Filmholder 18x18cm<br />
Tempered Glass Plate 18x18 cm<br />
Set of Reprolux-<strong>Projection</strong> Dyes<br />
(16 colours in bottles of 35g)<br />
For more details <strong>and</strong> spareparts<br />
requests, please contact our staff:<br />
+(43 1) 521 08 0 light@pani.com
AP 2 /<strong>Architekturprojektor</strong> / Architecture Projector PANI <strong>Projection</strong> <strong>and</strong> Stage <strong>Lighting</strong> Vertriebs GmbH<br />
4) Montage des Projektors / Setting up projector<br />
Das Anschlusselement für hängende und<br />
stehende Montage ist der Normzapfen DIN 15560/<br />
ø 28mm.<br />
Um an die Verwendung von Zubehör in Hinblick<br />
auf den Gesamtschwerpunkt besser angepasst zu<br />
werden, kann der Bügel (B 3/ 3) auch in einer der<br />
beiden <strong>and</strong>eren Anschraubpositionen (B 1/ 2)<br />
montiert werden.<br />
The connecting part for suspended <strong>and</strong><br />
st<strong>and</strong>ing installation is the TV-Spigot DIN<br />
15560/ ø 28mm.<br />
4.1) Bügelverstellung / Yoke adjustment<br />
When adapted to fit any existing accessory,<br />
the yoke (fig.3/ 3) can be fitted on to the<br />
projector in the proximity of the centre of<br />
gravity using one of the other two threads for<br />
mounting the yoke (fig.1/ 2) .<br />
4.2) Projektorneigungswinkel / Projector angle of inclination<br />
Abhängig von der Montageposition des Bügels<br />
kann der Projektor über ± 90° aus der<br />
horizontalen Lage geneigt werden. Somit können<br />
Sie jeden Projektionswinkel im Raum ohne die<br />
Verwendung eines Spiegels realisieren.<br />
Depending on the mounting position of the<br />
yoke, the projector can reach up to +/- 90° <strong>and</strong><br />
more from the horizontal position by being<br />
tilted, so any desired angle position in space is<br />
accessable without use of any mirror!<br />
5) Elektrische Verbindungen / Electrical connections<br />
Der Projektor wird mit dem Vorschaltgerät mit dem<br />
montierten Kabel elektrisch verbunden. Das<br />
Vorschaltgerät ist an ein Netz L1, L2, N, PE- 400 V/<br />
230 V/ 50 Hz über das Anschlusskabel und den 5<br />
pol. CEE- Stecker 0,15- 6/ 16 A anzuschließen!<br />
The projector is connected to the ballast by<br />
using the mounted cable. The ballast has to<br />
be connected to a L1, L2, N, PE- 400 V/ 230<br />
V/ 50 Hz power supply by connector cable<br />
<strong>and</strong> the 5-pole CEE 0.15- 6/ 16 A plug.<br />
6) Frontlinse / Front condenser lens (pos.I)<br />
Es können grundsätzlich 3 Frontlinsen<br />
zur Anpassung des Kondensors an das<br />
Objektiv verwendet werden:<br />
Principally it is possible to use 3 kinds of<br />
front condenser lenses to adapt the<br />
condenser to the projection lens:<br />
Für Objektive / for projection lenses Type Best. Nr. / Order Code<br />
f= 11 cm …. f= 27 cm G 503 12401<br />
Mit dieser Frontlinse ist der Projektor With this front condenser lens the<br />
st<strong>and</strong>ardgemäß ausgestattet. projector is basically equipped.<br />
f= 33 cm + f= 40 cm G 505/II 12434<br />
f= 50 cm + f= 60 cm G 505 12402<br />
Für längere Brennweiten ist der Projektor<br />
aus lichttechnischen Gegebenheiten<br />
nicht genug geeignet.<br />
Wechsel der Frontlinse:<br />
Nach Entfernen der 4 Rändelmuttern<br />
kann die Frontlinse demontiert werden.<br />
For longer focal lengths the projector is<br />
not enough suitable for optical reasons.<br />
Changing the front condenser lens:<br />
After removing the 4 knurled nuts the<br />
front condensor lens may be<br />
dismounted.<br />
7) Elemente am Projektor / elements on the projector<br />
An beiden Seiten des Projektors finden Sie<br />
die Klemmung für die Neigungsverstellung<br />
(Pos. K).<br />
Am hinteren Gehäuseanbau befindet sich<br />
der Betriebsstundenzähler (Pos.H).<br />
On both sides of the projector you find<br />
the clamps for the tilt adjustment<br />
(pos.K).<br />
At the rear housing extention you find<br />
the operation hour meter (pos.H).<br />
3
AP 2 /<strong>Architekturprojektor</strong> / Architecture Projector PANI <strong>Projection</strong> <strong>and</strong> Stage <strong>Lighting</strong> Vertriebs GmbH<br />
8) Bedienung am Vorschaltgerät / operation of the ballast<br />
Nach Einschalten des Hauptschalters<br />
(Pos.E) ist die Versorgung der Ein- und Aus-<br />
Taste (Pos F <strong>and</strong> G) und des<br />
ungeschalteten 230V-Ausganges gegeben.<br />
Fernzündung ist nun über den<br />
Fernzündanschluss (Pos.I) möglich.<br />
After toggeling the main switch<br />
(pos.E) the supply of the On <strong>and</strong> Off<br />
button <strong>and</strong> of the unswitsched 230V<br />
socket is granted.<br />
Now remote ignition is possible using<br />
the ignition remote connector (pos.I)<br />
9) Sicherheitshinweise / safety remarks<br />
Achtung! Hochspannung!<br />
Lebensgefahr!<br />
Vor dem Öffnen Projektor und Vorschaltgerät<br />
immer vom Netz trennen!<br />
Achtung! Projektor nie ohne Objektiv<br />
betreiben! Gefährliche Lichtbündelung<br />
vor dem Gerät!<br />
Anmerkungen zum Betrieb<br />
von Halogen Metalldampflampen<br />
Ä Häufiges Ein- und Ausschalten der<br />
Lampen (Brenner) sowie Betriebszeiten<br />
unter zwei Minuten führen zu erheblicher<br />
Reduzierung der Lebensdauer.<br />
Ä Nach einem Kaltstart sollte das<br />
Vorschaltgerät nicht vor Erreichen der<br />
Betriebstemperatur der Lampe (ca.<br />
1min) abgeschaltet werden, da dies zur<br />
Reduzierung der Lampenlebensdauer<br />
führen kann.<br />
Attention! High Voltage!<br />
Danger of Life!<br />
Before opening always disconnect<br />
projector <strong>and</strong> ballast from the source!<br />
Attention! Don’t operate the projector<br />
without projection lens! Dangerous light<br />
concentration before the projector!<br />
Notes for the operating of<br />
metal halide lamps<br />
Ä Switching on <strong>and</strong> off of the lamp as<br />
well as burning times under two<br />
minutes effect in a significant reduction<br />
of the lifetime.<br />
Ä After cold starting, the ballast should<br />
not be shut down after having reached<br />
the operating temperature of the lamp<br />
(about 1 minute) because of reduction<br />
of the lamp lifetime.<br />
10) Wartungstätigkeiten / maintainance activities<br />
10.1) Abnehmen des Projektordeckels / removing the projector lid<br />
Achtung !<br />
Vor dem Öffnen den Projektor vom<br />
Netz trennen !<br />
Nach Lösen der 4 Befestigungsschrauben<br />
kann der Projektordeckel (Pos. 5)<br />
nach oben abgenommen werden.<br />
Vorsicht, der Deckel betätigt einen<br />
Schutzschalter!<br />
Note !<br />
Before you open the projector, disconnect<br />
it from the source!<br />
After losening the 4 mounting screws, the<br />
projector housing lid (pos. 5) may be<br />
removed by upwards movement.<br />
Attention, the lid operates a safety<br />
switch!<br />
4
AP 2 /<strong>Architekturprojektor</strong> / Architecture Projector PANI <strong>Projection</strong> <strong>and</strong> Stage <strong>Lighting</strong> Vertriebs GmbH<br />
10.2) Wechsel der <strong>HQI</strong> - Lampe / changing the <strong>HQI</strong> - lamp<br />
Ä Erdungsverbindungen von der<br />
Spiegelplatte lÅsen.<br />
Ä Lampen- und ZÇndkabel abklemmen,<br />
Spiegelplatte herausziehen.<br />
Ä Nach Lockern der Blattfedern an den<br />
Lampenfassungen <strong>HQI</strong>- Lampe<br />
wechseln (Abschmelzstelle der Lampe<br />
zum Spiegel gerichtet!).<br />
Ä Blattfedern fixieren und Spiegelplatte in<br />
den Projektor einsetzen.<br />
Ä Lampen- und ZÇndkabel anklemmen,<br />
Erdungsverbindungen wieder herstellen.<br />
10.3) Kondensorreinigung / cleaning the condenser<br />
Bei geÅffnetem Projektordeckel kÅnnen<br />
die einzelnen Kondensorelemente zur<br />
Reinigung herausgenommen werden<br />
(St<strong>and</strong>ard-Glasreiniger und weiches<br />
Baumwolltuch verwenden!).<br />
11) Kondensoraufbau / condenser layout<br />
Ä losen the ground connection of the<br />
mirror plate.<br />
Ä Disconnect lamp <strong>and</strong> ignition cable<br />
<strong>and</strong> pull the mirror plate out.<br />
Ä After losening the leaf springs of<br />
the lamp holders change the <strong>HQI</strong>lamp<br />
(the fill port of the lamp<br />
directed to the mirror!).<br />
Ä Fix the leaf springs <strong>and</strong> insert the<br />
mirror plate into the projector.<br />
Ä Connect lamp <strong>and</strong> ignition cable as<br />
well as the ground connections.<br />
With open projector lid the elements of<br />
the condenser may be pulled out for<br />
cleaning (Use st<strong>and</strong>ard glass cleaning<br />
fluids <strong>and</strong> a soft cotton tissue!)<br />
Legende / legend:<br />
Frontlinse (1) front condenser lens<br />
Mittellinse (2) middle lens<br />
Filter (3) filter<br />
Plankonvexlinse lampenseitig (4) planconvex lens (lamp side)<br />
<strong>HQI</strong> 2000 É Lampe (5) <strong>HQI</strong> 2000 É lamp<br />
Kaltlichtspiegel (6) cold light mirror<br />
HINWEIS / NOTE:<br />
Die Abschmelzstelle der Lampe soll immer in Richtung Spiegel zeigen (siehe Abbildung)!<br />
The fill port of the lamp always has to be directed to the mirror (see figure)!<br />
5
AP 2 /<strong>Architekturprojektor</strong> / Architecture Projector PANI <strong>Projection</strong> <strong>and</strong> Stage <strong>Lighting</strong> Vertriebs GmbH<br />
12) Projektionsobjektive / projection lenses<br />
12.1 Projektionsobjektive / projection objective lenses<br />
Das optionale Objektiv (Brennweiten f= 11<br />
cm bis 60 cm) oder ein Projektions- ZOOM<br />
Objektiv f= 25- 60 cm wird in die vier<br />
Objektivtragbolzen eingehängt und mit den<br />
Flügelmuttern fixiert. Die Brennweite f des<br />
zu verwendenden Objektives hängt von<br />
der Projektionsentfernung und der<br />
gewünschten Bildgröße ab. Sie kann mit<br />
Hilfe des Projektionsdiagrammes oder des<br />
Berechnungstools auf der Webseite<br />
www.pani.com bestimmt werden.<br />
Die Schärfeeinstellung des Objektives<br />
erfolgt durch Verschieben desselben in der<br />
optischen Achse. Die Fixierung erfolgt<br />
mittels der zwei Rändelmuttern am<br />
Objektiv.<br />
Optional projection objective lenses (focal<br />
lengths from f=11 to 60cm) or one ZOOM<br />
projections objective lens 25 – 60 cm are<br />
mounted on the four support bolts on the<br />
front of the projector. Each lens is fixed in<br />
place by four wing nuts. The focal length<br />
(f=) depends upon the projection distance<br />
<strong>and</strong> desired picture size. This is illustrated<br />
further with the aid of the projection diagram<br />
or calculating tool on the website<br />
www.pani.com .<br />
Focus is achieved by sliding the objective<br />
lens forward or back along the optical axis.<br />
The focus position is fixed in place by two<br />
milled nuts located on either side of each<br />
objective lens.<br />
12.2) Effekt- und Vario-Objektive / effect <strong>and</strong> vario objective lenses<br />
Als Ergänzung zu den Projektionsobjektiven<br />
stehen Effekt- und -Varioobjektive zur<br />
Verfügung. Die Effektobjektive<br />
(Brennweiten f= 80/100 mm,110 mm, 150<br />
mm, 180 mm, 250 mm und 310 mm)<br />
haben große Lichtstärke mit guter<br />
Farbkorrektur und werden dort eingesetzt,<br />
wo eine Verstärkung der Tiefenwirkung<br />
und bewußte Verzerrung gewünscht wird.<br />
Mit Hilfe der Effekt- Vario- Objektive - f=<br />
20- 40 cm/ motorisch und f= 30- 60 cm/<br />
manuell - ist es möglich, innerhalb der<br />
Brennweitenbereiche jede Bildgröße zu<br />
projizieren. Beim Objektiv f= 20- 40 cm/<br />
motorisch kann man die<br />
Projektionsbildgröße mit verschiedenen<br />
Geschwindigkeiten verändern.<br />
To enhance the system of projection<br />
objective lenses, effects <strong>and</strong> vario-objective<br />
lenses are available. Effects Lenses (focal<br />
lengths of f=80/100 mm, 150 mm, 180 mm,<br />
250mm <strong>and</strong> 310 mm) provide a strong light<br />
output with good color correction, <strong>and</strong> may<br />
be used where an increase in depth or<br />
specific distortions are desired.<br />
With the aid of the vario-objective lenses<br />
[focal lengths of f=20-40 cm (motorized)<br />
<strong>and</strong> f=30-60 cm manual it is possible to<br />
enlarge or reduce image size. With the the<br />
f=20 – 40 cm / motorized it is possible to<br />
change the image size at different speeds.<br />
6
AP 2 /<strong>Architekturprojektor</strong> / Architecture Projector PANI <strong>Projection</strong> <strong>and</strong> Stage <strong>Lighting</strong> Vertriebs GmbH<br />
13) Projektionsdiagramm für / projection diagram for 0= 17cm<br />
Projektionsentfernung D projection distance<br />
10 20 30 40 50 60 70 80 90 100 METER<br />
5 10 15 20<br />
Projektionsbildbreite B width of projection<br />
Berechnungsformeln / calculating formulas<br />
F ... Objektivbrennweite / focal length of projection lens<br />
B ... Projektionsbildbreite / width of picture<br />
D ... Projektionsentfernung (gemessen Mitte Objektiv) / projection distance (measured from<br />
the middle of projection lens)<br />
O ... Objektgröße (Dianutzformat) / size of object<br />
Dianutzformat / usable slide format (O)= 17cm für Glasdias / for glass slides<br />
15,5cm für Diaspannrahmen / for slide mounting frame<br />
Siehe auch den Projektionsrechner auf www.pani.com (Bereich: support/kleine Helfer)<br />
See also the projection calculator on www.pani.com (area: support/smart assistance)<br />
7<br />
60cm<br />
50cm<br />
40cm<br />
33cm<br />
27cm<br />
25cm<br />
22cm<br />
18cm<br />
13,5cm<br />
11cm<br />
Objektivbrennweite<br />
required focal length<br />
F<br />
25 30 METER
AP 2 /<strong>Architekturprojektor</strong> / Architecture Projector PANI <strong>Projection</strong> <strong>and</strong> Stage <strong>Lighting</strong> Vertriebs GmbH<br />
14) Stromlaufplan / circuit diagram<br />
8
AP 2 /<strong>Architekturprojektor</strong> / Architecture Projector PANI <strong>Projection</strong> <strong>and</strong> Stage <strong>Lighting</strong> Vertriebs GmbH<br />
15) Maß- und Positionszeichnungen /<br />
dimension <strong>and</strong> position drawings<br />
15.1) Projektor / projector<br />
Gehäuseunterteil A housing bottom part<br />
Trägerleiste B bearing rod<br />
Frontplatte C front plate<br />
Gehäuse für Diaventilator D housing for slide fan<br />
Projektordeckel E projector lid<br />
Stützbolzen F supporting bolts<br />
Diaschieber G slide carrier<br />
Betriebsstundenzähler H operation hour meter<br />
Frontkondensorlinse I front condenser lens<br />
Einrastvorrichtung für Diaschieber J slide carrier locking pin<br />
Verstellbarer Klemmhebel (Neigungsverst.) K Adjustable Clamp Lever (incline adjust)<br />
Legende legend<br />
9
AP 2 /<strong>Architekturprojektor</strong> / Architecture Projector PANI <strong>Projection</strong> <strong>and</strong> Stage <strong>Lighting</strong> Vertriebs GmbH<br />
15.2) Vorschaltgerät / ballast<br />
Legende legend<br />
Gehäuse A housing<br />
Deckel B lid<br />
Bockrolle C fixed roller<br />
Griff D h<strong>and</strong>le bar<br />
Hauptschalter E main switch<br />
EIN-Schalter (grün) F ON switch (green)<br />
AUS-Schalter (rot) G OFF switch (red)<br />
Ungeschalteter 230V Ausgang H unswitched output 230V<br />
Fernzündungsanschluss I ignition remote connector<br />
Anbaustecker J projector connection socket<br />
Sicherungen (8AT) K fuses (8AT)<br />
10
AP 2 /<strong>Architekturprojektor</strong> / Architecture Projector PANI <strong>Projection</strong> <strong>and</strong> Stage <strong>Lighting</strong> Vertriebs GmbH<br />
16) Lichtwerte / light output values<br />
40cm<br />
33cm<br />
27cm<br />
22cm<br />
18cm<br />
13,5cm<br />
11cm<br />
Objektiv<br />
projection llens<br />
206900<br />
138400<br />
110800<br />
74400<br />
39400<br />
26400<br />
17500<br />
I max [cd]<br />
11<br />
170500<br />
115000<br />
90500<br />
61200<br />
33500<br />
22800<br />
14900<br />
I d [cd]<br />
22500<br />
22300<br />
26100<br />
26800<br />
22000<br />
26300<br />
25700<br />
ANSI - Lumen