ESX Signum Series Amplifiers - Audio Design GmbH
ESX Signum Series Amplifiers - Audio Design GmbH
ESX Signum Series Amplifiers - Audio Design GmbH

Sie wollen auch ein ePaper? Erhöhen Sie die Reichweite Ihrer Titel.
YUMPU macht aus Druck-PDFs automatisch weboptimierte ePaper, die Google liebt.
2 Channel Amplifer - Applications<br />
SX-260/SX-2100/SX-2150<br />
One 2 Channel Amplifier in Stereo Mode (Front Amplifier) with<br />
One 2 Channel Amplifier in Mono/Subwoofer Mode (Rear Amplifier)<br />
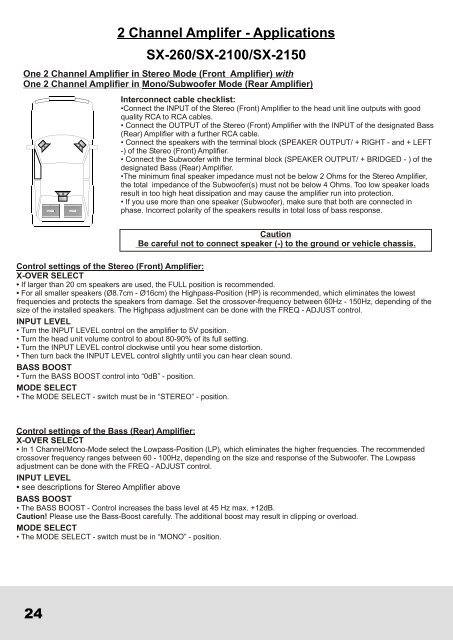
Interconnect cable checklist:<br />
•Connect the INPUT of the Stereo (Front) Amplifier to the head unit line outputs with good<br />
quality RCA to RCA cables.<br />
• Connect the OUTPUT of the Stereo (Front) Amplifier with the INPUT of the designated Bass<br />
(Rear) Amplifier with a further RCA cable.<br />
• Connect the speakers with the terminal block (SPEAKER OUTPUT/ + RIGHT - and + LEFT<br />
-) of the Stereo (Front) Amplifier.<br />
• Connect the Subwoofer with the terminal block (SPEAKER OUTPUT/ + BRIDGED - ) of the<br />
designated Bass (Rear) Amplifier.<br />
•The minimum final speaker impedance must not be below 2 Ohms for the Stereo Amplifier,<br />
the total impedance of the Subwoofer(s) must not be below 4 Ohms. Too low speaker loads<br />
result in too high heat dissipation and may cause the amplifier run into protection.<br />
• If you use more than one speaker (Subwoofer), make sure that both are connected in<br />
phase. Incorrect polarity of the speakers results in total loss of bass response.<br />
Caution<br />
Be careful not to connect speaker (-) to the ground or vehicle chassis.<br />
Control settings of the Stereo (Front) Amplifier:<br />
X-OVER SELECT<br />
• If larger than 20 cm speakers are used, the FULL position is recommended.<br />
• For all smaller speakers (Ø8.7cm - Ø16cm) the Highpass-Position (HP) is recommended, which eliminates the lowest<br />
frequencies and protects the speakers from damage. Set the crossover-frequency between 60Hz - 150Hz, depending of the<br />
size of the installed speakers. The Highpass adjustment can be done with the FREQ - ADJUST control.<br />
INPUT LEVEL<br />
• Turn the INPUT LEVEL control on the amplifier to 5V position.<br />
• Turn the head unit volume control to about 80-90% of its full setting.<br />
• Turn the INPUT LEVEL control clockwise until you hear some distortion.<br />
• Then turn back the INPUT LEVEL control slightly until you can hear clean sound.<br />
BASS BOOST<br />
• Turn the BASS BOOST control into “0dB” - position.<br />
MODE SELECT<br />
• The MODE SELECT - switch must be in “STEREO” - position.<br />
Control settings of the Bass (Rear) Amplifier:<br />
X-OVER SELECT<br />
• In 1 Channel/Mono-Mode select the Lowpass-Position (LP), which eliminates the higher frequencies. The recommended<br />
crossover frequency ranges between 60 - 100Hz, depending on the size and response of the Subwoofer. The Lowpass<br />
adjustment can be done with the FREQ - ADJUST control.<br />
INPUT LEVEL<br />
• see descriptions for Stereo Amplifier above<br />
BASS BOOST<br />
• The BASS BOOST - Control increases the bass level at 45 Hz max. +12dB.<br />
Caution! Please use the Bass-Boost carefully. The additional boost may result in clipping or overload.<br />
MODE SELECT<br />
• The MODE SELECT - switch must be in “MONO” - position.<br />
24