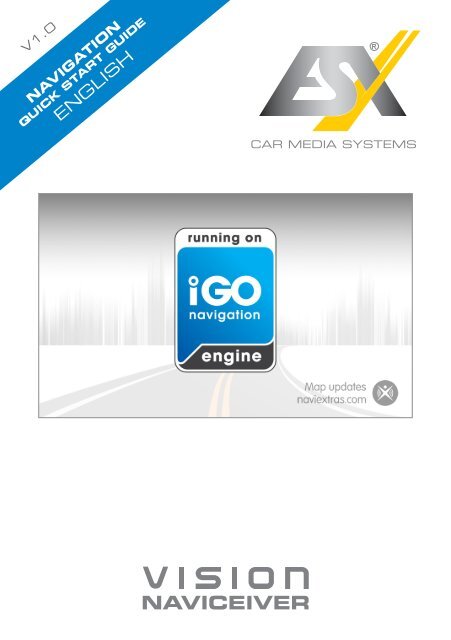
iGO Quick Start Guide (all Models / English) - Esxaudio.de
iGO Quick Start Guide (all Models / English) - Esxaudio.de
iGO Quick Start Guide (all Models / English) - Esxaudio.de

Create successful ePaper yourself
Turn your PDF publications into a flip-book with our unique Google optimized e-Paper software.
V1.0<br />
NAVIGATION<br />
ENGLISH<br />
QUICK START GUIDE
Getting started<br />
When using the navigation software for the first time, an initial setup process starts<br />
automatic<strong>all</strong>y. Do as follows:<br />
Select the program language. If your preferred language does not appear on the screen,<br />
tap / or drag the list up or down with your finger to view <strong>all</strong> available languages.<br />
Tap to select your preferred language. Tap to<br />
confirm your selection, and proceed to the next page.<br />
Read the Software and Database End User Licence Agreement, and tap<br />
if you agree with the terms of use.<br />
You are now asked whether you <strong>all</strong>ow the software to collect usage information and GPS<br />
logs that may be used for improving the application and the quality and coverage of maps.<br />
Tap to <strong>all</strong>ow the anonymous statistics or disable this function.<br />
Select the voice guidance language profile. If your preferred language does not appear on<br />
the screen, scroll the list for other available profiles. Tap any item in the list for a short voice<br />
sample. Tap to confirm your selection, and proceed to the next page.
Getting started<br />
Set your preferred time format and units. Tap to confirm your<br />
preferences.<br />
Set your preferred route planning options. Tap to confirm your<br />
preferences.<br />
The initial setup is now complete. Tap .<br />
The application starts.
<strong>Start</strong>up screen: the Navigation menu<br />
After the initial setup, and whenever the software is started, the Navigation menu appears.<br />
You have the following options:<br />
• Tap to select your <strong>de</strong>stination by entering an address or selecting<br />
a place of interest, a location on the map or one of your Favourite <strong>de</strong>stinations. You<br />
can also look up your recent <strong>de</strong>stinations from the Smart History or by entering its<br />
coordinate.<br />
• Tap to display the route parameters. You can view the route in its<br />
full length on the map. You can also perform route-related actions such as editing or<br />
cancelling your route, setting a start point for the route, picking route alternatives,<br />
avoiding parts of the route, simulating navigation or adding the <strong>de</strong>stination to your<br />
Favourites.<br />
• Tap to customise the way the navigation software works, simulate<br />
<strong>de</strong>mo routes, or to run some additional applications.<br />
• Tap to start navigating on the map.<br />
• Tap to stop navigation and exit the software.
Find menu<br />
In the Navigation menu, tap . The Find menu provi<strong>de</strong>s you with the<br />
following options:<br />
• Tap to specify an address as your <strong>de</strong>stination.<br />
• Tap to select a place of interest as your <strong>de</strong>stination.<br />
• Tap to navigate to a location selected on the map.<br />
• Tap to choose from the list of your favourite <strong>de</strong>stinations.<br />
• Tap or to navigate to the recent <strong>de</strong>stination that is shown on the button.<br />
• Tap to choose from the list of <strong>all</strong> recent <strong>de</strong>stinations.<br />
• Tap for other search methods.
Navigating to an address<br />
In the Navigation menu, tap , then tap . By <strong>de</strong>fault, the screen<br />
proposes the city or town where you are located.<br />
If nee<strong>de</strong>d, change the country. Tap the button showing the name of the country.<br />
1. Use the keyboard to enter the name of the country.<br />
2. After entering a couple of characters, the list of countries that match the entered string<br />
appears. Tap the country of your choice.<br />
If nee<strong>de</strong>d, change the city/town. Tap the button showing the name of the city/town, and<br />
use the keyboard to enter a part of its name. As you enter letters, the most likely city/town<br />
name is always shown in the input field. You have the following options:<br />
• Tap to select the city/town that is offered in the input field.<br />
• Tap to correct your entry.<br />
• Tap to browse the list of city/town names matching your input.<br />
Select a city/town from the list.
Navigating to an address<br />
Enter the street name:<br />
1. Tap .<br />
2. Use the keyboard to enter a part of the street name.<br />
3. Tap to select the street that is offered in the input field or tap<br />
from the list.<br />
Enter the house number:<br />
1. Tap .<br />
2. Use the keyboard to enter the house number.<br />
to browse the list of <strong>all</strong> streets matching your input. Select a street<br />
3. Tap to finish entering the address.<br />
The map appears with the selected <strong>de</strong>stination in the middle. Tap another map location if<br />
necessary, then tap to confirm the <strong>de</strong>stination.<br />
After a short summary of the route parameters, the map appears showing the entire route.<br />
Wait for a few seconds or tap and start navigating.
Navigating to a place of interest<br />
On the Map screen, tap to return to the Navigation menu. In the<br />
Navigation menu, tap , then tap . You are offered the following<br />
preset search categories:<br />
• Tap to get a list of petrol stations along the route or if it is not<br />
available, around your current position or your last known position.<br />
• Tap to get a list of parking lots near the <strong>de</strong>stination or if it is not<br />
available, around your current position or your last known position.<br />
• Tap to get a list of restaurants along the route, around your<br />
current position or your last known position.<br />
• Tap to get a list of accommodation near the <strong>de</strong>stination, around<br />
your current position or your last known position.<br />
You can also tap and search for a place by entering its name.<br />
If none of the above is appropriate, tap to find a place of interest at the following<br />
locations:<br />
• Tap to search around the current position or if it is not available,<br />
around the last know position.<br />
• Tap to search for a place within a selected city or town.<br />
• Tap to search for a place around the <strong>de</strong>stination of the active<br />
route.<br />
• Tap to search along the active route, and not around a given<br />
point. This is useful when you search for a later stopover that results in a minimal<br />
<strong>de</strong>tour only, such as searching for upcoming petrol stations or restaurants.
An example of navigating to a place of interest<br />
Example: To find a park around your <strong>de</strong>stination, do as follows (starting from the Navigation<br />
menu):<br />
Tap .<br />
Tap .<br />
Tap .<br />
Tap .<br />
The list of place categories appears. Tap or sli<strong>de</strong> your finger to browse the list, and<br />
tap .<br />
Tap to browse the whole category, or tap to<br />
narrow down your search.<br />
Tap any of the list items.<br />
Check the <strong>de</strong>tails and the location of the place, and then tap .<br />
After a short summary of the route parameters, the map appears showing the entire route.<br />
Wait for a few seconds or tap and start navigating.
The Map screen<br />
The Map screen is the most important and frequently used screen of the software. The<br />
Vehimarker (a blue arrow by <strong>de</strong>fault) represents your current position, and the orange line<br />
shows the recommen<strong>de</strong>d route. There are screen buttons and data fields on the screen to<br />
help you navigate. During navigation, the screen shows route information.<br />
• At the top of the screen, you see your heading and the house numbers on left and right<br />
if you have not selected a route <strong>de</strong>stination. When navigating a route, you see the next<br />
manoeuvre and the next street/road on your route. Tap either of them to open the route<br />
itinerary.<br />
• Tap to open the <strong>Quick</strong> menu with a selection of functions that are useful during<br />
navigation.<br />
• Tap the map anywhere to explore the map around your current position. Additional<br />
map control buttons appear.<br />
• Tap to open three data fields on the map. Tap any of them to<br />
suppress the others. The <strong>de</strong>fault values for navigation (you can change them in Map<br />
settings):<br />
• the remaining distance to the <strong>de</strong>stination,<br />
• the remaining time of the trip, and<br />
• the estimated time of the arrival at the <strong>de</strong>stination.<br />
• Tap to open the Navigation menu.
'More' menu<br />
The 'More' menu provi<strong>de</strong>s you with various options and additional applications. In the<br />
Navigation menu, tap .<br />
• : Fine-tune route planning options, change the look of the Map screen, turn on or<br />
off warnings, or restart the Configuration wizard, etc.<br />
• : Visit www.naviextras.com to get additional content, such as new maps or 3D<br />
landmarks and useful applications.<br />
• : Access travel applications: the unit converter, the clothing size converter or<br />
country information.<br />
• : Access other useful applications: the calculator, the fuel and maintenance<br />
monitor, sunrise and sunset information or the trip and track log monitor.<br />
• : Run the Demo and watch sample route simulations to see how navigation<br />
works, read the Software and Database End User License Agreement, or check the<br />
map and other contents of the application.
Settings menu<br />
In the Navigation menu, tap , then tap . The Settings menu<br />
provi<strong>de</strong>s you with the following options (scroll the list to see <strong>all</strong>):<br />
• : Adjust the different sound volumes, change the voice guidance<br />
profile, or enable and set up warnings.<br />
• : Change the function buttons in the <strong>Quick</strong> menu of the Map<br />
screen.<br />
• : Before selecting one of the Lorry profiles as the Vehicle type<br />
used in route calculation, set up the editable lorry attribute profile with the parameters<br />
of your lorry. These parameters will be used in route calculation.<br />
• : You can adjust traffic related settings such as using preloa<strong>de</strong>d<br />
statistical or online traffic, or select whether to take traffic events into consi<strong>de</strong>ration<br />
when calculating the route.<br />
• : Select the type of vehicle you are driving, the road types used in<br />
route planning, and the route planning method.<br />
• : Adjust map related settings: change the daytime and night colour<br />
schemes, change the <strong>de</strong>fault zoom level, switch between 2D and 3D map, suppress<br />
buildings or change the Vehimarker.<br />
• : Adjust how the software helps you navigate with different kinds of<br />
route related information on the Map screen.<br />
• : Turn the menu animations on or off, select a different skin for the<br />
application, or adjust the display backlight.<br />
• : Change the program language, the time format, units or the time<br />
zone.<br />
• : Turn the automatic trip or track log saving on or off, check the<br />
current size of the trip database.
• : The application collects usage information and GPS logs that<br />
may be used for improving the application and the quality and coverage of maps. Here<br />
you can enable or disable collecting these logs.<br />
• : Modify the basic software parameters set during the initial setup<br />
process.<br />
• : Delete <strong>all</strong> saved data and reset <strong>all</strong> settings to their factory<br />
<strong>de</strong>faults.
D E S I G N<br />
ESX Car Media Systems · Audio Design GmbH<br />
Am Breilingsweg 3 · D-76709 Kronau/Germany<br />
Tel. +49(0)7253 - 9465-0 · Fax +49(0)7253 - 946510<br />
www.esxaudio.<strong>de</strong> - www.audio<strong>de</strong>sign.<strong>de</strong><br />
©2013 All Rights Reserved