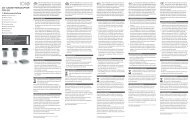
VM 3 K, Bed.-An (Konvertiert)-1 - Hartig + Helling GmbH & Co. KG
VM 3 K, Bed.-An (Konvertiert)-1 - Hartig + Helling GmbH & Co. KG
VM 3 K, Bed.-An (Konvertiert)-1 - Hartig + Helling GmbH & Co. KG

Sie wollen auch ein ePaper? Erhöhen Sie die Reichweite Ihrer Titel.
YUMPU macht aus Druck-PDFs automatisch weboptimierte ePaper, die Google liebt.
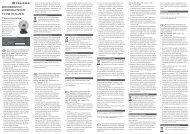
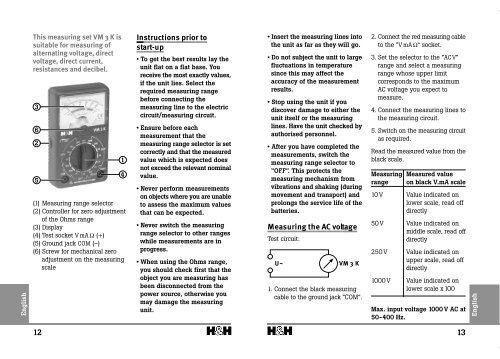
This measuring set <strong>VM</strong> 3 K is<br />
suitable for measuring of<br />
alternating voltage, direct<br />
voltage, direct current,<br />
resistances and decibel.<br />
3<br />
6<br />
2<br />
5<br />
(1) Measuring range selector<br />
(2) <strong>Co</strong>ntroller for zero adjustment<br />
of the Ohms range<br />
(3) Display<br />
(4) Test socket VmAΩ (+)<br />
(5) Ground jack COM (–)<br />
(6) Screw for mechanical zero<br />
adjustment on the measuring<br />
scale<br />
1<br />
4<br />
Instructions prior to<br />
start-up<br />
• To get the best results lay the<br />
unit flat on a flat base. You<br />
receive the most exactly values,<br />
if the unit lies. Select the<br />
required measuring range<br />
before connecting the<br />
measuring line to the electric<br />
circuit/measuring circuit.<br />
• Ensure before each<br />
measurement that the<br />
measuring range selector is set<br />
correctly and that the measured<br />
value which is expected does<br />
not exceed the relevant nominal<br />
value.<br />
• Never perform measurements<br />
on objects where you are unable<br />
to assess the maximum values<br />
that can be expected.<br />
• Never switch the measuring<br />
range selector to other ranges<br />
while measurements are in<br />
progress.<br />
• When using the Ohms range,<br />
you should check first that the<br />
object you are measuring has<br />
been disconnected from the<br />
power source, otherwise you<br />
may damage the measuring<br />
unit.<br />
• Insert the measuring lines into<br />
the unit as far as they will go.<br />
• Do not subject the unit to large<br />
fluctuations in temperature<br />
since this may affect the<br />
accuracy of the measurement<br />
results.<br />
• Stop using the unit if you<br />
discover damage to either the<br />
unit itself or the measuring<br />
lines. Have the unit checked by<br />
authorised personnel.<br />
• After you have completed the<br />
measurements, switch the<br />
measuring range selector to<br />
“OFF”. This protects the<br />
measuring mechanism from<br />
vibrations and shaking (during<br />
movement and transport) and<br />
prolongs the service life of the<br />
batteries.<br />
Measuring the AC voltage<br />
Test circuit:<br />
U~ <strong>VM</strong> 3 K<br />
1. <strong>Co</strong>nnect the black measuring<br />
cable to the ground jack “COM”.<br />
2. <strong>Co</strong>nnect the red measuring cable<br />
to the “VmAΩ” socket.<br />
3. Set the selector to the “AC V”<br />
range and select a measuring<br />
range whose upper limit<br />
corresponds to the maximum<br />
AC voltage you expect to<br />
measure.<br />
4. <strong>Co</strong>nnect the measuring lines to<br />
the measuring circuit.<br />
5. Switch on the measuring circuit<br />
as required.<br />
Read the measured value from the<br />
black scale.<br />
Measuring<br />
range<br />
Measured value<br />
on black V.mA scale<br />
10 V Value indicated on<br />
lower scale, read off<br />
directly<br />
50 V Value indicated on<br />
middle scale, read off<br />
directly<br />
250 V Value indicated on<br />
upper scale, read off<br />
directly<br />
1000 V Value indicated on<br />
lower scale x 100<br />
Max. input voltage 1000 V AC at<br />
50-400 Hz.<br />
12<br />
13