Bedienungsanleitung - Frankonia
Bedienungsanleitung - Frankonia
Bedienungsanleitung - Frankonia

Sie wollen auch ein ePaper? Erhöhen Sie die Reichweite Ihrer Titel.
YUMPU macht aus Druck-PDFs automatisch weboptimierte ePaper, die Google liebt.
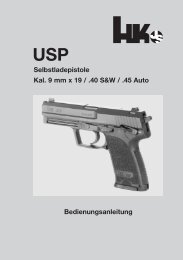
P8<br />
Selbstladepistole<br />
Selfloading Pistol<br />
Kaliber 9 mm x 19<br />
Caliber 9 mm x 19<br />
<strong>Bedienungsanleitung</strong><br />
Operator’s Manual
WARNING!<br />
This manual does not<br />
consider warnings in respect<br />
to US-product liability.<br />
For use in USA please order<br />
an User Manual from:<br />
Heckler & Koch Inc.<br />
21480 Pacific Blvd.<br />
Sterling, Virginia 20166-8903<br />
Tel. (703) 450-1900
m Vor Gebrauch der Pistole Sicherheitshinweise<br />
lesen!<br />
m Before handling the pistol, read and<br />
mind the safety instructions!<br />
Selbstladepistole P8<br />
Selfloading Pistol P8<br />
Kaliber 9 mm x 19<br />
Caliber 9 mm x 19<br />
1
Inhaltsverzeichnis . . . . . . . . Seite<br />
m Sicherheitshinweise zum<br />
Umgang mit Pistolen . . . . . . . . . . . . . 3<br />
Vorbemerkung. . . . . . . . . . . . . . . . . . . . 7<br />
Allgemeines. . . . . . . . . . . . . . . . . . . . . . 9<br />
Technische Daten . . . . . . . . . . . . . . . . 11<br />
Baugruppenübersicht . . . . . . . . . . . . . 12<br />
Bedienelemente, Bezeichnungen . . . 13<br />
Funktion . . . . . . . . . . . . . . . . . . . . . . . 14<br />
Prüfungen . . . . . . . . . . . . . . . . . . . . . . 15<br />
Prüfen vor und nach Gebrauch . . . . . 15<br />
Funktionsprüfung Verschluss<br />
mit Griffstück . . . . . . . . . . . . . . . . . . . 15<br />
Funktionsprüfung Abzugs- und<br />
Sicherungseinrichtung . . . . . . . . . . . . 15<br />
Prüfung des Schlagbolzens<br />
auf Gängigkeit. . . . . . . . . . . . . . . . . . . 15<br />
Handhabung und Bedienung . . . . . . . 17<br />
Grundsätze der<br />
Handhabung und Bedienung . . . . . . . 17<br />
Vorbereiten zum Schießen . . . . . . . . . 17<br />
Laden . . . . . . . . . . . . . . . . . . . . . . . . . 17<br />
Schießen mit Normalabzug<br />
(Single Action). . . . . . . . . . . . . . . . . . . 17<br />
Entspannen . . . . . . . . . . . . . . . . . . . . 19<br />
Schießen mit Spannabzug<br />
(Double Action) . . . . . . . . . . . . . . . . . . 19<br />
Erneutes Laden bei<br />
leergeschossenem Magazin . . . . . . . . 19<br />
Entladen der Pistole . . . . . . . . . . . . . . 21<br />
Füllen und Entleeren des Magazines . 21<br />
Pflege . . . . . . . . . . . . . . . . . . . . . . . . . 22<br />
Pflegemittel und Gerät . . . . . . . . . . . . 22<br />
Pflegearbeiten. . . . . . . . . . . . . . . . . . . 22<br />
Visierung, Justierung . . . . . . . . . . . . . 24<br />
Zerlegen der Pistole . . . . . . . . . . . . . . 25<br />
Zusammensetzen der Pistole . . . . . . . 27<br />
Störungen und Fehler,<br />
Ursachen, Beseitigung . . . . . . . . . . . . 29<br />
Teileliste . . . . . . . . . . . . . . . . . . . . . . . 33<br />
Contents . . . . . . . . . . . . . . . . Page<br />
m Safety notes for the<br />
handling of pistols . . . . . . . . . . . . . . . 5<br />
Preliminary note . . . . . . . . . . . . . . . . . . 8<br />
General . . . . . . . . . . . . . . . . . . . . . . . . 10<br />
Technical data. . . . . . . . . . . . . . . . . . . 11<br />
Component overview . . . . . . . . . . . . . 12<br />
Operating controls, designation . . . . . 13<br />
Function . . . . . . . . . . . . . . . . . . . . . . . 14<br />
Checking. . . . . . . . . . . . . . . . . . . . . . . 16<br />
Checking before and<br />
after use . . . . . . . . . . . . . . . . . . . . . . . 16<br />
Functional tests of slide<br />
with grip . . . . . . . . . . . . . . . . . . . . . . . 16<br />
Functional tests of the trigger<br />
and the safety lever . . . . . . . . . . . . . . 16<br />
Testing the smooth operation of<br />
the safety and of the firing pin . . . . . . 16<br />
Handling and operation . . . . . . . . . . . 18<br />
Principles of handling<br />
and operation . . . . . . . . . . . . . . . . . . . 18<br />
Preparation for firing . . . . . . . . . . . . . . 18<br />
Loading . . . . . . . . . . . . . . . . . . . . . . . . 18<br />
Firing in single action mode . . . . . . . . 18<br />
Decocking . . . . . . . . . . . . . . . . . . . . . . 20<br />
Firing in double action mode . . . . . . . 20<br />
Reloading when magazine<br />
is empty . . . . . . . . . . . . . . . . . . . . . . . 20<br />
Unloading the pistol . . . . . . . . . . . . . . 21<br />
Filling and emptying of<br />
the magazine . . . . . . . . . . . . . . . . . . . 21<br />
Cleaning and Maintenance . . . . . . . . . 23<br />
Cleaning materials and kits . . . . . . . . 23<br />
Cleaning work . . . . . . . . . . . . . . . . . . . 23<br />
Sighting, adjustment. . . . . . . . . . . . . . 24<br />
Disassembly of the pistol . . . . . . . . . . 26<br />
Assembly of the pistol . . . . . . . . . . . . 28<br />
Trouble shooting chart . . . . . . . . . . . . 30<br />
List of parts. . . . . . . . . . . . . . . . . . . . . 35<br />
2
m<br />
Sicherheitshinweise<br />
– Beim Umgang mit Pistolen ist besondere<br />
Vorsicht notwendig, da<br />
Lage und Richtung der Pistole<br />
sehr leicht verändert werden können.<br />
– Lesen Sie diese Anleitung vor Benutzung<br />
der Pistole gründlich<br />
durch. Benutzen Sie die Pistole<br />
erst dann, wenn Sie die Anleitung<br />
verstanden haben.<br />
– Beachten Sie alle Hinweise zur<br />
Handhabung und Bedienung.<br />
Nichtbeachtung kann Gefahr für<br />
Leib und Leben verursachen.<br />
– Unterlassen Sie den Umgang mit<br />
der Pistole, sofern Sie zuvor Alkohol,<br />
Drogen oder Medikamente zu<br />
sich genommen haben oder sich<br />
körperlich unwohl fühlen.<br />
– Vor der Benutzung, bei Störungen<br />
und vor dem Reinigen ist zu prüfen,<br />
ob<br />
– die Pistole entladen ist<br />
– (Patronenlager frei),<br />
– das Rohr frei ist von Fremd-<br />
– körpern und<br />
– das Magazin leer ist.<br />
– Bei der Übergabe oder Übernahme<br />
der Pistole muss der Verschluss<br />
immer geöffnet sein.<br />
– Die Pistole ist grundsätzlich so zu<br />
behandeln, als sei sie geladen<br />
und feuerbereit.<br />
– Zielen Sie beim Hantieren oder<br />
Üben mit der Pistole nie auf Personen.<br />
Pistole stets in eine sichere<br />
Richtung halten.<br />
zum Umgang mit Pistolen<br />
– Berühren Sie beim Laden und<br />
Entladen, beim Ziehen und sonstigem<br />
Handhaben niemals den Abzug.<br />
Der Abzugsfinger ist grundsätzlich<br />
am Abzugsbügel außen<br />
anzulegen. Der Abzug darf nur<br />
betätigt werden, wenn die Pistole<br />
zum Ziel zeigt.<br />
– Beim Handhaben, Zerlegen, Reinigen<br />
und Zusammensetzen darf<br />
keine Gewalt angewendet werden.<br />
– Zerlegen Sie die Pistole nur soweit,<br />
wie in dieser Anleitung beschrieben.<br />
– Tragen Sie beim Schießen immer<br />
eine Schutzbrille. Beim Schießen<br />
sind Ihre Augen durch Splitter<br />
oder ausgeworfene sowie von<br />
Wänden zurückprallende Patronenhülsen<br />
gefährdet.<br />
– Tragen Sie beim Schießen immer<br />
einen Gehörschutz.<br />
– Verwenden Sie nur fachgerecht<br />
laborierte und unbeschädigte Patronen<br />
mit dem richtigen Kaliber.<br />
– Beachten Sie, dass beim Schießen<br />
der Verschluss der Pistole mit<br />
hoher Geschwindigkeit zurückläuft.<br />
Halten Sie deshalb beim<br />
Schießen die Pistole so, dass sich<br />
Ihre Hände nicht im Bereich des<br />
Verschlussweges befinden, um<br />
Verletzungen zu vermeiden.<br />
– Achtung! Halten Sie beim Schießen<br />
immer den Mündungsbereich<br />
frei.<br />
3
Zubehör<br />
– Verwahren Sie die Pistole getrennt<br />
von der Munition. Unbefugte (insbesondere<br />
Kinder) dürfen keinen<br />
Zugriff zur Pistole erhalten.<br />
– Die ausgereifte Konstruktion der<br />
Pistole bietet größtmögliche<br />
Handhabungssicherheit.<br />
– Die Pistole besitzt eine Fallsicherung,<br />
die den Zweck hat, eine unbeabsichtigte<br />
Schussauslösung<br />
bei Stoß und Fall zu verhindern.<br />
Dadurch ist ein Höchstmaß an<br />
Fallsicherheit geboten. Eine absolute<br />
Fallsicherheit ist nicht erreichbar.<br />
– Außergewöhnliche Belastungen,<br />
wie harte Stöße oder Fallbeanspruchung<br />
können die Sicherheit<br />
beeinträchtigen. Nach solch<br />
außergewöhnlichen Vorkommnissen<br />
ist die Pistole vom Hersteller<br />
zu überprüfen.<br />
– Heckler & Koch übernimmt keine<br />
Haftung für Vorfälle, die auf Nichtbeachtung<br />
dieser Anleitung,<br />
falsche Handhabung, Fahrlässigkeit,<br />
unsachgemäße Behandlung,<br />
unbefugten Teileaustausch oder<br />
sonstige Eingriffe in die Pistole<br />
zurückzuführen sind.<br />
– Diese <strong>Bedienungsanleitung</strong> ist Teil<br />
der Pistole und muss bei der Weitergabe<br />
der Pistole immer mitgegeben<br />
werden.<br />
– Achten Sie bei der Verwendung<br />
von Holstern darauf, dass sich<br />
das Holster nach der Beschaffenheit<br />
der Pistole zu richten hat und<br />
nicht umgekehrt die Pistole nach<br />
dem Holster.<br />
– Die Führungsbahn des verwendeten<br />
Holsters muss so beschaffen<br />
sein, dass weder beim Hineinstecken<br />
noch beim Herausziehen<br />
der Pistole ein unbeabsichtigtes<br />
Umlegen des Sicherungshebels<br />
möglich ist.<br />
– Achten Sie darauf, dass die Pistole<br />
im Holster jederzeit so gehalten<br />
und gesichert wird, dass ein Herausfallen<br />
der Pistole ausgeschlossenist.<br />
– Unterziehen Sie Ihr Holster einer<br />
ständigen Kontrolle, da sowohl<br />
das Alter, Waffenöl sowie Körperwärme<br />
und längerer Gebrauch<br />
des Holsters dessen Eigenschaften<br />
negativ beeinflussen können.<br />
– Bei schnellen und unkontrollierten<br />
Bewegungen, im Laufschritt sowie<br />
bei allen Bewegungen, bei denen<br />
die Pistole im Holster eine<br />
starke Beschleunigung erfährt, ist<br />
vom Träger der Pistole die Hand<br />
schützend auf die im Holster befindliche<br />
Pistole zu halten, da die<br />
Pistole im Verhältnis zum Holster<br />
eine herhältnismäßig große spezifische<br />
Masse aufweist.<br />
4
m<br />
Safety<br />
– When handling pistols special<br />
caution is necessary as position<br />
and direction of the pistol can be<br />
changed easily.<br />
– Carefully read this operation manual<br />
before handling the pistol.<br />
Only use the pistol if you have understood<br />
the manual.<br />
– Observe all notes regarding<br />
handling and operation.<br />
Disregarding can cause danger<br />
to life and limb.<br />
– Do not handle the pistol in case<br />
you have consumed alcohol,<br />
drugs or medications, or if you<br />
feel physically unwell.<br />
– Before handling, in case of troubles<br />
and before cleaning it has to<br />
be checked wether:<br />
– the pistol is unloaded<br />
– (cartridge chamber free),<br />
– the barrel is free of<br />
– obstructions and<br />
– the magazine is empty.<br />
– When giving or taking the pistol<br />
the slide must always be open.<br />
– Always treat the pistol as if it is loaded<br />
and ready to fire.<br />
– Never point the pistol at anyone<br />
while handling or practise. Always<br />
point in a safe direction.<br />
– Keep your finger off the trigger<br />
while loading, unloading, drawing<br />
or otherwise handling the pistol.<br />
Always place the trigger finger<br />
against the trigger guard.<br />
– The trigger may only be pulled if<br />
your sights are aligned on the target.<br />
notes for the handling of pistols<br />
– Never use force when handling,<br />
disassembling, cleaning and assembling<br />
the pistol.<br />
– Disassemble the pistol only as far<br />
as described in this manual.<br />
– Always wear eye protection when<br />
using the pistol. When firing, your<br />
eyes are endangered by ejected<br />
cartridge cases or cartridge cases<br />
bounced off walls.<br />
– Always wear hearing protection<br />
when using the pistol.<br />
– Only use factory loaded and undamaged<br />
cartridges of the correct<br />
caliber.<br />
– Mind that during firing the pistol’s<br />
slide moves back with high velocity.<br />
Hold the pistol in such a way<br />
that your hands are away from the<br />
rearward moving slide, in order to<br />
avoid injuries.<br />
– Do not grasp over the muzzle and<br />
mind that the muzzle area is free<br />
when firing.<br />
– Store the pistol separately from<br />
ammunition and beyond the reach<br />
of unauthorized persons (especially<br />
children).<br />
– The proven P8 design ensures<br />
maximum possible safety for the<br />
shooter.<br />
– The P8 pistol is equipped with a<br />
drop safety in order to prevent accidental<br />
shots in case of shocks<br />
or drops. This provides an utmost<br />
possible degree of drop safety. An<br />
absolute drop safety cannot be<br />
achieved.<br />
5
Accessories<br />
– Extraordinary conditions as e.g.<br />
bad shocks or heavy drops may<br />
adversely affect the safety. After<br />
such events the pistol must be<br />
checked by the manufacturer.<br />
– Heckler & Koch do not assume<br />
any liability for events due to disregarding<br />
this manual, wrong<br />
handling, negligence, improper<br />
treatment, unauthorized part exchange<br />
and other manipulations<br />
in, with or at the pistol.<br />
– This operator’s manual is included<br />
in the scope of supply of the pistol<br />
and always has to be passed on<br />
along with the pistol.<br />
– If you use holsters, mind that the<br />
holster must suit the pistol and<br />
not vice versa.<br />
– The holster’s pistol guide elements<br />
must be configured in such<br />
a way that an accidental actuation<br />
of the safety lever is prevented<br />
when the pistol is drawn from or<br />
inserted into the holster.<br />
– Always check your holster, as ageing<br />
material, gun oil, body temperature<br />
or extended use of the<br />
holster may adversely affect its<br />
characteristics.<br />
– Always secure the pistol in the<br />
holster with your hand when you<br />
have to run or in case you carry<br />
out fast and uncontrolled movements.<br />
The pistol’s mass is relatively<br />
high as compared to the holster<br />
mass which may cause the<br />
pistol to drop out of the holster in<br />
such cases.<br />
6
Vorbemerkung<br />
1. Einwandfreie Funktion und lange<br />
Lebensdauer der Pistole P8 können<br />
nur durch ordnungsgemäße Handhabung,<br />
Bedienung und Pflege unter<br />
Beachtung der in dieser Anleitung<br />
enthaltenen Anweisungen sichergestellt<br />
werden.<br />
2. Die Angaben „rechts“, „links“,<br />
„vorn“ und „hinten“ sind bezogen<br />
auf die Lage der Pistole in Schussrichtung<br />
gesehen.<br />
3. Jede Beschreibung von Waffenteilen<br />
und jede Arbeit ist im allgemeinen<br />
nur einmal aufgeführt. Je<br />
nach Umfang wird deshalb ggf. auf<br />
bereits vorhandene Beschreibung<br />
von Pistolenteilen und Arbeiten in<br />
anderen Abschnitten hingewiesen.<br />
4. Soweit keine besonderen Einbauhinweise<br />
gegeben werden, erfolgt<br />
das Zusammenbauen in umgekehrter<br />
Reihenfolge des Zerlegens.<br />
5. Bitte teilen Sie Änderungs- bzw.<br />
Ergänzungsvorschläge zu dieser<br />
Beschreibung der Firma Heckler &<br />
Koch GmbH mit.<br />
6. Verwenden Sie nur Original<br />
HK-Ersatzteile.<br />
Bei Verwendung anderer Teile erlischt<br />
die Gewährleistung. Bei Bestellung<br />
von Ersatzteilen geben Sie<br />
bitte Positions- und Identnummer<br />
sowie die Benennung der erforderlichen<br />
Teile an.<br />
7
Preliminary note<br />
1. A perfect function and long life of<br />
the pistol P8 can only be ensured<br />
by a correct handling, operation<br />
and maintenance subject to the instructions<br />
of this manual.<br />
2. The indications “right”, “left”, “at<br />
the front” and “at the back” are relate<br />
to the shooter´s point of view<br />
when he holds the pistol in his<br />
hands and looks as it as when firing.<br />
3. Each description of weapon parts<br />
and each work is only specified<br />
once. Therefore, according to the<br />
extend, there is a reference to<br />
already existing descriptions of<br />
weapon parts and works in other<br />
sections.<br />
4. Unless there are no particular<br />
assembly notes, assembly takes<br />
place in reverse order than the disassembly.<br />
5. Please inform Heckler & Koch<br />
GmbH about all desirable modifications<br />
respectively supplementary<br />
suggestions to this manual.<br />
6. Use only original HK-Spare<br />
Parts.<br />
Otherwise the manufacturer liability<br />
will be no longer valid.<br />
When ordering spare parts please<br />
adress position and identification<br />
numbers as well as the designation.<br />
8
Allgemeines<br />
Die Pistole P8, Kal. 9 mm x 19, ist<br />
eine Selbstladepistole mit verriegeltem<br />
und gepuffertem Verschlusssystem.<br />
Griffstück und Magazin<br />
sind aus hochwertigem, faserverstärktem<br />
Kunststoff gefertigt.<br />
Die Pistole hat Normal- und Spannabzug<br />
(SA/DA).<br />
Das Magazin fasst 15 Patronen.<br />
Durch die unter dem Rohr liegende<br />
mechanische Puffereinrichtung wird<br />
die Impulsübertragung auf das<br />
Griffstück gedämpft. Daraus resultiert<br />
eine außergewöhnlich hohe<br />
Lebensdauer der Pistolenteile. Die<br />
Puffereinrichtung verringert die<br />
Kraftspitzen beim Entriegeln des<br />
Rohres und bei der Verschlussumkehr<br />
und vermindert somit das<br />
Stoßempfinden an der Hand des<br />
Schützen.<br />
Der Magazinhalter ist beidseitig<br />
bedienbar. Im Griffstück ist eine<br />
Montageschiene zur Aufnahme von<br />
Zielgeräten integriert. Die Visierung<br />
mit Kontrastpunkten ermöglicht<br />
eine schnelle und genaue Zielerfassung.<br />
Die ergonomisch gestaltete<br />
Außenform und die griffgünstig angebrachten<br />
Bedienelemente lassen<br />
den Schützen schnell mit der Pistole<br />
vertraut werden.<br />
Die Pistole P8 läßt sich zur Reinigung<br />
und Pflege ohne Werkzeug<br />
leicht in die Hauptbaugruppen zerlegen.<br />
Die Pistole P8 Combat hat anstelle<br />
des kombinierten Sicherungs-/Entspannhebels<br />
nur einen Entspannhebel<br />
ohne Sicherungsfunktion.<br />
Alle anderen Bedienteile sind identisch<br />
mit der Pistole P8.<br />
Die Abbildungen in der Beschreibung<br />
zeigen die Pistole P8 mit<br />
Normal- und Spannabzug (SA/DA)<br />
und kombiniertem Sicherungs-/<br />
Entspannhebel an der linken Griffseite.<br />
9
General<br />
The P8-pistol, caliber 9 mm x 19, is<br />
a selfloading pistol with locked and<br />
buffered breech system. The grip<br />
and magazine is made of highgrade<br />
fiber-reinforced plastic.<br />
The pistol is provided with a singleand<br />
Double Action Trigger (SA/DA).<br />
It has a magazine capacity of<br />
15 cartridges.<br />
By the mechanical recoil reduction<br />
system, located below the barrel,<br />
the recoil force to the grip is reduced,<br />
thus greatly extending the<br />
life expectancy of the weapon<br />
parts. The recoil reduction system<br />
dampens the impact of the barrel<br />
and slide on the grip during unlocking<br />
and when the slide reaches<br />
it’s most rearward position. This<br />
reduces the recoil forces, the felt<br />
recoil to the shooter’s hand and the<br />
load on the weapon parts.<br />
The magazine release can be actuated<br />
ambidextrous. A mounting<br />
groove for fitting targeting devices<br />
is incorporated into the grip.<br />
Sighting with dots allows a quick<br />
and precise target acquisition. Due<br />
to the ergonomically designed outer<br />
form and the operating controls, located<br />
easily to actuate, the shooter<br />
will become familiar with the weapon<br />
soon.<br />
The pistol P8 can be easily disassembled<br />
into the main components<br />
for cleaning and maintanance<br />
without any tool.<br />
The P8 Combat-pistol is a variant<br />
which features a decocking lever<br />
only instead of the conventional decocking<br />
safety lever.<br />
The illustrations in the manual<br />
show the Pistol P8 with Single<br />
Action and Double Action Trigger<br />
(SA/DA) and combined safety/-<br />
decocking lever on the left side of<br />
the grip.<br />
10
Technische Daten<br />
Maße:<br />
Kaliber . . . . . . . . . . . . . . . . . . . . . . . . . . . . . . . . . . . . . . . . . . . . . 9 mm x 19<br />
Gesamtlänge . . . . . . . . . . . . . . . . . . . . . . . . . . . . . . . . . . . . . . . . . . 194 mm<br />
Rohrlänge. . . . . . . . . . . . . . . . . . . . . . . . . . . . . . . . . . . . . . . . . . . . . 108 mm<br />
Visierlinie . . . . . . . . . . . . . . . . . . . . . . . . . . . . . . . . . . . . . . . . . . . . . 158 mm<br />
Drallänge . . . . . . . . . . . . . . . . . . . . . . . . . . . . . . . . . . . . . . . . . . . . . 250 mm<br />
Gesamthöhe. . . . . . . . . . . . . . . . . . . . . . . . . . . . . . . . . . . . . . . . . . . 136 mm<br />
Verschlussbreite . . . . . . . . . . . . . . . . . . . . . . . . . . . . . . . . . . . . . . . . 29 mm<br />
Griffstückbreite mit Sicherungshebel . . . . . . . . . . . . . . . . . . . . . . . 32 mm<br />
Gewichte:<br />
Pistole ohne Magazin<br />
720 g<br />
Magazin, leer<br />
50 g<br />
Sonstige Daten:<br />
Abzugskraft Normalabzug (Single Action) . . . . . . . . . . . . . . . . . . . ca. 20 N<br />
Abzugskraft Spannabzug (Double Action) . . . . . . . . . . . . . . . . . . . ca. 50 N<br />
Abzugsweg Normalabzug (Single Action) . . . . . . . . . . . . . . . . . . ca. 6 mm<br />
Abzugsweg Spannabzug (Double Action) . . . . . . . . . . . . . . . . . ca. 11 mm<br />
Magazinkapazität . . . . . . . . . . . . . . . . . . . . . . . . . . . . . . . . . . . 15 Patronen<br />
Visier. . . . . . . . . . . . . . . . . . . . . . Offenes Balkenvisier mit Kontrastpunkten<br />
Technical data<br />
Dimensions:<br />
Caliber . . . . . . . . . . . . . . . . . . . . . . . . . . . . . . . . . . . . . . . . . . . . . 9 mm x 19<br />
Total Length . . . . . . . . . . . . . . . . . . . . . . . . . . . . . . . . . . . . . . . . . . . 194 mm<br />
Barrel Length . . . . . . . . . . . . . . . . . . . . . . . . . . . . . . . . . . . . . . . . . . 108 mm<br />
Sight Radius. . . . . . . . . . . . . . . . . . . . . . . . . . . . . . . . . . . . . . . . . . . 158 mm<br />
Twist Length. . . . . . . . . . . . . . . . . . . . . . . . . . . . . . . . . . . . . . . . . . . 250 mm<br />
Total Height . . . . . . . . . . . . . . . . . . . . . . . . . . . . . . . . . . . . . . . . . . . 136 mm<br />
Width of Slide . . . . . . . . . . . . . . . . . . . . . . . . . . . . . . . . . . . . . . . . . . 29 mm<br />
Width of Grip . . . . . . . . . . . . . . . . . . . . . . . . . . . . . . . . . . . . . . . . . . . 32 mm<br />
Weights:<br />
Weight without magazine. . . . . . . . . . . . . . . . . . . . . . . . . . . . . . . . . . . 720 g<br />
Magazine empty. . . . . . . . . . . . . . . . . . . . . . . . . . . . . . . . . . . . . . . . . . . 50 g<br />
Other Data<br />
Trigger Pull, Single Action . . . . . . . . . . . . . . . . . . . . . . . . . . . . approx. 20 N<br />
Trigger Pull, Double Action . . . . . . . . . . . . . . . . . . . . . . . . . . . approx. 50 N<br />
Trigger Travel, Single Action. . . . . . . . . . . . . . . . . . . . . . . . . . approx. 6 mm<br />
Trigger Travel, Double Action . . . . . . . . . . . . . . . . . . . . . . . . approx. 11 mm<br />
Magazine capacity. . . . . . . . . . . . . . . . . . . . . . . . . . . . . . . . . . 15 cartridges<br />
Sight . . . . . . . . . . . . . . . . . . . . . . . . . . . . . . . . . Open Post Sight with dots<br />
11
Bedienelemente<br />
Bezeichnungen<br />
Operating controls,<br />
designations<br />
1 2 3 4 5<br />
2<br />
9 8<br />
6<br />
7<br />
1 Slide<br />
2 Proof marking<br />
3 Caliber designation<br />
4 Slide release<br />
5 Serial number<br />
6 Hammer<br />
7 Safety decocking lever<br />
8 Magazine release<br />
9 Trigger<br />
10 Sight<br />
11 Extractor<br />
12 Barrel<br />
13 Front sight<br />
14 Mounting grooves<br />
15 Trigger guard<br />
16 Grip<br />
17 Magazine<br />
1 Verschluss<br />
2 Beschusszeichen<br />
3 Seriennummer<br />
4 Kaliberbezeichnung<br />
5 Verschlussfanghebel<br />
6 Hahn<br />
7 Sicherungs-/<br />
Entspannhebel<br />
8 Magazinhalter<br />
9 Abzug<br />
10 Visier<br />
11 Auszieher<br />
12 Rohr<br />
13 Korn<br />
14 Montageschiene<br />
für Zielgeräte<br />
15 Abzugsbügel<br />
16 Griffstück<br />
17 Magazin<br />
10 11 12 13<br />
14<br />
15<br />
16<br />
17<br />
Pistole P8 Combat mit Entspannhebel an<br />
der linken Griffseite, ohne Sicherungsfunktion.<br />
Pistol P8 Combat with decocking lever<br />
only on the left side of the grip, without<br />
manual safety.<br />
13
Funktion<br />
Function<br />
Pistole geladen, entspannt und gesichert<br />
Pistol loaded, decocked and put on safe<br />
Nach dem Zünden der Patrone erhält<br />
die formschlüssig verriegelte Rohr-/Verschlussgruppe<br />
als Reaktion auf die Geschossbewegung<br />
einen Impuls und bewegt<br />
sich nach hinten. Nach kurzem<br />
Rücklauf wird das Rohr am Verriegelungsblock<br />
nach unten gezogen und entriegelt.<br />
Der Verschluss läuft weiter zurück, zieht<br />
und wirft die Patronenhülse aus und<br />
spannt den Hahn. Die gespannte<br />
Schließfeder drückt den Verschluss wieder<br />
nach vorn. Dabei wird eine Patrone<br />
aus dem Magazin mitgenommen.<br />
Kurz vor Ende des Verschlussvorlaufes<br />
wird das Rohr wieder nach oben gedrückt<br />
und verriegelt.<br />
Die mechanische Puffereinrichtung wirkt<br />
zweifach:<br />
Der Entriegelungsstoß wird abgedämpft<br />
und der zurücklaufende Verschluss wird<br />
am Umkehrpunkt abgebremst.<br />
Dabei werden die Kraftspitzen verringert,<br />
das Rückstoßempfinden an der Hand<br />
des Schützen wird vermindert und die<br />
Belastung der Pistolenteile erheblich reduziert.<br />
After ignition of the cartridge, the pressure<br />
developed by the propellant gases<br />
forces the slide and the barrel assembly<br />
to the rear. After removing approx.<br />
3,5 mm, the locking block is moved<br />
downwards and disengaged.<br />
The slide continues rearward, the slide<br />
extracts and ejects the fired cartridge<br />
case and cocks the hammer. The compressed<br />
recoil spring pushes the slide<br />
forward taking along a cartridge from the<br />
magazine.<br />
During the last 3,5 mm of forward movement<br />
the barrel is pushed upwards and<br />
locked.<br />
The mechanical recoil reduction system<br />
has two effects:<br />
It dampens the impact of the barrel and<br />
slide on the grip during unlocking and<br />
when the slide reaches it’s most rearward<br />
position.<br />
This reduces the recoil forces, the felt recoil<br />
to the shooter’s hand and the load<br />
on the pistol parts.<br />
14
Prüfungen<br />
Prüfen vor Gebrauch<br />
Stellen Sie sicher, dass die Pistole vor<br />
Gebrauch<br />
– gesichert ist<br />
– entladen ist (Patronenlager frei)<br />
– das Rohr frei ist von Fremdkörpern.<br />
Prüfen Sie die Pistole vor Gebrauch auf<br />
Gängigkeit und Funktion.<br />
Prüfen nach Gebrauch<br />
Stellen Sie sicher, dass die Pistole nach<br />
Gebrauch<br />
– gesichert ist<br />
– entladen ist (Patronenlager frei)<br />
– das Rohr frei ist von Fremdkörpern,<br />
– das Magazin leer ist.<br />
Funktionsprüfung Verschluss mit<br />
Griffstück<br />
– Magazin entnehmen<br />
– Verschluss bis zum Anschlag zurückziehen.<br />
Nach Loslassen des Verschlusses<br />
muss er durch die Schließfeder wieder<br />
in seine vordere Stellung gebracht<br />
werden.<br />
– Sicherungshebel nach unten drücken.<br />
Der Hahn muss sich aus der gespannten<br />
Stellung lösen und entspannen.<br />
– Leeres Magazin einsetzen.<br />
– Verschluss bis zum Anschlag zurückziehen.<br />
Der Verschluss muss in hinterer<br />
Stellung gehalten werden.<br />
– Magazin entnehmen.<br />
– Verschluss etwas zurückziehen. Nach<br />
Loslassen des Verschlusses muss er<br />
durch die Schließfeder wieder in seine<br />
vordere Stellung gebracht werden.<br />
– Leeres Magazin einsetzen.<br />
– Verschluss bis zum Anschlag zurückziehen.<br />
Der Verschluss muss in hinterer<br />
Stellung gehalten werden.<br />
– Verschlussfanghebel nach unten drücken.<br />
Der Verschluss muss durch die<br />
Schließfeder wieder in seine vordere<br />
Stellung gebracht werden.<br />
Funktionsprüfung Abzugs- und<br />
Sicherungseinrichtung<br />
– Hahn bis zum Anschlag spannen.<br />
Der Hahn muss in hinterster Stellung gehalten<br />
werden.<br />
– Pistole entsichern und Abzug betätigen.<br />
Der Hahn muss auslösen und nach<br />
vorne schnellen.<br />
– Pistole sichern. Hahn bis zum Anschlag<br />
spannen. Bei gesicherter Pistole Abzug<br />
bis zum Anschlag zurückziehen.<br />
Dabei darf der Abzug den Hahn nicht<br />
auslösen.<br />
– Pistole mittels Sicherungs-/Entspannhebel<br />
entspannen. Hahn nach vorne drücken,<br />
dabei muss der Hahn vor Erreichen<br />
des Schlagbolzens gesperrt werden.<br />
– Pistole entsichern. Abzug betätigen<br />
und gleichzeitig Hahn nach vorne drücken.<br />
Der Hahn muss frei sein und den<br />
Schlagbolzen eindrücken können.<br />
Prüfung des Schlagbolzens auf<br />
Gängigkeit und Sicherung<br />
– Verschluss abnehmen wie auf Seite 25<br />
beschrieben.<br />
– Schlagbolzensicherung (Teileliste Pos.<br />
10) ganz eindrücken, dann Schlagbolzen<br />
mittels Putzstange ganz nach vorne<br />
drücken.<br />
Der Schlagbolzenvorstand sollte dabei<br />
mindestens 1,55 mm betragen.<br />
Schlagbolzen und Schlagbolzensicherung<br />
müssen anschließend leichtgängig<br />
in ihre Ausgangslage zurückfedern.<br />
Der Schlagbolzen darf bei nicht eingedrückter<br />
Schlagbolzensicherung nicht in<br />
Zündposition kommen.<br />
Ist der Schlagbolzenvorstand zu gering<br />
oder der Schlagbolzen schwergängig, so<br />
muss die Schlagbolzenführung gereinigt<br />
werden.<br />
15
Checking<br />
Checking before use<br />
Make sure that before use the pistol is<br />
– put on safety<br />
– unloaded (cartridge chamber free) and<br />
– that the barrel is free of obstructions.<br />
Check the pistol for proper condition and<br />
troublefree functioning.<br />
Checking after usage<br />
Make sure that after usage the pistol is<br />
– set at safe<br />
– unloaded (cartridge chamber free) and<br />
– that the barrel is free of obstructions<br />
– that the magazine is empty.<br />
Functional tests of slide with grip<br />
– Remove magazine.<br />
– Retract the slide until stop. After releasing<br />
it has to be positioned in its front<br />
position by the recoil spring.<br />
– Push safety lever further downwards.<br />
The hammer has to be released from its<br />
cocked position and decocked.<br />
– Insert an empty magazine.<br />
– Retract the slide until stop. The slide<br />
has to be kept in rear position.<br />
– Remove magazine.<br />
– Fully retract the slide. After releasing<br />
the slide the recoil spring must fully move<br />
it to its forward position.<br />
– Insert an empty magazine.<br />
– Retract the slide until stop. The slide<br />
has to be kept in rear position.<br />
– Push slide release downwards. The recoil<br />
spring must fully move the slide to its<br />
forward position.<br />
Functional tests of the trigger<br />
and the safety lever<br />
– Cock the hammer. The hammer must<br />
stay in its cocked position.<br />
– Set the safety lever at “Fire” and pull<br />
the trigger. The hammer has to release<br />
and snap forward.<br />
– Set the safety lever at “Safe”. Cock the<br />
hammer and pull the trigger. It must not<br />
be possible to entirely pull the trigger and<br />
the hammer has to remain cocked.<br />
– Uncock the hammer by pressing down<br />
the decocking lever. Push the hammer<br />
forward. It has to be locked before<br />
reaching the firing pin.<br />
– Set the safety lever at “Fire”. Pull the<br />
trigger and at the same time push the<br />
hammer forward. The hammer must be<br />
free and depress the firing pin.<br />
Testing the smooth operation of<br />
the safety and of the firing pin<br />
– Remove the slide as described on<br />
page 26.<br />
– Entirely depress the firing pin safety,<br />
(Fig. 10), then push the firing pin entirely<br />
forward by means of the cleaning bar.<br />
The firing pin protrusion should be min.<br />
1.55 mm. Afterwards the firing pin and<br />
firing pin safety must smoothly spring<br />
back into the initial position.<br />
Tip of the firing pin should not be visible<br />
on the face of the slide when firing pin<br />
safety is not activated.<br />
If the firing pin protrusion is too small or<br />
the firing pin is sluggish, the firing pin<br />
hole in the slide must be cleaned.<br />
16
Handhabung und Bedienung<br />
Grundsätze der Handhabung und<br />
Bedienung<br />
Die Pistole ist immer so zu handhaben,<br />
als sei sie geladen und feuerbereit.<br />
Verboten ist insbesondere:<br />
– Spielerisches Handhaben mit der Pistole,<br />
besonders das Zielen auf Personen.<br />
– Anwendung von Gewalt beim Hantieren,<br />
beim Zerlegen und Reinigen.<br />
– Nach außergewöhnlichen Belastungen<br />
wie Stoß- oder Fallbeanspruchungen ist<br />
die Pistole vom Hersteller zu überprüfen.<br />
Hinweis: Die Pistole P8, Kal. 9 mm x 19<br />
ist für alle Munitionstypen entsprechend<br />
SAAMI und C.I.P. freigegeben.<br />
Vorbereiten zum Schießen<br />
– Pistole sichern.<br />
– Rohr mit trockenem Reinigungsdocht<br />
(handelsübliches Reinigungsgerät) entölen<br />
und prüfen, ob es frei von Fremdkörpern<br />
ist.<br />
– Verschluss und Sicherung auf Funktion<br />
prüfen.<br />
– Magazin auf richtiges Einrasten prüfen.<br />
Laden<br />
– Pistole sichern.<br />
– Gefülltes Magazin in das Griffstück einführen,<br />
bis der Magazinhalter einrastet.<br />
Die Pistole ist teilgeladen.<br />
– Verschluss bis zum Anschlag zurückziehen<br />
und wieder vorschnellen lassen.<br />
Die Pistole ist geladen, gespannt und<br />
gesichert.<br />
Schießen mit Normalabzug<br />
(Single Action)<br />
Die Pistole ist geladen, gespannt und gesichert.<br />
Zum Schießen<br />
– Sicherungshebel nach oben auf „F“<br />
schwenken (entsichern).<br />
– Abzug betätigen. Der gespannte Hahn<br />
wird freigegeben und die im Patronenlager<br />
befindliche Patrone wird durch den<br />
Schlagbolzen gezündet.<br />
Hinweis:<br />
Die Pistole P8 Combat hat keine aussenliegende<br />
Sicherung. Deshalb entfällt<br />
das Sichern und Entsichern von<br />
Hand.<br />
17
Handling and operation<br />
Principles of handling and<br />
operation<br />
Always handle the pistol as if it is loaded<br />
and ready to fire.<br />
In particular the following is<br />
forbidden:<br />
– playing with the pistol, especially aiming<br />
at anyone<br />
– using force while handling, disassembling<br />
and cleaning.<br />
– The pistol must be checked by the manufacturer<br />
in case it has been subjected<br />
to exrtraordinary conditions like e.g.<br />
shocks or heavy drops.<br />
Note: The P8-pistol, caliber 9 mm x 19 is<br />
approved for all ammunition types according<br />
to SAAMI and C.I.P.<br />
Preparation for firing<br />
– Set the safety lever at “Safe”.<br />
– Remove the oil from the barrel by using<br />
a dry cleaning rod (commercial cleaning<br />
material) and check that it is free of obstructions.<br />
– Check the pistol for proper condition<br />
and troublefree functioning.<br />
– Check magazine for correct engagement.<br />
Loading<br />
– Set the safety lever at “Safe”.<br />
– Insert the filled magazine into the grip<br />
until the magazine release is engaged.<br />
The pistol is partially loaded.<br />
– Retract the slide until stop and release<br />
it.<br />
The pistol is loaded, cocked and the<br />
safety lever is set at “Safe”.<br />
Firing in Single Action Mode<br />
The pistol is loaded, cocked and the<br />
safety lever is set at “Safe”.<br />
For firing<br />
– Move the safety lever upward to “Fire”<br />
(disengaging).<br />
– Pull the trigger. The cocked hammer is<br />
released and the cartridge in the chamber<br />
is ignited by the firing pin.<br />
Note:<br />
The P8 Combat-pistol is without external<br />
safety which is why it does not require<br />
the manual setting/unsetting of<br />
the safety.<br />
18
Entspannen<br />
Nach dem Durchladen oder nach Abgabe<br />
des letzten Schusses bleibt der Hahn<br />
in gespannter Stellung.<br />
Zum Entspannen<br />
– Sicherungs-/Entspannhebel über die<br />
Stellung „S“ = Sicher weiter nach unten<br />
drücken, bis sich der Hahn entspannt<br />
(siehe Bild). Dabei wird der Hahn von der<br />
Fangrast aufgefangen und kann den<br />
Schlagbolzen nicht berühren. Zusätzlich<br />
ist eine automatische Schlagbolzensicherung<br />
(Teileliste Pos. 10) eingebaut,<br />
die ein ungewolltes Zünden verhindert.<br />
Schießen mit Spannabzug<br />
(Double Action)<br />
Beim Schießen mit Spannabzug ist der<br />
Hahn vor dem Schießen nicht gespannt.<br />
Durch Betätigen des Abzugs wird zuerst<br />
der Hahn gespannt und anschließend<br />
ausgelöst.<br />
Erneutes Laden bei leergeschossenem<br />
Magazin<br />
Nach Abgabe des letzten Schusses<br />
bleibt der Verschluss durch den Verschlussfanghebel<br />
in hinterer Stellung<br />
gehalten. Beim Laden und Magazinwechsel<br />
ist die Pistole stets zu sichern.<br />
Zum Laden<br />
– Magazinhalter nach unten drücken und<br />
leeres Magazin entnehmen.<br />
– Gefülltes Magazin einführen, bis der<br />
Magazinhalter einrastet.<br />
– Verschlussfanghebel nach unten drücken<br />
(siehe Bild rechts)<br />
oder<br />
– Verschluss etwas zurückziehen und<br />
loslassen.<br />
Der Verschluss wird freigegeben und<br />
schnellt durch die Kraft der Schließfeder<br />
nach vorne. Dabei wird die nächste<br />
Patrone zugeführt.<br />
Die Pistole ist geladen und gespannt.<br />
➘<br />
Entspannen<br />
Decocking<br />
19
Decocking<br />
After working the slide or firing the last<br />
shot the hammer remains cocked.<br />
For decocking<br />
– press the safety decocking lever downward<br />
via the position “S” = Safe until the<br />
hammer is decocked (see figure – Decocking).<br />
By this the hammer is catched by the<br />
catch and may not touch the firing pin.<br />
Additionally an automatic firing pin safety<br />
is built in to avoid an unintended ignition.<br />
Firing in Double Action Mode<br />
When firing in DA-mode the hammer is<br />
uncocked before firing.<br />
By pulling the trigger the hammer will be<br />
cocked and then released.<br />
Reloading when magazine is<br />
empty<br />
After firing the last shot the slide remains<br />
in the rear position by means of the slide<br />
release. The safety lever always must be<br />
set at “Safe” for loading and changing<br />
the magazine.<br />
For loading<br />
– Press the magazine release lever downward<br />
and remove the empty magazine.<br />
– Insert the filled magazine until the<br />
magazine is engaged.<br />
– Press the slide release downward<br />
or<br />
– slightly retract the slide and release it.<br />
The slide is released and snaps forward<br />
by the recoil spring. By this the next cartridge<br />
is fed.<br />
The pistol is loaded and cocked.<br />
➘<br />
Verschlußfanghebel drücken<br />
Press slide release downward<br />
20
Entladen der Pistole<br />
– Pistole sichern!<br />
– Magazinhalter nach unten drücken und<br />
Magazin entnehmen.<br />
– Verschluss bis zum Anschlag nach hinten<br />
ziehen und Verschlussfanghebel<br />
nach oben drücken.<br />
– Überzeugen, dass sich keine Patrone<br />
mehr im Patronenlager befindet.<br />
– Verschluss durch Niederdrücken des<br />
Verschlussfanghebels oder durch Zurückziehen<br />
freigeben und vorschnellen<br />
lassen.<br />
Füllen und Entleeren des<br />
Magazins<br />
Zum Füllen des Magazins<br />
– Magazin umfassen und<br />
– Patronen mit dem Patronenboden voraus<br />
unter die Magazinlippen einführen.<br />
Zum Entleeren Patronen nach vorne<br />
schieben und aufnehmen.<br />
Unloading the pistol<br />
– Set the safety lever at “Safe”!<br />
– Press the magazine release lever downward<br />
and remove the magazine.<br />
– Retract the slide until stop and press<br />
the slide release upward.<br />
– Make sure that there is no cartridge left<br />
in the chamber.<br />
– Release the slide by pressing down the<br />
slide release or by slightly retracting it<br />
and snap forward.<br />
Filling and emptying the<br />
magazine<br />
For filling the magazine<br />
– hold the magazine in one hand and<br />
– insert the cartridges with the base of<br />
the cartridge ahead under the magazine<br />
lips.<br />
For unloading the cartridges must be<br />
pushed to the front and collected.<br />
➘➘<br />
Magazin füllen<br />
Filling of the magazine<br />
Hinweis: Das Magazin fasst 15 Patronen<br />
Kal. 9 mm x 19.<br />
Beschädigte, verbeulte oder verschmutzte<br />
Patronen dürfen nicht in das<br />
Magazin eingefüllt werden.<br />
Note: The magazine contains<br />
15 cartridges caliber 9 mm x 19.<br />
Damaged, battered or dirty cartridges<br />
may not be filled into the magazine.<br />
21
Pflege<br />
Pflegemittel und Geräte<br />
Zum Reinigen und Pflegen der Pistole<br />
werden verwendet:<br />
– handelsübliches Waffenreinigungsgerät<br />
für Kal. 9 mm.<br />
– Reinigungsdochte und Putzlappen,<br />
– chlor- und säurefreie Reinigungs- und<br />
Konservierungsmittel.<br />
Reinigen Sie nicht mit<br />
– Metallgegenständen,<br />
– Kunststoffen, z. B. Nylon, Perlon o. ä.,<br />
– Wasser.<br />
Pflegearbeiten<br />
Hinweis: Regelmäßige Reinigung und<br />
Pflege sowie Inspektion erhalten die<br />
Funktionssicherheit der Pistole und erhöhen<br />
die Lebensdauer.<br />
Normalreinigung<br />
Die Normalreinigung ist nach jedem<br />
Schießen durchzuführen.<br />
– Pistole sichern und prüfen, ob das Patronenlager<br />
frei ist.<br />
– Pistole zerlegen wie auf Seite 25 beschrieben.<br />
– Verschmutzte Teile und Flächen an<br />
Griffstück und Verschluss mit Reinigungsbürste<br />
und Putzlappen reinigen<br />
und anschließend leicht einölen.<br />
– Rohr mit ölgetränkter Reinigungsbürste<br />
mehrfach durchziehen, danach mit sauberen<br />
Reinigungsdochten durchziehen<br />
und anschließend innen und außen leicht<br />
einölen.<br />
– Magazinlippen und Zubringer reinigen<br />
und leicht einölen.<br />
– Pistole wieder zusammensetzen wie<br />
auf Seite 27 beschrieben.<br />
– Nach dem Reinigen und Zusammenbauen<br />
Pistole auf Gängigkeit und einwandfreie<br />
Funktion prüfen.<br />
Hauptreinigung<br />
Die Hauptreinigung sollte nach ca.<br />
1000 Schuss oder einmal pro Jahr<br />
durchgeführt werden.<br />
– Normalreinigung durchführen.<br />
Zusätzlich<br />
– Magazin zerlegen und Magazingehäuse<br />
innen sowie Außenflächen des Zubringers<br />
reinigen und leicht einölen.<br />
Zum Zerlegen des Magazins Einsatz im<br />
Magazinboden eindrücken, Magazinboden<br />
nach vorne abziehen und Magazinteile<br />
entnehmen.<br />
– Schlagbolzen auf Gängigkeit prüfen<br />
(siehe Seite 15) und ggf. Schlagbolzenführung<br />
reinigen.<br />
– Pistole und Magazin wieder zusammensetzen.<br />
– Nach dem Reinigen und Zusammenbauen<br />
Pistole auf Gängigkeit und einwandfreie<br />
Funktion prüfen.<br />
22
Cleaning and Maintenance<br />
Cleaning materials and kits<br />
For cleaning and maintenance of the pistol<br />
the following is necessary:<br />
– commercial weapon cleaning kit for<br />
caliber 9 mm,<br />
– cleaning rods and rags,<br />
– cleaning solvent and conserving agents<br />
without chlorine or acids.<br />
Do not clean with<br />
– objects made of metal,<br />
– plastics, e.g. Nylon, Perlon or something<br />
similar,<br />
– water.<br />
Cleaning work<br />
Note: A regular checking, cleaning and<br />
maintenance keeps the functional safety<br />
of the pistol and increases the service<br />
life.<br />
Normal cleaning<br />
The normal cleaning should be performed<br />
after each firing.<br />
– Set the pistol at safe and make sure<br />
that it is unloaded (no cartridge in the<br />
chamber).<br />
– Disassemble the pistol as described on<br />
page 26.<br />
– Clean fouled parts and surfaces on the<br />
grip and the slide with a cleaning brush<br />
and rags and then lubricate them lightly.<br />
– Moisten a cleaning brush with oil and<br />
repeatedly pass it through the barrel,<br />
then pass pure cleaning rods through<br />
and subsequently lubricate the exterior<br />
and interior of the barrel.<br />
– Clean the magazine lips and follower<br />
and slightly lubricate them.<br />
– Reassemble the pistol as described on<br />
page 28.<br />
– After cleaning and assembly check the<br />
pistol for proper condition and troublefree<br />
functioning.<br />
Major cleaning<br />
The major cleaning should be performed<br />
after approx. 1000 rounds or<br />
once every twelve months.<br />
– Perform the normal cleaning.<br />
Additionally<br />
– Disassemble the magazine. For disassembling<br />
press magazine locking plate<br />
down through the hole of the magazine<br />
floor plate and push magazine floor plate<br />
forward with your thumb. Remove magazine<br />
components.<br />
Clean and lubricate slightly the magazine<br />
housing inside and the external surfaces<br />
of the follower.<br />
– Check the firing pin for smooth operation<br />
(see page 16) and clean firing pin<br />
hole inside the slide.<br />
– Reassemble the pistol and the magazine.<br />
After cleaning and assembly check the<br />
pistol for proper condition and troublefree<br />
functioning.<br />
23
Visierung, Justierung<br />
Die Visierung besteht aus Visier und Korn.<br />
Sie ist mit dauerhaften Kontrastpunkten<br />
versehen und ermöglicht dem Schützen<br />
eine schnelle Zielerfassung auch unter<br />
ungünstigen Lichtverhältnissen.<br />
Justieren nach der Seite<br />
Die Justierung nach der Seite erfolgt<br />
durch seitliches Verschieben des Visiers<br />
und/oder des Korns mittels leichtem<br />
Hammer und Holzstück oder Kunststoffbolzen.<br />
Justieren nach der Höhe<br />
Die Justierung nach der Höhe erfolgt<br />
durch Auswechseln des Korns mit verschiedenen<br />
Kornhöhen.<br />
Die jeweilige Kornhöhe ist auf der Unterseite<br />
des Korns eingraviert.<br />
Sighting, adjustment<br />
The sighting consists of the rear sight<br />
and the front sight.<br />
It is equipped with durable dots and enables<br />
the shooter a fast target acquisition<br />
even under unfavourable lighting conditions.<br />
Horizontal adjustment<br />
The horizontal adjustment takes place by<br />
shifting the rear sight and/or the front<br />
sight to the side by means of a light<br />
hammer and a wooden piece or plastic<br />
bolts.<br />
Vertical adjustment<br />
For the vertical adjustment the front sight<br />
is replaced. There are different heights of<br />
the front sight available.<br />
The height of the front sight is indicated<br />
on the underside.<br />
24
Zerlegen der Pistole<br />
Zum Reinigen wird die Pistole zerlegt.<br />
mVor dem Zerlegen ist sicherzustellen,<br />
dass das Magazin leer<br />
und das Patronenlager frei ist.<br />
Die Pistole wird ohne Werkzeug zerlegt<br />
und zusammengebaut. Jede Gewaltanwendung<br />
ist zu vermeiden.<br />
Die Pistole darf nicht weiter zerlegt<br />
werden als nachfolgend beschrieben.<br />
➘<br />
Aussparung<br />
recess<br />
– Verschluss soweit nach hinten ziehen,<br />
bis die Aussparung für den Verschlussfanghebel<br />
(links am Verschluss) mit dem<br />
vorderen Ende des Verschlussfanghebels<br />
übereinstimmt (siehe Bild)<br />
– mit der anderen Hand die Verschlussfanghebelachse<br />
(siehe Bild) von rechts<br />
andrücken und Verschlussfanghebel<br />
nach links herausziehen.<br />
– Verschluss nach vorne vom Griffstück<br />
abziehen (siehe Bild).<br />
➘<br />
Lage Aussparung zu Verschlussfanghebel<br />
Position of the recess of the slide release<br />
Lage Verschlussfanghebelachse<br />
Position of the axle of the slide release<br />
– Magazin entnehmen,<br />
– Verschluss bis zum Anschlag nach hinten<br />
ziehen und prüfen, ob das Patronenlager<br />
frei ist,<br />
– Verschluss wieder nach vorne gleiten<br />
lassen,<br />
– Pistole so in die Hand nehmen, dass<br />
der Daumen die Griffstückhinterseite<br />
umfasst und die restlichen Finger auf der<br />
Verschlussoberseite liegen,<br />
– Pufferstange gegen den Federdruck<br />
herausnehmen (siehe Bild).<br />
– Rohr hinten etwas anheben, nach vorne<br />
schieben und nach hinten entnehmen.<br />
25
Disassembly of the pistol<br />
For cleaning the pistol is disassembled.<br />
mBefore disassembly make sure<br />
that the magazine is empty<br />
and that the chamber is clear<br />
of any ammunition.<br />
The pistol is disassembled and assembled<br />
without any tool. Do not use any<br />
force.<br />
The pistol must not be disassembled<br />
further than described below.<br />
– With the other hand press in the axle of<br />
the slide release from the right and pull<br />
out the slide release to the left.<br />
– Remove the slide by sliding it forward<br />
off the grip (see illustration).<br />
– Remove the recoil / buffer spring guide<br />
rod downward against the spring tension<br />
(see illustration).<br />
– Slightly lift the barrel up at the back,<br />
push it forwards and remove it backward.<br />
Verschluss abziehen<br />
Remove the slide<br />
– Remove the magazine,<br />
– retract the slide until stop and check<br />
that the chamber is free of any ammunition.<br />
– Then let the slide pass forward again,<br />
– hold the pistol so that the thumb grasps<br />
the rear side of the grip and the remaining<br />
fingers lay on the upper side of the slide,<br />
– retract the slide backward until the<br />
recess for the slide release on the left<br />
side of the slide aligns with the front end<br />
of the slide release (see figure)<br />
Pufferstange herausnehmen<br />
Remove the recoil / buffer spring guide<br />
rod<br />
26
Zusammensetzen der<br />
Pistole<br />
– Rohr in den Verschluss einlegen und<br />
nach hinten schieben, bis es mit dem<br />
Verschluss verriegelt,<br />
– Pufferstange in den Verschluss unter<br />
das Rohr einlegen.<br />
Dabei das vordere Ende der Pufferstange<br />
gegen den Druck der Schließfeder durch<br />
die Bohrung an der Vorderseite des Verschlusses<br />
schieben.<br />
– Scheibe des Puffers an der Vorderseite<br />
der Steuernase des Rohres abstützen<br />
(Lage Pufferstange siehe Bild).<br />
– Pufferstange mit Daumen festhalten<br />
und Griffstück von hinten in die Führungsnuten<br />
des Verschlusses schieben<br />
(siehe Bild), bis die Aussparung für den<br />
Verschlussfanghebel mit der Achsenbohrung<br />
übereinstimmt.<br />
– Verschlussfanghebel von der linken<br />
Griffstückseite her eindrücken.<br />
Pufferstange, vollst. einlegen<br />
Insert the recoil / buffer spring guide rod<br />
Scheibe<br />
Retainer<br />
Lage der Pufferstange<br />
Position of the recoil / buffer spring guide<br />
rod<br />
27
Assembly of the pistol<br />
– Insert the barrel into the slide and press<br />
backwards until it locks with the slide,<br />
– Insert the recoil / buffer spring guide<br />
rod into the slide below the barrel (see<br />
figure). By this pressing the front end of<br />
the recoil spring guide against the pressure<br />
of the recoil spring through the hole<br />
provided in the front of the slide.<br />
– Support the recoil spring retainer at the<br />
front of the shelf of the barrel (position of<br />
the recoil reducing system see figure).<br />
– Hold the recoil / buffer spring guide rod<br />
with the thumb and insert the grip from<br />
the rear into the guiding grooves of the<br />
slide (see illustration) until the recess for<br />
the slide release aligns with the hole in<br />
the axle.<br />
– Depress the slide release from the left<br />
side of the grip.<br />
➘<br />
Griffstück einschieben<br />
Press in th grip<br />
28
Störungen und Fehler, Ursachen, Beseitigung<br />
Bei auftretenden Störungen ist die Pistole<br />
sofort zu sichern und solange als geladen<br />
zu betrachten, bis der tatsächliche<br />
Zustand festgestellt ist.<br />
Bei der Beseitigung von Störungen sind<br />
die Sicherheitsmaßnahmen dieser Beschreibung<br />
zu beachten.<br />
Störung, Fehler Ursache Beseitigung<br />
Patrone wird nicht Munitionsfehler (Versager). Zur Sicherheit Waffe ca. 30 sec.<br />
gezündet.<br />
im Ziel halten. Dann entladen<br />
und prüfen, ob Rohr frei ist.<br />
Nicht abgefeuerte Patrone<br />
an Händler/Hersteller zurückgeben.<br />
Schlagbolzen schwergängig. Schlagbolzenführung reinigen.<br />
Schlagbolzen beschädigt Schlagbolzen auswechseln.<br />
oder gebrochen.<br />
Hahnfeder defekt.<br />
Pistole zur Reparatur abgeben.<br />
Verschluss hat nach Hülse klemmt im Patronenlager, Entladen, dabei Verschluss<br />
dem Schuss nicht weil sie deformiert oder das zurückziehen, damit Hülse<br />
geöffnet. Patronenlager verschmutzt ist. ausgezogen wird;<br />
ggf. Patronenlager reinigen.<br />
Hülse wird nicht Verschlussrücklauf zu gering. Entladen, dabei Verschluss<br />
ausgeworfen.<br />
zurückziehen und Hülse entfernen.<br />
Gängigkeit überprüfen und<br />
ggf. Patronenlager reinigen.<br />
Falsche Munitionslaborierung. Andere Munition verwenden.<br />
Auszieher, Auszieherfeder Pistole zur Reparatur abgeben.<br />
oder Auswerfer beschädigt.<br />
Patrone wird nicht Patronenlager verschmutzt. Entladen und reinigen.<br />
eingeführt. Patrone deformiert. Patrone auswechseln.<br />
Schließfeder defekt.<br />
Schließfeder auswechseln.<br />
Patrone wird nicht Magazinfeder defekt. Magazinfeder auswechseln.<br />
zugeführt. Magazin oder Magazinlippen Magazin auswechseln.<br />
beschädigt.<br />
Verschluss bleibt Magazinfeder defekt. Magazinfeder auswechseln.<br />
nach dem letzten Verschlussrücklauf zu gering. Gängigkeit überprüfen und<br />
Schuss nicht geöffnet.<br />
ggf. Patronenlager reinigen.<br />
Verschlussfanghebel beschädigt. Verschlussfanghebel auswechseln.<br />
Falsche Munitionslaborierung. Andere Munition verwenden.<br />
Formfeder für Verschlussfang- Pistole zur Reparatur abgeben.<br />
hebel defekt.<br />
Trefferlage nach Korn oder Visier verschoben. Neu justieren.<br />
der Seite verändert.<br />
Trefferlage hat sich Korn oder Visier beschädigt. Auswechseln und neu justieren.<br />
nach der Höhe Andere Munitionssorte. Munition wechseln oder<br />
verändert.<br />
neu justieren.<br />
29
Trouble shooting chart<br />
If troubles occur the pistol’s safety lever<br />
must be immediately set at “Safe” and the<br />
pistol must be treated as loaded until the<br />
trouble has been found out and cleared.<br />
When eliminating troubles the safety measures<br />
of this manual must be observed.<br />
Trouble, error Cause Elimination<br />
Cartridge is not Ammunition malfunction For safety reasons point the<br />
ignited. (failure). weapon at the safe area<br />
Then unload the weapon and<br />
mind that no cartridge is left<br />
inside the chamber.<br />
Return the defective cartridges<br />
to the dealer/manufacturer.<br />
Sluggish firing pin.<br />
Clean the firing pin hole inside<br />
the slide.<br />
Damaged or broken firing pin. Replace the firing pin.<br />
Defective hammer spring. Return the weapon for repair.<br />
Slide did not open Cartridge jams in the chamber Unload the pistol. Pull back<br />
after the shot. because it is deformed or the the slide so that the cartridge is<br />
chamber is fouled.<br />
extracted; clean the cartridge<br />
chamber if necessary.<br />
Cartridge will not be Insufficient slide recoil. Unload the pistol. Pull back<br />
ejected.<br />
the slide and remove the<br />
cartridge. Check for smooth<br />
operation and clean the cartridge<br />
chamber if necessary.<br />
Badly loaded ammunition. Use another ammunition.<br />
Damaged extractor, extractor Return the weapon for repair.<br />
spring or ejector.<br />
Cartridge is not Fouled cartridge chamber. Unload the pistol and clean<br />
chambered.<br />
the chamber.<br />
Battered cartridge.<br />
Replace the cartridge.<br />
Defective recoil spring.<br />
Replace the recoil spring.<br />
Cartridge is not fed. Defective magazine spring. Replace the magazine spring.<br />
Damaged magazine or<br />
Replace the magazine.<br />
magazine lips.<br />
Slide does not stay Magazine spring is defective. Replace the magazine spring.<br />
open after the last Insufficient slide recoil. Check for smooth<br />
round has been fired.<br />
operation and clean the cartridge<br />
chamber if necessary.<br />
Damaged slide release lever. Replace the slide release.<br />
Defective shaped spring for the Return the pistol for repair.<br />
slide release.<br />
Badly loaded ammunition. Use another ammunition.<br />
Point of impact pattern Displaced front sight or Readjust.<br />
moves laterally. rear sight.<br />
Point of impact pattern Damaged front sight or rear sight. Replace and readjust.<br />
moves laterally. Change of type of ammunition. Change the ammunition or readjust.<br />
30
P8<br />
Kaliber 9 mm x 19<br />
32
Teileliste<br />
Pos. Benennung. . . . . . . . . . . . Ident-Nr.<br />
1 Verschluss . . . . . . . . . . . . . 214685<br />
2 Korn, vollst. (6,4 mm). . . . . 214220<br />
2.1 Korn, vollst. (6,6 mm). . . . . 214221<br />
2.2 Korn, vollst. (6,8 mm). . . . . 214222<br />
2.3 Korn, vollst. (7,0 mm). . . . . 214223<br />
2.4 Korn, vollst. (7,2 mm). . . . . 214224<br />
2.5 Korn, vollst. (7,4 mm). . . . . 214225<br />
3 Spannstift (3x) . . . . . . . . . . 980838<br />
4 Auszieher . . . . . . . . . . . . . . 214187<br />
5 Druckfeder . . . . . . . . . . . . . 214188<br />
6 Visier. . . . . . . . . . . . . . . . . . 214193<br />
7 Druckfeder . . . . . . . . . . . . . 214190<br />
8 Schlagbolzen . . . . . . . . . . . 214189<br />
9 Druckfeder . . . . . . . . . . . . . 214192<br />
10 Bolzen . . . . . . . . . . . . . . . . 214191<br />
11 Abzugstange . . . . . . . . . . . 214176<br />
12 Schenkelfeder . . . . . . . . . . 214164<br />
13 Abzug . . . . . . . . . . . . . . . . . 214841<br />
14 Blattfeder . . . . . . . . . . . . . . 214167<br />
15 Bolzen . . . . . . . . . . . . . . . . 214165<br />
16 Druckfeder . . . . . . . . . . . . . 214166<br />
17 Platte . . . . . . . . . . . . . . . . . 214840<br />
18 Zylinderstift. . . . . . . . . . . . . 214101<br />
19 Steuerklinke . . . . . . . . . . . . 214688<br />
20 Fangklinke . . . . . . . . . . . . . 214773<br />
21 Klinke . . . . . . . . . . . . . . . . . 214180<br />
22 Spannstift . . . . . . . . . . . . . . 982785<br />
23 Hülse . . . . . . . . . . . . . . . . . 214678<br />
— Hahn, vollst. (25–26). . . . . . 214825<br />
24 Hahn. . . . . . . . . . . . . . . . . . 214687<br />
25 Spannstift . . . . . . . . . . . . . . 926066<br />
26 Stange . . . . . . . . . . . . . . . . 214819<br />
27 Druckfeder . . . . . . . . . . . . . 214695<br />
28 Bolzen . . . . . . . . . . . . . . . . 214314<br />
29 Einsatz. . . . . . . . . . . . . . . . 214341<br />
— Magazin, vollst. (31–35) . . . 214689<br />
30 Magazingehäuse . . . . . . . . 214690<br />
31 Zubringer . . . . . . . . . . . . . . 214211<br />
32 Einsatz. . . . . . . . . . . . . . . . 214288<br />
33 Magazinboden . . . . . . . . . . 214691<br />
34 Magazinfeder . . . . . . . . . . . 214212<br />
35 Sicherungsflügel. . . . . . . . . 214682<br />
36 Druckfeder . . . . . . . . . . . . . 214104<br />
37 Schieber . . . . . . . . . . . . . . . 214959<br />
38 Rastplatte. . . . . . . . . . . . . . 214949<br />
39 Magazinhalter. . . . . . . . . . . 214169<br />
40 Druckfeder . . . . . . . . . . . . . 214170<br />
41 Verschlussfanghebel . . . . . 214181<br />
Pos. Benennung. . . . . . . . . . . . Ident-Nr.<br />
42 Achse . . . . . . . . . . . . . . . . . 214154<br />
43 Formfeder. . . . . . . . . . . . . . 214171<br />
44 Griffstück . . . . . . . . . . . . . . 214679<br />
— Pufferstange, vollst.<br />
(46–53) . . . . . . . . . . . . . . . . 214151<br />
45 Pufferstange. . . . . . . . . . . . 214205<br />
46 Scheibe . . . . . . . . . . . . . . . 214206<br />
47 Druckfeder . . . . . . . . . . . . . 214207<br />
48 Ring . . . . . . . . . . . . . . . . . . 214208<br />
49 Spannstift . . . . . . . . . . . . . . 929908<br />
50 Druckfeder . . . . . . . . . . . . . 214148<br />
51 Stützscheibe . . . . . . . . . . . 214721<br />
52 Sprengring . . . . . . . . . . . . . 929191<br />
53 Rohr . . . . . . . . . . . . . . . . . . 214686<br />
Ersatzteile P8 Combat<br />
Pos. Benennung. . . . . . . . . . . . Ident-Nr.<br />
20 Steuerklinke . . . . . . . . . . . . 214817<br />
24 Hülse . . . . . . . . . . . . . . . . . 214774<br />
36 Sicherungsflügel. . . . . . . . . 214352<br />
39 Rastplatte. . . . . . . . . . . . . . 214254<br />
45 Griffstück . . . . . . . . . . . . . . 214820<br />
33
P8<br />
Caliber 9 mm x 19<br />
34
Parts list<br />
Pos. Designation . . . . . . . . . . . Ident-No.<br />
1 Slide . . . . . . . . . . . . . . . . . . 214685<br />
2 Front sight, compl.<br />
(6,4 mm) . . . . . . . . . . . . . . . 214220<br />
2.1 Front sight, compl.<br />
(6,6 mm) . . . . . . . . . . . . . . . 214221<br />
2.2 Front sight, compl.<br />
(6,8 mm) . . . . . . . . . . . . . . . 214222<br />
2.3 Front sight, compl.<br />
(7,0 mm) . . . . . . . . . . . . . . . 214223<br />
2.4 Front sight, compl.<br />
(7,2 mm) . . . . . . . . . . . . . . . 214224<br />
2.5 Front sight, compl.<br />
(7,4 mm) . . . . . . . . . . . . . . . 214225<br />
3 Roll pin (3x) . . . . . . . . . . . . 980838<br />
4 Extractor. . . . . . . . . . . . . . . 214187<br />
5 Extractor spring . . . . . . . . . 214188<br />
6 Rear sight. . . . . . . . . . . . . . 214193<br />
7 Firing pin spring . . . . . . . . . 214190<br />
8 Firing pin . . . . . . . . . . . . . . 214189<br />
9 Firing pin block spring . . . . 214192<br />
10 Firing pin block . . . . . . . . . 214191<br />
11 Trigger bar . . . . . . . . . . . . . 214176<br />
12 Trigger rebound spring. . . . 214164<br />
13 Trigger . . . . . . . . . . . . . . . . 214841<br />
14 Flat spring . . . . . . . . . . . . . 214167<br />
15 Trigger bar bolt. . . . . . . . . . 214165<br />
16 Trigger bar spring. . . . . . . . 214166<br />
17 Plate . . . . . . . . . . . . . . . . . . 214840<br />
18 Cylindrical pin. . . . . . . . . . . 214101<br />
19 Control latch. . . . . . . . . . . . 214688<br />
20 Catch . . . . . . . . . . . . . . . . . 214773<br />
21 Latch . . . . . . . . . . . . . . . . . 214180<br />
22 Roll pin . . . . . . . . . . . . . . . . 982785<br />
23 Hammer axle . . . . . . . . . . . 214678<br />
— Hammer, compl. (25–26) . . 214825<br />
24 Hammer . . . . . . . . . . . . . . . 214687<br />
25 Roll Pin . . . . . . . . . . . . . . . . 926066<br />
26 Hammer strut . . . . . . . . . . . 214819<br />
27 Hammer spring . . . . . . . . . 214695<br />
28 Locking bolt . . . . . . . . . . . . 214314<br />
29 Grip insert. . . . . . . . . . . . . . 214341<br />
— Magazine, compl. (31–35) . 214689<br />
30 Magazine body. . . . . . . . . . 214690<br />
31 Follower . . . . . . . . . . . . . . . 214211<br />
32 Locking plate . . . . . . . . . . . 214288<br />
33 Floor plate . . . . . . . . . . . . . 214691<br />
34 Magazine spring. . . . . . . . . 214212<br />
35 Safety lever . . . . . . . . . . . . 214682<br />
Pos. Designation . . . . . . . . . . . Ident-No.<br />
36 Compression spring. . . . . . 214104<br />
37 Slide plate . . . . . . . . . . . . . 214959<br />
38 Detent plate . . . . . . . . . . . . 214949<br />
39 Magazine release . . . . . . . . 214169<br />
40 Magazine release spring . . 214170<br />
41 Slide release. . . . . . . . . . . . 214181<br />
42 Trigger axle. . . . . . . . . . . . . 214154<br />
43 Shaped spring . . . . . . . . . . 214171<br />
44 Grip . . . . . . . . . . . . . . . . . . 214679<br />
— Recoil/buffer spring<br />
guide rod, compl. (46–53) . 214151<br />
45 Recoil spring guide rod . . . 214205<br />
46 Recoil spring retainer . . . . . 214206<br />
47 Buffer spring. . . . . . . . . . . . 214207<br />
48 Buffer spring retainer . . . . . 214208<br />
49 Roll pin . . . . . . . . . . . . . . . . 929908<br />
50 Recoil spring . . . . . . . . . . . 214148<br />
51 Support disk. . . . . . . . . . . . 214721<br />
52 Spring ring . . . . . . . . . . . . . 929191<br />
53 Barrel . . . . . . . . . . . . . . . . . 214686<br />
Spare parts P8 Combat<br />
Pos. Designation . . . . . . . . . . . Ident-No.<br />
20 Control latch. . . . . . . . . . . . 214817<br />
4 Hammer axle . . . . . . . . . . . 214774<br />
36 Safety lever . . . . . . . . . . . . 214352<br />
39 Detent plate . . . . . . . . . . . . 214254<br />
45 Grip . . . . . . . . . . . . . . . . . . 214820<br />
35
WARNING!<br />
This manual does not<br />
consider warnings in respect<br />
to US-product liability.<br />
For use in USA please order<br />
an User Manual from:<br />
Heckler & Koch Inc.<br />
21480 Pacific Blvd.<br />
Sterling, Virginia 20166-8903<br />
Tel. (703) 450-1900
Heckler & Koch<br />
Jagd- und Sportwaffen GmbH<br />
Postfach 1329<br />
D-78722 Oberndorf/N.<br />
Telefon: +49 (0) 74 23/79-0<br />
Telefax: +49 (0) 74 23/79-22 80<br />
E-mail: hkinfoboard@heckler-koch.de<br />
http://www.heckler-koch.de<br />
© Copyright 1997 Ident-Nr. 986 450<br />
Änderungen vorbehalten HK 1e - 103 / RAL<br />
Subject to modifications Printed in the Federal Republic of Germany<br />
OD 1004