ATH Pneumatischer Montagefinger Bedienungsanleitung
ATH Pneumatischer Montagefinger Bedienungsanleitung
ATH Pneumatischer Montagefinger Bedienungsanleitung
Erfolgreiche ePaper selbst erstellen
Machen Sie aus Ihren PDF Publikationen ein blätterbares Flipbook mit unserer einzigartigen Google optimierten e-Paper Software.
Press down the pedal for fixing the rim and remove the foot. The rim will be<br />
fixed.<br />
Adjustment of the mounting head<br />
In the case of mainly use large wheels up to 24 "or small 8" wheels, it is expedient to adjust the<br />
mounting head setting to the rim diameter.<br />
The setting of the mounting head is explained in detail in the MAINTENANCE section.<br />
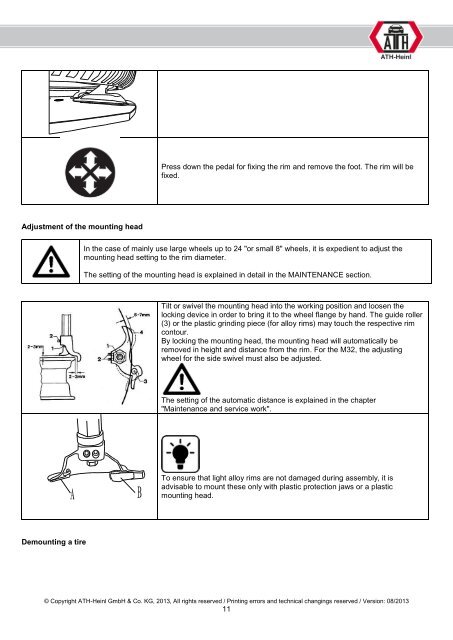
Tilt or swivel the mounting head into the working position and loosen the<br />
locking device in order to bring it to the wheel flange by hand. The guide roller<br />
(3) or the plastic grinding piece (for alloy rims) may touch the respective rim<br />
contour.<br />
By locking the mounting head, the mounting head will automatically be<br />
removed in height and distance from the rim. For the M32, the adjusting<br />
wheel for the side swivel must also be adjusted.<br />
The setting of the automatic distance is explained in the chapter<br />
"Maintenance and service work".<br />
To ensure that light alloy rims are not damaged during assembly, it is<br />
advisable to mount these only with plastic protection jaws or a plastic<br />
mounting head.<br />
Demounting a tire<br />
© Copyright <strong>ATH</strong>-Heinl GmbH & Co. KG, 2013, All rights reserved / Printing errors and technical changings reserved / Version: 08/2013<br />
11


