

Machine Quilting Unlimited - Special Edition - Winter 2011
Machine Quilting Unlimited - Special Edition - Winter 2011
Machine Quilting Unlimited - Special Edition - Winter 2011

Create successful ePaper yourself
Turn your PDF publications into a flip-book with our unique Google optimized e-Paper software.
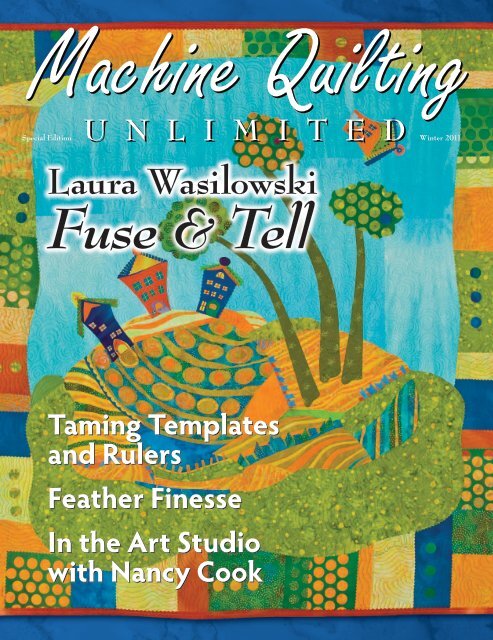
<strong>Special</strong> <strong>Edition</strong><br />
Laura Wasilowski<br />
Fuse & Tell<br />
Taming Templates<br />
and Rulers<br />
Feather Finesse<br />
In the Art Studio<br />
with Nancy Cook<br />
<strong>Winter</strong> <strong>2011</strong>
Contents<br />
Contributors . . . . . . . . . . . . . . . . . . . . . . . . . . . . . . . . . . . . . . . . . . . . . . . . . . . . 4<br />
Fuse and Tell:<br />
Adventures with Laura Wasilowski . . . . . . . . . . . . . . . . 5<br />
© 2010 Laura Wasilowski<br />
Lions and Tigers and Templates, Oh My! . . . 10<br />
© 2010 Kim Brunner<br />
Foundations . . . . . . . . . . . . . . . . . . . . . . . . . . . . . . . . . . . . . . . . . . . . . . . . . . . . 14<br />
Simple Strategies for <strong>Quilting</strong> Patchwork<br />
© 2010 Barbara Hollinger<br />
Design Elements . . . . . . . . . . . . . . . . . . . . . . . . . . . . . . . . . . . . . . . . . . . 20<br />
Feather Finesse<br />
©2010 Diane Rusin Doran<br />
Environmentally-Friendly Quilts . . . . . . . . . . . . . . . . . . 25<br />
Art Studio . . . . . . . . . . . . . . . . . . . . . . . . . . . . . . . . . . . . . . . . . . . . . . . . . . . . 28<br />
<strong>Quilting</strong> by the Slightly Obsessive<br />
© 2009 Nancy G. Cook<br />
Jaw Dropper . . . . . . . . . . . . . . . . . . . . . . . . . . . . . . . . . . . . . . . . . . . . . . . . 31<br />
Sand Storm over the White Desert<br />
© 2010 Jenny Bowker<br />
On the Cover: Lacking Gravity by Laura Wasilowski<br />
<strong>Machine</strong> <strong>Quilting</strong> <strong>Unlimited</strong><br />
<strong>Special</strong> <strong>Edition</strong> — <strong>Winter</strong> <strong>2011</strong><br />
Publisher and Executive Editor<br />
Vicki Anderson<br />
Managing Editor<br />
Kit Robinson<br />
Graphic Designer<br />
Jonathan Miller<br />
JLM Graphics<br />
Photographer<br />
Gregory Case Photography<br />
www.gregorycase.com<br />
Circulation Manager<br />
Tiffani Hahn<br />
Additional Contributors<br />
Kim Brunner<br />
Nancy Cook<br />
Diane Rusin Doran<br />
Barb Hollinger<br />
<strong>Machine</strong> <strong>Quilting</strong> <strong>Unlimited</strong><br />
Published six times per year by<br />
Meander Publishing Inc<br />
1801 Aspen St., Fort Lupton, CO 80621<br />
(Jan., March, May, July, Sept., Nov.)<br />
info@mqumag.com www.mqumag.com<br />
SUBSCRIPTIONS:<br />
1 Year – 6 Issues 2 Years – 12 Issues<br />
USA ......1 Year $30US | 2 Years $52US<br />
Canada ...1 Year $45US | 2 Years $78US<br />
Australia ................ 1 Year $52US<br />
Prices subject to change without notice<br />
CEO ........................ Vicki Anderson<br />
Vice President ............Richard Anderson<br />
Editorial Director . ..............Kit Robinson<br />
Printer ......Citizen Printing, Fort Collins CO<br />
Renewal: Check the expiration date on your<br />
mailing label. It states the last issue that you<br />
will receive.<br />
Back Issues: Visit www.mqumag.com for<br />
availability and ordering information.<br />
Manuscripts: We welcome unsolicited<br />
manuscripts on topics of interest to machine<br />
quilters. Please send an email query titled<br />
“Article for Submission” to submissions@<br />
mqumag.com.<br />
New Products and Media Reviews: We are<br />
happy to review publications (both print and<br />
electronic) and products of interest to our<br />
readers. Please send samples or review copies<br />
to the above address.<br />
Advertising Rates: Available upon request:<br />
vicki@meanderpublishing.com.<br />
Mission Statement: To provide a forum<br />
for discussion and exchange of ideas for the<br />
betterment of machine quilters worldwide.<br />
Copyright © <strong>2011</strong> Meander Publishing Inc:<br />
All Rights Reserved. Contents may not be<br />
reproduced without WRITTEN permission of<br />
the publisher. Copyright of individual articles<br />
are retained by the contributor.<br />
We welcome your suggestions, editorial<br />
comments and concerns, subscription<br />
renewals, back issue inquiries, and<br />
advertising.<br />
2 <strong>Machine</strong> <strong>Quilting</strong> <strong>Unlimited</strong> | <strong>Special</strong> <strong>Edition</strong> <strong>Winter</strong> <strong>2011</strong>
Dear Reader,<br />
Welcome to our <strong>Special</strong> <strong>Edition</strong> of <strong>Machine</strong> <strong>Quilting</strong> <strong>Unlimited</strong>. In this compilation of articles<br />
from past issues of our magazine, offered by invitation only and not available in our store, we<br />
hope to give you a glimpse of why machine quilters are so excited about what we have to offer.<br />
Our focus is on the quilting stage of a quilt—whether you use a domestic sewing machine, a<br />
frame system or a longarm machine. We cover myriad machine quilting techniques in each<br />
issue, on topics ranging from simple background fillers, template design work, free motion<br />
machine embroidery, complex computerized designs and more. Our design articles show how<br />
to plan stitching motifs and designs to complement your quilts, and stitch embellishment<br />
techniques to give your quilts that special touch. Remarkable quilting artists are invited to be<br />
our Cover and Featured Quilters, and art quilters of all genres are featured in our Art Studio<br />
section. Collections of themed quilts are frequently included in MQU, such as those shown in<br />
Environmentally Friendly Quilts, included in this publication. We bring you the news from<br />
selected popular quilt and machine quilting shows and showcase some of the incredibly beautiful<br />
award winners from these exhibitions. We introduce you to the latest products, threads and<br />
gadgets, provide articles to help with technical machine issues and review the latest books, DVDs<br />
and websites. Our readers are invited to share their quilts with us in our Noteworthy section,<br />
which is located in each of our regular issues.<br />
Our cover story in this <strong>Special</strong> <strong>Edition</strong> is the incomparable Laura Wasilowski. Follow her<br />
journey into quilting, and read how she and her Chicago School of Fusing cohorts take the<br />
art of fusing to new levels! Master teacher Kim Brunner, now the author of the popular<br />
Ask Kimmy! question and answer column, teaches the basics of ruler and template work<br />
in Lions and Tigers and Templates, Oh My! Barbara Hollinger gives us Simple Strategies<br />
for <strong>Quilting</strong> Patchwork in a section we call Foundations. Diane Rusin Doran illustrates<br />
how to design and stitch simple feathers in Feather Finesse, and in each of MQU’s <strong>2011</strong><br />
regular issues Diane’s new column on fillers will provide inspiration to keep your background<br />
work lovely and interesting. Nancy G. Cook tells of her obsession with quilting<br />
in the Art Studio and shares some of her techniques for quilting her exceptional<br />
nature art works. We wrap up this special issue, as we do all issues, with a Jaw<br />
Dropper quilt chosen by the Editors—this time it is Sand Storm over the White<br />
Desert by Australian artist Jenny Bowker.<br />
We hope you enjoy this <strong>Special</strong> <strong>Edition</strong>, and that you visit our website,<br />
www.mqumag.com, to experience more machine quilting magic!<br />
Kit Robinson<br />
Managing Editor<br />
<strong>Machine</strong> <strong>Quilting</strong> <strong>Unlimited</strong> Magazine<br />
<strong>Special</strong> <strong>Edition</strong> <strong>Winter</strong> <strong>2011</strong> | <strong>Machine</strong> <strong>Quilting</strong> <strong>Unlimited</strong> 3
Contributors<br />
Kim Brunner<br />
Voted ‘<strong>Machine</strong> <strong>Quilting</strong> Teacher of the Year<br />
2009’ by her students, Kimmy Brunner is<br />
a third generation quilter who has made it<br />
a goal to bring her family’s quilting history<br />
into the future. Her work has won multiple<br />
national and international level awards<br />
and has been featured in numerous books,<br />
magazines and calendars. Nominated five<br />
times for Teacher of the Year, and known for her beautiful quilting<br />
and crazy sense of humor, her style combines laughter with years of<br />
experience. She produces top-rated instructional DVDs for midarmers<br />
and longarmers alike, digitized patterns for computerized<br />
quilters, and high quality quilting aids and tools. A frequent contributor<br />
to quilting industry publications and the author of the askthe-expert<br />
column ‘Ask Kimmy!’, she teaches jam-packed classes at<br />
major machine quilting shows. Still sane (sort of) despite having<br />
two teenagers, she lives in Minnesota with her family, spoiled rotten<br />
dogs, and an alarming stash of fabric. Visit her website at<br />
www.Kimmyquilt.com for more information.<br />
Diane Rusin Doran<br />
Always fascinated by color and fabric,<br />
Diane Rusin Doran has been sewing<br />
since childhood and quilting since 1987.<br />
Focusing on machine techniques, she uses<br />
piecing, appliqué, and digital imagery to<br />
create complex, heavily quilted pieces. Her<br />
quilts have been exhibited internationally,<br />
and have won awards at a variety of major<br />
shows. Diane’s work is also in collections across the country. She<br />
teaches and quilts in the Baltimore/Washington area. You can see<br />
more of her work at www.dianedoran.com.<br />
Southern Hospitality by Nancy Cook<br />
Nancy G. Cook<br />
Nancy is an artist who maintains a private<br />
studio in Charlotte, NC, an area rich in the<br />
traditions of needlework. Her nature inspired<br />
quilts are found in both private and public<br />
collections across the United States. She<br />
has received multiple grants and awards<br />
for her work, which has been included in<br />
juried and invitational exhibitions in the<br />
US and Europe. In 2009, her work has been shown in Renew: Quilts<br />
Go Green, Sacred Threads, in the special exhibit Contemporary<br />
Colorations II at the 2009 NQA show and she received the Jurors’<br />
Choice Award at ARTQUILTStransitions. Nancy’s fourth solo show<br />
is scheduled for September – October 2009 in Chapel Hill, NC. See<br />
more of her work at www.nancygcook.com.<br />
Barb Hollinger<br />
Barbara comes from a long line of quilters.<br />
She learned to sew from her mother and<br />
dabbled in quilting after she graduated<br />
from college. She picked it back up after<br />
she retired from engineering and never<br />
looked back.<br />
Barb now manages the Jinny Beyer Studio<br />
in Great Falls, VA, and is an active member<br />
in both the local guild and a regional art group, Fiber Artists @<br />
Loose Ends. She has taught and exhibited nationally as well as<br />
being on staff at the Jinny Beyer Seminar at Hilton Head, SC.<br />
Barb can be contacted at hollinger.quilts@verizon.net.<br />
4 <strong>Machine</strong> <strong>Quilting</strong> <strong>Unlimited</strong> | <strong>Special</strong> <strong>Edition</strong> <strong>Winter</strong> <strong>2011</strong>
Fuse and Tell:<br />
Adventures with Laura Wasilowski<br />
© 2010 Laura Wasilowski<br />
<strong>Special</strong> <strong>Edition</strong> <strong>Winter</strong> <strong>2011</strong> | <strong>Machine</strong> <strong>Quilting</strong> <strong>Unlimited</strong> 5
Previous Page:<br />
Birdland<br />
Below:<br />
Seed Pods with<br />
detail<br />
Who knew that a<br />
little girl in a 4-H<br />
sewing club could<br />
grow into a quilt artist<br />
who travels the world?<br />
Through serendipity and good friends, these early<br />
sewing skills led this lucky little girl to a career<br />
of teaching, lecturing and exhibiting art work<br />
internationally.<br />
As a teenager, my sewing skills gained my<br />
entrance to a work/study program in a college<br />
costume shop. There I learned another valuable<br />
skill: fabric dyeing. Combining sewing and dyeing,<br />
I began my first business as a young mother<br />
making one-of-a-kind clothing. A friendly neighbor,<br />
Janet Dye, introduced me to a new passion,<br />
the wonderful world of quilt making. Together<br />
we attended quilt shows, listened to lectures, and<br />
toured exhibits like the extraordinary showing of<br />
Amish quilts at the Terra Museum in Chicago.<br />
My quilting career had a rocky start. In high<br />
school I constructed my first quilt, a curved<br />
pieced bed quilt made from old wool skirts.<br />
It was like sleeping under a lead blanket! But<br />
encouraged by Janet’s enthusiasm, I tried making<br />
another pieced quilt, lighter in weight and lighter<br />
in color. As my quilting skills grew, so did my circle<br />
of quilt friends. This is when I met my future<br />
Artfabrik business partner, Melody Johnson.<br />
As Artfabrik (vendors of hand-dyed fabric and<br />
threads), we sold our wares at local and national<br />
quilt shows. The exposure to a vast variety of<br />
quilt styles captured my imagination. Why not<br />
take the fabric I was dyeing and make this thing<br />
called an ‘art quilt’? With Melody’s encouragement,<br />
I tried the technique of quilt construction<br />
I use to this day, fusing.<br />
Fusible web is dry glue which is applied to fabric<br />
with the heat of an iron. After a fused fabric is cut<br />
to shape, it is ironed or fused onto other fabrics.<br />
Fusers work directly with color and shape, much<br />
like a painter works with paint. Without sewing<br />
fabrics together, organic shapes are joined and<br />
detail pieces are stacked on top of other fabrics.<br />
Artists train by producing lots of work. With<br />
fusing, you learn design skills quickly by easily<br />
making lots of quilts. You by-pass traditional<br />
quilt construction techniques and go directly to<br />
the making of the art. And although it is a simple<br />
technique, you soon discover that the skill in<br />
fusing comes in the designing of compositions.<br />
Fusing gives you endless possibilities for designs.<br />
The growth of my artwork is directly related to<br />
the technique of fusing. It allows me to practice<br />
and create enough art to develop a personal<br />
style. In the 15 years I’ve been making art quilts,<br />
my style has been described as bright, pictorial,<br />
narrative and, my favorite, whimsical. It is this<br />
whimsical set of mind that so invigorates me<br />
when creating art. When I make art, inner critics<br />
are banished from my head. I feel free and playful.<br />
6 <strong>Machine</strong> <strong>Quilting</strong> <strong>Unlimited</strong> | <strong>Special</strong> <strong>Edition</strong> <strong>Winter</strong> <strong>2011</strong>
Inspiration for my art comes from illustrating<br />
stories of family, friends, home<br />
or a favorite bend in the road. Story<br />
telling runs deep in my veins and what<br />
better way to tell a story than through<br />
a quilt? A motif or favorite object can<br />
also become an obsessive muse. A<br />
series about my blue chair, begun<br />
in the early 1990’s, continues on<br />
today. And at one point chicken<br />
quilts dominated my every quilting<br />
moment.<br />
Currently, my favorite inspiration<br />
for creating art comes from<br />
the hand-dyed and fused fabric<br />
scraps left over from other<br />
projects. Triggering ideas for<br />
designs, these small shapes give<br />
me hours of play like a toy box<br />
full of color and shape. When<br />
I improvise with the fabric<br />
scraps I lose track of time and obligations<br />
and enter that creative zone artists crave.<br />
These small improvised art quilts come to life<br />
with my latest passion: hand stitchery. With the<br />
addition of simple embroidery stitches, the art<br />
On a Leaf<br />
<strong>Special</strong> <strong>Edition</strong> <strong>Winter</strong> <strong>2011</strong> | <strong>Machine</strong> <strong>Quilting</strong> <strong>Unlimited</strong> 7
Above: Bridges and Fences<br />
Right: Coleen’s Calling Bird<br />
Below: Laura Wasilowski<br />
gains another level of texture, pattern and color.<br />
It adds those all important details you can’t make<br />
with fabric. The simple act of hand stitching a<br />
fused quilt takes the art from flat to fabulous.<br />
The final act of machine stitching adds another<br />
dimension to my art. My pictorial quilts have a lot<br />
of organic shapes. Free-motion stitching allows<br />
me to reach the nooks and crannies found in the<br />
fused designs. In free-motion quilting the feed<br />
dogs are dropped, a free-motion foot is placed on<br />
the machine, and the stitching is advanced by<br />
moving the quilt beneath the needle with your<br />
hands. It is like drawing by moving a piece of<br />
paper under a stationary pencil.<br />
Before I begin machine quilting, I plan a freemotion<br />
stitch route so I can sew continuously<br />
without changing thread color or stopping the<br />
needle. My finger traces the stitch path on the<br />
surface of the quilt and I look for the shortest<br />
transition between shapes so the connecting<br />
stitches between those shapes are not conspicuous.<br />
I’m also looking for an escape route, a place<br />
to end the stitching.<br />
Fused art quilts invite certain kinds of stitching,<br />
such as: outlining, echoing, sketching, patterning,<br />
and enclosed stitches.<br />
8 <strong>Machine</strong> <strong>Quilting</strong> <strong>Unlimited</strong> | <strong>Special</strong> <strong>Edition</strong> <strong>Winter</strong> <strong>2011</strong>
Outlining fused elements with stitching advances<br />
shapes. To outline a shape, I smoothly guide the<br />
needle around the shape without stitching the<br />
element.<br />
If I have a fabric edge cut with a decorative rotary<br />
cutter blade, I will follow that decorative edge<br />
with echo stitches. This gives me a repetitive<br />
motif on the quilt surface that adds movement<br />
and interest.<br />
Sketching with free-motion<br />
stitches is like drawing on the quilt<br />
with a pencil, especially if you use<br />
thread colors that contrast in hue<br />
or value with the fused shape. I<br />
use sketching to add more detail;<br />
like veins for a leaf or petals on a<br />
flower. If you can free-motion quilt<br />
your name, you can sketch or draw<br />
on your quilt top with thread.<br />
When it’s time to cover a lot of<br />
territory, I use pattern stitches.<br />
There are hundreds of free-motion<br />
pattern designs in the quilt world,<br />
but my favorite for filling in open<br />
expanses of fabric is the MEMEME<br />
design. For this design, simply<br />
make 3 vertical peaks of stitching<br />
(M) then 3 horizontal peaks of<br />
stitching (E). These patterning<br />
stitches fit nicely around fused<br />
shapes, fill in large areas, and have endless variations<br />
when you add tilts, knobs, and waves.<br />
Enclosed stitching begins with sketching a large<br />
shape on the fabric like a leaf or flower. The<br />
interior of the shape is then filled with pattern<br />
or sketching stitches. I make sure I plan an<br />
escape route before filling the shape if I want to<br />
add more quilting outside of the shape.<br />
Whether in a museum, corporate, or personal<br />
collection, each piece of art work I make<br />
remains very near and dear to my heart. Each<br />
is invested with my memories as a little girl,<br />
teenager, mother, and traveling quilt maker.<br />
Each carries my joy in the creative process. For<br />
me, there is nothing finer than making an art<br />
quilt.<br />
Visit Laura’s website: www.artfabrik.com<br />
Above: Pressing Matters<br />
The Chicago School of Fusing<br />
The Chicago School of Fusing is a state of mind, created and maintained<br />
by dedicated fusers Laura Wasilowski, Robbi Joy Eklow, Frieda<br />
Anderson, Melody Johnson, Emily Parson and Annie Lullie to promote<br />
the fine art of fusing fabric. Each member of the ‘faculty’ has a special<br />
talent or position in the organization. Laura is known as the Dean<br />
of Corrections, teaching techniques, etiquette and deportment to all<br />
would-be fusers. Choir leader<br />
Melody leads the Fusettes, offering<br />
such ditties as the school<br />
fight song, Press On Chicago<br />
Fuse. Emily handles the quilt<br />
exhibits, promotion and sales<br />
training. Frieda has the website<br />
expertise as well as acting as a<br />
calming influence on the others.<br />
And Annie—well she was brought<br />
in because of her party skills!<br />
This imaginary school boasts<br />
an imaginary campus as<br />
well. Classes are held in the<br />
Fusitorium building; iron repair<br />
and maintenance is covered in<br />
the Iron Workers United building;<br />
there is also the Flat Iron<br />
Student Services building and a<br />
Rowenta Sports Arena; and they<br />
tell me you can buy your protective steel-toe boots, along with fusing<br />
supplies, at the Hot Stuff Bookstore and Uniform Shop!<br />
If you desire admission to the Chicago School of Fusing, you must<br />
first demonstrate the ability to locate Chicago on a map and to have<br />
had some experience with an iron. Undergraduate applications may be<br />
obtained by contacting the Office of Undergraduate Admissions (any<br />
faculty member) to discover where off-campus classes are held.<br />
Members of the Chicago School of Fusing team use vibrant hand-dyed<br />
fabrics to create bold, dynamic art quilts with themes ranging from a<br />
love of nature to an appreciation of chickens. Check out their various<br />
websites and blogs:<br />
n Laura Wasilowski, www.artfabrik.com<br />
n Melody Johnson, www.wowmelody.com<br />
n Robbi Joy Eklow, www.robbieklow.com<br />
n Frieda Anderson, www.friestyle.com<br />
n Emily Parson, www.emilyquilts.com<br />
n Annie Lullie, www.annelullie.com<br />
<strong>Special</strong> <strong>Edition</strong> <strong>Winter</strong> <strong>2011</strong> | <strong>Machine</strong> <strong>Quilting</strong> <strong>Unlimited</strong> 9
Ask any new midarm or longarm machine<br />
quilter about using templates, and you will<br />
almost always get this response: “Oh, no! They’re<br />
so scary!” Yet nothing will quickly make a new<br />
quilter’s work look more professional than<br />
template work. Templates will keep your circles<br />
circular, your straight lines perfectly straight,<br />
and give your quilt a crisply polished finish. In<br />
short, templates will make you look like you<br />
know what you are doing long before you actually<br />
do. Who could ask for more?<br />
There are a couple of things to know in order to<br />
get off to a smooth start. Most importantly, the<br />
first Immutable Law of Template Use: You can<br />
go fast, or you can use a template. You cannot<br />
do both. With template work, slow and steady<br />
always wins the race. If you rush, you will<br />
Lions and Tigers<br />
and Templates,<br />
Oh My!<br />
© 2010 Kim Brunner<br />
increase your chances of getting the template<br />
caught underneath your hopping foot, ‘jumping’<br />
your foot up on top of the template, breaking a<br />
needle or throwing your machine’s timing out of<br />
whack. Slow down, steer your machine carefully,<br />
pay attention to proper hand placement and you<br />
will be just fine.<br />
When it comes to hand placement, here is<br />
another rule to remember; never (and I mean<br />
never!) get ahead of your hand. Place your hand<br />
on the template, fingers spread slightly, holding<br />
the template lightly but firmly in place, and stitch<br />
only as far as you can go without passing your last<br />
fingertip. The area of the template on which your<br />
hand is resting is stable and secure, but once you<br />
start stitching past your hand you are entering<br />
dangerous territory. When you reach that final<br />
fingertip, stop stitching, reposition your hand<br />
and resume stitching. The reach of your hand is<br />
always your guide when using templates.<br />
When holding the template in place, do not push<br />
down too hard as doing so will interfere with<br />
how your machine moves and can prevent proper<br />
stitch formation. This, in turn, leads to skipped<br />
stitches and thread breakage. Remember, it is the<br />
template you are trying to hold in place, not the<br />
machine! Press down hard enough to keep the<br />
template still, but not hard enough to retard the<br />
machine’s movement. Instead of trying to squash<br />
the template into submission, try sticking little<br />
sandpaper dots on the underside of the template<br />
to prevent shifting. These inexpensive dots,<br />
which are found in the notions department of<br />
your local fabric store, work wonders and it only<br />
takes a couple of them to do the trick.<br />
You will need some sort of an extended base plate<br />
on your machine in order to use templates successfully.<br />
Most midarm and longarm machines<br />
have narrow needle plates, and trying to balance<br />
a template on that narrow base, keep it from<br />
shifting, steer your machine, execute a pleasing<br />
design and keep an even stitch length all at the<br />
same time is a bit like juggling live grenades;<br />
sooner or later, there is going to be a loud bang!<br />
It will be much easier if you have an extended<br />
base, which will give you a nice little ‘table’ on<br />
which to securely rest your template. These<br />
extended bases can be found at many online<br />
quilting supply sites.<br />
When template shopping, what should you look<br />
for? First, be sure that the template will work<br />
with your machine. There is a world of difference<br />
between templates made for piecing and those<br />
made for quilting, and you must never mix them<br />
up! Most longarm and midarm machines require<br />
a minimum ¼-inch thick template. Any template<br />
thinner than ¼ inch will slip right under the<br />
hopping foot, causing all kinds of problems.<br />
However, there are some machine brands that<br />
require a template thicker than ¼ inch and it is<br />
your responsibility to know what your machine<br />
needs. Do not expect the template manufacturer<br />
to be an expert on your machine’s requirements!<br />
If you have questions about what templates to<br />
buy, contact your dealer or manufacturer.<br />
Next, look for something that can be used in<br />
multiple ways, allowing you to get more bang<br />
for your template buck. Circles, straight rulers,<br />
ovals, and football shaped templates are all great<br />
multitasking tools and will enable you to make<br />
10 <strong>Machine</strong> <strong>Quilting</strong> <strong>Unlimited</strong> | <strong>Special</strong> <strong>Edition</strong> <strong>Winter</strong> <strong>2011</strong>
myriad designs. In this article we will explore just<br />
a few of the ways you can use these tools, and I<br />
will show you several easily achievable designs<br />
that are gender-neutral, making them appropriate<br />
for a wide range of quilt types.<br />
The most useful template of all is the straight<br />
ruler. Look for one that has incremental markings<br />
etched onto the Plexiglas, as this will<br />
eliminate the need for you to keep a separate<br />
ruler on hand for measuring blocks, borders,<br />
etc., while quilting. It is also nice to have 45 and<br />
60 degree lines marked on the ruler, as these<br />
are angles that you will use again and again.<br />
There are long straight rulers, short rulers, and<br />
everything in between. My preference is one that<br />
will fit comfortably in my hand and extend no<br />
more than a few inches beyond the reach of my<br />
fingers. If it is wider than my hand I cannot grip<br />
it properly, and if it is too long for me to hold<br />
securely that extra length is wasted space. I look<br />
for straight rulers that are approximately two<br />
inches wide and ten inches long.<br />
Why is a straight ruler a great choice? First and<br />
foremost, using a ruler will make stitching in the<br />
ditch much easier as it will enable you to slide<br />
your hopping foot smoothly along the ruler and<br />
glide down the ditch in a nice straight line. It<br />
will also make crosshatching a snap, especially if<br />
you buy a ruler with incremental measurements.<br />
These measurements will allow you to get away<br />
with doing a fraction of the marking you would<br />
normally have to do for this technique. Instead of<br />
pre-marking each and every crosshatch line, you<br />
can mark every fifth or sixth line to keep your<br />
spacing even, and then use the ruler’s markings<br />
to enable you to perfectly fill in the other lines on<br />
the fly.<br />
Let’s look at a few of the designs that can be<br />
accomplished with a straight ruler. The first<br />
one requires minimal marking, has only eight<br />
lines, can be manipulated to fill almost any<br />
shape, and performs flawlessly as a jack of all<br />
trades in blocks, cornerstones and borders. To<br />
execute this design, start with a square. Place a<br />
tick mark at the center of each of the four sides,<br />
and number the corners and centers as shown in<br />
Illustration 1. Notice that the starting point is<br />
numbered 1 and 9. You will begin your stitching<br />
line in the top left hand corner as you are learning<br />
this design, but you will quickly see that any<br />
one of the corners or centers could be used as the<br />
starting point. Position your template diagonally<br />
across your block from the top left corner to<br />
the center of the bottom side and, gliding your<br />
machine lightly (the key word here is lightly—<br />
there is no shoving when using templates!)<br />
against the side of the ruler, stitch a straight line<br />
1 & 9 6<br />
4 8<br />
7 2<br />
5<br />
1 & 9 6<br />
4 8<br />
7 2<br />
5<br />
1 & 9 6<br />
4 8<br />
7 2<br />
5<br />
<strong>Special</strong> <strong>Edition</strong> <strong>Winter</strong> <strong>2011</strong> | <strong>Machine</strong> <strong>Quilting</strong> <strong>Unlimited</strong> 11<br />
3<br />
3<br />
3<br />
1<br />
2<br />
3
from 1 to 2. Now, reposition your ruler, and stitch<br />
a line from 2 to 3, forming a V. (Illustration 2)<br />
Continue from 4 to 5, from 5 to 6 and so on<br />
until you come to 9, which is the point at which<br />
you started your design. You just stitched out a<br />
beautiful Mariner’s Compass-type star, and it was<br />
so easy! (Illustration 3)<br />
Step it up a bit and work on a design that has a<br />
little more ‘oomph’. It is still a star, and it is still<br />
very simple, but it will look like lot more work<br />
than it actually was. Start with a circle, and<br />
subdivide it evenly into sixteen sections. In the<br />
middle of the circle, add a second circle. This<br />
circle can be as large or as small as you wish.<br />
(Illustration 4) Place your ruler diagonally so that<br />
you can stitch from the point at which one of your<br />
subdivision lines crosses the inner circle to where<br />
the next line intersects the outer circle. Pivot<br />
4<br />
6<br />
your ruler and stitch diagonally down to where<br />
the next line crosses the inner circle, continuing<br />
around the circle until you return to your starting<br />
point. Finish by stitching the inner circle to add<br />
another level of interest to the star. See? That was<br />
so easy, but it looks so cool! (Illustration 5)<br />
Now dress that star up even more. This time you<br />
will add a third circle, and again, this circle can<br />
be whatever size you wish. (Illustration 6) Stitch<br />
a star using the technique you just learned, but<br />
instead of ending with a simple eight pointed<br />
star, stitch a second star, bouncing your stitching<br />
lines from the innermost circle to the middle<br />
circle. (Illustration 7) Ta-da! It looks complex,<br />
but it was no work at all.<br />
Next, work on border designs. A perennial<br />
favorite among quilters is the Hanging Squares<br />
border. It is a design that works equally well in<br />
12 <strong>Machine</strong> <strong>Quilting</strong> <strong>Unlimited</strong> | <strong>Special</strong> <strong>Edition</strong> <strong>Winter</strong> <strong>2011</strong><br />
5<br />
7
sashing strips, stop borders and outside borders,<br />
since it looks great in almost any size. Begin by<br />
measuring the width of your border. In general,<br />
the border width determines the spacing of the<br />
squares. Occasionally you will have to fudge the<br />
markings to fill the entire length of the border<br />
evenly. In that case, you can either fiddle with<br />
the markings just a bit, making your squares<br />
ever so slightly diamond-shaped or, if you find<br />
that the border length is really throwing you off,<br />
you can work the design from corner to center<br />
and place one or two oddly shaped squares in the<br />
middle of the border to create a separate design<br />
to fill the space.<br />
In this example, we have a 4-inch wide border,<br />
and we want to have a square floating in the corner.<br />
Our first chalk mark will be two inches out<br />
from the interior corner and the rest of our markings<br />
will be four inches apart. (Illustration 8)<br />
We will also make two 2-inch markings in the<br />
outer corner to aid in stitching the corner square.<br />
Remember, when placing your markings and<br />
stitching the lines, allow for a ¼-inch binding<br />
seam allowance, so do not stitch all the way out to<br />
the edge of the border, or your squares will have<br />
their heads cut off by the binding!<br />
Now that the marking is done, the rest is a<br />
breeze. Begin your stitching line at point A<br />
(Illustration 9), stitch to point B, then on to C,<br />
etc., creating a zig-zag line all the way down your<br />
border. When you reach the opposite corner,<br />
pivot your ruler, turn around and come back in<br />
the opposite direction, filling in the opposing<br />
zig-zags. Depending on the look you prefer, you<br />
may leave your squares plain, or make them pop<br />
by filling in the background spaces as shown in<br />
Photo 10 or by filling in the squares themselves<br />
and leaving the backgrounds blank.<br />
To dress up this design even further, try ‘shadowing’<br />
the first set of squares. Your pre-marking<br />
will be exactly the same, and so will the first and<br />
second stitching lines. Once you have finished<br />
the first set of squares, you will then come back<br />
and stitch a second set, each of which is ¼ inch<br />
away from the first set. This is easily accomplished<br />
by lining up your ruler directly on top of<br />
the first stitched line and stitching another line<br />
right next to your ruler. Your hopping foot will<br />
keep your new stitches ¼ inch away from the first<br />
stitched line, allowing you to effortlessly stitch a<br />
¼ inch ‘shadow’ line. (Photo 11)<br />
I hope that I have given you the confidence<br />
needed to experiment with rulers and templates.<br />
Remember, follow the safety rules, use your<br />
imagination, and before you know it you will be<br />
quilting like a pro!<br />
B<br />
2"<br />
2"<br />
C<br />
A<br />
2"<br />
2"<br />
D<br />
4" 4"<br />
E<br />
4" 4"<br />
<strong>Special</strong> <strong>Edition</strong> <strong>Winter</strong> <strong>2011</strong> | <strong>Machine</strong> <strong>Quilting</strong> <strong>Unlimited</strong> 13<br />
F<br />
8<br />
9<br />
10<br />
11
Foundations<br />
Simple Strategies for <strong>Quilting</strong> Patchwork<br />
© 2010 Barbara Hollinger<br />
Many recent quilt shows<br />
and current magazine articles feature quilts<br />
finished with the most amazing machine quilting<br />
where design and color blend in a beautiful<br />
array of form and texture the likes of which<br />
1<br />
most of us can only dream of creating.<br />
The quilters who craft these<br />
works of art spend countless hours<br />
honing their skills, planning their<br />
masterpieces and working through<br />
every detail, filled with what must<br />
be miles and miles of thread. Many<br />
quilters, especially beginners, find<br />
themselves working at the other<br />
end of the spectrum, making simple<br />
patchwork quilts that will warm a<br />
chilled lap, bundle a small child, or<br />
Simple Shapes<br />
wrap a college student with comfort<br />
from home. Busy schedules and<br />
hectic lives do not allow us to pour<br />
our time into the utility quilts that<br />
are likely to become well worn before<br />
very long. Over the years, I have<br />
used a series of techniques to finish<br />
this type of quilt in an easy way that<br />
gives each one its own style. The<br />
simple approaches outlined in this<br />
article will get you started and will<br />
hopefully serve you well as you work<br />
toward a masterpiece of your own.<br />
Focal Block<br />
Oversized Block<br />
Basic Guidelines<br />
Before you get started, it will be<br />
helpful for you to step back and<br />
assess the quilt composition.<br />
Consider how the pieces interact.<br />
Do they meet at the corners or are<br />
they offset? Are the pieces uniformly<br />
sized or are there small patches<br />
mixed with larger ones? Is the quilt<br />
full of piecework or are there large<br />
blank spaces? Is there a focal point<br />
to the design or does the pattern<br />
repeat across the quilt? With these questions<br />
in mind, read through the steps that follow and<br />
think about how you can customize quilting<br />
designs for your quilt.<br />
Break down the composition into smaller elements.<br />
(Image 1) Most patchwork can be placed<br />
into one of several categories:<br />
1. Blocks made of small simple shapes;<br />
squares rectangles, triangles and<br />
diamonds.<br />
2. Blocks with a focal point; stars, leaves, and<br />
baskets.<br />
3. Blocks with a large over-all design; log<br />
cabins, crazy patch.<br />
4. Pieced borders.<br />
Plan a design using a unified theme when quilting<br />
these different elements. This will give your<br />
quilt a cohesive appearance. I love to use swirls<br />
and spirals but for this sampler I selected leaves<br />
as my quilting theme. (Image 2) I was able to<br />
incorporate this theme into each section so there<br />
were no areas which looked like an afterthought.<br />
I used the same basic shape for all my leaves but<br />
varied their size and orientation. I let the size of<br />
the space they needed to fill dictate the size of<br />
the leaf. Choose a theme that compliments not<br />
14 <strong>Machine</strong> <strong>Quilting</strong> <strong>Unlimited</strong> | <strong>Special</strong> <strong>Edition</strong> <strong>Winter</strong> <strong>2011</strong><br />
2
just the design but also your fabric choices. Keep<br />
in mind that you might even be able to borrow<br />
design details from one of the fabrics.<br />
Map out a plan indicating your starting point.<br />
Work in small sections rather than trying to<br />
make long passes across the whole quilt. I often<br />
work on the simplest sections first while I contemplate<br />
my approach to the more difficult areas.<br />
Assuming the quilt is pin basted and the layers<br />
thoroughly stabilized, you should be able to begin<br />
wherever you like. On this quilt I started with the<br />
‘Double 9 Patch’ blocks as I thought they were<br />
clearly the simplest to quilt, even though they<br />
had more pieces and smaller sections than the<br />
other blocks. I desperately try to avoid marking<br />
my quilts, especially for simple quilting lines, but<br />
you might elect to add guide lines with a chalk<br />
pencil.<br />
Space your quilting evenly across the quilt surface.<br />
Quilts where the quilting is either too dense<br />
or too sparse will not lie or hang flat, and even if<br />
the batting instructions say you can quilt it up to<br />
8 inches apart, I do not recommend it. The quilt<br />
will wear much better if you anchor the layers<br />
together at least every 2 to 3 inches.<br />
Define the hard edges by running a straight<br />
line of quilting in the ditch between the pieced<br />
center and the borders using a walking foot.<br />
Sashing can be treated in the same fashion if it<br />
cannot be integrated into the block piecing. The<br />
finished quilt will remain straighter with these<br />
design elements anchored from the start. Add<br />
one last line of straight stitching to the perimeter<br />
of the quilt, just inside the line where you will<br />
add the binding. This serves to stabilize the edge<br />
as well as providing a guide line for the quilting<br />
in the borders. (Image 3) I prefer to trim away<br />
the extra batting and backing at this point so it<br />
does not fold under and become trapped in the<br />
quilting by accident. (Image 4)<br />
Select a thread that will work in all the areas<br />
of the quilt. If there are large value changes<br />
between the fabrics, try something in the<br />
medium range. The thread will show on enough<br />
of the fabrics that it will not look out of place. If<br />
the thread only shows on the darkest or lightest<br />
fabrics, it can sometimes stand out too much in<br />
these areas. Variegated threads work beautifully<br />
in this setting and can be an unexpected highlight<br />
as the thread shifts from one color or value<br />
<strong>Special</strong> <strong>Edition</strong> <strong>Winter</strong> <strong>2011</strong> | <strong>Machine</strong> <strong>Quilting</strong> <strong>Unlimited</strong> 15<br />
3<br />
4
1<br />
20 19 27<br />
7<br />
3<br />
26<br />
5<br />
8<br />
2<br />
18<br />
6<br />
21 25<br />
4<br />
28<br />
14<br />
10<br />
12<br />
to another. Keep in mind, however, that if your<br />
motif requires much backtracking, you will lose<br />
the gradual color shift and end up with abrupt<br />
color jumps instead.<br />
Quilt Away<br />
9<br />
13<br />
11<br />
15 22<br />
16<br />
17 29<br />
23<br />
24<br />
30 31<br />
6<br />
5<br />
Now that you have a plan, you can really get<br />
started. I will step you through the blocks in my<br />
sampler to illustrate how you can treat each type<br />
of patchwork. If the blocks are joined to each<br />
other rather than being separated by sashing,<br />
you can quilt from one section into another<br />
without adding a start/stop point. With a little<br />
forethought, you can quilt the whole quilt in<br />
one pass, stopping only to refill your<br />
bobbin.<br />
Close the path to<br />
finish quilting.<br />
Repeat sequence<br />
for each segment.<br />
Continuous Curved<br />
<strong>Quilting</strong><br />
Double Nine Patch blocks are made<br />
up only of squares of two sizes.<br />
Traditionally these squares might<br />
be quilted by echoing the seam<br />
line on ¼ inch inside each patch.<br />
By replacing the straight lines<br />
1<br />
2<br />
3<br />
with gentle curves, you can alter this style for<br />
machine quilting. Each arch starts and ends at<br />
a seam intersection and comes into the patch to<br />
the same ¼ inch margin. The arches are connected<br />
end to end to allow a continuous curved<br />
line of quilting through the block, following<br />
from one seam line to another until the block is<br />
completed. (Image 5) Notice that I have made<br />
S-curves that undulate along the seam line<br />
rather than clamshells that come to sharp V’s.<br />
It is much easier to aim for an intersection and<br />
stitch through it rather than to stitch into a<br />
point where you have to abruptly change direction.<br />
The only time I have to quilt these clam<br />
shells is where only a single side of the patch<br />
remains to be quilted.<br />
Before you start this step, it is quite helpful to<br />
sketch the block on paper and map out your<br />
intended pathway. (Image 6) Did you outline all<br />
the patches on all the sides? Keep this map handy<br />
in case you need to go back to it. If, while you are<br />
quilting, you find that you have missed a section,<br />
slip a safety pin into the spot and go back to it<br />
later. By winding your way from one block into<br />
another at the corners, you may be able to connect<br />
the blocks with a maze of soft curves that<br />
create a wonderful design on the reverse of the<br />
quilt. Leave an escape route open in your path<br />
until all the blocks are quilted. You should be<br />
able to work your way back to where you stared<br />
by leaving the last side un-quilted until you run<br />
out of seams to follow.<br />
In addition to the curved lines of quilting<br />
along the seam lines, I filled each of the larger<br />
squares with a leaf. I was able to complete<br />
16 <strong>Machine</strong> <strong>Quilting</strong> <strong>Unlimited</strong> | <strong>Special</strong> <strong>Edition</strong> <strong>Winter</strong> <strong>2011</strong><br />
7
this quilting as I wove through the blocks by<br />
connecting it at the corners. I did not mark my<br />
leaves before quilting them. Instead I used the<br />
boundaries of the square to guide my quilting.<br />
Before moving to another section, I finished<br />
off the look of my leaves by adding several<br />
asymmetrical veins running through each leaf.<br />
Be careful of symmetrical motifs. Your eye<br />
is much more likely to pick up on variations<br />
if the shape is too regular. For that reason, I<br />
chose to start my leaves in the corners of the<br />
square that would allow the designs to rotate<br />
around the center of the block rather than having<br />
them all point the same direction.<br />
(Image 7)<br />
Creating a Focal Design<br />
Pieced blocks that create a focal design are easy<br />
to quilt if, rather than quilting each individual<br />
patch, you highlight the overall design. The<br />
center star in this sampler is made of parallelograms<br />
fragmented into four pieces. I once<br />
again chose to use my leaf motif and create a<br />
radiating foliage design that followed the shape<br />
of the block, filling in the center with the same<br />
veins found in my first set of leaves. (Image 8)<br />
If you cannot quite picture what your design<br />
should look like, take a digital picture of the<br />
block, print it in black and white, and doodle a<br />
few ideas in colored marker. This will allow you<br />
to explore several possibilities before you start<br />
to stitch and save you from picking out stitches<br />
which form a design that did not work out as<br />
you had hoped.<br />
8<br />
Filling a Large Block<br />
Blocks such as log cabin and crazy patch require<br />
a little more planning. By treating them as a<br />
blank space, you can easily quilt the space with<br />
total disregard for the actual piecing. Fill them<br />
with a wreath, a series of spirals or a spray of<br />
leaves, and you not only successfully anchor your<br />
quilt together, but you add a level of detail that<br />
can be enjoyed up close. Good quilts, even simple<br />
ones, are appealing both from a distance and<br />
upon closer inspection. Think of it as the bi-focal<br />
effect; what comes into focus from far away is not<br />
what you will see when it is closer than an arm’s<br />
length.<br />
I repeated my leaf motif once again<br />
and designed a laurel wreath that<br />
started at the same point in each<br />
block. Because this design was to<br />
be reasonably symmetrical, I created<br />
a template for the main stem<br />
that would be the foundation for<br />
each block. The remaining stems<br />
and leaves were filled in freehand<br />
without marking by anchoring them<br />
to the arching stems, leaving the<br />
<strong>Special</strong> <strong>Edition</strong> <strong>Winter</strong> <strong>2011</strong> | <strong>Machine</strong> <strong>Quilting</strong> <strong>Unlimited</strong> 17<br />
10<br />
9
11<br />
Quilted Border: First Pass<br />
Quilted Border: Second Pass<br />
12<br />
variations in quilting less noticeable. Likewise,<br />
quilting free-form feathers is easier and flows<br />
more evenly if you establish the center vein first.<br />
I drafted my stem by sketching out my block to<br />
scale, folding it in half diagonally and drawing<br />
a smooth curved line with a drafting curve that<br />
would allow space on either side of the stem to<br />
add leaves. (Image 9) I reproduced this curve<br />
with a manila folder and marked each stem with<br />
chalk. By originating my design in the corner of<br />
the block, I was able to link it to the remainder of<br />
my quilting. (Image 10)<br />
<strong>Quilting</strong> a Pieced Border<br />
Piecing within a border provides a ready made<br />
quilting guide that can tie in the quilting elements<br />
from the interior blocks. Quilt simple<br />
squares and triangles with continuous curves<br />
and fill the blank spaces surrounding them with<br />
the same design motif you selected to fill the<br />
open areas of the patchwork. Once again, I put<br />
my leaves to use by springing them from the corners<br />
of my pieced border. By twisting the last leaf<br />
in the row, I was even able to fill in the empty<br />
space at the corner. I break my borders down into<br />
several passes so I repeat one movement over and<br />
over, rather than trying to cover the whole width.<br />
It makes it much easier to be consistent as I arch<br />
from square to square and surround my quilt in<br />
a vine of leaves. (Image 11)<br />
I chose to orient my leaves in the same direction<br />
each time. You might prefer to frame the<br />
quilt and have the motif change direction at<br />
the center point of the border. If you work<br />
better in one direction than another, as<br />
many of us do, the one directional pass<br />
might be faster and easier. I find I am<br />
a clock-wise quilter with my smoother<br />
passes coming as I quilt toward myself<br />
where I can see my path more clearly.<br />
These techniques are not designed to<br />
be the end of your journey, just an easy<br />
place to start. Take a look at your stack<br />
of UFOs and find a pieced quilt that<br />
cries out to be finished. Work out a<br />
simple plan on paper and watch as<br />
your thread transforms your unfinished<br />
top into a quilt you can really<br />
enjoy using. (Image 12)<br />
18 <strong>Machine</strong> <strong>Quilting</strong> <strong>Unlimited</strong> | <strong>Special</strong> <strong>Edition</strong> <strong>Winter</strong> <strong>2011</strong>
Additional Resources:<br />
v Show and Event Calendar<br />
v Articles and Information<br />
v Teachers and Classes<br />
v Guilds<br />
v Quilt Gallery<br />
v MQU Back Issues<br />
v Connect to our Facebook<br />
and Twitter<br />
Online!<br />
www.mqumag.com<br />
Sign Up for our E-Newsletter!
Design Elements<br />
Feather Finesse<br />
©2010 Diane Rusin Doran<br />
1: Traditional feather<br />
design from a stencil.<br />
Arrows indicate<br />
where backtracking<br />
was required. 2: An<br />
unmarked feather<br />
with outlining.<br />
Open a quilting magazine<br />
or go to any quilt show and you will see feather<br />
quilting motifs on a wide variety of quilts.<br />
Feathers have been classic quilting motifs nearly<br />
as long as quilts have been made. Formal or<br />
flowing, they add softness and movement to any<br />
quilt. One of the best attributes of feathers is that<br />
they can be used to fill a wide variety of shapes<br />
and spaces. And, once you get the hang of them,<br />
they are really fun to quilt!<br />
Feathers consist of a stem and the feathers<br />
themselves. The feathers are usually a teardrop<br />
or paisley shape. The shape, size and curve of the<br />
stem, along with the area you want to fill, determine<br />
the shape of the feather motif. The feather<br />
creates a sculptural effect and you will probably<br />
want to emphasize that by leaving some space<br />
around the motif for background fill.<br />
Traditional feathers require backtracking, as<br />
indicated by the arrows in Figure 1. Backtracking<br />
requires some precision, and is less visible when<br />
you use a very fine thread, such as YLI silk or<br />
Aurifil size 50. When you leave space between<br />
1 2<br />
your feathers, as shown in Figure 2, the need to<br />
backtrack is eliminated. This type of feather will<br />
also work better if you prefer using thicker thread.<br />
Remember—thin thread, small needle, thick<br />
thread, big needle. Note: Some of my samples<br />
were made with dark thread on light fabric to<br />
make them easier to see. Normally I would choose<br />
to use a slightly lighter thread than the fabric<br />
color in order to hide small bobbles in the work.<br />
A variety of feather stencils are available to<br />
quilters, as are traceable designs. Here, though,<br />
we will learn how to make a feather to fit your<br />
quilt, using just a bit of marking. If you do not<br />
feel comfortable with this technique, you can<br />
always use a template to mark your feathers,<br />
and follow along with the same order of sewing<br />
shown here. Once you are comfortable with the<br />
basic technique you may want to branch out into<br />
making a feather design unique to you.<br />
Let’s start by drawing a basic feather and at the<br />
same time break down the order of sewing. We<br />
can begin by drawing a slightly curved line in<br />
a rectangle about 4 inches by<br />
5 inches. Some people like to<br />
make their feather spine a single<br />
line of stitching, but I prefer<br />
my spines to have a little width<br />
to them. Start drawing at the<br />
bottom of the spine. When you<br />
reach the top you can make a<br />
point, a leaf shape, or a rounded<br />
tip—the choice is yours. Come<br />
back down the spine, making a<br />
parallel line slightly to the right<br />
of your original line, down to<br />
a point or a squared off end as<br />
shown in Figure 3.<br />
Starting on the left side of<br />
the spine, begin moving<br />
upwards using tear drop<br />
20 <strong>Machine</strong> <strong>Quilting</strong> <strong>Unlimited</strong> | <strong>Special</strong> <strong>Edition</strong> <strong>Winter</strong> <strong>2011</strong>
Start<br />
shapes. (Figure 4) The teardrop shapes should<br />
be angled upward, not perpendicular to the<br />
spine. (Figure 5) Try to make the teardrops<br />
fill the space, leaving room around the edge<br />
for background quilting. If you accidentally<br />
make a teardrop a little too horizontal, make<br />
the next teardrop smaller and more angled to<br />
get back on track. As you come around back to<br />
the spine, the end of your teardrop shape will<br />
eventually become more parallel to the spine.<br />
The teardrops remain separate shapes. Although<br />
they stack one upon the other, they are not<br />
touching. This is what eliminates the need to<br />
backtrack. It also creates an elegant set of lines<br />
that curve toward the spine. The teardrops can<br />
be skinny or chubby, whichever you prefer. I<br />
prefer to make my teardrops relatively thin as<br />
they approach the spine.<br />
Once you have reached the top of the spine, start<br />
drawing teardrops on the right hand side, again<br />
starting at the bottom. (Figure 6) Because your<br />
spine is curved, the teardrops on the right will<br />
3 4 5 6<br />
No<br />
X<br />
not exactly match the ones on the left, and that<br />
is a good thing!<br />
We are starting with a curved spine, rather<br />
than a straight one, for several reasons. If you<br />
make a mistake on a straight line it is very<br />
obvious, but not as noticeable on a curved one.<br />
If a straight spine is centered in your design<br />
area, the temptation is to make a symmetrical<br />
design. Symmetrical designs are more difficult<br />
to quilt well than asymmetrical ones, and small<br />
errors become glaring. Making an asymmetrical<br />
feather, with variations in feather size, angle,<br />
and number of feathers on each side, is an easier<br />
approach, and gives your project some artistic<br />
flair to boot.<br />
Congratulations—you have successfully drawn<br />
a feather! A feather is sewn in the same order<br />
in which you just drew one—start at the bottom<br />
of the spine, go up and around (Figure 7),<br />
come down, feathers on the left (Figure 8), then<br />
feathers on the right. (Figure 9) As you meet the<br />
3: Drawing a simple,<br />
slightly curved spine.<br />
4: Start drawing the<br />
teardrops on the<br />
bottom left hand<br />
side of the spine.<br />
5: Angle the teardrop<br />
shapes upwards, not<br />
horizontally, for a<br />
graceful look. 6: The<br />
completed drawn<br />
feather. 7: Sewing<br />
the spine with a<br />
rounded top. 8:<br />
Sewing the left hand<br />
feathers, starting at<br />
the bottom of the<br />
spine. 9: Beginning<br />
on the bottom, sew<br />
the feathers on the<br />
right hand side of the<br />
spine.<br />
7 8 9<br />
<strong>Special</strong> <strong>Edition</strong> <strong>Winter</strong> <strong>2011</strong> | <strong>Machine</strong> <strong>Quilting</strong> <strong>Unlimited</strong> 21
10<br />
10: The completed<br />
sewn feather.<br />
11: A more balanced<br />
feather. By using a<br />
curved mark on the<br />
right hand side of<br />
the feather I was<br />
able to make a more<br />
graceful shape.<br />
12<br />
spine at the end of each feather you will ‘kiss’ the<br />
spine and then reverse the direction you are sewing<br />
to go upwards. Sewn this way you can get<br />
away with starting and stopping the thread just<br />
twice. In the figures you can see where I used<br />
the blue wash away marker line as a reference<br />
to sew the spine. It is okay to not sew exactly<br />
on the line, as you will eventually erase it and<br />
your error will never be visible. On this feather<br />
I am not entirely happy with the imbalance<br />
of the feathers on the right side. (Figure 10) I<br />
could have prevented this by making a simple<br />
mark as a reference on the right side, as shown<br />
11<br />
in Figure 11. The mark helps me to gracefully<br />
balance the right side of the feather with the<br />
left. Again, this is just a reference mark, not<br />
something to be followed exactly.<br />
If you are feeling a little more creative, and want<br />
to get a head start on the background quilting,<br />
you can get away with starting and stopping just<br />
once. Instead of stopping after the last feather<br />
on the upper left, come back down the left<br />
side, outlining close to the tips of the feathers.<br />
Backtrack directly on the spine to the bottom,<br />
come up around the right side, and begin your<br />
feathers there. When you finish the<br />
right side feathers you can again<br />
outline quilt down that side. The<br />
feather in Figure 2 was quilted in<br />
this way.<br />
Bear in mind that, as in all machine<br />
quilting, it is easier to make a short<br />
smooth curve than a long one. You<br />
may be surprised to also learn that<br />
it is easier to make a relatively small<br />
feather rather than a large one. On<br />
a small feather you have a shorter<br />
distance in which you must maintain<br />
control, while on a larger feather you<br />
can end up having to create a longer<br />
smooth curve, especially as you leave<br />
and approach the spine. The wider<br />
your design, the longer each teardrop<br />
will be.<br />
Tip: When sewing a curve, try<br />
to sew the entire curve without<br />
stopping. This usually creates a<br />
22 <strong>Machine</strong> <strong>Quilting</strong> <strong>Unlimited</strong> | <strong>Special</strong> <strong>Edition</strong> <strong>Winter</strong> <strong>2011</strong>
smoother curve. Whenever you stop while<br />
quilting, be sure to stop with your needle down.<br />
Before beginning to sew again, put the needle<br />
in the up position, make any small adjustment<br />
necessary to move the needle in the correct<br />
position, and start sewing slowly. Often when<br />
you stop sewing, it is because you are readjusting<br />
the quilt top and the needle can become<br />
misaligned with respect to the line or angle you<br />
are trying to achieve. This technique will help<br />
you create a smoother line.<br />
When making the feathers you can get into a<br />
rhythm. Start at the spine, come around the<br />
teardrop without stopping, reach the spine and if<br />
necessary rest momentarily, change directions to<br />
go back up. This breaks up the sewing into little<br />
chunks that you can do smoothly. This is not a<br />
race! Go slowly enough to maintain control, but<br />
keep moving so that you can maintain smooth<br />
lines.<br />
Batting choice will, as always, affect the look of<br />
your motif. Using a batting with some puff to it<br />
will make the feathers stand out nicely. All of the<br />
samples here were made using Hobbs Heirloom<br />
Wool batting. Choosing a matching thread will<br />
give you lots of texture, and hide any mistakes<br />
you might make. A contrasting thread will<br />
emphasize the lines of the feather. Try using different<br />
colored threads for the feathers versus the<br />
background fill for added dimension.<br />
The samples that I made specifically for this<br />
article are on solid or near solid fabrics. Why?<br />
<strong>Machine</strong> quilting of any kind will show up more<br />
on a solid fabric than a print. If you are going to<br />
the trouble to quilt feathers, plan your quilt so<br />
that the feathered areas have fabrics that will let<br />
you show off your newfound skills.<br />
13<br />
On a border you can make continuous feathers,<br />
or break up the space into diamonds, triangles,<br />
or rectangles. Breaking up the space gives you<br />
the opportunity to change the size or direction of<br />
the feathers. Just because a space is rectangular<br />
or square does not mean that your feathers have<br />
to completely fill that space. In Figure 12 you<br />
see how a straight spined feather looks when a<br />
rectangle has another shape drawn within it as a<br />
guideline for the teardrops. A natural variation in<br />
the size of the teardrops is produced by drawing<br />
the teardrops to fill these inner shapes, instead of<br />
the rectangle.<br />
Feather motifs can be successfully used on<br />
both traditional and art quilts. Figure 13 shows<br />
feathers in a simple pieced block. The feathers<br />
on the green fabric are on long stems in a rather<br />
narrow space. I used a light green silk thread,<br />
which makes the feathers stand out a little bit.<br />
The triangular orange space has a feather with<br />
two stems to gracefully fill the space. The feathers<br />
themselves are quilted using a light pink<br />
silk thread, then outlined once with Superior<br />
Thread’s BottomLine in orange. Figures 2, 14,<br />
15 and 16 show how feathers can be used in art<br />
quilts. In Figure 16 the spine of the feathers is<br />
the black, coral-like segment of the quilt. The<br />
feathers march up either side of the coral. I love<br />
to use feathers and feather variations in unexpected<br />
places on art quilts, or to fill hand dyed<br />
borders with movement.<br />
Once you are comfortable making basic feathers,<br />
you can use the same techniques to quilt other<br />
botanical designs. Fern designs and leafy fronds<br />
are close cousins of feathers.<br />
A leafy frond is made in the same order as a<br />
feather; first sew stem and top leaf, then leaves<br />
12: By drawing<br />
simple guidelines<br />
to follow within a<br />
rectangle, the shape<br />
of your feather can<br />
be dramatically<br />
changed. 13: Two<br />
feather variations<br />
on a traditional<br />
quilt. Note that<br />
the feather in the<br />
orange triangle has<br />
two spines, and has<br />
been outline quilted<br />
in a different thread<br />
color. 14: A feather<br />
and a leafy frond on<br />
the border of The<br />
Gathering.<br />
<strong>Special</strong> <strong>Edition</strong> <strong>Winter</strong> <strong>2011</strong> | <strong>Machine</strong> <strong>Quilting</strong> <strong>Unlimited</strong> 23<br />
14
15<br />
17<br />
15: A variety of<br />
feather designs on<br />
Riot. 16: Feathers<br />
on the quilt Under<br />
the Rainbow. The<br />
black ‘coral’ serves<br />
as spines for the<br />
feathers.<br />
17: A leafy frond<br />
feather variation.<br />
18: A fern-like<br />
feather variation.<br />
16<br />
starting at the bottom of one side, going up,<br />
and finally sewing the other side. Variations<br />
to consider are making the leaves all the same<br />
size or varying sizes, having stems or not, and<br />
keeping the leaves symmetrical on both sides or<br />
asymmetrical. As with the feathers, the space<br />
you want to fill will determine the shape of your<br />
frond. Some examples can be seen in Figures 14,<br />
15, and 17.<br />
An easy fern design starts with marking a spine<br />
and the outline you would like to fill. Sew the<br />
spine as usual. Marking an angled reference<br />
line on either side of the fern can be helpful in<br />
keeping your fern symmetrical. Instead of kissing<br />
the spine and then going straight upwards, curve<br />
into it and then curve out. An example fern is<br />
shown in Figure 18.<br />
So now you know how to make feathers. But<br />
wait, there is more! There are countless examples<br />
of feathers on quilts in magazines, calendars,<br />
and on the internet. Take some time to look at<br />
those feathers and analyze the ones that you like.<br />
Are they skinny, or fat? Symmetrical or asymmetrical?<br />
Curved or straight? You can now create<br />
feathers in the style that appeals to you and fits<br />
your quilt.<br />
24 <strong>Machine</strong> <strong>Quilting</strong> <strong>Unlimited</strong> | <strong>Special</strong> <strong>Edition</strong> <strong>Winter</strong> <strong>2011</strong><br />
18
Environmentally-Friendly<br />
Quilts<br />
Ken Sanville Photographic Services, Inc .<br />
Quilts that encourage us to help make our<br />
planet a healthier, more beautiful place to live.<br />
Environmental concerns have led many<br />
quilters to create quilts that use only<br />
recycled or already owned materials and/<br />
or to use their art to encourage the viewer to<br />
examine how they might make their own life<br />
more ‘green’. We have assembled four of these<br />
quilts, along with the artists’ statements describing<br />
why they chose to make these pieces and the<br />
messages they hope to convey with their artwork.<br />
Go Green—Piece By Piece<br />
54 × 41 inches<br />
© 2009 The Artful Quilters, Northern Colorado<br />
We challenged ourselves to make 12 inch squares<br />
that were interfaced, batted and backed, using<br />
the analogous color palette from yellow green<br />
to aqua green, and following a set of rules that<br />
were given to us one at a time per month. The<br />
rules for the challenge ranged from “Do not buy<br />
anything new for this piece” and “use a bit of<br />
Christmas trash in your square”, to “include a<br />
<strong>Special</strong> <strong>Edition</strong> <strong>Winter</strong> <strong>2011</strong> | <strong>Machine</strong> <strong>Quilting</strong> <strong>Unlimited</strong> 25
piece of sheer fabric and some text” and more.<br />
When the blocks were completed and machine<br />
quilted, they were cut into smaller pieces, rearranged<br />
and satin stitched together. The results<br />
are an example of the whole being greater than<br />
the sum of its parts.<br />
Go Green Piece by Piece has been donated to<br />
hang in the main office of the School for Global<br />
Environmental Responsibility (SOGES) on the<br />
Colorado State University campus. The Director<br />
of SOGES is Dr. Diana Wall, a leading scientist<br />
studying climate change impacts in Antarctica.<br />
She is there currently with her team, on her 20th<br />
annual expedition.<br />
The Vessel<br />
14 × 56 inches<br />
© 2009 Eleanor Levie, Doylestown, PA<br />
I find it fascinating that the anatomical muscle<br />
commonly known as the womb resembles nothing<br />
so much as a vase or vessel, with the fallopian<br />
tubes forming handles. Whether a ‘womb-man’<br />
comes to hold new life or not, she is blooming<br />
glorious in holding the family together, and as<br />
the receptacle of loving memories. Women are<br />
collectors of treasures for sharing—cloth, thread,<br />
and mother-of-pearl; pots to hold nourishment<br />
for the body (food) and soul (flowers); and ideas<br />
for wisdom and growth.<br />
Women support men—as represented by the traditional<br />
bow-tie quilt top fragment. We are gatherers<br />
and nurturers, and we weave the diverse<br />
strands of life into a cohesive whole. We shall lead<br />
by example, teaching those who are still green to<br />
the ways and means of protecting Mother Earth.<br />
Biologically and ecologically, we hold the future<br />
of our green earth.<br />
The materials are cottons, ribbons, vintage quilt<br />
fragments and vintage buttons. The techniques<br />
used are cutwork, as learned from QSDS teacher<br />
Judy Hooworth, pin-weaving, fusible and raw<br />
edge appliqué, free-motion machine and minimal<br />
hand quilting.<br />
Rhapsody Watershed<br />
30 × 45 inches<br />
© 2009 Eileen Doughty, Vienna, VA<br />
I created three art quilts for the Studio Art Quilt<br />
Associates invitational exhibition, A Sense of<br />
Place II: Artists Working in Series. I chose to<br />
make pieces exploring issues of water pollution<br />
and erosion. Access to clean water is expected to<br />
become one of the critical issues of this century,<br />
even more important than access to energy<br />
resources.<br />
26 <strong>Machine</strong> <strong>Quilting</strong> <strong>Unlimited</strong> | <strong>Special</strong> <strong>Edition</strong> <strong>Winter</strong> <strong>2011</strong>
Rhapsody Watershed depicts the waste of<br />
rainwater in my suburban neighborhood, due<br />
to impermeable surfaces. Those surfaces are<br />
symbolized as holes filled with black netting,<br />
since the precipitation is lost to the normal water<br />
cycle. A gold thread spirals out of each house,<br />
down the driveway and street, and down the<br />
storm drain. Gold symbolizes the preciousness of<br />
clean water. The quilt is painted whole cloth and<br />
densely machine quilted.<br />
Hot and Exhausted<br />
38 × 30 inches<br />
© 2006 Patricia Anderson Turner<br />
Port Charlotte, FL<br />
Our planet is suffering from heat exhaustion.<br />
The planet earth in this piece is based on a<br />
EUMETSAT satellite image of earth’s air masses<br />
taken on September 4, 2006.<br />
Toy cars circle the planet representing our childlike<br />
oblivion to the consequences of burning<br />
fossil fuels. Our exhaust emissions are altering<br />
the very fabric of our atmosphere.<br />
Constructed with artist dyed cotton, felt, batting,<br />
and yarn on black dupioni silk. The earth image<br />
extends outward two inches and focuses on<br />
Europe and Africa.<br />
<strong>Special</strong> <strong>Edition</strong> <strong>Winter</strong> <strong>2011</strong> | <strong>Machine</strong> <strong>Quilting</strong> <strong>Unlimited</strong> 27
Art Studio<br />
1<br />
2<br />
3<br />
<strong>Quilting</strong> by the Slightly Obsessive<br />
© 2009 Nancy G. Cook<br />
People often ask me about my quilting<br />
process. There is no one answer, but<br />
techniques learned from the masters provide<br />
the tools for allowing the design and<br />
the quilting to be integrated. In planning<br />
the design I take into account where the<br />
quilting will show up and where it will<br />
play a subordinate role to focal points.<br />
(Photo 1, Before the Waxwings)<br />
Setting Up to Quilt<br />
A batting of wool and polyester blend is<br />
easy to work and does not retain creases<br />
if folded. On Ruth McDowell’s advice,<br />
I use a backing fabric of heavy weight<br />
decorator cotton, which reduces the<br />
likelihood of quilting in tucks on the<br />
backing.<br />
One of the challenges is for the finished<br />
wall quilt to lie straight and flat after<br />
quilting heavily in some areas and only<br />
outlining others. Step one is to square<br />
the backing and top layer with each<br />
other when preparing the quilt sandwich<br />
(top, batting and backing). Next<br />
I pin baste closely with long Japanese<br />
flower-head pins. I used to use bent<br />
safety pins but they killed my fingers.<br />
Sharp straight pins reduce stress on the<br />
hands. (Photo 2)<br />
I then hand baste in a three-inch grid<br />
of half-inch stitches, using silk thread<br />
and a fine needle. Silk slides easily<br />
through the layers, reduces stress on<br />
the hands and speeds along. I learned<br />
the importance of fine basting from<br />
Cherilyn Martin. I remove the pins<br />
as I baste. Hand basting may seem<br />
redundant, but it helps to secure the<br />
sandwich throughout the quilting<br />
process. (Photo 3)<br />
Selecting Threads—<br />
A Joy, Two Ways<br />
The fun begins with selecting the quilting<br />
threads. An analysis of what will set<br />
off the design helps guide the selections.<br />
Does the design need to be warmer,<br />
cooler, more definition, softer? While<br />
the quilting is important, I use threads<br />
that blend with background or design<br />
elements, rather than creating strong<br />
contrasts. I love variegated threads<br />
that have little value changes. They are<br />
hard to find, but worth looking for. The<br />
first selection will be modified during<br />
quilting. Thread becomes my paint for<br />
the details. I love the King Tut Tone on<br />
Tone, YLI <strong>Machine</strong> quilting, Mettler silkfinish<br />
multi, some Sulky Blendables,<br />
and Oliver Twist. I recently used the<br />
variegated YLI silk thread and loved it.<br />
I will add more of these to my thread<br />
stash. Invariably I find that I need to<br />
purchase a new thread—or two—or<br />
three. Oh joy! (Photo 4)<br />
Setting up the <strong>Machine</strong> for<br />
<strong>Quilting</strong><br />
On the advice of Linda Fiedler and Libby<br />
Lehman, I purchased a single needle<br />
soleplate for the sewing machine. It gives<br />
a much nicer stitch for both straight<br />
stitching and free-motion stitching. I use<br />
the single needle soleplate, an embroidery<br />
sewing machine needle that allows<br />
me to change threads easily, and I clean<br />
out and oil the machine before beginning.<br />
Before quilting, I double-check<br />
the thread balance on a sample quilt<br />
sandwich. I use an open-toed embroidery<br />
foot and the built-in walking foot on<br />
my old 1473 Pfaff. Feed dogs are UP and<br />
28 <strong>Machine</strong> <strong>Quilting</strong> <strong>Unlimited</strong> | <strong>Special</strong> <strong>Edition</strong> <strong>Winter</strong> <strong>2011</strong>
engaged throughout and the needle is<br />
down. The open foot allows me complete<br />
visibility of where the needle will go. I<br />
get a better stitch quality when the feed<br />
dogs are engaged. Straight stitching can<br />
be tedious, but I prefer the stitch quality.<br />
Years ago, my husband created a sewing<br />
table for me that the machine drops<br />
into and has a large sewing surface to<br />
take the drag out of quilting. It makes a<br />
world of difference. (Photo 5)<br />
<strong>Quilting</strong> and Chocolate<br />
In order to anchor the sandwich, the first<br />
stitches closely follow the outline of the<br />
design along the longest lines first. This<br />
is all straight stitching and a bit slow.<br />
The needle down position is essential to<br />
create nice lines when the quilt needs<br />
repositioning. I remove basting threads<br />
about one inch at a time as I get to them.<br />
Inside areas may need a pin or two after<br />
basting threads are removed. (Photo 6)<br />
After outlining the design elements,<br />
thread painting adds emphasis and<br />
details. Once the outlining and the thread<br />
painting are completed, the echo quilting<br />
begins. The quilting on Hawaiian quilts<br />
fascinates me, so I use echo quilting to<br />
emphasize the negative spaces (the spaces<br />
around the designs). I love the rhythm<br />
and textural patterns that build up.<br />
The first round of quilting is the most<br />
difficult and time consuming, requiring<br />
lots of turning of the sandwich and<br />
short stitching lines to fill in initial<br />
details. I stretch the area to be stitched<br />
flat between my hands as it goes under<br />
the needle. After about three to four<br />
rounds, the quilting line gets smoother<br />
and goes faster. (Photo 7)<br />
The first several quilting rounds are<br />
tedious and a piece of chocolate provides<br />
strength for the next round. I finish by<br />
quilting the small isolated areas of the<br />
background. Again, chocolate comes to<br />
the rescue. The quilt seems totally different<br />
when the quilting is finished. This<br />
is why I quilt rather than paint.<br />
<strong>Special</strong> <strong>Edition</strong> <strong>Winter</strong> <strong>2011</strong> | <strong>Machine</strong> <strong>Quilting</strong> <strong>Unlimited</strong> 29<br />
4<br />
5<br />
6
7 9<br />
8<br />
I complete any details with hand<br />
embroidery, using DMC cotton embroidery<br />
floss. (Photo 8)<br />
Blocking<br />
The final step to creating a flat wall<br />
piece is blocking. I block on a portable,<br />
padded blocking board, using Japanese<br />
flower pins to pin the piece flat while<br />
stretching it tightly to remove wrinkles<br />
and lumps. Once pinned, I steam the<br />
piece thoroughly and gently. I wet and<br />
wring out a muslin press cloth and<br />
place over the pinned quill. With the<br />
iron set for steaming, I gradually move<br />
the iron just above the surface, driving<br />
the steam into the quilt without overly<br />
flattening it. Eventually the press cloth<br />
is thoroughly dry and the steaming is<br />
complete. It may take a couple of days<br />
for it to complete drying. Once dry, it<br />
is perfectly flat with nicely raised nonquilted<br />
areas. (Photo 9)<br />
Southern Hospitality<br />
Reclamation<br />
30 <strong>Machine</strong> <strong>Quilting</strong> <strong>Unlimited</strong> | <strong>Special</strong> <strong>Edition</strong> <strong>Winter</strong> <strong>2011</strong>
Sand Storm over the White Desert<br />
© 2009 Jenny Bowker<br />
Garran, Australia<br />
97 × 81½ inches<br />
Egypt’s White Desert is five and a half hours drive from Cairo and must be<br />
one of the most beautiful places on earth. Magdy Badrmany is a good friend<br />
and guide to the desert. He drives, sets up camp, cooks fantastic meals and<br />
becomes a friend to his passengers. One day as we were setting up camp a<br />
dust storm was blowing in on the horizon. It gathered low and dark, and as<br />
it shadowed the desert colors changed and silvered in the strange light.<br />
I have been working on a series of Egyptian men who work with competence<br />
at what they do, eking out a sometimes difficult existence with pride. I<br />
admire the way Magdy, a Bedouin with great knowledge of his area, will not<br />
be pushed into doing things he feels are not safe, or not good for his beloved<br />
desert—even by VIPs.<br />
My two Bernina sewing machines, the Aurora 440 and the new 820, were<br />
used to construct and quilt Sand Storm over the White Desert. It is quilted<br />
predominantly with both polyester and cotton Superior and Mettler threads.<br />
Fabrics which were hand dyed or hand painted, as well as some commercial<br />
cotton prints, are included in the quilt.<br />
Visit Jenny’s website www.jennybowker.com<br />
for more information about<br />
her work.<br />
Photography by David Paterson<br />
Jaw Dropper<br />
<strong>Special</strong> <strong>Edition</strong> <strong>Winter</strong> <strong>2011</strong> | <strong>Machine</strong> <strong>Quilting</strong> <strong>Unlimited</strong> 31
MQU delivers!<br />
Six times a year, MQU delivers informative articles—<br />
right to your mailbox! Don’t miss an issue . . .<br />
v Foundations—the basics and beyond<br />
v Design Elements—gives you the<br />
confidence to try new design ideas<br />
v Art Studio—unique ideas from<br />
cutting-edge fabric artists<br />
v Tech Talk and Ask Kimmy—technical<br />
know-how<br />
v plus . . . quilt show coverage and<br />
collections from around the world<br />
Subscribers save<br />
up to 45%<br />
over the cover price!<br />
1 Year – 6 Issues 2 Years – 12 Issues<br />
USA 1 Year $30US 2 Years $52US<br />
Canada 1 Year $45US 2 Years $78US<br />
Australia 1 Year $52US<br />
Prices subject to change without notice<br />
Above: A Tisket A Tasket, pieced by Susan Cake. Top Right: A Tisket<br />
A Tasket detail. Bott om Right: behind Lisa, Hula Hibicus.<br />
40 <strong>Machine</strong> <strong>Quilting</strong> <strong>Unlimited</strong> | November 2010<br />
Lisa Calle<br />
A New Generation Quilter<br />
Lisa Calle lives in Pottstown, Pennsylvania, with<br />
her husband, Jon, and their three sons. This is<br />
the story of how machine quilting came to be an<br />
integral part of her life.<br />
G rowing<br />
© 2010<br />
Photography © Gregory Case Photography<br />
up, I used to watch my mother<br />
needlepoint and knit. I loved to hear the clickclack<br />
of the knitting needles. She was not a sewist<br />
and rarely used her Singer sewing machine.<br />
When I was about 15, I decided I wanted to make<br />
a jersey knit dress. I remember her saying “Are<br />
you sure?” I dove in and soon realized that it was<br />
a lot harder than it looked. My mom and I forged<br />
ahead and we did fi nally produce a dress that<br />
I wore once. After that, I stuck to knitting and<br />
needlepoint.<br />
My fi rst year of college was spent at the Fashion<br />
Institute of Technology in New York, and I<br />
watched my poor roommate sew on her machine<br />
every night, trying to fi nish one garment or<br />
another for class. I heard a lot of words I cannot<br />
repeat and there was a great deal of ripping out<br />
and redoing. I wondered why anyone would put<br />
themselves through such torture, and I was sure that<br />
I would never own a sewing machine. After transferring<br />
to the Philadelphia College of Textiles and<br />
Science and graduating with a degree in Textile<br />
Management and Marketing, I had no idea<br />
what I was going to do for a living; I just knew<br />
it would not involve a sewing machine!<br />
I worked for the Limited Corp. at Bath and Body<br />
Works as a district manager in Colorado until<br />
1998, when I decided to stay at home with my<br />
fi rst son, Brandon. Childbirth must have fried<br />
my brain because I went out and purchased a<br />
sewing machine. I needed something to do<br />
if I was going to stay at home, so I signed<br />
up for a class on quilting at the local shop<br />
www.mqumag.com v 800.910.1925 v info@mgumag.com<br />
Vol. XV No. 6<br />
Lisa Calle<br />
A New<br />
Generation<br />
Quilter<br />
Echoes From the Past—<br />
<strong>Quilting</strong> Appliqué Quilts<br />
America Celebrates!<br />
Traveling Exhibit<br />
Planning Trapunto Designs<br />
In the Art Studio<br />
with Lenore Crawford<br />
November 2010<br />
November 2010 | <strong>Machine</strong> <strong>Quilting</strong> <strong>Unlimited</strong> 41