

Machine Quilting Unlimited - Special Edition - Winter 2011
Machine Quilting Unlimited - Special Edition - Winter 2011
Machine Quilting Unlimited - Special Edition - Winter 2011

You also want an ePaper? Increase the reach of your titles
YUMPU automatically turns print PDFs into web optimized ePapers that Google loves.
1<br />
20 19 27<br />
7<br />
3<br />
26<br />
5<br />
8<br />
2<br />
18<br />
6<br />
21 25<br />
4<br />
28<br />
14<br />
10<br />
12<br />
to another. Keep in mind, however, that if your<br />
motif requires much backtracking, you will lose<br />
the gradual color shift and end up with abrupt<br />
color jumps instead.<br />
Quilt Away<br />
9<br />
13<br />
11<br />
15 22<br />
16<br />
17 29<br />
23<br />
24<br />
30 31<br />
6<br />
5<br />
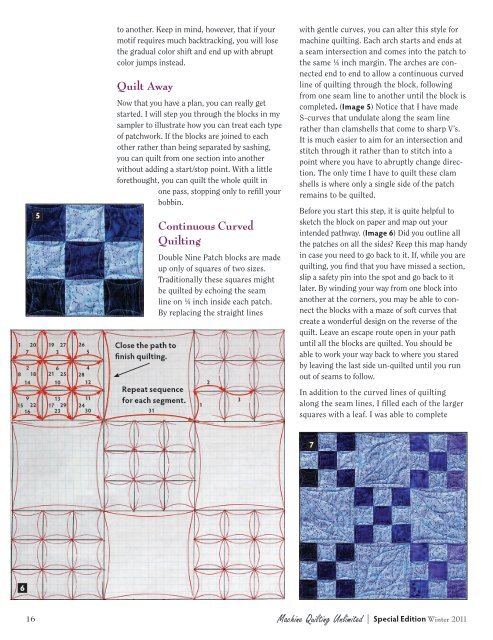
Now that you have a plan, you can really get<br />
started. I will step you through the blocks in my<br />
sampler to illustrate how you can treat each type<br />
of patchwork. If the blocks are joined to each<br />
other rather than being separated by sashing,<br />
you can quilt from one section into another<br />
without adding a start/stop point. With a little<br />
forethought, you can quilt the whole quilt in<br />
one pass, stopping only to refill your<br />
bobbin.<br />
Close the path to<br />
finish quilting.<br />
Repeat sequence<br />
for each segment.<br />
Continuous Curved<br />
<strong>Quilting</strong><br />
Double Nine Patch blocks are made<br />
up only of squares of two sizes.<br />
Traditionally these squares might<br />
be quilted by echoing the seam<br />
line on ¼ inch inside each patch.<br />
By replacing the straight lines<br />
1<br />
2<br />
3<br />
with gentle curves, you can alter this style for<br />
machine quilting. Each arch starts and ends at<br />
a seam intersection and comes into the patch to<br />
the same ¼ inch margin. The arches are connected<br />
end to end to allow a continuous curved<br />
line of quilting through the block, following<br />
from one seam line to another until the block is<br />
completed. (Image 5) Notice that I have made<br />
S-curves that undulate along the seam line<br />
rather than clamshells that come to sharp V’s.<br />
It is much easier to aim for an intersection and<br />
stitch through it rather than to stitch into a<br />
point where you have to abruptly change direction.<br />
The only time I have to quilt these clam<br />
shells is where only a single side of the patch<br />
remains to be quilted.<br />
Before you start this step, it is quite helpful to<br />
sketch the block on paper and map out your<br />
intended pathway. (Image 6) Did you outline all<br />
the patches on all the sides? Keep this map handy<br />
in case you need to go back to it. If, while you are<br />
quilting, you find that you have missed a section,<br />
slip a safety pin into the spot and go back to it<br />
later. By winding your way from one block into<br />
another at the corners, you may be able to connect<br />
the blocks with a maze of soft curves that<br />
create a wonderful design on the reverse of the<br />
quilt. Leave an escape route open in your path<br />
until all the blocks are quilted. You should be<br />
able to work your way back to where you stared<br />
by leaving the last side un-quilted until you run<br />
out of seams to follow.<br />
In addition to the curved lines of quilting<br />
along the seam lines, I filled each of the larger<br />
squares with a leaf. I was able to complete<br />
16 <strong>Machine</strong> <strong>Quilting</strong> <strong>Unlimited</strong> | <strong>Special</strong> <strong>Edition</strong> <strong>Winter</strong> <strong>2011</strong><br />
7