GHOST Pickup System Acousti-Phonic Intelligent Pre ... - Graph Tech
GHOST Pickup System Acousti-Phonic Intelligent Pre ... - Graph Tech
GHOST Pickup System Acousti-Phonic Intelligent Pre ... - Graph Tech

You also want an ePaper? Increase the reach of your titles
YUMPU automatically turns print PDFs into web optimized ePapers that Google loves.
Plug into a world of possibilities.<br />
<strong>GHOST</strong> <strong>Pickup</strong> <strong>System</strong><br />
<strong>Acousti</strong>-<strong>Phonic</strong> <strong>Intelligent</strong> <strong>Pre</strong>-amp<br />
User Guide
Welcome to the World of <strong>Graph</strong> <strong>Tech</strong>!<br />
Thank you for purchasing the <strong>GHOST</strong> Modular <strong>Pickup</strong> <strong>System</strong>. We have<br />
worked long and hard developing and testing this system to give you the best<br />
acoustic sound available today. We are sure that you will enjoy playing and performing<br />
with it as much as we do!<br />
The principle behind the <strong>GHOST</strong> Modular <strong>Pickup</strong> <strong>System</strong> is simple but the<br />
results are truly amazing. By strategically implanting a custom engineered piezo<br />
pickup inside a set of <strong>Graph</strong> <strong>Tech</strong> saddles then processing the signal through<br />
the <strong>Acousti</strong>-<strong>Phonic</strong> <strong>Intelligent</strong> <strong>Pre</strong>-amp, the natural acoustics of your guitar are<br />
captured. Feedback and mic placement problems associated with an amplified<br />
acoustic guitar are eliminated, and you can play as hard as you like without<br />
overload.<br />
This guide describes installing the <strong>GHOST</strong> Modular <strong>Pickup</strong> <strong>System</strong> and the<br />
<strong>GHOST</strong> <strong>Acousti</strong>-<strong>Phonic</strong> <strong>Intelligent</strong> <strong>Pre</strong>-amp in your guitar.<br />
• The <strong>GHOST</strong> Modular <strong>Pickup</strong> <strong>System</strong> consists of custom engineered piezo pickups<br />
individually calibrated and supplied as a matched set. They are available in<br />
a variety of different saddle styles. Refer to the <strong>Graph</strong> <strong>Tech</strong> catalog for the correct<br />
saddle to suit your guitar before proceeding.<br />
• The <strong>GHOST</strong> <strong>Acousti</strong>-<strong>Phonic</strong> <strong>Intelligent</strong> <strong>Pre</strong>-amp is an integral part of the <strong>GHOST</strong><br />
sound. It processes the signal from the pickups to create a pristine acoustic tone,<br />
and provides the perfect interface to a console or guitar amp. Through an intelligent<br />
stereo jack the <strong>Acousti</strong>-<strong>Phonic</strong> <strong>Intelligent</strong> <strong>Pre</strong>-amp provides both the original<br />
magnetic pickup signal and the <strong>GHOST</strong> acoustic signal, or a continuously variable<br />
blend of the two. You should have obtained either the Guitar or Bass version of the<br />
<strong>Acousti</strong>-<strong>Phonic</strong> <strong>Intelligent</strong> <strong>Pre</strong>-amp to suit your instrument.<br />
• The installation of the <strong>GHOST</strong> system can be achieved without the use of the<br />
<strong>Acousti</strong>-<strong>Phonic</strong> <strong>Intelligent</strong> <strong>Pre</strong>-amp, however this is not recommended. The<br />
preamp was designed to enhance the overall tonal quality of the <strong>GHOST</strong> system<br />
while allowing for intelligent switching between mono and stereo.<br />
2
Parts List<br />
<strong>GHOST</strong> <strong>Pickup</strong> <strong>System</strong><br />
• Set of <strong>GHOST</strong>-equipped saddles<br />
BLACK (E), BLUE (B), GREEN (G), YELLOW (D), RED (A) & WHITE (E) LEADS.<br />
• Common connector block<br />
Part number BE-5017-00<br />
• Dual Connector Teflon Cable Assembly<br />
Part number BE-5021-00<br />
<strong>GHOST</strong> <strong>Acousti</strong>-<strong>Phonic</strong> <strong>Intelligent</strong> <strong>Pre</strong>-Amp<br />
• <strong>Acousti</strong>-<strong>Phonic</strong> <strong>Intelligent</strong> Guitar<strong>Pre</strong>-amp<br />
Part number PE-0210-00, or<br />
• <strong>Acousti</strong>-<strong>Phonic</strong> <strong>Intelligent</strong> Bass <strong>Pre</strong>-amp<br />
Part number PE-0310-00<br />
• Stereo Switched Jack<br />
Part number PE-0216-00<br />
• Battery Snap Cable Assembly<br />
Part number BE-0204-00<br />
Part number BE-0205-00 (Clip)<br />
• Connector Cable Assemblies<br />
Part number BE-5002-00 Six-Pin<br />
(PURPLE, YELLOW, GREEN & BLACK LEAD)<br />
Part number BE-5003-00 Six-Pin<br />
(RED, WHITE, BLUE & BLACK LEAD)<br />
Passive Volume Kit<br />
Part number PE-0400-00 includes:<br />
• Stereo Jack<br />
• Volume potentiometer (pot), 5 Mega Ohm<br />
• Resistor, 5 Mega Ohm<br />
• Teflon Cable<br />
• 330pf Capacitor<br />
QSW<br />
PIN<br />
MID<br />
FAA<br />
S<br />
VOL<br />
MAG<br />
RING<br />
TIP<br />
SW<br />
PWR<br />
x 6<br />
x 1<br />
x 1<br />
x 1<br />
x 1<br />
x 1<br />
x 1<br />
x 1<br />
x 1<br />
x 1<br />
x 1<br />
x 1<br />
x 1<br />
3
<strong>GHOST</strong> <strong>System</strong> Overview<br />
Optional<br />
QuickSwitch<br />
(PE-0111-00)<br />
Optional<br />
Push/Push Volume Pot<br />
or MidBoost Switch<br />
(PE-0206-00 or<br />
PE-0106-00)<br />
Magnetic In<br />
(GREEN)<br />
4<br />
Stereo Jack<br />
Power/Battery<br />
IMPORTANT! This diagram<br />
is an artistic representation<br />
only, not a schematic.<br />
Consult this guide for correct<br />
wiring procedure to avoid<br />
voiding your warranty.<br />
Common<br />
Connector Block<br />
(BE-5017-00)
Pieze<br />
Balance<br />
Control<br />
<strong>Acousti</strong>-<strong>Phonic</strong><br />
<strong>Pre</strong>-amp<br />
(PE-0210-00)<br />
BLACK<br />
Dual Connector<br />
Teflon Cable Assembly<br />
(BE-5021-00)<br />
Q RED<br />
Q TEFLON<br />
P EMPTY<br />
M BLUE<br />
G PURPLE<br />
V YELLOW<br />
M GREEN<br />
R RED<br />
T BLUE<br />
S WHITE<br />
P RED<br />
B RED<br />
<strong>GHOST</strong><br />
Saddle <strong>Pickup</strong>s<br />
QuickSwitch<br />
Piezo In<br />
Mid Boost or<br />
Push/Push Vol Pot<br />
Stereo Jack<br />
Power/Battery<br />
Pin Connector Colour Codes.<br />
Note Black Ground leads ALWAYS on left.<br />
5
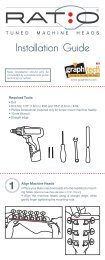
STEP 1: Installing the <strong>GHOST</strong> <strong>Pickup</strong>s.<br />
Strat ® READ THOROUGHLY BEFORE INSTALLING.<br />
See tips on Page 22.<br />
Style Instruments<br />
•<br />
•<br />
•<br />
•<br />
•<br />
•<br />
•<br />
6<br />
Remove the strings and the bridge saddles from the guitar.<br />
Remove the pick guard assembly.<br />
Cut six tiny grooves at the bottom of the underside of the pick guard with a<br />
round file or a Dremel tool, closest to the bridge, so that the pickup wires can<br />
slip easily into the pickup cavity (Diagram 1). This step may not be necessary,<br />
depending of the closeness of the fit between the pick guard and the guitar<br />
body.<br />
Install the <strong>GHOST</strong> <strong>Pickup</strong> <strong>System</strong> saddles on the bridge plate.<br />
Connect the wires from the pickups to the common connector block. Be sure to<br />
match correct lead color to string (see <strong>Pickup</strong> Color Codes, page 22).<br />
Arrange the pickup wires so they will align with the grooves in the pick guard.<br />
Arrange the wires in the pickup cavity so that they will not be damaged when<br />
the pick guard assembly is replaced.<br />
Connect the dual connector cable assembly to the spare position on the<br />
•<br />
common connector block and route the other end through to the control cavity.<br />
Diagram 1.<br />
Connector<br />
Block<br />
E<br />
A D G B E<br />
Inside the <strong>Pickup</strong> Cavity Pickguard and Bridge Plate<br />
Pickguard grooves detail<br />
Grooves in<br />
Pickguard
Tele ® Style Instruments<br />
•<br />
•<br />
•<br />
•<br />
•<br />
•<br />
•<br />
Remove the strings and the bridge saddles from the guitar.<br />
Remove the entire bridge assembly.<br />
Remove the pickup from the bridge plate.<br />
Install the <strong>GHOST</strong> <strong>Pickup</strong> <strong>System</strong> saddles on the bridge plate. Route the wires<br />
through the pickup hole (Diagram 2).<br />
Re-install the pickup on the bridge plate.<br />
Connect the wires from the pickups to the common connector block. Be sure<br />
to match correct lead color to string (see <strong>Pickup</strong> Color Codes, page 22).<br />
Connect the dual connector cable assembly to the spare position on the<br />
common connector block and route the other end through to the control cavity.<br />
Re-install the bridge assembly, arranging the pickup wires so that they are<br />
not damaged.<br />
E<br />
A D<br />
E<br />
G B<br />
Inside the Bridge Cavity<br />
Diagram 2.<br />
• Alternatively, the pickup wires may be<br />
routed through individual holes drilled<br />
beneath each saddle in the bridge plate.<br />
IMPORTANT: Be sure to set your intonation<br />
before drilling holes in baseplate.<br />
Bridge Plate<br />
7
Jazz<br />
Remove the strings and the bridge saddles from the guitar.<br />
Remove the entire bridge assembly.<br />
Drill holes in the bridge plate beneath each saddle, after setting intonation, to<br />
allow the pickup wires to be routed through to the bridge cavity (Diagram 3).<br />
Install the <strong>GHOST</strong> <strong>Pickup</strong> <strong>System</strong> saddles on the bridge plate. Route the wires<br />
through the new holes.<br />
Connect the wires from the pickups to the common connector block. Be sure<br />
to match correct lead color to string (see <strong>Pickup</strong> Color Codes, page 22).<br />
Connect the dual connector cable assembly to the spare position on the<br />
common connector block and route the other end through to the control cavity.<br />
Re-install the bridge assembly, arranging the pickup wires so that they are not<br />
damaged.<br />
® or <strong>Pre</strong>cision ® Style Instruments<br />
•<br />
•<br />
•<br />
•<br />
•<br />
•<br />
Diagram 3.<br />
Les Paul ® Style Instruments<br />
•<br />
•<br />
•<br />
•<br />
•<br />
•<br />
8<br />
Connector<br />
Block<br />
E<br />
A D G<br />
Bridge Plate Inside the Bridge Cavity<br />
Remove the strings and the saddles from the guitar.<br />
Remove the bridge pickup.<br />
Install the <strong>GHOST</strong> <strong>Pickup</strong> <strong>System</strong> saddles. Route the wires through the pickup<br />
cavity.<br />
Re-install the bridge pickup.<br />
Connect the wires from the pickups to the common connector block. Be sure<br />
to match correct lead color to string (see <strong>Pickup</strong> Color Codes, page 22).<br />
Connect the dual connector cable assembly to the spare position on the<br />
common connector block and route the other end through to the control<br />
cavity. Re-install the bridge assembly, arranging the pickup wires so that they<br />
are not damaged.
STEP 2: Installing the Stereo Jack<br />
• Disconnect the wires and remove the existing output jack from the guitar.<br />
• Install the new stereo jack. The stereo jack is the same physical size as a<br />
standard stereo jack and should fit in most guitars without requiring any<br />
physical modifications.<br />
STEP 3A: Wiring without a <strong>Pre</strong>-Amplifier<br />
If you are installing the <strong>Acousti</strong>-<strong>Phonic</strong> <strong>Intelligent</strong> <strong>Pre</strong>-amp, skip to STEP<br />
3B, page 12. If you are not installing an <strong>Acousti</strong>-<strong>Phonic</strong> <strong>Intelligent</strong> <strong>Pre</strong>-amp, the<br />
guitar may now be wired using the passive volume potentiometer (pot).<br />
• Install the volume pot.<br />
The volume pot is most conveniently installed in place of an existing pot. For<br />
Tele® style instruments this will likely be the Tone control. For Strat® style instruments<br />
this will likely be the second Tone control.<br />
The replaced control may be sacrificed, or it may be moved to share a knob with<br />
another existing control by fitting a push-pull double pot or similar arrangement.<br />
Alternatively, if there is room, a new hole may be drilled and an entirely new pot<br />
may be added.<br />
Regardless of the arrangement chosen, it is important that the volume pot used<br />
for the <strong>GHOST</strong> pickups is a 5 Mega Ohm type. Lower value types are not suitable<br />
due to the very high impedance of the <strong>GHOST</strong> pickups.<br />
The diagram below (Diagram 4) shows the schematic for an installation with a<br />
passive volume control.<br />
Diagram 4.<br />
Schematic<br />
330pF<br />
<strong>GHOST</strong><br />
<strong>Pickup</strong>s<br />
From Mag<br />
<strong>Pickup</strong>s<br />
<strong>GHOST</strong><br />
Volume<br />
5M<br />
Ring<br />
Tip<br />
Shank<br />
Stereo Jack<br />
9
•<br />
•<br />
•<br />
•<br />
•<br />
10<br />
Find the magnetic (mag) pickup signal wire that you disconnected from the<br />
old output jack, which will likely come from the centre contact of the existing<br />
volume pot. Route the wire to the stereo jack and solder to the tip contact of<br />
the jack.<br />
Cut off the (unused) connector on the end of the dual connector from the<br />
common connector block and solder the cable to the top contact of the new<br />
volume pot (see Diagram 14, page 22, for pot contact key). The shield may be<br />
connected to the bottom contact or the body of the pot.<br />
Solder a shielded cable to the center contact of the new volume pot. The shield<br />
may be connected to the body of the pot. Route the cable to the stereo jack.<br />
Cut to length and solder to the ring contact of the jack. Solder the shield to the<br />
ground contact of the jack.<br />
Solder the capacitor between the top and centre contacts of the new volume<br />
pot.<br />
Solder a wire from the body of the new volume pot to ground (for example, the<br />
body of another pot).<br />
The wiring diagrams (Diagram 5) below show the <strong>GHOST</strong> volume pot installed<br />
in place of an existing Tone control. For clarity, the wiring diagrams highlight the<br />
new wires.<br />
Magnetic<br />
Volume<br />
<strong>GHOST</strong><br />
<strong>Pickup</strong>s<br />
Ring<br />
<strong>GHOST</strong><br />
Volume<br />
Diagram 5.<br />
Tip<br />
Magnetic<br />
Tone<br />
Magnetic<br />
Tone<br />
<strong>GHOST</strong><br />
<strong>Pickup</strong>s<br />
Tip<br />
Ring<br />
<strong>GHOST</strong><br />
Volume<br />
Strat Style Instruments Tele Style Instruments
Ring<br />
<strong>GHOST</strong><br />
<strong>Pickup</strong>s<br />
Magnetic<br />
Volume<br />
<strong>GHOST</strong><br />
Volume<br />
Tip<br />
<strong>Pre</strong>cision Bass Style Instruments<br />
Rear<br />
Front<br />
Switch<br />
Rear<br />
Volume<br />
Ring<br />
Front<br />
Volume<br />
Tip<br />
Ring Sleeve<br />
<strong>GHOST</strong><br />
<strong>Pickup</strong>s<br />
Bridge<br />
Volume<br />
<strong>GHOST</strong><br />
Volume<br />
<strong>GHOST</strong><br />
<strong>Pickup</strong>s<br />
Les Paul Style Instruments<br />
Tip<br />
Stereo Jack Wiring<br />
Neck<br />
Volume<br />
Tip<br />
Tip<br />
Ring<br />
Jazz Bass Style Instruments<br />
Rear<br />
Tone<br />
Ring<br />
<strong>GHOST</strong><br />
Volume<br />
11
STEP 3B: Installing the <strong>Acousti</strong>-<strong>Phonic</strong> <strong>Intelligent</strong> <strong>Pre</strong>-Amp<br />
If you are using an <strong>Acousti</strong>-<strong>Phonic</strong> <strong>Intelligent</strong> <strong>Pre</strong>-amp, this may be installed<br />
now (Diagram 6).<br />
• Make sure that there is adequate room in the control cavity for the <strong>Acousti</strong>-<br />
<strong>Phonic</strong> <strong>Intelligent</strong> <strong>Pre</strong>-amp and battery, and decide how you will arrange them.<br />
• Remember that you must leave room to connect the wires to the pins at the end<br />
of the <strong>Acousti</strong>-<strong>Phonic</strong> <strong>Intelligent</strong> <strong>Pre</strong>-amp.<br />
• Secure the battery clip in place with double-sided foam tape supplied, or with<br />
small wood screws.<br />
• Secure the <strong>Acousti</strong>-<strong>Phonic</strong> <strong>Intelligent</strong> <strong>Pre</strong>-amp in place with the double-sided<br />
foam tape supplied.<br />
Diagram 6.<br />
12<br />
<strong>Pre</strong>-amp<br />
Battery Battery<br />
Strat Style Instruments Tele Style Instruments<br />
<strong>Pre</strong>-amp
Wiring with the <strong>Acousti</strong>-<strong>Phonic</strong> <strong>Intelligent</strong> <strong>Pre</strong>-Amp<br />
The <strong>Acousti</strong>-<strong>Phonic</strong> <strong>Intelligent</strong> <strong>Pre</strong>-amp requires a potentiometer (pot) to control<br />
the volume of the <strong>GHOST</strong> pickups.<br />
It is easiest to replace the function of an existing pot. For Tele style instruments<br />
this will likely be the Tone control. For Strat style instruments this will likely be<br />
the second Tone control.<br />
The <strong>Acousti</strong>-<strong>Phonic</strong> <strong>Intelligent</strong> <strong>Pre</strong>-amp will work with either a 250k or 500k ohm<br />
pot. As these are standard values it is likely that the existing pot will be the correct<br />
value and may be re-used. For this reason a new pot is not included with the<br />
<strong>Acousti</strong>-<strong>Phonic</strong> <strong>Intelligent</strong> <strong>Pre</strong>-amp.<br />
The replaced function may be sacrificed, or it may be moved to share a knob<br />
with another existing control by fitting a push-pull double pot or similar arrangement.<br />
Alternatively, if there is room, a new hole may be drilled and an entirely<br />
new pot installed.<br />
If the pot to be re-used is not 250k or 500k ohm you must obtain a new 250k or<br />
500k ohm volume pot for the <strong>Acousti</strong>-<strong>Phonic</strong> <strong>Intelligent</strong> <strong>Pre</strong>-amp. Do not re-use<br />
a pot of a different value as the tone will be compromised.<br />
Connections to the <strong>Acousti</strong>-<strong>Phonic</strong> <strong>Intelligent</strong> <strong>Pre</strong>-amp are made via the micropatch<br />
bay at the edge of the board. The supplied cable assemblies plug on to this<br />
micro-patch bay, making installation a snap.<br />
Each signal (the magnetic pickup and the <strong>GHOST</strong>) is provided with two pins on<br />
the micro-patch bay (Diagram 7). The pin nearest the centre of the board carries<br />
the signal. The adjacent pin near the edge of the board is ground. The cables<br />
must be plugged on to the micro-patch bay so that the signal wire connects<br />
to the signal pins, and the ground (black) wire connects to a ground pin.<br />
In the case of the battery connector, the positive (red) lead connects to the pin<br />
nearest the centre of the board, and the negative (black) lead connects to the<br />
pin nearest the edge.<br />
13
The diagram below shows the functions of the pins used in a standard<br />
installation.<br />
Diagram 7.<br />
The diagram below shows the schematic for a standard installation.<br />
•<br />
14<br />
Magnetic <strong>Pickup</strong>s<br />
and Controls<br />
<strong>GHOST</strong> <strong>Pickup</strong>s<br />
<strong>GHOST</strong> Volume<br />
Magnetic <strong>Pickup</strong>s<br />
Stereo Jack<br />
<strong>GHOST</strong><br />
<strong>Pickup</strong>s<br />
Battery<br />
Ground<br />
(Black)<br />
Diagram 8.<br />
<strong>Acousti</strong>-<strong>Phonic</strong> <strong>Intelligent</strong> <strong>Pre</strong>-amp<br />
MAG<br />
PIN<br />
Schematic<br />
Signal<br />
(Colored)<br />
<strong>Acousti</strong>-<strong>Phonic</strong> <strong>Intelligent</strong> <strong>Pre</strong>-amp Connections<br />
Stereo Jack<br />
<strong>GHOST</strong><br />
Volume<br />
The magnetic signal comes from wherever you removed the connection to the<br />
old output jack, which will likely be the centre contact of the existing volume<br />
pot or, for Les Paul style instruments, the pickup selector switch. Solder the<br />
black wire to ground.<br />
TIP<br />
RING<br />
SW<br />
BATT<br />
<strong>GHOST</strong><br />
<strong>Pickup</strong>s<br />
VOL<br />
Tip<br />
Ring<br />
Switch<br />
Shank<br />
<strong>GHOST</strong> Gain Adjust
• Plug the cable from the <strong>GHOST</strong> pickups into the PIN pins of the <strong>Acousti</strong>-<strong>Phonic</strong><br />
<strong>Intelligent</strong> <strong>Pre</strong>-amp.<br />
• Plug the BE-5003-00 Six-Pin Connector (blue, red, white and black wires) into<br />
the RING, TIP, and SW pins of the <strong>Acousti</strong>-<strong>Phonic</strong> <strong>Intelligent</strong> <strong>Pre</strong>-amp. Route<br />
the wires to the stereo jack. Cut to length and solder the wires to the tip, ring,<br />
switch and shank contacts of the jack (Diagram 9, page 15).<br />
• Plug the BE-5002-00 Six-Pin Connector (purple, yellow, green and black wires)<br />
into the <strong>GHOST</strong> and VOL pins of the <strong>Acousti</strong>-<strong>Phonic</strong> <strong>Intelligent</strong> <strong>Pre</strong>-amp. Cut<br />
the <strong>GHOST</strong> (purple) wire to length and solder to the top contact of the <strong>GHOST</strong><br />
volume pot (Diagram 9). Cut the VOL (yellow) wire to length and solder to the<br />
centre contact of the <strong>GHOST</strong> volume pot. Cut the ground (black) wire to length<br />
and solder to the bottom contact of the <strong>GHOST</strong> volume pot. Connect the MAG<br />
(green) wire to the mag pickup output.<br />
• Solder a wire from the outer casing of the <strong>GHOST</strong> volume pot to ground.<br />
• Plug the cable from the battery snap into the BAT pins of the <strong>Acousti</strong>-<strong>Phonic</strong><br />
<strong>Intelligent</strong> <strong>Pre</strong>-amp. Make sure that the two red leads connect to the<br />
Signal side of the pins marked BAT and PWR, and the two black leads<br />
to the Ground side.<br />
The wiring diagrams below show the <strong>GHOST</strong> volume pot fitted in place of an<br />
existing Tone control. For clarity, the wiring diagrams highlight the new wires.<br />
Magnetic<br />
Volume<br />
<strong>GHOST</strong> (Purple)<br />
VOL (Yellow)<br />
GND (Black)<br />
<strong>GHOST</strong><br />
Volume<br />
Diagram 9.<br />
GND (Black)<br />
MAG (Green)<br />
Magnetic<br />
Tone<br />
MAG (Green)<br />
GND (Black)<br />
<strong>GHOST</strong> (Purple)<br />
VOL (Yellow)<br />
GND (Black)<br />
Strat Style Instruments Tele Style Instruments<br />
15
Diagram 9 Continued.<br />
<strong>GHOST</strong> (Purple)<br />
VOL (Yellow)<br />
GND (Black)<br />
16<br />
Magnetic<br />
Volume<br />
<strong>GHOST</strong><br />
Volume<br />
GND (Black)<br />
MAG (Green)<br />
<strong>GHOST</strong> (Purple)<br />
VOL (Yellow)<br />
GND (Black)<br />
<strong>Pre</strong>cision Bass Style Instruments Jazz Bass Style Instruments<br />
Ring Sleeve<br />
Tip<br />
Rear<br />
Volume<br />
Front<br />
Volume<br />
GND (Black)<br />
MAG (Green)<br />
Les Paul Style Instruments<br />
Switch<br />
Stereo Jack Wiring<br />
Neck<br />
Volume<br />
Rear<br />
Tone<br />
<strong>GHOST</strong><br />
Volume<br />
GND (Black)<br />
VOL (Yellow)<br />
<strong>GHOST</strong> (Purple)<br />
Bridge<br />
Volume<br />
GND (Black)<br />
MAG (Green)<br />
<strong>GHOST</strong><br />
Volume<br />
RING (Red)<br />
GND (Black)<br />
TIP (Blue)<br />
SW (White)
STEP 4: Optional Mid Boost Switch<br />
If you are NOT installing the optional Mid Boost Switch, skip to STEP 5, page<br />
18. The <strong>Acousti</strong>-<strong>Phonic</strong> <strong>Intelligent</strong> <strong>Pre</strong>-amp processes the signal from the <strong>GHOST</strong><br />
pickups to produce the <strong>GHOST</strong> acoustic tone. This is the signal from the <strong>GHOST</strong><br />
output that normally connects to the top contact of the volume control.<br />
A second sound is available from the <strong>Acousti</strong>-<strong>Phonic</strong> <strong>Intelligent</strong> <strong>Pre</strong>-amp. The<br />
signal from the Mid/Dark output boosts the mids, lowers the highs and lows<br />
and produces a new tone. You can fit a switch to allow you to switch instantly<br />
between the <strong>GHOST</strong> and Mid Boost sounds.<br />
A pre-wired switch assembly is available:<br />
Mid/Dark Switch Assembly part number PE 0106-00<br />
To install and wire the Mid/Dark Switch Assembly:<br />
• Install the switch in a new hole in the pick guard (or control plate).<br />
• Plug the Six-Pin connector (blue, purple, yellow, green and black wires) from<br />
the switch into the MID, FAAS, VOL and MAG pins of the <strong>Acousti</strong>-<strong>Phonic</strong> Intel-<br />
•<br />
ligent <strong>Pre</strong>-amp.<br />
Cut the VOL (yellow) wire to length and solder to the centre contact of the<br />
<strong>GHOST</strong> volume pot (Diagram 10). Cut the ground (black) wire to length and<br />
solder to the outer casing of the <strong>GHOST</strong> volume pot. Solder the wire from the<br />
centre of the switch to the top of the <strong>GHOST</strong> volume control.<br />
For clarity the wiring diagrams below show only the new wires.<br />
Mid<br />
Boost<br />
<strong>GHOST</strong> (Purple)<br />
MID (Blue)<br />
VOL (Yellow)<br />
GND (Black)<br />
Magnetic<br />
Volume<br />
Magnetic<br />
Tone<br />
Diagram 10.<br />
<strong>GHOST</strong><br />
Volume<br />
Magnetic<br />
Volume<br />
<strong>GHOST</strong> (Purple)<br />
MID (Blue)<br />
VOL (Yellow)<br />
GND (Black)<br />
<strong>GHOST</strong><br />
Volume<br />
Strat Style Instruments Tele Style Instruments<br />
Mid<br />
Boost<br />
17
Diagram 10 Continued.<br />
Magnetic <strong>Pickup</strong>s<br />
and Controls<br />
STEP 5: Optional QuickSwitch<br />
If you are NOT installing the optional QuickSwitch, skip to STEP 6, page<br />
19. When a guitar equipped with an <strong>Acousti</strong>-<strong>Phonic</strong> <strong>Intelligent</strong> <strong>Pre</strong>-amp is connected<br />
to an amplifier via mono cable, the <strong>Acousti</strong>-<strong>Phonic</strong> <strong>Intelligent</strong> <strong>Pre</strong>-amp<br />
automatically provides a blended magnetic/<strong>GHOST</strong> signal. To play with just a<br />
mag sound the <strong>GHOST</strong> volume control is set to zero. To play with just an acoustic<br />
sound the mag volume control is set to zero. This is fine unless you need to<br />
change quickly from one sound to the other. Then you have to adjust two volume<br />
controls quickly.<br />
A Quick Switch Assembly is available to allow quick switching between mag,<br />
acoustic or blended sound. In the mag position the switch mutes the <strong>GHOST</strong><br />
signal leaving just the mag sound. In the acoustic position the switch mutes the<br />
mag signal leaving just the acoustic sound. In the centre position the switch has<br />
no effect, leaving the blended sound.<br />
• Install the switch in a new hole in the pick guard (or control plate).<br />
• Plug QuickSwitch into the QSW pin contact on the <strong>Acousti</strong>-<strong>Phonic</strong> <strong>Intelligent</strong><br />
<strong>Pre</strong>-amp. (Diagram 11).<br />
For clarity the wiring diagrams show only the new wires.<br />
18<br />
<strong>GHOST</strong><br />
<strong>Pickup</strong>s<br />
Battery<br />
<strong>Acousti</strong>-<strong>Phonic</strong> <strong>Intelligent</strong> <strong>Pre</strong>-amp<br />
MAG TIP<br />
Tip<br />
RING<br />
Ring<br />
PIN SW<br />
Mid<br />
Boost<br />
MID<br />
Switch<br />
Shank<br />
BATT <strong>GHOST</strong><br />
<strong>Pickup</strong>s<br />
VOL<br />
Quick<br />
Switch<br />
Optional QuickSwitch & Mid/Dark Switch Schematic<br />
Quick Switch Assembly part number PE 0111-00<br />
To install and wire the Quick Switch Assembly:<br />
<strong>GHOST</strong><br />
Volume<br />
Stereo Jack
Quick<br />
Switch<br />
Magnetic<br />
Volume<br />
Magnetic<br />
Tone<br />
Strat Style Instruments Tele Style Instruments<br />
STEP 6: Auxiliary Power Out<br />
STEP 7: Setup<br />
To QSW pin<br />
contact on<br />
pre-amp.<br />
Diagram 11.<br />
<strong>GHOST</strong><br />
Volume<br />
To QSW pin<br />
contact on<br />
pre-amp.<br />
Magnetic<br />
Volume<br />
<strong>GHOST</strong><br />
Volume<br />
Quick<br />
Switch<br />
If you do NOT require auxiliary power out, skip to STEP 7, below. The<br />
<strong>Acousti</strong>-<strong>Phonic</strong> <strong>Intelligent</strong> <strong>Pre</strong>-amp includes a circuit to switch on battery power<br />
when a plug is inserted into the stereo jack. If you have another electronic device<br />
(such as an active pickup system) inside the guitar cavity that requires a nine volt<br />
supply, you may power it from the auxiliary power output of the <strong>Acousti</strong>-<strong>Phonic</strong><br />
<strong>Intelligent</strong> <strong>Pre</strong>-amp. The auxiliary power output is switched on and off with the<br />
<strong>Acousti</strong>-<strong>Phonic</strong> <strong>Intelligent</strong> <strong>Pre</strong>-amp.<br />
Connect your device to the PWR pins of the <strong>Acousti</strong>-<strong>Phonic</strong> <strong>Intelligent</strong> <strong>Pre</strong>-amp.<br />
The pin next to the PWR marking is positive. The pin near the edge of the board<br />
is negative.<br />
The maximum current that may be drawn from the auxiliary power output is<br />
50mA. However, for long battery life the current drawn should be kept to no more<br />
than a few mA. Do not exceed the maximum current (in particular, do not short<br />
the output) or the <strong>Acousti</strong>-<strong>Phonic</strong> <strong>Intelligent</strong> <strong>Pre</strong>-amp may be damaged.<br />
Once you are finished installing the <strong>GHOST</strong> system you need to set up your action<br />
and intonation.<br />
Step 1: To set up your action, set each string’s height using the two Allen screws<br />
on each saddle. Once it is close, tune it up. Do any final height adjustments. You<br />
want to set the height for each string high enough so notes don’t buzz when<br />
played, but low enough to play easily.<br />
19
Step 2: To set up your intonation, play the 12th fret harmonic of your high E string<br />
(place finger lightly on the high E above the twelfth fret and pluck - the string<br />
should keep ringing when you remove your finger) and tune it to E. Then play the<br />
12th fret E note with the same pressure you would normally use playing. If this<br />
note is sharp (compared to the harmonic B) you need to lengthen the string by<br />
moving the saddle back. Do this by turning the intonation screw clockwise, then<br />
retune and start step 2 again. Do this until the fretted and harmonic notes are<br />
the same pitch. If it is flat you need to shorten the string by turning the intonation<br />
screw counter-clockwise.<br />
Repeat step 2 for the rest of the strings until the harmonic and fretted notes are in<br />
tune with each other. Remember, every time a saddle is moved back and forth, or<br />
up and down, the individual string needs to be retuned to pitch before comparing<br />
the harmonic and fretted note.<br />
STEP 8: Playing<br />
Plug a stereo cable into your instrument’s output jack to hear the mag and acoustic<br />
sounds separately (Diagram 12). The original mag signal is available on the<br />
Tip contact of the stereo jack and can be connected to a conventional guitar amp.<br />
The <strong>GHOST</strong> signal is available on the Ring contact of the stereo jack and should<br />
be connected to a full-range acoustic guitar amp, keyboard amp, or PA system. A<br />
“Y” cable (stereo plug to two mono jacks) allows convenient connection.<br />
If you have installed the <strong>Acousti</strong>-<strong>Phonic</strong> <strong>Intelligent</strong> <strong>Pre</strong>-amp, you may also plug a<br />
mono cable into your instrument. The <strong>Acousti</strong>-<strong>Phonic</strong> <strong>Intelligent</strong> <strong>Pre</strong>-amp senses<br />
the mono plug and automatically switches to a blended signal. The blended<br />
sound can be varied with the individual mag and <strong>GHOST</strong> volume controls.<br />
20<br />
Y<br />
Cable<br />
Guitar<br />
Amp<br />
Magnetic<br />
Sound<br />
Diagram 12.<br />
Full-Range<br />
Amp<br />
<strong>Acousti</strong>c<br />
Sound<br />
Mono<br />
Cable<br />
Full-Range or<br />
GuitarAmp<br />
Blended<br />
Sound
The output of the mag and acoustic signals should be similar at identical volume<br />
control settings. If they are not, the <strong>Acousti</strong>-<strong>Phonic</strong> <strong>Intelligent</strong> <strong>Pre</strong>-amp includes<br />
a Gain pot which may be adjusted with a small screwdriver if necessary. NOTE:<br />
Clockwise adjustment will increase output.<br />
STEP 9: Batteries<br />
Battery life is about 500 hours of continuous use. While this means many months<br />
for most players, we recommend replacing the battery every six months as a<br />
precaution. The <strong>Acousti</strong>-<strong>Phonic</strong> <strong>Intelligent</strong> <strong>Pre</strong>-amp is designed for use with a<br />
single nine volt battery. Higher voltages will damage the <strong>Acousti</strong>-<strong>Phonic</strong> <strong>Intelligent</strong><br />
<strong>Pre</strong>-amp and void the warranty.<br />
Always make sure that your guitar amp is turned down or off before plugging a<br />
cable into your instrument’s output jack. Failure to do so will cause a loud thump<br />
as the <strong>Acousti</strong>-<strong>Phonic</strong> <strong>Intelligent</strong> <strong>Pre</strong>-amp turns on. Remember to unplug your<br />
instrument when you are finished playing to avoid draining the battery.<br />
The installation and setup of your <strong>GHOST</strong> <strong>Pickup</strong> <strong>System</strong> is complete.<br />
Mono-only Blend Installation<br />
Utilizing conventional stereo jack.<br />
Note that RING goes to ground from the pre-amp and the negative from BATT<br />
goes to RING on the jack.<br />
MAG<br />
PIN<br />
TIP<br />
RING<br />
SW<br />
BATT<br />
<strong>GHOST</strong><br />
<strong>Pickup</strong>s<br />
VOL<br />
Diagram 13.<br />
Shank<br />
+ -<br />
Mono-only Blend Schematic<br />
21
Installation Tips<br />
• Many guitar cavities are coated with either electrically conductive paints or<br />
foil tapes to help isolate the circuitry from interference. When installing the<br />
<strong>Acousti</strong>-<strong>Phonic</strong> <strong>Intelligent</strong> <strong>Pre</strong>-amp it is very important to make sure that the<br />
pre-amp is completely isolated from this electrically conductive material.<br />
• Do not attempt to install the pre-amp by using screws through the two holes in<br />
the pre-amp, as they are there only for manufacturing purposes. Double sided<br />
adhesive tape or hot glue should be used.<br />
• Make sure that all plug-in connections are properly in place.<br />
• For more installation tips, please visit our website at www.graphtech.bc.ca<br />
Wire Color Code for <strong>Pickup</strong> Installation<br />
E 1st - Black. B 2nd - Blue. G 3rd- Green. D 4th - Yellow. A 5th- Red.<br />
E 6th - White.<br />
Wire Color Code for <strong>Pre</strong>-amp Installation<br />
PIN: Teflon cable from piezos. NOTE: Blue teflon lead is always ground.<br />
Mid: Blue 7” lead to on/on type Mid/Dark switch or volume pot.<br />
<strong>GHOST</strong>: Purple 7” lead to on/on type Mid/Dark switch or volume pot.<br />
Volume: Yellow 7” lead piezo volume return.<br />
Mag: Green 7” lead input from magnetic pickups post volume and tone pots.<br />
Ring: Red 7” lead to the ring post on the stereo switched jack.<br />
Tip: Blue 7” lead to the tip post on the stereo switched jack.<br />
SW: White 7” lead to the switch post on the switchcraft “littel j” series stereo<br />
jack. Ensure ground is connected to sleeve.<br />
PWR: Red positive out.<br />
BATT: Red battery connector.<br />
Potentiometer (Pot) Contact Key<br />
22<br />
Top Contact<br />
Center Contact<br />
Bottom Contact<br />
Diagram 14.<br />
Body or<br />
Outer Casing
Optional <strong>Acousti</strong>c Tone Control Schematic<br />
<strong>GHOST</strong><br />
or MID<br />
VOL<br />
GND<br />
<strong>GHOST</strong><br />
or MID<br />
Black<br />
Purple or Blue<br />
Yellow<br />
22k<br />
Diagram 15.<br />
.022uF<br />
(22nF)<br />
Volume<br />
Tone<br />
250k<br />
250k<br />
Tone<br />
For information on options and new products, please visit our website at<br />
www.graphtech.bc.ca.<br />
VOL<br />
23
Contact Us<br />
If you have any questions or comments we would love to hear from you.<br />
Please contact us:<br />
By email: sales@graphtech.bc.ca<br />
On the web: www.graphtech.bc.ca<br />
By phone: (604) 940-5353<br />
By fax: (604) 940-4961<br />
Canada<br />
<strong>Graph</strong> <strong>Tech</strong> Guitar Labs<br />
#5 - 7551 Vantage Way,<br />
Delta, BC V4G 1C9 Canada<br />
United States<br />
<strong>Graph</strong> <strong>Tech</strong> Guitar Labs<br />
145 Tyee Drive,<br />
Point Roberts, WA 98281 U.S.A.<br />
Warranty<br />
<strong>Graph</strong> <strong>Tech</strong> Guitar Labs guarantees the <strong>GHOST</strong> <strong>Pickup</strong> <strong>System</strong> and <strong>Acousti</strong>-<br />
<strong>Phonic</strong> <strong>Intelligent</strong> <strong>Pre</strong>-amp for one year against defects in materials and original<br />
workmanship when installed by a qualified, <strong>Graph</strong> <strong>Tech</strong>-approved guitar technician.<br />
As a registered buyer your <strong>GHOST</strong> <strong>Pickup</strong> <strong>System</strong> and <strong>Acousti</strong>-<strong>Phonic</strong> <strong>Intelligent</strong><br />
<strong>Pre</strong>-amp are also covered by an extended two-year exchange policy. See<br />
Warranty Certificate for details.<br />
It is important that you mail in your warranty certificate immediately and<br />
retain your original purchase receipt for warranty verification.<br />
Legal<br />
Fender, Stratocaster, Strat, Telecaster, Tele, Jazz Bass and <strong>Pre</strong>cision Bass are<br />
trademarks of Fender Musical Instruments Corporation. Gibson and Les Paul are<br />
Trademarks of Gibson Guitar Corp. <strong>GHOST</strong> is a trademark of <strong>Graph</strong> <strong>Tech</strong> Guitar<br />
Labs Ltd. <strong>Graph</strong> <strong>Tech</strong> Guitar Labs is not responsible for any damage caused<br />
to your instrument, equipment or <strong>GHOST</strong> <strong>Pickup</strong> <strong>System</strong> components<br />
during installation.
Notes
Notes
Notes