C14N/C15N - Marantec
C14N/C15N - Marantec
C14N/C15N - Marantec

You also want an ePaper? Increase the reach of your titles
YUMPU automatically turns print PDFs into web optimized ePapers that Google loves.
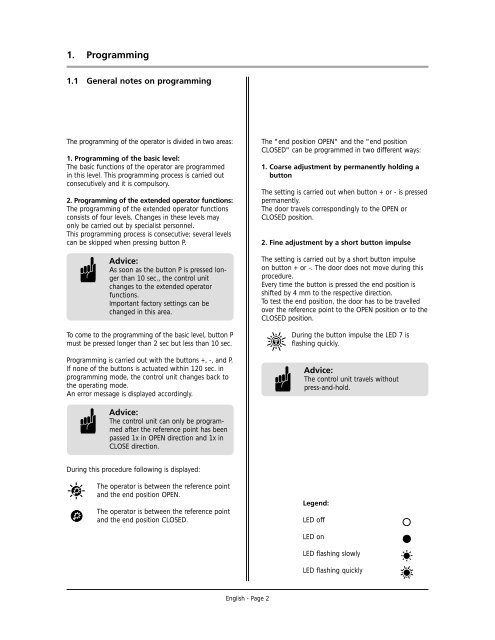
1. Programming<br />
1.1 General notes on programming<br />
The programming of the operator is divided in two areas:<br />
1. Programming of the basic level:<br />
The basic functions of the operator are programmed<br />
in this level. This programming process is carried out<br />
consecutively and it is compulsory.<br />
2. Programming of the extended operator functions:<br />
The programming of the extended operator functions<br />
consists of four levels. Changes in these levels may<br />
only be carried out by specialist personnel.<br />
This programming process is consecutive; several levels<br />
can be skipped when pressing button P.<br />
Advice:<br />
As soon as the button P is pressed longer<br />
than 10 sec., the control unit<br />
changes to the extended operator<br />
functions.<br />
Important factory settings can be<br />
changed in this area.<br />
To come to the programming of the basic level, button P<br />
must be pressed longer than 2 sec but less than 10 sec.<br />
Programming is carried out with the buttons +, -, and P.<br />
If none of the buttons is actuated within 120 sec. in<br />
programming mode, the control unit changes back to<br />
the operating mode.<br />
An error message is displayed accordingly.<br />
Advice:<br />
The control unit can only be programmed<br />
after the reference point has been<br />
passed 1x in OPEN direction and 1x in<br />
CLOSE direction.<br />
During this procedure following is displayed:<br />
The operator is between the reference point<br />
and the end position OPEN.<br />
The operator is between the reference point<br />
and the end position CLOSED.<br />
English - Page 2<br />
The "end position OPEN" and the "end position<br />
CLOSED" can be programmed in two different ways:<br />
1. Coarse adjustment by permanently holding a<br />
button<br />
The setting is carried out when button + or - is pressed<br />
permanently.<br />
The door travels correspondingly to the OPEN or<br />
CLOSED position.<br />
2. Fine adjustment by a short button impulse<br />
The setting is carried out by a short button impulse<br />
on button + or -. The door does not move during this<br />
procedure.<br />
Every time the button is pressed the end position is<br />
shifted by 4 mm to the respective direction.<br />
To test the end position, the door has to be travelled<br />
over the reference point to the OPEN position or to the<br />
CLOSED position.<br />
During the button impulse the LED 7 is<br />
flashing quickly.<br />
Advice:<br />
The control unit travels without<br />
press-and-hold.<br />
Legend:<br />
LED off<br />
LED on<br />
LED flashing slowly<br />
LED flashing quickly