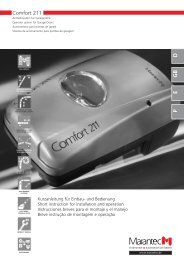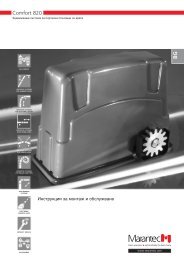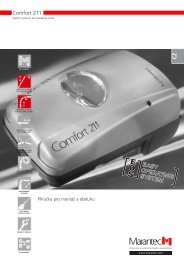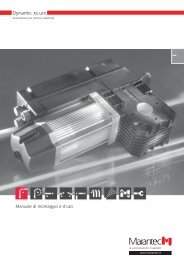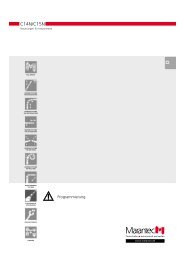
C14N/C15N - Marantec
C14N/C15N - Marantec
C14N/C15N - Marantec

Create successful ePaper yourself
Turn your PDF publications into a flip-book with our unique Google optimized e-Paper software.
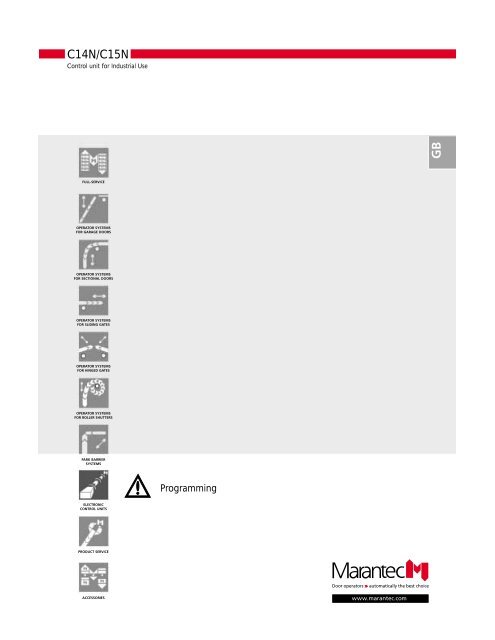
<strong>C14N</strong>/<strong>C15N</strong><br />
Control unit for Industrial Use<br />
FULL-SERVICE<br />
OPERATOR SYSTEMS<br />
FOR GARAGE DOORS<br />
OPERATOR SYSTEMS<br />
FOR SECTIONAL DOORS<br />
OPERATOR SYSTEMS<br />
FOR SLIDING GATES<br />
OPERATOR SYSTEMS<br />
FOR HINGED GATES<br />
OPERATOR SYSTEMS<br />
FOR ROLLER SHUTTERS<br />
PARK BARRIER<br />
SYSTEMS<br />
ELECTRONIC<br />
CONTROL UNITS<br />
PRODUCT SERVICE<br />
ACCESSORIES<br />
Programming<br />
GB
1. Programming<br />
1.1 General notes on programming<br />
The programming of the operator is divided in two areas:<br />
1. Programming of the basic level:<br />
The basic functions of the operator are programmed<br />
in this level. This programming process is carried out<br />
consecutively and it is compulsory.<br />
2. Programming of the extended operator functions:<br />
The programming of the extended operator functions<br />
consists of four levels. Changes in these levels may<br />
only be carried out by specialist personnel.<br />
This programming process is consecutive; several levels<br />
can be skipped when pressing button P.<br />
Advice:<br />
As soon as the button P is pressed longer<br />
than 10 sec., the control unit<br />
changes to the extended operator<br />
functions.<br />
Important factory settings can be<br />
changed in this area.<br />
To come to the programming of the basic level, button P<br />
must be pressed longer than 2 sec but less than 10 sec.<br />
Programming is carried out with the buttons +, -, and P.<br />
If none of the buttons is actuated within 120 sec. in<br />
programming mode, the control unit changes back to<br />
the operating mode.<br />
An error message is displayed accordingly.<br />
Advice:<br />
The control unit can only be programmed<br />
after the reference point has been<br />
passed 1x in OPEN direction and 1x in<br />
CLOSE direction.<br />
During this procedure following is displayed:<br />
The operator is between the reference point<br />
and the end position OPEN.<br />
The operator is between the reference point<br />
and the end position CLOSED.<br />
English - Page 2<br />
The "end position OPEN" and the "end position<br />
CLOSED" can be programmed in two different ways:<br />
1. Coarse adjustment by permanently holding a<br />
button<br />
The setting is carried out when button + or - is pressed<br />
permanently.<br />
The door travels correspondingly to the OPEN or<br />
CLOSED position.<br />
2. Fine adjustment by a short button impulse<br />
The setting is carried out by a short button impulse<br />
on button + or -. The door does not move during this<br />
procedure.<br />
Every time the button is pressed the end position is<br />
shifted by 4 mm to the respective direction.<br />
To test the end position, the door has to be travelled<br />
over the reference point to the OPEN position or to the<br />
CLOSED position.<br />
During the button impulse the LED 7 is<br />
flashing quickly.<br />
Advice:<br />
The control unit travels without<br />
press-and-hold.<br />
Legend:<br />
LED off<br />
LED on<br />
LED flashing slowly<br />
LED flashing quickly
1. Programming<br />
1.2 Programming of the basic level<br />
1.2.1 Programming of the "end position OPEN"<br />
1.<br />
2.<br />
3.<br />
4.<br />
5.<br />
6.<br />
7.<br />
8.<br />
9.<br />
The control unit is in<br />
operating mode.<br />
To change to the<br />
programming mode<br />
press button P:<br />
> 2 Sec. < 10 Sec.<br />
Do not hold button P<br />
longer than 10 sec.!<br />
The control unit is in<br />
menu 1 of the basic<br />
programming.<br />
Set the end position<br />
DOOR OPEN.<br />
The reference point<br />
must be passed 1x.<br />
Fine adjustment is carried<br />
out with impulse on<br />
button + or -.<br />
Press button P 1x:<br />
save the end position.<br />
Automatic change to<br />
the programming of the<br />
"end position CLOSED".<br />
1.<br />
2.<br />
3.<br />
4.<br />
5.<br />
English - Page 3<br />
1.2.2 Programming of the "end position CLOSED"<br />
The control unit is in<br />
menu 2 of the basic<br />
programming.<br />
Set end position DOOR<br />
CLOSED.<br />
The reference point<br />
must be passed 1x.<br />
Fine adjustment is carried<br />
out with impulse on<br />
button + or -.<br />
Press button P 1x:<br />
save the end position.<br />
Automatic change to<br />
the programming of<br />
"power limit OPEN".
1. Programming<br />
1.2.3 Programming of the "power limit OPEN" 1.2.4 Programming of the "power limit CLOSE"<br />
1.<br />
2.<br />
3.<br />
4.<br />
5.<br />
6.<br />
The control unit is in<br />
menu 3 of the basic<br />
programming.<br />
Press button + 1x:<br />
The current setting is<br />
displayed.<br />
Set the power limit as<br />
sensitive as possible.<br />
Press button + or -:<br />
Setting in steps from 1<br />
(sensitive) to 16.<br />
Press button P 1x:<br />
save the set value.<br />
Automatic change to<br />
the programming of the<br />
"power limit CLOSE".<br />
1.<br />
2.<br />
3.<br />
4.<br />
5.<br />
6.<br />
English - Page 4<br />
Legend:<br />
LED off<br />
LED on<br />
The control unit is in<br />
menu 4 of the basic<br />
programming.<br />
Press button + 1x:<br />
The current setting is<br />
displayed.<br />
Set the power limit as<br />
sensitive as possible.<br />
Press button + or -:<br />
Setting in steps from<br />
1 (sensitive) to 16.<br />
Press button P 1x:<br />
save the set value.<br />
Automatic change to<br />
the programming of the<br />
"RC remote control".<br />
LED flashing slowly<br />
LED flashing quickly
1. Programming<br />
1.2.5 Programming of the "RC remote control"<br />
Function allocation of the storage places<br />
You can read in up to 3 differently coded functions:<br />
1. Function Impulse<br />
2. Function OPEN<br />
3. Function CLOSE<br />
Select the programming of RC remote control<br />
1.<br />
2.<br />
3.<br />
The control unit is in<br />
menu 5 of the basic<br />
programming.<br />
Press button + 1x:<br />
The first storage place is<br />
selected.<br />
Press button P 1x:<br />
The next storage place<br />
is selected.<br />
1.<br />
2.<br />
3.<br />
4.<br />
5.<br />
English - Page 5<br />
Program the RC remote control<br />
(example storage place 1)<br />
The first storage place is<br />
selected.<br />
Press button + 1x:<br />
The selected storage<br />
place is ready to be<br />
programmed.<br />
Press the respective<br />
button on the hand<br />
transmitter.<br />
Press button P 1x:<br />
The coding of the hand<br />
transmitter is saved.<br />
Change to the next<br />
storage place.<br />
Advice:<br />
Wrongly programmed coding can be<br />
overwritten with a new coding.<br />
If necessary they can be deleted!
1. Programming<br />
Delete RC remote control - if necessary<br />
(example storage place 1)<br />
1.<br />
2.<br />
3.<br />
4.<br />
The first storage place is<br />
selected.<br />
Press button - 1x:<br />
The selected storage<br />
place is ready to be<br />
deleted.<br />
Press button P 1x:<br />
The coding of the selected<br />
storage place is<br />
deleted.<br />
Change to the next storage<br />
place.<br />
English - Page 6<br />
Finish the programming of the RC remote control<br />
1.<br />
2.<br />
3.<br />
4.<br />
5.<br />
Legend:<br />
LED off<br />
LED on<br />
Press button P until the<br />
third storage place is<br />
selected.<br />
Press button P 1x:<br />
The programming of RC<br />
remote control is terminated.<br />
The control unit changes<br />
to the programming<br />
"reset factory settings".<br />
Press button P 1x:<br />
The programming of the<br />
basic level is terminated.<br />
The control unit is in<br />
operating mode.<br />
LED flashing slowly<br />
LED flashing quickly
1. Programming<br />
1.2.6 Programming of "reset factory settings"<br />
With the reset function all menus can be reset to the<br />
values already set from factory.<br />
1.<br />
2.<br />
3.<br />
4.<br />
5.<br />
6.<br />
7.<br />
8.<br />
9.<br />
The control unit is in<br />
operating mode.<br />
To change to the<br />
programming mode:<br />
press button P:<br />
> 2 Sec. < 10 Sec.<br />
Do not hold button P<br />
longer than 10 sec.!<br />
Press button P 5x to<br />
get to the menu<br />
"reset factory settings".<br />
Press button + or - 1x:<br />
Selection "no reset" -<br />
all set values remain<br />
unchanged.<br />
Press button - or + 1x:<br />
Selection "reset" -<br />
factory settings are<br />
restored.<br />
Press button P 1x:<br />
Save and terminate<br />
programming.<br />
New start when RESET<br />
has been selected:<br />
All LED's glow up for<br />
2 sec.<br />
The control unit is in<br />
operating mode.<br />
English - Page 7<br />
Legend:<br />
LED off<br />
LED on<br />
LED flashing slowly<br />
LED flashing quickly
1. Programming<br />
1.3 Extended operator functions (only for specialist personnel)<br />
1.3.1 Overview of the extended operator functions<br />
Level Functions Explanation Factory settings<br />
3rd programming<br />
level<br />
Automatic timer<br />
function<br />
4th programming<br />
level<br />
Parameter<br />
6th programming<br />
level<br />
Reversion<br />
modes<br />
8th programming<br />
level<br />
Operating<br />
modes<br />
Open door time The time the door is open before it closes automatically.<br />
Warning time<br />
Warning before start<br />
Early closing after having<br />
passed the photocell<br />
Signal lights<br />
Excess travel stop<br />
The time the signal light is flashing before the door<br />
closes automatically.<br />
The time the signal light flashes before the door starts<br />
to move.<br />
The door closes either after the set open time or earlier<br />
after having passed the photocell.<br />
The signal light function can be set to flashing or to<br />
permanent light.<br />
The time period after which the operator cuts out<br />
without having reached an end position.<br />
English - Page 8<br />
Automatic timer<br />
function deactivated<br />
Automatic timer<br />
function deactivated<br />
0 seconds<br />
No<br />
Flashing light<br />
55 seconds<br />
Offset learned power limit The learned power limit can be set in steps from 1 - 16. Step 4<br />
Sensitivity power limit<br />
Power limit OPEN<br />
Power limit CLOSE<br />
Activation of photocell /<br />
photocell CLOSE<br />
Closing edge safety device<br />
CLOSE<br />
The sensitivity of the power limit can be set in steps<br />
from 1 - 16.<br />
Setting whether the operator stops, short or long<br />
reversion.<br />
Setting whether the operator stops, short or long<br />
reversion.<br />
Setting whether the operator stops, short or long<br />
reversion.<br />
Setting whether the operator stops, short or long<br />
reversion.<br />
Press-and-hold OPEN After start the operator runs to the selected position. On<br />
Press-and-hold CLOSE After start the operator runs to the selected position. On<br />
Impulse commands<br />
Direction commands<br />
(Pushbutton OPEN or CLOSE)<br />
Activation of the impulse button when the operator<br />
runs.<br />
Activation of the direction button when the operator<br />
runs.<br />
Step 13<br />
Stop<br />
Stop<br />
not existing<br />
short reversion<br />
No<br />
Yes
1. Programming<br />
1.3.2 Programming sequences of the extended<br />
operator functions<br />
1.<br />
2.<br />
3.<br />
4.<br />
5.<br />
6.<br />
7.<br />
8.<br />
9.<br />
The control unit is in<br />
operating mode.<br />
Press button P:<br />
> 10 Sec.<br />
Countdown from 8 to<br />
1, then all LED's are on.<br />
Release button P:<br />
The control unit is in the<br />
first level of the extended<br />
operator functions.<br />
Press button P 1x:<br />
Change to the next<br />
level of the extended<br />
functions.<br />
Press button + 1x:<br />
Change to the first<br />
menu of the selected<br />
level.<br />
Press button + 1x:<br />
Display of the current<br />
setting.<br />
Press button + or -:<br />
Change the current<br />
value.<br />
Press button P 1x:<br />
Save the value, display<br />
of the selected level.<br />
If P is pressed without<br />
changing the value,<br />
the setting remains<br />
unchanged!<br />
10.<br />
11.<br />
12.<br />
13.<br />
14.<br />
15.<br />
English - Page 9<br />
Legend:<br />
LED off<br />
LED on<br />
Press button P 1x:<br />
Change to the next<br />
menu in the selected<br />
level.<br />
After the last<br />
programming menu of<br />
the selected level the<br />
control unit displays the<br />
selected level.<br />
Press button P 1x:<br />
The control unit<br />
changes to the next<br />
level.<br />
After the last<br />
programming level the<br />
programming of the<br />
extended operator<br />
functions is terminated.<br />
Press button P 1x:<br />
The programming is<br />
terminated.<br />
The control unit is in<br />
operating mode.<br />
LED flashing slowly<br />
LED flashing quickly
English - Page 10<br />
English - Page 11<br />
English - Page 12<br />
English - Page 13<br />
2. Messages<br />
2.1 Display of the messages<br />
Messages at permanent actuation<br />
When actuating operating and safety elements<br />
permanently the current status of the system is<br />
displayed.<br />
1.<br />
2.<br />
Status displays<br />
The control light<br />
MALFUNCTION (6)<br />
glows.<br />
Press button P 1x:<br />
Display of the status<br />
(see below).<br />
IMPULSE button actuated<br />
OPEN button actuated<br />
Closing edge safety device OPEN actuated<br />
CLOSE button actuated<br />
Closing edge safety device CLOSE actuated<br />
Photocell actuated<br />
Static current circuit interrupted<br />
1.<br />
2.<br />
English - Page 14<br />
Messages at malfunctions<br />
Malfunctions in the system are displayed by a<br />
corresponding error number.<br />
1.<br />
2.<br />
3.<br />
4.<br />
5.<br />
6.<br />
The control light<br />
MALFUNCTION (6) is<br />
flashing.<br />
Press button P 1x:<br />
Display of the error<br />
number (see 10.2).<br />
Message memory<br />
The message memory displays the last 5 messages of<br />
the control unit.<br />
Press button P:<br />
The LED's from<br />
1 - 8 are glowing.<br />
The control unit shows<br />
the current messages.<br />
Press button -:<br />
Old messages are<br />
displayed.<br />
Press button +:<br />
The current message is<br />
displayed.<br />
Press button P:<br />
The display of the<br />
message memory is<br />
finished.<br />
The control unit is in<br />
operating mode.
2. Messages<br />
2.2 Overview of the error numbers<br />
Number Message Display<br />
6 Photocell actuated<br />
7 Programming cancelled<br />
8 Reference point<br />
9 R.P.M sensor defective<br />
10 Power limit<br />
11 Excess travel stop<br />
12<br />
13<br />
15<br />
Testing<br />
closing edge safety device<br />
OPEN not o.k.<br />
Testing<br />
closing edge safety device<br />
CLOSE not o.k.<br />
Testing<br />
photocell not o.k.<br />
English - Page 15<br />
Number Message Display<br />
16 Testing power limit<br />
27 Sensitivity power limit<br />
28<br />
36<br />
Offset learned<br />
Power limit<br />
Static current circuit<br />
interrupted<br />
Legend:<br />
LED off<br />
LED on<br />
LED flashing slowly<br />
LED flashing quickly
English Copyright.<br />
No part of this manual may be reproduced without our prior approval.<br />
Subject to alterations in the interests of technical progress.<br />
Version: 08.2004<br />
#71 421