LCD TV SERVICE MANUAL - Goldhand
LCD TV SERVICE MANUAL - Goldhand
LCD TV SERVICE MANUAL - Goldhand

You also want an ePaper? Increase the reach of your titles
YUMPU automatically turns print PDFs into web optimized ePapers that Google loves.
4. Total Assembly line process<br />
4.1. Adjustment Preparation<br />
(1) W/B Equipment condition<br />
CA210: CH 9, Test signal: Inner pattern (85IRE)<br />
(2) Above 5 minutes H/run in the inner pattern. (“power on”<br />
key of adjust remote control)<br />
(3) 15 Pin D-Sub Jack is connected to the AUTO W/B<br />
EQUIPMENT.<br />
(4) Adjust Process will start by execute I2C Command (Inner<br />
pattern (0xF3, 0xFF).<br />
Color Cool 11,000 ºK X=0.276(±0.002) <br />
Temperature Y=0.283(±0.002) Inner patern<br />
Medium 9,300 ºK X=0.285(±0.002)<br />
Y=0.293(±0.002)<br />
(216gray,85IRE)<br />
Warm 6,500 ºK X=0.313(±0.002)<br />
Y=0.329(±0.002)<br />
(5) Adjust Process will finish by execute I2C Command (Inner<br />
pattern (Inner pattern (0xF3,0x00)).<br />
** Caution **<br />
Color Temperature: COOL, Medium, Warm<br />
One of R Gain/G Gain/ B Gain should be kept on 0xC0, and<br />
adjust other two lower than C0.<br />
(when R/G/B Gain are all C0, it is the FULL Dynamic Range<br />
of Module)<br />
* Manual W/B process using adjusts Remote control.<br />
After enter Service Mode by pushing “ADJ” key,<br />
Enter White Pattern off of service mode, and change off -> on.<br />
Enter “W/B ADJUST” by pushing “G” key at “3.W/B ADJUST”.<br />
* After done all adjustments, Press “In-start” button and<br />
compare Tool option and Area option value with its BOM, if it<br />
is correctly same then unplug the AC cable.<br />
If it is not same, then correct it same with BOM and unplug<br />
AC cable.<br />
For correct it to the model’s module from factory JIG model.<br />
* Don’t push The “IN STOP KEY” after completing the function<br />
inspection.<br />
4.2. DPM operation confirmation<br />
(Only Apply for MNT Model)<br />
Check if Power LED Color and Power Consumption operate<br />
as standard.<br />
- Set Input to RGB and connect D-sub cable to set<br />
- Measurement Condition: (100~240V@ 50/60Hz)<br />
- Confirm DPM operation at the state of screen without Signal<br />
Copyright © 2008 LG Electronics. Inc. All right reserved.<br />
Only for training and service purposes<br />
- 12 -<br />
4.3 DDC EDID Write (RGB 128Byte )<br />
- Connect D-sub Signal Cable to D-Sub Jack.<br />
- Write EDID DATA to EEPROM (24C02) by using DDC2B<br />
protocol.<br />
- Check whether written EDID data is correct or not.<br />
4.4. DDC EDID Write (HDMI 256Byte)<br />
- Connect HDMI Signal Cable to HDMI Jack.<br />
- Write EDID DATA to EEPROM(24C02) by using DDC2B<br />
protocol.<br />
- Check whether written EDID data is correct or not.<br />
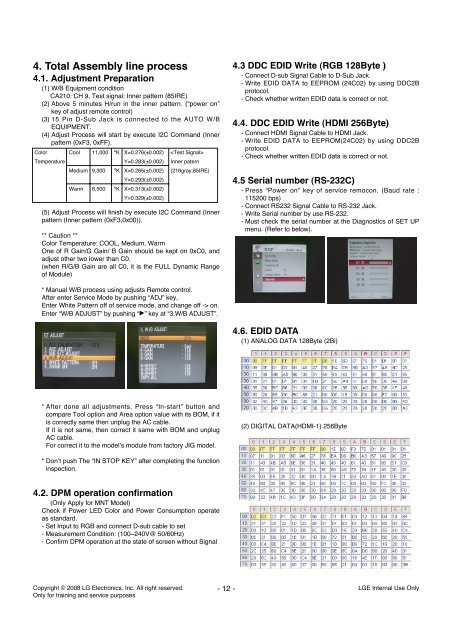
4.5 Serial number (RS-232C)<br />
- Press “Power on” key of service remocon. (Baud rate :<br />
115200 bps)<br />
- Connect RS232 Signal Cable to RS-232 Jack.<br />
- Write Serial number by use RS-232.<br />
- Must check the serial number at the Diagnostics of SET UP<br />
menu. (Refer to below).<br />
4.6. EDID DATA<br />
(1) ANALOG DATA 128Byte (2Bi)<br />
(2) DIGITAL DATA(HDMI-1) 256Byte<br />
LGE Internal Use Only