


You also want an ePaper? Increase the reach of your titles
YUMPU automatically turns print PDFs into web optimized ePapers that Google loves.
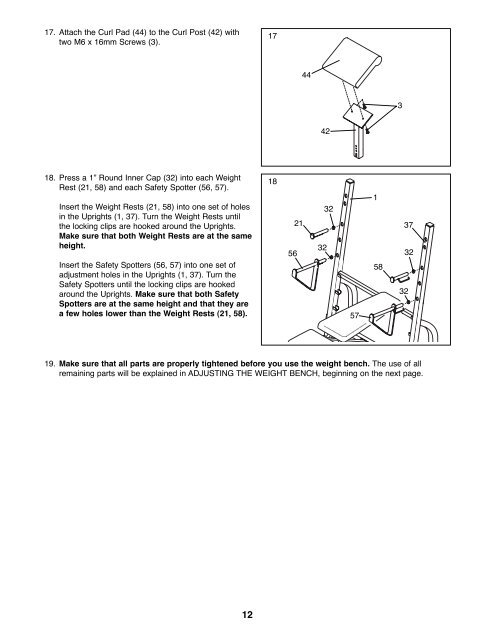
17. Attach the Curl Pad (44) to the Curl Post (42) with<br />
two M6 x 16mm Screws (3).<br />
18. Press a 1Ó Round Inner Cap (32) into each Weight<br />
Rest (21, 58) and each Safety Spotter (56, 57).<br />
Insert the Weight Rests (21, 58) into one set of holes<br />
in the Uprights (1, 37). Turn the Weight Rests until<br />
the locking clips are hooked around the Uprights.<br />
Make sure that both Weight Rests are at the same<br />
height.<br />
Insert the Safety Spotters (56, 57) into one set of<br />
adjustment holes in the Uprights (1, 37). Turn the<br />
Safety Spotters until the locking clips are hooked<br />
around the Uprights. Make sure that both Safety<br />
Spotters are at the same height and that they are<br />
a few holes lower than the Weight Rests (21, 58).<br />
19. Make sure that all parts are properly tightened before you use the weight bench. The use of all<br />
remaining parts will be explained in ADJUSTING THE WEIGHT BENCH, beginning on the next page.<br />
12<br />
17<br />
18<br />
56<br />
21<br />
44<br />
42<br />
32<br />
32<br />
57<br />
1<br />
58<br />
3<br />
32<br />
37<br />
32


