proform 385s - ICON Health & Fitness, Inc. Customer Service
proform 385s - ICON Health & Fitness, Inc. Customer Service
proform 385s - ICON Health & Fitness, Inc. Customer Service
Create successful ePaper yourself
Turn your PDF publications into a flip-book with our unique Google optimized e-Paper software.
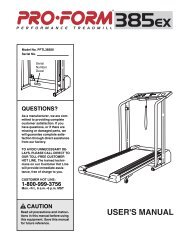
Model No. PFTL39101Serial No.¨Serial NumberDecalQUESTIONS?USER'S MANUALAs a manufacturer, we are committedto providing completecustomer satisfaction. If youhave questions, or if there aremissing parts, we will guaranteecomplete satisfaction through directassistance from our factory.TO AVOID UNNECESSARY DE-LAYS, PLEASE CALL DIRECT TOOUR TOLL-FREE CUSTOMERHOT LINE. The trained technicianson our <strong>Customer</strong> Hot Linewill provide immediate assistance,free of charge to you.CUSTOMER HOT LINE:1-800-999-3756Mon.ÐFri., 6 a.m.Ð6 p.m. MSTCAUTIONRead all precautions and instructionsin this manual before usingthis equipment. Save this manualfor future reference.Visit our website atwww.<strong>proform</strong>.comnew products, prizes,fitness tips, and much more!
TABLE OF CONTENTSIMPORTANT PRECAUTIONS . . . . . . . . . . . . . . . . . . . . . . . . . . . . . . . . . . . . . . . . . . . . . . . . . . . . . . . . . . . . . . . . .2BEFORE YOU BEGIN . . . . . . . . . . . . . . . . . . . . . . . . . . . . . . . . . . . . . . . . . . . . . . . . . . . . . . . . . . . . . . . . . . . . . . .4ASSEMBLY . . . . . . . . . . . . . . . . . . . . . . . . . . . . . . . . . . . . . . . . . . . . . . . . . . . . . . . . . . . . . . . . . . . . . . . . . . . . . . .5OPERATION AND ADJUSTMENT . . . . . . . . . . . . . . . . . . . . . . . . . . . . . . . . . . . . . . . . . . . . . . . . . . . . . . . . . . . . .7HOW TO FOLD AND MOVE THE TREADMILL . . . . . . . . . . . . . . . . . . . . . . . . . . . . . . . . . . . . . . . . . . . . . . . . . .10TROUBLE-SHOOTING . . . . . . . . . . . . . . . . . . . . . . . . . . . . . . . . . . . . . . . . . . . . . . . . . . . . . . . . . . . . . . . . . . . . .12CONDITIONING GUIDELINES . . . . . . . . . . . . . . . . . . . . . . . . . . . . . . . . . . . . . . . . . . . . . . . . . . . . . . . . . . . . . . .14ORDERING REPLACEMENT PARTS . . . . . . . . . . . . . . . . . . . . . . . . . . . . . . . . . . . . . . . . . . . . . . . . . .Back CoverLIMITED WARRANTY . . . . . . . . . . . . . . . . . . . . . . . . . . . . . . . . . . . . . . . . . . . . . . . . . . . . . . . . . . . . . . .Back CoverNote: An EXPLODED DRAWING and a PART LIST are attached in the center of this manual. Save theEXPLODED DRAWING and PART LIST for future reference.IMPORTANT PRECAUTIONSWARNING: To reduce the risk of burns, fire, electric shock, or injury to persons, read thefollowing important precautions and information before operating the treadmill.1. It is the responsibility of the owner to ensurethat all users of this treadmill are adequatelyinformed of all warnings and precautions.2. Use the treadmill only as described.3. Place the treadmill on a level surface, witheight feet of clearance behind it. Do not placethe treadmill on a surface that blocks any airopenings. To protect the floor or carpet fromdamage, place a mat under the treadmill.4. Keep the treadmill indoors, away from moistureand dust. Do not put the treadmill in agarage or covered patio, or near water.5. Do not operate the treadmill where aerosolproducts are used or where oxygen is beingadministered.6. Keep children under the age of 12 and petsaway from the treadmill at all times.7. The treadmill should be used only by personsweighing 250 pounds or less.8. Never allow more than one person on thetreadmill at a time.9. Wear appropriate exercise clothing whenusing the treadmill. Do not wear loose clothingthat could become caught in the treadmill.Athletic support clothes are recommended forboth men and women. Always wear athleticshoes. Never use the treadmill with bare feet,wearing only stockings, or in sandals.10. When connecting the power cord (see page 7),plug the power cord into a surge suppressor(not included) and plug the surge suppressorinto a grounded circuit capable of carrying 15or more amps. No other appliance should be onthe same circuit. Do not use an extension cord.11. Use only a single-outlet surge suppressor thatis UL 1449 listed as a transient voltage surgesuppressor (TVSS). The surge suppressormust have a UL suppressed voltage rating of400 volts or less and a minimum surge dissipationof 450 joules. The surge suppressormust be electrically rated for 120 volts AC and15 amps. To purchase a surge suppressor, seeyour local PROFORM dealer or call 1-800-999-3756 and order part number 146148.12. Keep the power cord and the surge suppressoraway from heated surfaces.13. Never move the walking belt while the poweris turned off. Do not operate the treadmill ifthe power cord or plug is damaged, or if thetreadmill is not working properly. (See BE-FORE YOU BEGIN on page 4 if the treadmill isnot working properly.)2
ASSEMBLYAssembly requires two people. Set the treadmill in a cleared area and remove all packing materials. Do notdispose of the packing materials until assembly is completed. Refer to the drawings below to identify the partsused in assembly. Assembly requires the following tools: The included allen wrench and your ownphillips screwdriver and mallet .Note: The underside of the treadmill walking belt is coated with high-performance lubricant. During shipping, asmall amount of lubricant may be transferred to the top of the walking belt or the shipping carton. This is a normalcondition and does not affect treadmill performance. If there is lubricant on top of the walking belt, simply wipe offthe lubricant with a soft cloth and a mild, non-abrasive cleaner.Extension Leg Screw (34)Ð2Handrail Bolt (15)Ð2Handrail Washer (32)Ð2Latch Screw (88)Ð2Handrail Screw (13)Ð41. With the help of a second person, carefully raise theUprights (14) until the treadmill is in the position shown.1142. Insert a Handrail Bolt (15) with a Handrail Washer (32)into one of the Extension Legs (41) as shown. Thread aHandrail Bolt four turns into the lower end of one of theHandrails (2).Attach the other Extension Leg (41) to the other Handrail(2) in the same way.224132155
3. Slide a Rubber Ring (74) onto the post on each Upright(14). Refer to the inset drawing. Make sure that eachRubber Ring is turned so the tapered side is facingthe thickest part of the post.3Post1474Tapered SidePost74144. Slide the upper end of a Handrail (2) and then the attachedExtension Leg (41) into the right Upright (14) asshown. (Note: As you insert the Extension Leg, it may behelpful to tip the Uprights [14] forward and tap theExtension Leg with a mallet.) Tighten two of the fourHandrail Screws (13) into the Handrail.42131421314Refer to the inset drawing. Tighten an Extension LegScrew (34) into the right Upright (14) as shown. Be sureto push on the head of the Extension Leg Screwwhile tightening it.1434Attach the other Handrail (2) to the left Upright (14) asdescribed above.415. With the help of a second person, carefully tip theUprights (14) down as shown.5Tighten the two Handrail Bolts (15) in the Extension Legs(41). Refer to drawing 4. Make sure that the four HandrailScrews (13) are tightened.152With the help of a second person, carefully tip the41Uprights (14) back to the upright position. 1514416. Attach the Storage Latch (12) to the left Upright (14) withthe Latch Spacer (23) and two Latch Screws (88). Becareful not to overtighten the Latch Screws.6147. Make sure that all parts are tightened before you usethe treadmill. Keep the included allen wrench in a secureplace. The allen wrench is used to adjust the walkingbelt (see page 13). To protect the floor, place a matunder the treadmill.6231288
OPERATION AND ADJUSTMENTTHE PERFORMANT LUBE TM WALKING BELTYour treadmill features a walking belt coated withPERFORMANT LUBE TM , a high-performance lubricant.IMPORTANT: Never apply silicone spray or othersubstances to the walking belt or the walking platform.Such substances will deteriorate the walkingbelt and cause excessive wear.This product is for use on a nominal 120-volt circuit,and has a grounding plug that looks like the plug illustratedin drawing 1 below. A temporary adapter thatlooks like the adapter illustrated in drawing 2 may beused to connect the surge suppressor to a 2-polereceptacle as shown in drawing 2 if a properlygrounded outlet is not available.HOW TO PLUG IN THE POWER CORDDANGER: Improper connectionof the equipment-grounding conductor canresult in an increased risk of electric shock.Check with a qualified electrician or servicemanif you are in doubt as to whether theproduct is properly grounded. Do not modifythe plug provided with the productÑif it willnot fit the outlet, have a proper outletinstalled by a qualified electrician.Your treadmill, like any other type of sophisticatedelectronic equipment, can be seriously damaged bysudden voltage changes in your homeÕs power.Voltage surges, spikes, and noise interference canresult from weather conditions or from other appliancesbeing turned on or off. To decrease the possibility ofyour treadmill being damaged, always use a surgesuppressor with your treadmill (see drawing 1 atthe right).12Grounded Outlet BoxSurge SuppressorGrounding PinGrounding PinGrounded OutletGrounding PlugGrounded Outlet BoxAdapterSurge SuppressorLugMetal ScrewTo purchase a surge suppressor, see your localPROFORM dealer or call 1-800-999-3756 and orderpart number 146148. Use only a single-outlet surgesuppressor that is UL 1449 listed as a transient voltagesurge suppressor (TVSS). The surge suppressor musthave a UL suppressed voltage rating of 400 volts orless and a minimum surge dissipation of 450 joules.The surge suppressor must be electrically rated for120 volts AC and 15 amps.This product must be grounded. If it should malfunctionor break down, grounding provides a path of leastresistance for electric current to reduce the risk of electricshock. This product is equipped with a cord havingan equipment-grounding conductor and a groundingplug. Plug the power cord into a surge suppressor,and plug the surge suppressor into an appropriateoutlet that is properly installed and grounded inaccordance with all local codes and ordinances.Important: The treadmill is not compatible withGFCI-equipped outlets.The temporary adapter should be used only until aproperly grounded outlet (drawing 1) can be installedby a qualified electrician.The green-colored rigid ear, lug, or the like extendingfrom the adapter must be connected to a permanentground such as a properly grounded outlet box cover.Whenever the adapter is used it must be held in placeby a metal screw. Some 2-pole receptacle outlet boxcovers are not grounded. Contact a qualified electricianto determine if the outlet box cover isgrounded before using an adapter.7
DIAGRAM OF THE CONSOLESpeed ControlLED TrackDisplays<strong>Inc</strong>line ControlClipKeyIf there is a thin sheet ofclear plastic on the faceof the console, remove it.CAUTION: Before operating theconsole, read the following precautions.¥ Do not stand on the walking belt when turningon the power.¥ Always wear the clip (see the drawing above)while using the treadmill. When the key is removedfrom the console, the walking belt willstop.¥ Adjust the speed in small increments.¥ The training zones marked beside the speedcontrol are general guidelines only. See page14 for more information.¥ To reduce the possibility of electric shock,keep the console dry. Avoid spilling liquids onthe console. Use only a sealable water bottle.BATTERY INSTALLATIONThe console requires two "AA" batteries (not included).Alkaline batteries are recommended. To installbatteries, open the battery cover as shown below.Press two batteries into the battery compartment, withthe negative (Ð) ends of the batteries touching thesprings. Close the battery cover, push up on the tab,and then push the tab forward as shown. Be sure thatthe tab locks into place.STEP-BY-STEP CONSOLE OPERATIONBefore operating the console, make sure that thepower cord is properly plugged in. (See HOW TOPLUG IN THE POWER CORD on page 7.)BatteriesBattery CoverBatteryCover TabNext, step onto the foot rails of the treadmill. Find theclip attached to the key (see the drawing above), andslide the clip onto the waistband of your clothing. Testthe clip by carefully taking a few steps backwarduntil the key is pulled from the console. If the keyis not pulled from the console, adjust the positionof the clip as needed.Follow the steps on page 9 to operate the console.8
1234Insert the key fully into the power switch.Inserting the key willnot turn on the displays.The displays willturn on when theON/RESET button ispressed or when thewalking belt is started.Note: If you just installed batteries, the displayswill already be on.Reset the speed control.Slide the speed controldown to the RESETposition. Note: Eachtime the walking beltis stopped, the speedcontrol must bemoved to the RESETposition before thewalking belt can berestarted.Start the walking belt.After you have moved the speed control to theRESET position, slowly slide it upward until thewalking belt begins to move at slow speed.Carefully step onto the walking belt and begin exercising.Change the speed of the walking belt asdesired by sliding the speed control.To stop the walking belt, step onto the foot railsand slide the speed control to the RESET position.Adjust the incline of the treadmill as desired.To change the incline ofthe treadmill, press thetop or bottom of the inclinecontrol until thedesired incline level isreached.56Monitor your progress with the LED track andthe two displays.The LED TrackÑTheLED track in the centerof the console representa distance of 1/4mile. As you exercise,the indicators aroundthe track will light oneat a time until you have completed 1/4 mile. Thefirst indicator beside the arrow will then light and anew lap will begin.CALS/F-CALS/SPEEDArrowdisplayÑThis displayshows the approximatenumbers of calories andfat calories you haveburned. (See FATBURNING on page 14.)In addition, the display shows the speed of thewalking belt, in miles per hour. Every seven seconds,the display will change from one number tothe next. Arrows in the display will indicate whichnumber is currently shown.TIME/DISTANCEArrowdisplayÑThis displayshows the elapsed timeand distance that youhave walked or run, inmiles. Every seven seconds,the display willchange from one number to the other. Arrows inthe display will indicate which number is currentlyshown.To reset the displays atany time, press theON/RESET button.When you are finished exercising, stop thewalking belt and remove the key.Step onto the foot rails, stop the walking belt andremove the key from the console. The displays willturn off about five minutes after the key is removed.Note: Any time that the walking belt isstopped and the ON/RESET button is notpressed for five minutes, the displays will automaticallyturn off to conserve the batteries.9
HOW TO FOLD AND MOVE THE TREADMILLHOW TO FOLD THE TREADMILL FOR STORAGEBefore folding the treadmill, unplug the power cord. Caution:You must be able to safely lift 45 pounds (20 kg) in orderto raise, lower, or move the treadmill.1. Hold the treadmill with your hands in the locations shownat the right. To decrease the possibility of injury, bendyour legs and keep your back straight. As you raisethe treadmill, make sure to lift with your legs ratherthan your back. Raise the treadmill about halfway to thevertical position.2. Move your right hand to the position shown and hold thetreadmill firmly. Raise the treadmill until the storage latchcloses over the catch. Make sure that the storage latchis fully engaged over the catch.To protect the floor or carpet from damage, place amat under the treadmill. Keep the treadmill out ofdirect sunlight. Do not leave the treadmill in the storageposition in temperatures above 85¡ Fahrenheit.HOW TO MOVE THE TREADMILLBefore moving the treadmill, convert the treadmill to the storageposition as described above. Make sure that the storagelatch is closed fully over the catch.1. Hold the upper ends of the handrails. Place one foot onthe base as shown.2. Tilt the treadmill back until it rolls freely on the frontwheels. Carefully move the treadmill to the desired location.To reduce the risk of injury, use extreme cautionwhile moving the treadmill. Do not move the treadmillover an unevensurface.3. Place one foot on the base, and carefully lower the treadmilluntil it is resting in the storage position.
HOW TO LOWER THE TREADMILL FOR USE1. Hold the upper end of the treadmill with your right hand asshown. Using your left thumb, press the storage latch andhold it. Pivot the treadmill until the frame and foot rail arepast the storage latch.UnlatchedStorageLatch2. Hold the treadmill firmly with both hands, and lower thetreadmill to the floor. Do not drop the treadmill frameto the floor. To decrease the possibility of injury,bend your legs and keep your back straight.11
TROUBLE-SHOOTINGMost treadmill problems can be solved by following the steps below. Find the symptom that applies, andfollow the steps listed. If further assistance is needed, please call our <strong>Customer</strong> <strong>Service</strong> Department tollfreeat 1-800-999-3756, Monday through Friday, 6 a.m. until 6 p.m. Mountain Time (excluding holidays).1. SYMPTOM: THE POWER DOES NOT TURN ONa. Make sure that the power cord is plugged into a surge suppressor, and that the surge suppressor is pluggedinto a properly grounded outlet (see page 7). Use only a single-outlet surge suppressor that is UL 1449listed as a transient voltage surge suppressor (TVSS). The surge suppressor must have a UL suppressedvoltage rating of 400 volts or less and a minimum surge dissipation of 450 joules. The surge suppressormust be electrically rated for 120 volts AC and 15 amps. Important: The treadmill is not compatible withGFCI-equipped outlets.b. After the power cord has been plugged in, make sure that the key is fully inserted into the console.c. Check the circuit breaker located on the treadmill near thepower cord. If the switch protrudes as shown, the circuitbreaker has tripped. To reset the circuit breaker, wait for fiveminutes and then press the switch back in.cTrippedReset2. SYMPTOM: THE POWER TURNS OFF DURING USETrippedReseta. Check the circuit breaker located on the treadmill frame near the power cord (see 1. c. above). If the circuitbreaker has tripped, wait for five minutes and then press the switch back in.b. Make sure that the power cord is plugged in.c. Remove the key from the console. Reinsert the key fully into the console.d. If the treadmill still will not run, please call our <strong>Customer</strong> <strong>Service</strong> Department, toll-free.3. SYMPTOM: THE DISPLAYS OF THE CONSOLE DO NOT FUNCTION PROPERLYa. Check the batteries in the console. See BATTERY INSTALLATION on page 8. Most problems are the resultof drained batteries.b. Remove the key from the console and UNPLUG THE POWERCORD. Remove the screws from the hood. Carefully remove thehood. Locate the Reed Switch (86) and the Magnet (87) on theleft side of the Pulley (85). Turn the Pulley until the Magnet isaligned with the Reed Switch. Make sure that the gap betweenthe Magnet and the Reed Switch is about 1/8Ó. If necessary,loosen the Screw (82) and move the Reed Switch slightly.Retighten the Screw. Re-attach the hood, and run the treadmillfor a few minutes to check for a correct speed reading.8682TopView1/8Ó 858712
4. SYMPTOM: THE WALKING BELT SLOWS WHEN WALKED ONa. Use only a single-outlet surge suppressor that is UL 1449 listed as a transient voltage surge suppressor(TVSS). The surge suppressor must have a UL suppressed voltage rating of 400 volts or less and a minimumsurge dissipation of 450 joules. The surge suppressor must be electrically rated for 120 volts AC and 15 amps.b. If the walking belt is overtightened, treadmill performance maydecrease and the walking belt may be permanently damaged.Remove the key and UNPLUG THE POWER CORD. Using theallen wrench, turn both rear roller adjustment bolts counterclockwise,1/4 of a turn. When the walking belt is properly tightened,you should be able to lift each side of the walking belt 2 to 3inches off the walking platform. The center of the walking beltshould just touch the walking platform. Be careful to keep thewalking belt centered. Plug in the power cord, insert the key andrun the treadmill for a few minutes. Repeat until the walking beltis properly tightened.b2ÓÐ3ÓRear Roller Adjustment Boltsc. If the walking belt still slows when walked on, please call our <strong>Customer</strong> <strong>Service</strong> Department, toll-free.5. SYMPTOM: THE WALKING BELT IS OFF-CENTERa. If the walking belt has shifted to the left, first remove the keyand UNPLUG THE POWER CORD. Using the allen wrench,turn the left rear roller adjustment bolt clockwise, and the rightbolt counterclockwise, 1/4 of a turn each. Be careful not to overtightenthe walking belt. Plug in the power cord, insert the keyand run the treadmill for a few minutes. Repeat until the walkingbelt is centered.ab. If the walking belt has shifted to the right, first remove thekey and UNPLUG THE POWER CORD. Using the allen wrench,turn the left rear roller adjustment bolt counterclockwise, and theright bolt clockwise, 1/4 of a turn each. Be careful not to overtightenthe walking belt. Plug in the power cord, insert the keyand run the treadmill for a few minutes. Repeat until the walkingbelt is centered.bc. If the walking belt slips when walked on, first remove the keyand UNPLUG THE POWER CORD. Using the allen wrench,turn both rear roller adjustment bolts clockwise, 1/4 of a turn.When the walking belt is correctly tightened, you should be ableto lift each side of the walking belt 2 to 3 inches off the walkingplatform. Be careful to keep the walking belt centered. Plug inthe power cord, insert the key and run the treadmill for a fewminutes. Repeat until the walking belt is properly tightened.c13
CONDITIONING GUIDELINESAerobic ExerciseWARNING: Before beginningthis or any exercise program, consult yourphysician. This is especially important for individualsover the age of 35 or individualswith pre-existing health problems.The following guidelines will help you to plan your exerciseprogram. RememberÑthese are general guidelinesonly. For more detailed exercise information, obtaina reputable book or consult your physician.EXERCISE INTENSITYWhether your goal is to burn fat or to strengthen yourcardiovascular system, the key to achieving the desiredresults is to exercise with the proper intensity. Theproper intensity level can be found by using your heartrate as a guide. The chart below shows recommendedheart rates for fat burning and aerobic exercise.If your goal is to strengthen your cardiovascular system,your exercise must be Òaerobic.Ó Aerobic exerciseis activity that requires large amounts of oxygen forprolonged periods of time. This increases the demandon the heart to pump blood to the muscles, and on thelungs to oxygenate the blood. For aerobic exercise,adjust the speed and incline of the treadmill until yourheart rate is near the highest number in your trainingzone. It may also be helpful to set the speed control onthe console to AEROBIC to help you maintain theproper intensity level. (See page 9.)High Performance Athletic ConditioningIf your goal is high performance athletic conditioning,set the speed control on the console to PERFOR-MANCE to help you maintain the proper intensity level.(See page 9.) Note: During the first few weeks of yourexercise program, keep your heart rate near the lowend of your training zone.HOW TO MEASURE YOUR HEART RATETo find the proper heart rate for you, first find your ageat the bottom of the chart (ages are rounded off to thenearest ten years). Next, find the three numbers at thetop of your age. The three numbers are your Òtrainingzone.Ó The lower two numbers are recommendedheart rates for fat burning; the higher number is therecommended heart rate for aerobic exercise.Fat BurningTo burn fat effectively, you must exercise at a relativelylow intensity level for a sustained period of time. Duringthe first few minutes of exercise, your body uses easilyaccessible carbohydrate calories for energy. Only afterthe first few minutes does your body begin to usestored fat calories for energy. If your goal is to burn fat,adjust the speed and incline of the treadmill until yourheart rate is near one of the lower two numbers in yourtraining zone. It may also be helpful to set the speedcontrol on the console to FAT BURN to help you maintainthe proper intensity level. (See page 9.)To measure yourheart rate, stop exercisingand placetwo fingers on yourwrist as shown.Take a six-secondheartbeat count,and multiply the resultby ten to findyour heart rate. (A six-second count is used becauseyour heart rate drops quickly when you stop exercising.)If your heart rate is too high or too low, adjust thespeed or incline of the treadmill accordingly.WORKOUT GUIDELINESA well-rounded workout includes the following threeimportant parts:A Warm-upStart each workout with 5 to 10 minutes of stretchingand light exercise (see SUGGESTED STRETCHES onpage 15). A proper warm-up increases your bodytemperature, heart rate, and circulation in preparationfor exercise.14
Training Zone ExerciseAfter warming up, increase the intensity of your exerciseuntil your pulse is in your training zone for 20 to60 minutes. (During the first few weeks of your exerciseprogram, do not keep your pulse in your trainingzone for longer than 20 minutes.) Breathe regularlyand deeply as you exerciseÑnever hold your breath.A Cool-downFinish each workout with 5 to 10 minutes of stretchingto cool down. This will increase the flexibility of yourmuscles and will help to prevent post-exercise problems.EXERCISE FREQUENCYTo maintain or improve your condition, complete threeworkouts each week, with at least one day of rest betweenworkouts. After a few months, you may completeup to five workouts each week if desired.The key to success is to make exercise a regular andenjoyable part of your everyday life.SUGGESTED STRETCHESThe correct form for several basic stretches is shown at the right.Move slowly as you stretchÑnever bounce.11. Toe Touch StretchStand with your knees bent slightly and slowly bend forward fromyour hips. Allow your back and shoulders to relax as you reachdown toward your toes as far as possible. Hold for 15 counts,then relax. Repeat 3 times. Stretches: Hamstrings, back of knees,and back.22. Hamstring StretchSit with one leg extended. Bring the sole of the opposite foot towardyou and rest it against the inner thigh of your extended leg.Reach toward your toes as far as possible. Hold for 15 counts,then relax. Repeat 3 times for each leg. Stretches: Hamstrings,lower back, and groin.33. Calf/Achilles StretchWith one leg in front of the other, reach forward and place yourhands against a wall. Keep your back leg straight and your backfoot flat on the floor. Bend your front leg, lean forward and moveyour hips toward the wall. Hold for 15 counts, then relax. Repeat3 times for each leg. To cause further stretching of the achillestendons, bend your back leg as well. Stretches: Calves, achillestendons, and ankles.44. Quadriceps StretchWith one hand against a wall for balance, reach back and graspone foot with your other hand. Bring your heel as close to yourbuttocks as possible. Hold for 15 counts, then relax. Repeat 3times for both legs. Stretches: Quadriceps and hip muscles.55. Inner Thigh StretchSit with the soles of your feet together and your knees outward.Pull your feet toward your groin area as far as possible. Hold for15 counts, then relax. Repeat 3 times. Stretches: Quadriceps andhip muscles.15
PART LISTÑModel No. PFTL39101R1000AKey No. Qty. Description Key No. Qty. Description1 1 Key/Clip2 2 Handrail3 6 Electronic Screw4 2 Hood Screw (Front)5 2 Rear Isolator Screw6 1 Console Base7 1 Speed Control Knob8 1 Speed Potentiometer9 2 Battery Cover10 18 Isolator Screw11* 1 Console Assembly12 1 Storage Latch13 4 Handrail Screw14 1 Upright15 2 Handrail Bolt16 5 Washer17 1 Motor Belt18 1 Motor Pivot Nut19* 1 Motor/Pulley/Flywheel/Fan20 1 Pulley/Flywheel/Fan21 1 Motor22 4 Motor Tension Bolt/<strong>Inc</strong>line Bolt23 1 Storage Latch Spacer24 1 Motor Tension Star Washer25 1 Motor Swivel Bolt26 1 Wire Harness27 2 Ground Wire Screw28 1 Hood29 1 Hood Shield30 10 Screw31 1 Latch Decal32 8 Frame Pivot Washer33 2 Frame Pivot Bolt34 2 Extension Leg Screw35 4 Belt Guide Screw36 4 Base Pad37 2 Wheel Bolt38 2 Wheel39 8 Wheel Nut/Base Pivot Nut40 1 Controller41 2 Extension Leg42 1 Circuit Breaker43 1 Power Cord Grommet44 1 Power Cord45 1 Upright Spacer (Left)46 4 Isolator47 4 Belly Pan Fastener48 1 Choke49 1 Motor Locknut50 2 Belt Guide51 1 Belly Pan52 2 Releasable Tie53 1 Cable Tie Clamp54 1 Motor Belly Pan55 1 7 1/2Ó Cable Tie56 4 8Ó Cable Tie57 1 <strong>Inc</strong>line Motor Bolt58 1 <strong>Inc</strong>line Bracket59 6 Console Screw60 1 Endcap (Right)61 1 <strong>Inc</strong>line Motor62 3 <strong>Inc</strong>line Leg Nut63* 2 Extension Leg Assembly64 2 <strong>Inc</strong>line Wheel Bolt65 2 <strong>Inc</strong>line Wheel66 1 1Ó Grommet67 1 Endcap (Left)68 1 Ground Wire69 1 <strong>Inc</strong>line Leg70 1 Frame71 2 Rear Roller Adj. Bolt72 1 Rear Roller Endcap73 1 Allen Wrench74 2 Rubber Ring75 2 Foot Rail76 1 Rear Roller77 4 Platform Screw78 1 Catch79 1 Walking Platform80 1 Walking Belt81 1 Front Roller Adjustment Bolt82 1 Clip Screw83 1 Motor Tension Washer84 1 Sensor Clip85 1 Front Roller/Pulley86 1 Reed Switch87 1 Magnet88 8 Latch Screw/Endcap Screw/Console Base Screw89 1 <strong>Inc</strong>line Wire# 1 8Ó White Wire, M/F# 1 4Ó Red Wire, M/F# 1 4Ó Blue Wire, M/F# 1 UserÕs Manual* <strong>Inc</strong>ludes all parts shown in the box# These parts are not illustrated
4610461030294230888867608859595935643151737271 16 7116472768472265696264653922396157 58 6222391036303030543030363030301616891678911*411288171819*2521202283 2436308437398638878545777716812333456275352355048323347980777757678303249555391670403434439461046108275268874747563*14503 66363037383963*4132151323215102844102332323213EXPLODED DRAWINGÑModel No. PFTL39101 R1000A
ORDERING REPLACEMENT PARTSTo order replacement parts, call our <strong>Customer</strong> <strong>Service</strong> Department toll-free at 1-800-999-3756, Monday throughFriday, 6 a.m. until 6 p.m. Mountain Time (excluding holidays). When ordering parts, please be prepared to givethe following information:¥ The MODEL NUMBER OF THE PRODUCT (PFTL39101).¥ The NAME OF THE PRODUCT (PROFORM¨ 385S treadmill).¥ The SERIAL NUMBER OF THE PRODUCT (see the front cover of this manual).¥ The KEY NUMBER AND DESCRIPTION OF THE PART(S) (see the EXPLODED DRAWING and PART LISTattached in the center of this manual).If possible, place the treadmill near your telephone for easy reference when calling.PROFORM is a registered trademark of <strong>ICON</strong> <strong>Health</strong> & <strong>Fitness</strong>, <strong>Inc</strong>.LIMITED WARRANTY<strong>ICON</strong> <strong>Health</strong> & <strong>Fitness</strong>, <strong>Inc</strong>. (<strong>ICON</strong>), warrants this product to be free from defects in workmanship andmaterial, under normal use and service conditions, for a period of ninety (90) days from the date of purchase.This warranty extends only to the original purchaser. <strong>ICON</strong>'s obligation under this warranty is limitedto replacing or repairing, at <strong>ICON</strong>'s option, the product at one of its authorized service centers. Allproducts for which warranty claim is made must be received by <strong>ICON</strong> at one of its authorized servicecenters with all freight and other transportation charges prepaid, accompanied by sufficient proof of purchase.All returns must be pre-authorized by <strong>ICON</strong>. This warranty does not extend to any product ordamage to a product caused by or attributable to freight damage, abuse, misuse, improper or abnormalusage or repairs not provided by an <strong>ICON</strong> authorized service center, to products used for commercial orrental purposes, or to products used as store display models. No other warranty beyond that specificallyset forth above is authorized by <strong>ICON</strong>.<strong>ICON</strong> is not responsible or liable for indirect, special or consequential damages arising out of or in connectionwith the use or performance of the product or damages with respect to any economic loss, lossof property, loss of revenues or profits, loss of enjoyment or use, costs of removal, installation or otherconsequential damages of whatsoever nature. Some states do not allow the exclusion or limitation of incidentalor consequential damages. Accordingly, the above limitation may not apply to you.The warranty extended hereunder is in lieu of any and all other warranties and any implied warranties ofmerchantability or fitness for a particular purpose is limited in its scope and duration to the terms setforth herein. Some states do not allow limitations on how long an implied warranty lasts. Accordingly,the above limitation may not apply to you.This warranty gives you specific legal rights. You may also have other rights which vary from state to state.<strong>ICON</strong> HEALTH & FITNESS, INC., 1500 S. 1000 W., LOGAN, UT 84321-9813Part No. 170715 R1000APrinted in USA © 2000 <strong>ICON</strong> <strong>Health</strong> & <strong>Fitness</strong>, <strong>Inc</strong>.


