

petl38590 - proform 385ex - Fitness Equipment
petl38590 - proform 385ex - Fitness Equipment
petl38590 - proform 385ex - Fitness Equipment

You also want an ePaper? Increase the reach of your titles
YUMPU automatically turns print PDFs into web optimized ePapers that Google loves.
15. Never start the treadmill whilst you are standingon the walking belt. Always hold thehandrails whilst using the treadmill.16. The treadmill is capable of high speeds.Adjust the speed in small increments to avoidsudden jumps in speed.17. Never leave the treadmill unattended whilst itis running. Always remove the key when thetreadmill is not in use.18. Do not attempt to raise, lower, or move thetreadmill until it is properly assembled. (SeeASSEMBLY on page 5, and HOW TO MOVETHE TREADMILL on page 11.) You must beable to safely lift 45 pounds (20 kg) in order toraise, lower, or move the treadmill.19. Do not change the incline of the treadmill byplacing objects under the treadmill.20. When folding or moving the treadmill, makesure that the storage latch is fully closed.21. Inspect and tighten all parts of the treadmillregularly.22. Never insert or drop any object into any opening.23. DANGER: Always unplug the power cord beforeperforming the maintenance and adjustmentprocedures described in this manual.Never remove the motor hood unless instructedto do so by an authorised servicerepresentative. Servicing other than the proceduresin this manual should be performedby an authorised service representative only.24. This treadmill is intended for in-home useonly. Do not use this treadmill in any commercial,rental, or institutional setting.25. The pulse sensor is not a medical device.Various factors, including the userÕs movement,may affect the accuracy of heart ratereadings. The pulse sensor is intended onlyas an exercise aid in determining heart ratetrends in general.WARNING: Before beginning this or any exercise program, consult your physician. Thisis especially important for persons over the age of 35 or persons with pre-existing health problems.Read all instructions before using. ICON assumes no responsibility for personal injury or propertydamage sustained by or through the use of this product.SAVE THESE INSTRUCTIONSThe decal shown at the right has beenplaced on your treadmill. If the decal ismissing, or if it is not legible, pleasecall our Customer Service Departmentto order a free replacement decal (seeORDERING REPLACEMENT PARTS onthe back cover of this manual). Applythe decal in the location shown.3
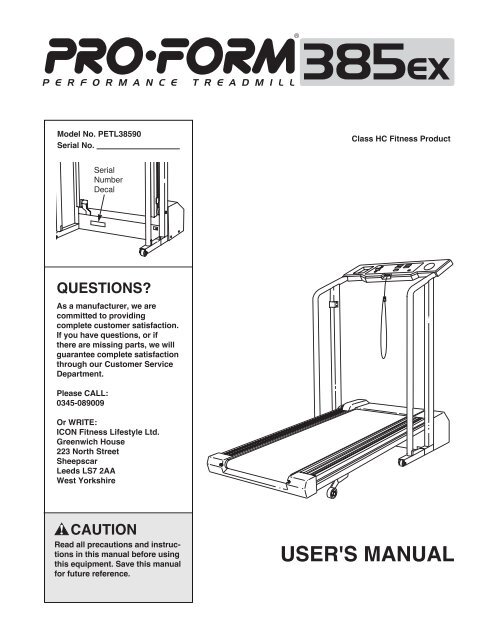
BEFORE YOU BEGINThank you for selecting the PROFORM¨ 385EX treadmill.The 385EX treadmill combines advanced technologywith innovative design to let you enjoy an excellentform of cardiovascular exercise in the convenience andprivacy of your home. And when youÕre not exercising,the unique 385EX can be folded up, requiring less thanhalf the floor space of other treadmills.For your benefit, read this manual carefully beforeusing the treadmill. If you have additional questions,please call our Customer Service Department at 0345-089009. To help us assist you, please note the productmodel number and serial number before calling. Themodel number of the treadmill is PETL38590. The serialnumber can be found on a decal attached to thetreadmill (see the front cover of this manual for the location).Before reading further, please review the drawingbelow and familiarise yourself with the parts that arelabelled.ConsoleAccessory TrayHandrailStorage LatchKey/ClipWater BottleHolder (Bottlenot included)HandrailLEFT SIDERIGHT SIDEWalking BeltHoodFoot RailsFront WheelRear RollerAdjustment BoltsInclineLegCushioned WalkingPlatform4
2. Refer to HOW TO LOWER THE TREADMILL FOR USE onpage 12. Follow the instructions in step 2 to lower thetreadmill.215Plastic TieCut the plastic ties that hold the cage nuts in eachHandrail (2).Position one of the Handrails (2) on the left Upright (14).The lower end of the left Handrail should be resting againstthe bracket on the Extension Leg (41) as shown. Thread aHandrail Bolt (15) with a Handrail Washer (16) into the leftUpright and Handrail. Do not tighten the Handrail Boltyet.Make sure that the hole in the bracket on the Extension Leg(41) is aligned with the hole in the Handrail (2). Tighten anExtension Leg Screw (34) into the bracket and Handrail.34161423. With the help of a second person, hold the Console Base(6) and the other Handrail (2) near the right Upright (14)as shown. Insert the Wire Harness (26) down into the rightUpright; bend the Wire Harness, if necessary. Next, routethe Wire Harness through the bracket on the Handrail andinsert the bracket into the right Upright. Make sure thatthe Wire Harness is not pinched.3Bracket2Bracket 41626144. Thread a Handrail Bolt (15) with a Handrail Washer (16)into the right Upright (14) and the right Handrail (2). Donot tighten the Handrail Bolt yet.Make sure that the hole in the bracket on the ExtensionLeg (41) is aligned with the hole in the Handrail (2).Tighten an Extension Leg Screw (34) into the bracket andHandrail.42151614345. Attach the Console Base (6) to the Handrails (2) with fourHandrail Screws (4).541BracketTighten all parts used in this step and in steps 2 and 4.264624
6. Attach the Storage Latch (12) to the left Upright (14) withtwo Latch Screws (13). Be careful not to overtighten theScrews.61412137. Make sure that all parts are tight before you use thetreadmill. Note: The ratchet screws shown at the far rightare factory set and should not be adjusted.7Some parts may be left over after assembly is completed.Save the included allen wrench for adjusting the walkingbelt. To protect the floor or carpet from damage, place a matunder the treadmill.Ratchet ScrewsOPERATION AND ADJUSTMENTTHE PERFORMANT LUBE TM WALKING BELTYour treadmill features a walking belt coated with PERFORMANT LUBE TM , a high-performance lubricant. IMPOR-TANT: Never apply silicone spray or other substances to the walking belt or the walking platform. They willdeteriorate the walking belt and cause excessive wear.HOW TO PLUG IN THE POWER CORDThis product must be earthed. If it should malfunction or breakdown, earthing provides a path of least resistance for electric currentto reduce the risk of electric shock. This product is equippedwith a cord having an equipment-earthing conductor and a earthingplug. Plug one end of the cord into the treadmill. Plug thepower cord into an appropriate outlet that is properly installedand earthed in accordance with all local codes andordinances.DANGER: Improper connection of theequipment-earthing conductor can result in an increasedrisk of electric shock. Check with a qualifiedelectrician or serviceman if you are in doubt as towhether the product is properly earthed. Do not modifythe plug provided with the productÑif it will not fitthe outlet, have a proper outlet installed by a qualifiedelectrician.FUSEDUse only a power cord type H05VV-F with a conductor of at least 1mm 2 , with a country recognised plug and anappliance coupler.7
DIAGRAM OF THE CONSOLEDisplaysOn/ResetButtonSpeed ControlClipKeyThumb PulseSensorCAUTION: Before operating theconsole, read the following precautions.¥ Do not stand on the walking belt when turningon the power.¥ Always wear the clip (see the drawing above)whilst using the treadmill. When the key isremoved from the console, the walking belt willstop.¥ Adjust the speed in small increments.¥ To reduce the possibility of electric shock,keep the console dry. Avoid spilling liquids onthe console. Use only a sealable water bottle.BATTERY INSTALLATIONThe console requiresthree "AA"batteries (not included).Alkalinebatteries are recommended.To installbatteries,open the batterycover under theconsole. Pressthree batteriesBatteryCoverinto the battery compartment. Make sure that the negativeends of the batteries (marked ÒÐÓ) are touchingthe springs. Close the battery cover.STEP BY STEP CONSOLE OPERATIONBatteriesFollow the steps below and on page 9 to operate theconsole.Note: The console can display distance and speed ineither kilometres or miles. (See HOW TO SELECTKILOMETRES OR MILES on page 10.)1Insert the key fully into the power switch.Note: Inserting the keywill not turn on the displays.The displays willturn on when the on/resetbutton is pressed or whenthe walking belt isstarted. If you just installedbatteries, the displayswill already be on.Before operating the console, make sure that thepower cord is properly plugged in. (See HOW TOPLUG IN THE POWER CORD on page 7.)8Next, step onto the foot rails of the treadmill. Find theclip attached to the key (see the drawing above), andslide the clip onto the waistband of your clothing.
23Reset the speed control.Slide the speed controldown until it stops. Note:Each time the walkingbelt is stopped, thespeed control must bemoved to the lowest positionbefore the walkingbelt can berestarted.Start the walking belt.After you have moved the speed control to the lowestposition, slowly slide it upward until the walkingbelt begins to move at slow speed. Carefully steponto the walking belt and begin exercising. Changethe speed of the walking belt as desired by slidingthe speed control.To stop the walking belt, step onto the foot rails andslide the speed control to the lowest position.5Measure your pulse, if desired.To use the pulse sensor,stand on the footrails of the treadmilland place your thumbon the pulse sensoras shown. The pulsesensor is pressure-activated;fully press itdown. Do not presstoo hard, or the circulationin yourthumb will be restricted,and yourpulse will not be detected.Next, raiseIndicatorPulseSensoryour thumb slightly until the heart-shaped indicatorin the Calories/Fat Calories display flashessteadily. Hold your thumb at this level. After 5 to 10seconds, your pulse will be shown. Hold yourthumb on the pulse sensor for another 15 secondsfor the most accurate reading.4Follow your progress with the monitor displays.TIME displayÑThisdisplay shows the totaltime that you havewalked or run on thetreadmill.DISTANCE displayÑThis display shows thetotal distance that youhave walked or run.SPEED displayÑThisdisplay shows the speedof the walking belt.6If the displayed pulse appears to be too high or toolow, or if your pulse is not displayed, lift your thumboff the pulse sensor and allow the display to reset.Press down again on the sensor as described above.Make sure that your thumb is positioned as shown,and that you are applying the proper amount ofpressure to the pulse sensor. Try the pulse sensorseveral times until you become familiar with it.Remember to stand still whilst measuring yourpulse.CAUTION: The pulse sensor is not a medicaldevice. Various factors, including the user'smovement, may affect the accuracy of heart ratereadings. The pulse sensor is intended only asan exercise aid in determining heart rate trendsin general.When you are finished exercising, stop thewalking belt and remove the key.CALORIES/FATCALORIES displayÑThis display shows theapproximate numbersof calories and fat caloriesyou have burned.(See FAT BURNING on page 15 for an explanationof fat calories.) Every seven seconds, the displaywill change from one number to the other. Arrows inthe display will indicate which number is currentlyshown. Note: This display also shows your pulsewhen the pulse sensor is used (see step 5 below).Step onto the foot rails, stop the walking belt, andremove the key from the console. Store the key in asecure place. After the key is removed, the displayswill remain on for about five minutes.Note: Any time that the walking belt is stoppedand no console buttons are pressed for fiveminutes, the displays will automatically turn offin order to conserve the batteries.9
HOW TO CHANGE THE INCLINE OF THETREADMILLThe incline of the treadmill can be changed by raisingor lowering the back end. Before changing the incline,remove the key and unplug the power cord.Hold the rear roller cover with both hands. When theback end of the treadmill is in the lowest position, theincline is about 10%. Raise the back end until it clicksinto position. (Note: It may be necessary to shake thetreadmill slightly so that it clicks into position.) The inclinewillthen beabout 5%.Raise theback endagain until itclicks intoposition.The inclinewill then beabout 3%.To lower theHold the RearRoller Coverin these locationsInclineLegback end, first raise it past the highest position, andthen lower it. CAUTION: Before exercising, push onthe back of the treadmill to make sure that the inclinelegs are locked in position. Do not place objectsunder the treadmill to change the incline;change the incline only as described above.HOW TO SELECT KILOMETRES AND MILESThe console can display distance and speed in eitherkilometres or miles. To change the unit of measurement,first UNPLUG THE POWER CORD. Next, removethe six screws attaching the console to the consolebase. Lift the console a few inches, being carefulnot to pull on the wires, and turn the console over.Locate the small switch on the back of the console.Move the switch upward or downward to select kilometresor miles. Re-attach the console to the consolebase. After changing the unit of measurement, removeone of the batteries from the console forabout five seconds and then reinsert it. This willreset the console.ConsoleScrewsScrews10
HOW TO FOLD AND MOVE THE TREADMILLHOW TO FOLD THE TREADMILL FOR STORAGEBefore folding the treadmill, unplug the power cord. Caution:You must be able to safely lift 45 pounds(20 kg) in order to raise, lower, or move the treadmill.1. Hold the treadmill with your hands in the locations shownat the right. To decrease the possibility of injury, bendyour legs and keep your back straight. As you raisethe treadmill, make sure to lift with your legs ratherthan your back. Raise the treadmill about halfway to thevertical position.2. Move your right hand to the position shown at the right,and hold the treadmill firmly. Raise the treadmill until thestorage latch locks over the catch. Make sure that thestorage latch closes fully over the catch.To protect the floor or carpet from damage, place amat under the treadmill. Keep the treadmill out of directsunlight. Do not leave the treadmill in the storageposition in temperatures above 34 o C.StorageLatchCatchClosedHOW TO MOVE THE TREADMILLBefore moving the treadmill, convert the treadmill to the storageposition as described above. Make sure that the storagelatch is locked fully over the catch.1. Hold the upper ends of the handrails. Place one foot onone of the front wheels as shown.2. Tilt the treadmill back until it rolls freely on the front wheels.Carefully move the treadmill to the desired location. Nevermove the treadmill without tipping it back, or the basepads may come off. To reduce the risk of injury, useextreme caution whilst moving the treadmill. Do notattempt to move the treadmill over an uneven surface.3. Place one foot on the base, and carefully lower the treadmilluntil it is resting in the storage position.BaseFront Wheels11
HOW TO LOWER THE TREADMILL FOR USE1. Hold the upper end of the treadmill with your right hand asshown. Using your left hand, slide open the storage latch.Pivot the treadmill until the frame and the foot rail are pastthe storage latch.OpenedStorageLatch2. Hold the treadmill firmly with both hands, and lower thetreadmill to the floor. To decrease the possibility of injury,bend your legs and keep your back straight.12
MAINTENANCE AND TROUBLE-SHOOTINGMost treadmill problems can be solved by following the steps below. Find the symptom that applies, andfollow the steps listed. If further assistance is needed, please call our Customer Service Department.PROBLEM: The power does not turn onSOLUTION: a. Make sure that the power cord is plugged into a surge protector, and that the surge protector isplugged into a properly earthed outlet. (See HOW TO PLUG IN THE POWER CORD on page 7.)If you need an extension cord, use only a 3-conductor, 14 gauge (1mm 2 ) cord that is no longerthan 5 feet.b. After the power cord has been plugged in, make sure that the key is fully inserted into the console.(See step 1 on page 8.)c. Check the circuit breaker located on the treadmillnear the power cord. If the switch protrudes asshown, the circuit breaker has tripped. To reset thecircuit breaker, wait for five minutes and then pressthe switch back in.cTrippedTrippedResetResetPROBLEM: The power turns off during useSOLUTION: a. Check the circuit breaker located on the treadmill frame near the power cord (see 1. c. above). Ifthe circuit breaker has tripped, wait for five minutes and then press the switch back in.b. Make sure that the power cord is plugged in.c. Remove the key from the console. Reinsert the key fully into the console. (See step 1 on page 8.)d. If the treadmill still will not run, please call our Customer Service Department.PROBLEM: The displays of the console do not function properlySOLUTION: a. Check the batteries in the console. See BATTERY INSTALLATION on page 8. Most problems arethe result of drained batteries.b. Remove the key from the console and UNPLUG THEPOWER CORD. Remove the screws from the hood.Carefully remove the hood. Locate the Reed Switch(86) and the Magnet (87) on the left side of the Pulley(85). Turn the Pulley until the Magnet is aligned withthe Reed Switch. Make sure that the gap betweenthe Magnet and the Reed Switch is about 3 mm. Ifnecessary, loosen the Screw (27) and move the ReedSwitch slightly. Retighten the Screw. Re-attach thehood, and run the treadmill for a few minutes to checkfor a correct speed reading.3 mm 85868727TopView13
PROBLEM: The walking belt slows when walked onSOLUTION: a. If you need an extension cord is needed, use only a 3- conductor, 14-gauge (1mm 2 ) cord that isno longer than 5 feet (1.5 meters).b. If the walking belt is overtightened, treadmill performancemay decrease and the walking belt may bepermanently damaged. Remove the key and UN-PLUG THE POWER CORD. Using the allen wrench,turn both rear roller adjustment bolts counterclockwise,1/4 of a turn. When the walking belt is properlytightened, you should be able to lift each side of thewalking belt 5 to 7 cm off the walking platform. Becareful to keep the walking belt centred. Plug in thepower cord, insert the key and run the treadmill for afew minutes. Repeat until the walking belt is properlytightened.b5Ð7 cmRear Roller Adjustment Boltsc. If the walking belt still slows when walked on, please call our Customer Service Department.PROBLEM: The walking belt is off-centre when walked onSOLUTION: a. If the walking belt has shifted to the left, first removethe key and UNPLUG THE POWER CORD. Usingthe allen wrench, turn the left rear roller adjustmentbolt clockwise, and the right bolt counterclockwise,1/4 of a turn each. Be careful not to overtighten thewalking belt. Plug in the power cord, insert the keyand run the treadmill for a few minutes. Repeat untilthe walking belt is centred.ab. If the walking belt has shifted to the right, first removethe key and UNPLUG THE POWER CORD. Usingthe allen wrench, turn the left rear roller adjustmentbolt counterclockwise, and the right bolt clockwise,1/4 of a turn each. Be careful not to overtighten thewalking belt. Plug in the power cord, insert the keyand run the treadmill for a few minutes. Repeat untilthe walking belt is centred.bPROBLEM: The walking belt slips when walked onSOLUTION: a. If the walking belt slips when walked on, first removethe key and UNPLUG THE POWER CORD. Usingthe allen wrench, turn both rear roller adjustment boltsclockwise, 1/4 of a turn. When the walking belt is correctlytightened, you should be able to lift each side ofthe walking belt 5 to 7 cm off the walking platform. Becareful to keep the walking belt centred. Plug in thepower cord, insert the key and carefully walk on thetreadmill for a few minutes. Repeat until the walkingbelt is properly tightened.a14
CONDITIONING GUIDELINESWARNING: Before beginning thisor any exercise program, consult your physician.This is especially important for individualsover the age of 35 or individuals with preexistinghealth problems.The pulse sensor is not a medical device.Various factors, including the userÕs movement,may affect the accuracy of heart ratereadings. The pulse sensor is intended onlyas an exercise aid in determining heart ratetrends in general.The following guidelines will help you to plan your exerciseprogram. RememberÑthese are general guidelinesonly. For more detailed exercise information, obtaina reputable book or consult your physician.EXERCISE INTENSITYWhether your goal is to burn fat or to strengthen yourcardiovascular system, the key to achieving the desiredresults is to exercise with the proper intensity.The proper intensity level can be found by using yourheart rate as a guide. The chart below shows recommendedheart rates for fat burning and aerobic exercise.(This chart is also found on the console.)accessible carbohydrate calories for energy. Only afterthe first few minutes does your body begin to usestored fat calories for energy. If your goal is to burn fat,adjust the speed and incline of the treadmill until yourheart rate is near one of the lower two numbers in yourtraining zone.Aerobic ExerciseIf your goal is to strengthen your cardiovascular system,your exercise must be Òaerobic.Ó Aerobic exerciseis activity that requires large amounts of oxygen forprolonged periods of time. This increases the demandon the heart to pump blood to the muscles, and on thelungs to oxygenate the blood. For aerobic exercise,adjust the speed and incline of the treadmill until yourheart rate is near the highest number in your trainingzone.WORKOUT GUIDELINESA well-rounded workout includes the following threeimportant parts:A Warm-upStart each workout by warming up for 5 to 10 minutes.Begin with slow, controlled stretches, and progress tomore rhythmic stretches to increase your body temperature,heart rate, and circulation in preparation forstrenuous exercise.Training Zone ExerciseAfter warming up, increase the intensity of your exerciseuntil your heart rate is in your training zone for 20to 60 minutes. (During the first few weeks of your exerciseprogram, do not keep your heart rate in your trainingzone for longer than 20 minutes.) Breathe regularlyand deeply as you exerciseÑnever hold your breath.A Cool-downTo find the proper heart rate for you, first find your ageat the top of chart (ages are rounded off to the nearestten years). Next, find the three numbers below yourage. The three numbers are your Òtraining zone.Ó Thelower two numbers are recommended heart rates forfat burning; the higher number is the recommendedheart rate for aerobic exercise.Fat BurningTo burn fat effectively, you must exercise at a relativelylow intensity level for a sustained period of time. Duringthe first few minutes of exercise, your body uses easilyFinish each workout with 5 to 10 minutes of stretchingto cool down. This will increase the flexibility of yourmuscles and will help to prevent post-exercise problems.EXERCISE FREQUENCYTo maintain or improve your condition, complete threeworkouts each week, with at least one day of rest betweenworkouts. After a few months, you may completeup to five workouts each week if desired.The key to success is to make exercise a regular andenjoyable part of your everyday life.15
PART LISTÑModel No. PETL38590R0599AKey No. Qty.DescriptionKey No. Qty.Description1 1 Key/Clip2 2 Handrail3 2 Cage Nut4 10 Hood/Handrail Screw5 2 Rear Isolator Screw6 1 Console Base7 1 Speed Control Knob8 1 Speed Potentiometer9 1 Battery Cover10 8 Isolator Screw11* 1 Console Assembly12 1 Storage Latch13 10 Latch Screw14 1 Upright/Base15 2 Handrail Bolt16 7 Handrail Washer17 1 Motor Belt18 1 Motor Swivel Nut19* 1 Motor/Pulley/Flywheel/Fan20 1 Pulley/Flywheel/Fan21 1 Motor22 3 Motor Tension Bolt/Incline Bolt23 1 Motor Tension Washer24 1 Motor Tension Star Washer25 1 Motor Swivel Bolt26 1 Wire Harness27 12 Ground Wire/Electronic Screw28 1 Hood29 1 Hood Shield30 10 Screw/Handrail Screw31 1 Latch Decal32 2 Frame Pivot Washer33 2 Frame Pivot Bolt34 4 Extension Leg Screw35 1 Cable Clamp36 6 Base Pad37 2 Wheel Bolt38 2 Wheel39 7 Wheel Nut/Base Pivot Nut40 1 Controller41* 2 Extension Leg42 1 Circuit Breaker43 1 Left Foot Rail44 1 Receptacle45 1 Left Upright Spacer46 4 Isolator47 14 Belly Pan Fastener48 1 Choke49 1 Motor Locknut50 2 Belt Guide51 1 Belly Pan52 4 Isolator Spacer53 1 Cable Tie Clamp54 1 Motor Belly Pan55 1 11 1/2Ó Cable Tie56 4 8Ó Cable Tie57 1 Ratchet Spring58 1 Ratchet59 6 Motor Belly Pan Screw60 1 Ratchet Spring Screw61 2 Ratchet Screw62 1 Incline Leg Plate63 2 Roller Guard64 2 Incline Wheel Bolt65 2 Incline Wheel66 2 Wheel Nut67 1 Motor Spacer68 1 Ground Wire69 1 Incline Leg70 1 Frame71 2 Rear Roller Adj. Bolt72 1 Rear Roller Endcap73 1 Allen Wrench74 1 Ferrite75 1 Right Foot Rail76 1 Rear Roller77 4 Platform Screw78 1 Latch Catch79 1 Walking Platform80 1 Walking Belt81 1 Front Roller Adjustment Bolt82 1 Shock83 1 Ratchet Pivot Bolt84 1 Sensor Clip85 1 Front Roller/Pulley86 1 Reed Switch87 1 Magnet88 2 Incline Leg Spacer (short)89 1 Incline Leg Spacer (long)90 1 Grounding Screw91 1 Grounding Nut92 1 Grounding Washer93 1 Filter94 2 Motor Pivot Bushing95 3 Plastic Washer96 1 Right Upright Spacer# 1 8Ó Green/Yellow# 1 4Ó Black, 2 Female# 1 12Ó Green/Yellow# 1 4Ó Black, Male/Female# 1 8Ó Red, Male/Female# 1 8Ó Black Wire, Pig Tail# 1 8Ó White Wire, Male/Female# 1 8Ó White Wire, 2 Female# 1 UserÕs Manual* Includes all parts shown in the box# These parts are not illustrated
46 104610227271 16 711630293065341313131344422740279324953436303738163941*27485252741432678911*41*121315161718 19*2615162521208236278437398638878545777716 81 143233343630303054595959561353275096 347980777577573317678303632555391642768706742844463633943593047465147836147 60 58 57886466896669654739 622264394788104610929022 23499494679530323352523659363591EXPLODED DRAWINGÑModel No. PETL38590R0599A
ORDERING REPLACEMENT PARTSTo order replacement parts, contact the ICON <strong>Fitness</strong> Lifestyle Ltd. office, or write:ICON <strong>Fitness</strong> Lifestyle Ltd.Greenwich House223 North StreetSheepscarLeeds LS7 2AAWest YorkshireTel: Country Code: 0345-089009Fax: 0113-2411120When ordering parts, please be prepared to give the following information:¥ The MODEL NUMBER OF THE PRODUCT (PETL38590)¥ The NAME OF THE PRODUCT (PROFORM¨ 385EX)¥ The SERIAL NUMBER OF THE PRODUCT (see the front cover of this manual)¥ The KEY NUMBER OF THE PART(S) (see the PART LIST and the EXPLODED DRAWINGattached in the centre of this manual)¥ The DESCRIPTION OF THE PART(S) (see the PART LIST and the EXPLODED DRAWINGattached in the centre of this manual).If possible, place the treadmill near your telephone for easy reference when calling.PROFORM is a registered trademark of ICON Health & <strong>Fitness</strong>, Inc.Part No. 153481 R0599APrinted in Canada © 1999 ICON Health & <strong>Fitness</strong>, Inc.


