Water Cycle Terrarium - Lesson Plan - Region of Peel
Water Cycle Terrarium - Lesson Plan - Region of Peel
Water Cycle Terrarium - Lesson Plan - Region of Peel

You also want an ePaper? Increase the reach of your titles
YUMPU automatically turns print PDFs into web optimized ePapers that Google loves.
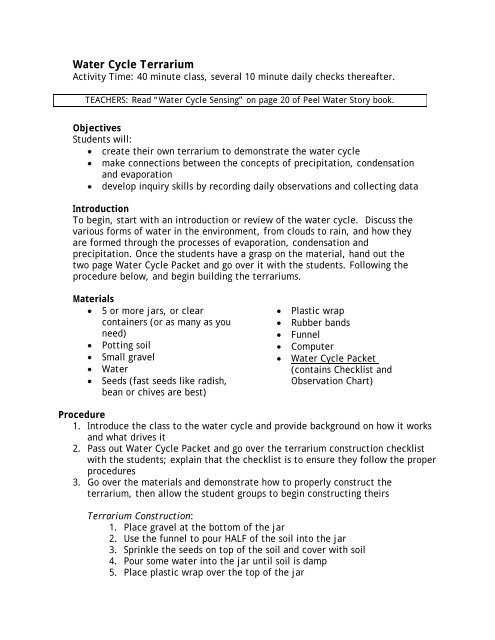
<strong>Water</strong> <strong>Cycle</strong> <strong>Terrarium</strong><br />
Activity Time: 40 minute class, several 10 minute daily checks thereafter.<br />
TEACHERS: Read “<strong>Water</strong> <strong>Cycle</strong> Sensing” on page 20 <strong>of</strong> <strong>Peel</strong> <strong>Water</strong> Story book.<br />
Objectives<br />
Students will:<br />
create their own terrarium to demonstrate the water cycle<br />
make connections between the concepts <strong>of</strong> precipitation, condensation<br />
and evaporation<br />
develop inquiry skills by recording daily observations and collecting data<br />
Introduction<br />
To begin, start with an introduction or review <strong>of</strong> the water cycle. Discuss the<br />
various forms <strong>of</strong> water in the environment, from clouds to rain, and how they<br />
are formed through the processes <strong>of</strong> evaporation, condensation and<br />
precipitation. Once the students have a grasp on the material, hand out the<br />
two page <strong>Water</strong> <strong>Cycle</strong> Packet and go over it with the students. Following the<br />
procedure below, and begin building the terrariums.<br />
Materials<br />
5 or more jars, or clear<br />
containers (or as many as you<br />
need)<br />
Potting soil<br />
Small gravel<br />
<strong>Water</strong><br />
Seeds (fast seeds like radish,<br />
bean or chives are best)<br />
Plastic wrap<br />
Rubber bands<br />
Funnel<br />
Computer<br />
<strong>Water</strong> <strong>Cycle</strong> Packet<br />
(contains Checklist and<br />
Observation Chart)<br />
Procedure<br />
1. Introduce the class to the water cycle and provide background on how it works<br />
and what drives it<br />
2. Pass out <strong>Water</strong> <strong>Cycle</strong> Packet and go over the terrarium construction checklist<br />
with the students; explain that the checklist is to ensure they follow the proper<br />
procedures<br />
3. Go over the materials and demonstrate how to properly construct the<br />
terrarium, then allow the student groups to begin constructing theirs<br />
<strong>Terrarium</strong> Construction:<br />
1. Place gravel at the bottom <strong>of</strong> the jar<br />
2. Use the funnel to pour HALF <strong>of</strong> the soil into the jar<br />
3. Sprinkle the seeds on top <strong>of</strong> the soil and cover with soil<br />
4. Pour some water into the jar until soil is damp<br />
5. Place plastic wrap over the top <strong>of</strong> the jar
6. Wrap the rubber band around the plastic wrap to hold it in place<br />
7. Place groups label on the jar<br />
4. Now that the terrarium is constructed, go over the observation sheet and<br />
explain to the students what they will be looking for when they record their<br />
observations<br />
5. Over the next few days, take some time in class to record observations about<br />
what is going on in the terrarium with a focus on the soil’s dampness, plant<br />
growth, and water<br />
6. After a week <strong>of</strong> observation, ask the students to remove the plastic wrap and<br />
feel the soil, but first allow them to formulate a hypothesis. The soil should<br />
still be damp, use this fact to ask some questions regarding the water cycle:<br />
Why is the soil still wet?<br />
Do you think the water has evaporated from the soil? Why?<br />
If it evaporated, where did it go?<br />
Did it ever rain in your terrarium? How do you know?<br />
Is there anything in your terrarium that reminds you <strong>of</strong> a cloud or<br />
cloud drops?<br />
Debrief<br />
What happened in the terrarium? Why?<br />
What did changes did you observe over the week?<br />
How does this demonstrate how the water cycle works?<br />
Resources<br />
<strong>Terrarium</strong> Checklist and <strong>Terrarium</strong> Observation Chart, see below.<br />
See Conservation Ontario’s animated <strong>Water</strong> <strong>Cycle</strong> web page:<br />
www.conservationontario.ca/resources/multimedia/animated_wetlands_cd/index.html<br />
Contents <strong>of</strong> this publication may be photocopied provided the source is acknowledged on every page by<br />
including the following <strong>Peel</strong> <strong>Water</strong> Story, Public Works Department, <strong>Region</strong> <strong>of</strong> <strong>Peel</strong>.<br />
Not to be adapted or reprinted without written permission <strong>of</strong> the Public Works Department <strong>of</strong> the<br />
<strong>Region</strong>al Municipality <strong>of</strong> <strong>Peel</strong>. Address: 10 <strong>Peel</strong> Centre Drive, Brampton, Ontario L6T 4B9<br />
<strong>Peel</strong> <strong>Water</strong> Story, Public Works Department, <strong>Region</strong> <strong>of</strong> <strong>Peel</strong><br />
2
<strong>Terrarium</strong> Construction Checklist<br />
Follow the list <strong>of</strong> instructions below to build your miniature terrarium. After you<br />
finish each step, have someone on your team check <strong>of</strong>f the box for that step.<br />
Then continue to the next step.<br />
Place gravel at the bottom <strong>of</strong> the jar<br />
Use the funnel to pour HALF <strong>of</strong> the soil into the jar<br />
Sprinkle the seeds on top <strong>of</strong> the soil and cover with soil<br />
Pour some water into the jar until soil is damp<br />
Place plastic wrap over the top <strong>of</strong> the jar<br />
Wrap the rubber band around the plastic wrap to hold it in place<br />
Place groups label on the jar<br />
<strong>Peel</strong> <strong>Water</strong> Story, Public Works Department, <strong>Region</strong> <strong>of</strong> <strong>Peel</strong><br />
3
<strong>Terrarium</strong> Observation Chart<br />
Use the chart below to write in what you see each time you observe your terrarium. Begin by<br />
writing in the date each time. Ask yourselves these questions and record your observations:<br />
What is happening in the jar? (write or draw)<br />
On which part <strong>of</strong> the jar do you see water?<br />
Is there anything new happening in the jar?<br />
Other observations?<br />
1. Date:<br />
2. Date:<br />
3. Date:<br />
4. Date:<br />
5. Date:<br />
DATES OBSERVATIONS<br />
<strong>Peel</strong> <strong>Water</strong> Story, Public Works Department, <strong>Region</strong> <strong>of</strong> <strong>Peel</strong><br />
4