
You also want an ePaper? Increase the reach of your titles
YUMPU automatically turns print PDFs into web optimized ePapers that Google loves.
MAKING THE STRINGERS (cont.)<br />
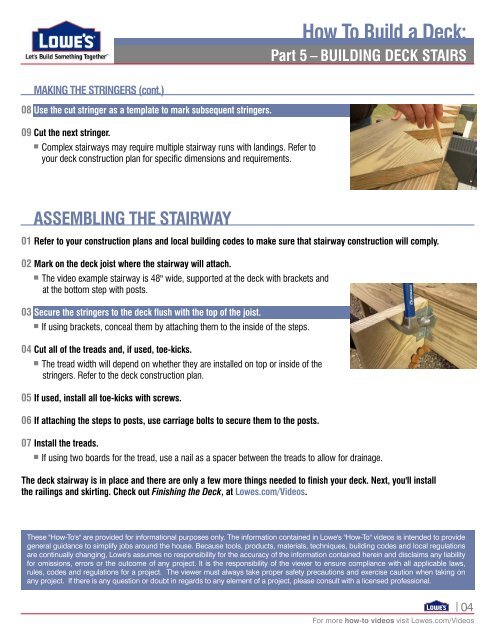
08 Use the cut stringer as a template to mark subsequent stringers.<br />
09 Cut the next stringer.<br />
Complex stairways may require multiple stairway runs with landings. Refer to<br />
your deck construction plan for specific dimensions and requirements.<br />
ASSEMBLING THE STAIRWAY<br />
<strong>How</strong> <strong>To</strong> <strong>Build</strong> a <strong>Deck</strong>:<br />
Part 5 – BUILDING DECK STAIRS<br />
01 Refer to your construction plans and local building codes to make sure that stairway construction will comply.<br />
02 Mark on the deck joist where the stairway will attach.<br />
The video example stairway is 48" wide, supported at the deck with brackets and<br />
at the bottom step with posts.<br />
03 Secure the stringers to the deck flush with the top of the joist.<br />
If using brackets, conceal them by attaching them to the inside of the steps.<br />
04 Cut all of the treads and, if used, toe-kicks.<br />
The tread width will depend on whether they are installed on top or inside of the<br />
stringers. Refer to the deck construction plan.<br />
05 If used, install all toe-kicks with screws.<br />
06 If attaching the steps to posts, use carriage bolts to secure them to the posts.<br />
07 Install the treads.<br />
If using two boards for the tread, use a nail as a spacer between the treads to allow for drainage.<br />
The deck stairway is in place and there are only a few more things needed to finish your deck. Next, you'll install<br />
the railings and skirting. Check out Finishing the <strong>Deck</strong>, at Lowes.com/Videos.<br />
These "<strong>How</strong>-<strong>To</strong>'s" are provided for informational purposes only. The information contained in <strong>Lowe's</strong> "<strong>How</strong>-<strong>To</strong>" videos is intended to provide<br />
general guidance to simplify jobs around the house. Because tools, products, materials, techniques, building codes and local regulations<br />
are continually changing, <strong>Lowe's</strong> assumes no responsibility for the accuracy of the information contained herein and disclaims any liability<br />
for omissions, errors or the outcome of any project. It is the responsibility of the viewer to ensure compliance with all applicable laws,<br />
rules, codes and regulations for a project. The viewer must always take proper safety precautions and exercise caution when taking on<br />
any project. If there is any question or doubt in regards to any element of a project, please consult with a licensed professional.<br />
04<br />
For more how-to videos visit Lowes.com/Videos