How To: INSTALL A DEADBOLT LOCK BORING THE ... - Lowe's
How To: INSTALL A DEADBOLT LOCK BORING THE ... - Lowe's
How To: INSTALL A DEADBOLT LOCK BORING THE ... - Lowe's

You also want an ePaper? Increase the reach of your titles
YUMPU automatically turns print PDFs into web optimized ePapers that Google loves.
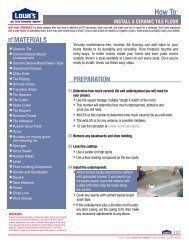
PREPARATION<br />
<strong>How</strong> <strong>To</strong>:<br />
Skill Level: INTERMEDIATE Give these projects a try if you're a confident DIYer with a good working knowledge of a variety of tools. They can take a day or more to<br />
complete. If you can build a birdhouse or install a ceiling fan, your skill level is probably appropriate.<br />
MATERIALS<br />
• Deadbolt Lock<br />
• Screwdrivers (Slotted/Standard and<br />
Cross-head/Phillips)<br />
• Batteries—for an electronic lock<br />
If the door is not pre-bored for<br />
a deadbolt:<br />
• Tape Measure<br />
• Ruler or Square<br />
• Pencil<br />
• Masking Tape<br />
• Lockset Template<br />
- Paper Template—included with<br />
most deadbolts<br />
- Door Lock Installation<br />
Kit—optional<br />
• Drill and Drill Bits<br />
• 2-1/8" and 1" Hole Saws<br />
• Hammer<br />
• Chisel<br />
• Dust Mask<br />
• Safety Glasses<br />
01 Identify the type of door in which you will install the deadbolt: wood, fiberglass,<br />
or steel.<br />
• Make sure you buy the correct tools for your type of door.<br />
• TIP: Measure the door's thickness. It should be between 1-3/8" and 1-3/4". The<br />
new deadbolt must fit doors of this dimension.<br />
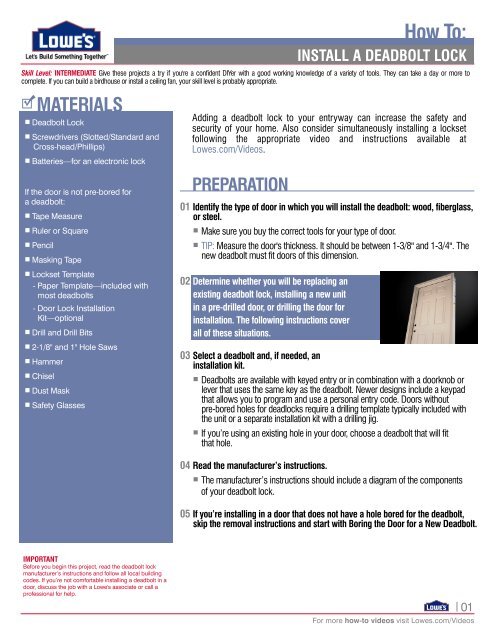
02 Determine whether you will be replacing an<br />
existing deadbolt lock, installing a new unit<br />
in a pre-drilled door, or drilling the door for<br />
installation. The following instructions cover<br />
all of these situations.<br />
<strong>INSTALL</strong> A <strong>DEADBOLT</strong> <strong>LOCK</strong><br />
Adding a deadbolt lock to your entryway can increase the safety and<br />
security of your home. Also consider simultaneously installing a lockset<br />
following the appropriate video and instructions available at<br />
Lowes.com/Videos.<br />
03 Select a deadbolt and, if needed, an<br />
installation kit.<br />
• Deadbolts are available with keyed entry or in combination with a doorknob or<br />
lever that uses the same key as the deadbolt. Newer designs include a keypad<br />
that allows you to program and use a personal entry code. Doors without<br />
pre-bored holes for deadlocks require a drilling template typically included with<br />
the unit or a separate installation kit with a drilling jig.<br />
• If you’re using an existing hole in your door, choose a deadbolt that will fit<br />
that hole.<br />
04 Read the manufacturer’s instructions.<br />
• The manufacturer’s instructions should include a diagram of the components<br />
of your deadbolt lock.<br />
05 If you’re installing in a door that does not have a hole bored for the deadbolt,<br />
skip the removal instructions and start with Boring the Door for a New Deadbolt.<br />
IMPORTANT<br />
Before you begin this project, read the deadbolt lock<br />
manufacturer’s instructions and follow all local building<br />
codes. If you’re not comfortable installing a deadbolt in a<br />
door, discuss the job with a <strong>Lowe's</strong> associate or call a<br />
professional for help.<br />
01<br />
For more how-to videos visit Lowes.com/Videos
REMOVING AN EXISTING <strong>DEADBOLT</strong> <strong>LOCK</strong><br />
01 Remove all screws that attach the existing deadbolt to the door.<br />
<strong>How</strong> <strong>To</strong>:<br />
<strong>INSTALL</strong> A <strong>DEADBOLT</strong> <strong>LOCK</strong><br />
02 Remove the lock and thumbturn assembly.<br />
03 Remove the deadbolt.<br />
04 Inspect the holes in the door for debris and clean as needed. Be sure that the new<br />
deadbolt components will fit in the existing holes.<br />
<strong>BORING</strong> <strong>THE</strong> DOOR FOR A NEW <strong>DEADBOLT</strong><br />
01 Determine the exterior location of the new deadbolt lock assembly.<br />
• Typically, it is installed between 6" and 12" above the doorknob or lever.<br />
02 Draw a horizontal line on the interior side of the door where the deadbolt will be positioned.<br />
• Mark the jamb, too. The doorjamb is the side piece of the doorframe.<br />
03 The following steps might be easier if you remove the door from the hinges and work on sawhorses.<br />
04 Select the appropriate backset, which is the distance from the edge of the door to the center of the hole you will be drilling.<br />
• Typically, it is either 2-3/8" or 2-3/4" as recommended by the deadbolt manufacturer.<br />
• Try to match the placement of your lockset.<br />
05 Place the template at the horizontal line, following the template instructions.<br />
06 Attach the template to the door.<br />
1. If you’re using the door lock installation kit, drill two 1/8" pilot holes for the screws<br />
on the door edge.<br />
2. Secure the jig to the door edge with the faceplate screws.<br />
These "<strong>How</strong>-<strong>To</strong>'s" are provided for informational purposes only. The information contained in <strong>Lowe's</strong> "<strong>How</strong>-<strong>To</strong>" videos is intended to provide<br />
general guidance to simplify jobs around the house. Because tools, products, materials, techniques, building codes and local regulations<br />
•<br />
are continually<br />
If you’re using<br />
changing,<br />
a paper<br />
<strong>Lowe's</strong><br />
template,<br />
assumes<br />
it<br />
no<br />
may<br />
responsibility<br />
help to tape<br />
for<br />
it<br />
the<br />
in<br />
accuracy<br />
place, then<br />
of the<br />
mark<br />
information<br />
the screw<br />
contained herein and disclaims any liability<br />
for omissions, holes on the errors edge or the of the outcome door. of any project. It is the responsibility of the viewer to ensure compliance with all applicable laws,<br />
rules, • codes and regulations for a project. The viewer must always take proper safety precautions and exercise caution when taking on<br />
WARNING: Wear safety glasses when using a drill with bits or a hole saw.<br />
any project. If there is any question or doubt in regards to any element of project, please consult with a licensed professional.<br />
02<br />
For more how-to videos visit Lowes.com/Videos
<strong>BORING</strong> <strong>THE</strong> DOOR FOR A NEW <strong>DEADBOLT</strong> (cont.)<br />
07 Use a 2-1/8" hole saw to drill the hole for the deadbolt lock assembly.<br />
<strong>How</strong> <strong>To</strong>:<br />
<strong>INSTALL</strong> A <strong>DEADBOLT</strong> <strong>LOCK</strong><br />
• TIP: <strong>To</strong> prevent the door from splintering, drill halfway through one side, then drill the other half from the other side of the<br />
door. It may help to drill a pilot hole if you’re template does not extend to both the interior and exterior sides of the door.<br />
08 Use a 1" hole saw to drill the deadbolt shaft hole from the door edge to the center of the 2-1/8” hole.<br />
09 Remove the template, or jig, from the door.<br />
10 Choose a faceplate.<br />
• If you’re simply replacing the deadbolt, you can save time by matching the old faceplate.<br />
• Most deadbolts come with both rounded and square-corner faceplates. You should be<br />
able to pry off the one you don’t want, then snap on the new one.<br />
• If the neither of the new faceplates match the old faceplate, you can sometimes save<br />
installation time by using the new deadbolt with the old faceplate.<br />
11 You’ll have to create a mortise, which is a slot in the edge of the door or jamb, for the faceplate. First, slide the deadbolt<br />
into the drilled hole and trace around the edge.<br />
12 Chisel the area to the proper depth so the deadbolt and faceplate are flush with the door.<br />
• Alternatively, your installation kit may have included a jig for marking the deadbolt<br />
faceplate and a router bit to cut into the wood.<br />
1. Attach the jig to the door.<br />
2. Use the router bit with a drill to cut along the grooves of the jig.<br />
3. Any excess material in the center can be removed using a hammer and chisel. Try to<br />
stay at the depth set by the router bit.<br />
13 Next, prepare the jamb. At the mark on the jamb, drill two overlapping holes, above<br />
and below the center point so you have intersecting circles.<br />
• Follow the manufacturer’s instructions for exact measurements.<br />
• Drill the holes deep enough so the deadbolt can fully extend without interference, typically to a depth of 1".<br />
• TIP: Mark the hole depth on the drill bit with a masking tape.<br />
14 Use a chisel to remove excess material from the doorjamb deadbolt hole.<br />
These "<strong>How</strong>-<strong>To</strong>'s" are provided for informational purposes only. The information contained in <strong>Lowe's</strong> "<strong>How</strong>-<strong>To</strong>" videos is intended to provide<br />
general guidance to simplify jobs around the house. Because tools, products, materials, techniques, building codes and local regulations<br />
are continually changing, <strong>Lowe's</strong> assumes no responsibility for the accuracy of the information contained herein and disclaims any liability<br />
for omissions, errors or the outcome of any project. It is the responsibility of the viewer to ensure compliance with all applicable laws,<br />
rules, codes and regulations for a project. The viewer must always take proper safety precautions and exercise caution when taking on<br />
any project. If there is any question or doubt in regards to any element of a project, please consult with a licensed professional.<br />
15 Place the strike component against the hole, trace around it and mark the screw holes.<br />
16 Drill 1/8" pilot holes for the strike screws.<br />
17 Use a chisel to create a mortise (slot) for the strike.<br />
03<br />
For more how-to videos visit Lowes.com/Videos
<strong>INSTALL</strong>ING <strong>THE</strong> NEW <strong>DEADBOLT</strong> <strong>LOCK</strong><br />
<strong>How</strong> <strong>To</strong>:<br />
<strong>INSTALL</strong> A <strong>DEADBOLT</strong> <strong>LOCK</strong><br />
01 Making sure the top is pointing upward, slide the new deadbolt into the 1” hole on the door edge.<br />
02 Attach the faceplate with screws.<br />
• Make sure the deadbolt is retracted before continuing.<br />
03 Install the lock and thumbturn assembly, making sure that the top is pointing upward.<br />
• If your deadbolt has a keypad, install it now, following the manufacturer’s instructions.<br />
1. Again, make sure the top is pointing upward and the deadbolt is retracted.<br />
2. Typically, you feed the cable over the top of the actual deadbolt and connect it to<br />
the cable on that side.<br />
04 From inside the door, install the mounting plate.<br />
• Make sure the top is pointing upward.<br />
• For keypads, connect the cable and battery.<br />
05 Install screws in the deadbolt plate and the lock and thumbturn assembly.<br />
• For keypads, install the screws, then the battery. Then tuck the battery and cables inside the unit and attach the thumbturn.<br />
06 On the jamb, if your lock included a dust box, install it now. If not, proceed to Step #07.<br />
• A dust box provides additional security against kick-in door damage.<br />
• Insert the box in the hole and secure with the included screws.<br />
07 Position the strike and attach it with screws.<br />
08 Close the door from inside and use the thumbturn to verify that the deadbolt<br />
fully extends.<br />
• Make adjustments as needed for smooth operation.<br />
• If you are installing a keypad assembly, follow additional manufacturer's instructions for programming the keyboard.<br />
Installing a new deadbolt lock is a simple way to add security to your home. For other projects with printable instructions,<br />
including how to install a lockset or door viewer, visit Lowes.com/Videos.<br />
These "<strong>How</strong>-<strong>To</strong>'s" are provided for informational purposes only. The information contained in <strong>Lowe's</strong> "<strong>How</strong>-<strong>To</strong>" videos is intended to provide<br />
general guidance to simplify jobs around the house. Because tools, products, materials, techniques, building codes and local regulations<br />
are continually changing, <strong>Lowe's</strong> assumes no responsibility for the accuracy of the information contained herein and disclaims any liability<br />
for omissions, errors or the outcome of any project. It is the responsibility of the viewer to ensure compliance with all applicable laws,<br />
rules, codes and regulations for a project. The viewer must always take proper safety precautions and exercise caution when taking on<br />
any project. If there is any question or doubt in regards to any element of a project, please consult with a licensed professional.<br />
04<br />
For more how-to videos visit Lowes.com/Videos