How To: INSTALL A DEADBOLT LOCK BORING THE ... - Lowe's
How To: INSTALL A DEADBOLT LOCK BORING THE ... - Lowe's
How To: INSTALL A DEADBOLT LOCK BORING THE ... - Lowe's

You also want an ePaper? Increase the reach of your titles
YUMPU automatically turns print PDFs into web optimized ePapers that Google loves.
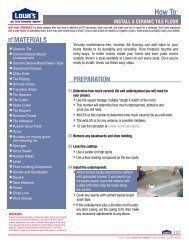
REMOVING AN EXISTING <strong>DEADBOLT</strong> <strong>LOCK</strong><br />
01 Remove all screws that attach the existing deadbolt to the door.<br />
<strong>How</strong> <strong>To</strong>:<br />
<strong>INSTALL</strong> A <strong>DEADBOLT</strong> <strong>LOCK</strong><br />
02 Remove the lock and thumbturn assembly.<br />
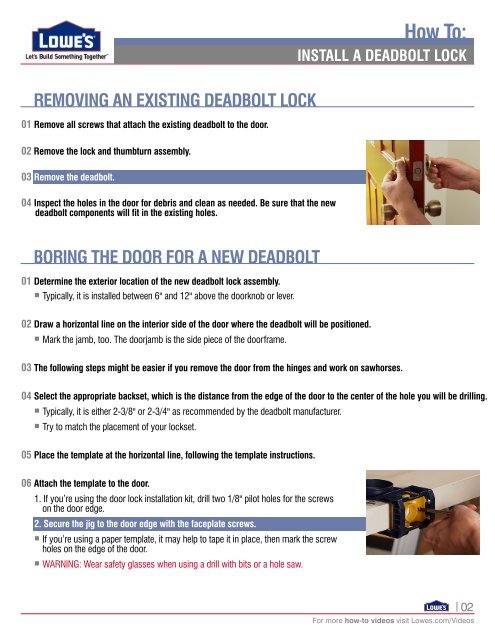
03 Remove the deadbolt.<br />
04 Inspect the holes in the door for debris and clean as needed. Be sure that the new<br />
deadbolt components will fit in the existing holes.<br />
<strong>BORING</strong> <strong>THE</strong> DOOR FOR A NEW <strong>DEADBOLT</strong><br />
01 Determine the exterior location of the new deadbolt lock assembly.<br />
• Typically, it is installed between 6" and 12" above the doorknob or lever.<br />
02 Draw a horizontal line on the interior side of the door where the deadbolt will be positioned.<br />
• Mark the jamb, too. The doorjamb is the side piece of the doorframe.<br />
03 The following steps might be easier if you remove the door from the hinges and work on sawhorses.<br />
04 Select the appropriate backset, which is the distance from the edge of the door to the center of the hole you will be drilling.<br />
• Typically, it is either 2-3/8" or 2-3/4" as recommended by the deadbolt manufacturer.<br />
• Try to match the placement of your lockset.<br />
05 Place the template at the horizontal line, following the template instructions.<br />
06 Attach the template to the door.<br />
1. If you’re using the door lock installation kit, drill two 1/8" pilot holes for the screws<br />
on the door edge.<br />
2. Secure the jig to the door edge with the faceplate screws.<br />
These "<strong>How</strong>-<strong>To</strong>'s" are provided for informational purposes only. The information contained in <strong>Lowe's</strong> "<strong>How</strong>-<strong>To</strong>" videos is intended to provide<br />
general guidance to simplify jobs around the house. Because tools, products, materials, techniques, building codes and local regulations<br />
•<br />
are continually<br />
If you’re using<br />
changing,<br />
a paper<br />
<strong>Lowe's</strong><br />
template,<br />
assumes<br />
it<br />
no<br />
may<br />
responsibility<br />
help to tape<br />
for<br />
it<br />
the<br />
in<br />
accuracy<br />
place, then<br />
of the<br />
mark<br />
information<br />
the screw<br />
contained herein and disclaims any liability<br />
for omissions, holes on the errors edge or the of the outcome door. of any project. It is the responsibility of the viewer to ensure compliance with all applicable laws,<br />
rules, • codes and regulations for a project. The viewer must always take proper safety precautions and exercise caution when taking on<br />
WARNING: Wear safety glasses when using a drill with bits or a hole saw.<br />
any project. If there is any question or doubt in regards to any element of project, please consult with a licensed professional.<br />
02<br />
For more how-to videos visit Lowes.com/Videos