New Roof Construction MANUAL - Cedar Shake and Shingle Bureau
New Roof Construction MANUAL - Cedar Shake and Shingle Bureau
New Roof Construction MANUAL - Cedar Shake and Shingle Bureau

You also want an ePaper? Increase the reach of your titles
YUMPU automatically turns print PDFs into web optimized ePapers that Google loves.
R<br />
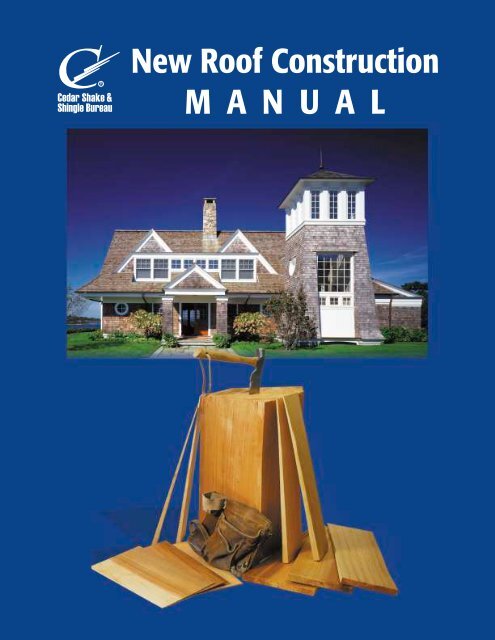
<strong>New</strong> <strong>Roof</strong> <strong>Construction</strong><br />
M A N U A L
INTRODUCTION<br />
<strong>New</strong> <strong>Roof</strong> <strong>Construction</strong> Manual<br />
This manual is intended for use with Western<br />
Red <strong>Cedar</strong> <strong>and</strong> Alaskan Yellow <strong>Cedar</strong> shake<br />
<strong>and</strong> shingle application only. Western Red<br />
<strong>Cedar</strong> <strong>and</strong> Yellow <strong>Cedar</strong> products<br />
manufactured by CSSB members are labeled<br />
with the “Certi” br<strong>and</strong> name. The species is<br />
indicated by either “Yellow” or “Red” <strong>Cedar</strong> at<br />
the top of the label. For ease of reference this<br />
TM<br />
manual refers to “Certi-label Western <strong>Cedar</strong>”<br />
<strong>and</strong> the term is understood to include both<br />
Western Red <strong>Cedar</strong> <strong>and</strong> Alaskan Yellow <strong>Cedar</strong><br />
products manufactured by CSSB members.<br />
Material for this manual has been compiled<br />
from various authoritative sources, <strong>and</strong> many<br />
of the construction methods shown herein<br />
have been developed by the shake <strong>and</strong> shingle<br />
specialists in both the United States <strong>and</strong><br />
Canada. The design <strong>and</strong> application details<br />
<strong>and</strong> methods of construction reflect current<br />
good building practice. Other options are<br />
possible but ensure that you check with your<br />
local code jurisdiction for approval.<br />
The information in this manual is<br />
not intended to supercede local<br />
building codes.<br />
<strong>Cedar</strong> <strong>Shake</strong> & <strong>Shingle</strong> <strong>Bureau</strong><br />
History<br />
On June 9, 1915, at a meeting of the Trustees<br />
of the West Coast Lumber Manufacturers<br />
Association, it was agreed to establish a<br />
branch of the association to serve those<br />
members who manufactured shingles. Our<br />
influence grew, <strong>and</strong> as we survived both the<br />
Great Depression <strong>and</strong> World War II,<br />
manufacturers continued their quality<br />
commitment. In 1963 the organization merged<br />
with the H<strong>and</strong>split <strong>Shake</strong> <strong>Bureau</strong> to become<br />
the Red <strong>Cedar</strong> <strong>Shingle</strong> & H<strong>and</strong>split<br />
<strong>Shake</strong> <strong>Bureau</strong>.<br />
Manufacturers’ product lines continued to<br />
broaden <strong>and</strong>, in 1988, the members changed<br />
the organization's name to the <strong>Cedar</strong> <strong>Shake</strong> &<br />
<strong>Shingle</strong> <strong>Bureau</strong>. In the late 1980s, mill quality<br />
control inspections were subcontracted to<br />
independent, third party quality control<br />
agencies.<br />
Each year the <strong>Cedar</strong> <strong>Shake</strong> & <strong>Shingle</strong> <strong>Bureau</strong>’s<br />
staff answer thous<strong>and</strong>s of technical questions<br />
<strong>and</strong> product selection queries. Our proud<br />
history, quality reputation <strong>and</strong> dedicated<br />
members provide excellent Certi-label<br />
cedar shake <strong>and</strong> shingle roofing <strong>and</strong><br />
siding products.<br />
TM<br />
Certi-label Products<br />
<strong>Cedar</strong> shakes <strong>and</strong> shingles manufactured by<br />
members of the <strong>Cedar</strong> <strong>Shake</strong> & <strong>Shingle</strong><br />
<strong>Bureau</strong> (”CSSB”) are the only products<br />
labeled with the ”Certi” br<strong>and</strong> name.<br />
Certi-label cedar shakes <strong>and</strong> shingles are<br />
made by experienced craftsmen who take<br />
pride in their trade <strong>and</strong> the quality of their<br />
product. Despite their varying sizes <strong>and</strong><br />
sometimes remote locations, member mills<br />
are bound together by a rigid quality code.<br />
Unannounced independent inspections<br />
conducted by accredited third party agencies<br />
ensure that product quality is maintained.<br />
Products are inspected to conform with<br />
various local, national <strong>and</strong> international codes<br />
<strong>and</strong> st<strong>and</strong>ards (contact the CSSB for specific<br />
details).<br />
Each bundle of product has the mill’s<br />
distinctive Certi-label tucked under the bundle<br />
strap. Asking for “the blue label” or “number<br />
one blue label” is not specific enough: CSSB<br />
members' products are the only ones with the<br />
Certi br<strong>and</strong> name on the label.<br />
Approved Installer Guidelines<br />
Good workmanship is crucial to the integrity<br />
of any roofing system. Installers should read<br />
this manual carefully <strong>and</strong> ensure that they<br />
follow proper workmanship practices. CSSB<br />
Approved Installers agree to follow the<br />
guidelines in this manual, or local code<br />
regulations, if stricter than the guidelines<br />
contained in this manual.<br />
Product Warranty<br />
The CSSB administers a product warranty for<br />
Certi-label product applications performed by<br />
an Approved Installer. Warrantied Certi-label<br />
products include ONLY Premium Grade <strong>and</strong><br />
Number 1 Grade materials.<br />
Note: This manual replaces all previous<br />
versions of the "<strong>Cedar</strong> <strong>Shake</strong> <strong>and</strong> <strong>Shingle</strong><br />
<strong>Bureau</strong> Design <strong>and</strong> Application Manual<br />
for <strong>New</strong> <strong>Roof</strong> <strong>Construction</strong>.”<br />
CONTENTS<br />
Certi-label Products pages 1-2<br />
General Design &<br />
Application Details pages 3-5<br />
Mansard <strong>Roof</strong> Details page 6<br />
Low Slope <strong>Roof</strong> Details page 7<br />
Hip & Ridge Details page 7<br />
<strong>Roof</strong> Juncture Details pages 8-9<br />
<strong>Roof</strong> Valley<br />
Flashing Details pages 9-10<br />
<strong>Roof</strong> Projection<br />
Flashing Details page 11<br />
<strong>Roof</strong> Fastener<br />
Guidelines page 12<br />
Ventilation Details pages 13-14<br />
Specialty <strong>Roof</strong><br />
Deck Details pages 15-16<br />
Cold <strong>Roof</strong> System<br />
Details pages 17-18<br />
High Humidity<br />
Area Details page 19<br />
Coverage &<br />
Exposure Tables page 20<br />
Care & Maintenance<br />
Overview pages 21-22<br />
Specification Guidelines pages 23-24<br />
How to Read a Certi-label page 25<br />
Cover House Photo:<br />
Architect: Shope Reno Wharton<br />
Photo: Robert Benson<br />
Cover Product Photo: John Gordon
CERTI-LABEL CEDAR SHAKES<br />
Certi-Split H<strong>and</strong>split <strong>Shake</strong>s<br />
Certi-Sawn Tapersawn <strong>Shake</strong>s<br />
Certi-Split Tapersplit<br />
Certi-Split Straight-Split<br />
Number 2 Red Label<br />
Number 3 Black Label<br />
Number 4 Undercoursing<br />
CERTI-SPLIT<br />
PREMIUM GRADE<br />
100% Edge Grain<br />
H<strong>and</strong>split Red <strong>Cedar</strong> <strong>Shake</strong>s<br />
CEDAR SHAKE & SHINGLE BUREAU<br />
THE RECOGNIZED AUTHORITY SINCE 1915<br />
SUMAS, WASHINGTON (604) 820-7700<br />
PREMIUM GRADE<br />
100% Edge Grain<br />
Tapersawn Red <strong>Cedar</strong> <strong>Shake</strong>s<br />
CEDAR SHAKE & SHINGLE BUREAU<br />
THE RECOGNIZED AUTHORITY SINCE 1915<br />
SUMAS, WASHINGTON (604) 820-7700<br />
CERTI-SPLIT<br />
PREMIUM GRADE<br />
100% Edge Grain<br />
H<strong>and</strong>split Red <strong>Cedar</strong> <strong>Shake</strong>s<br />
CEDAR SHAKE & SHINGLE BUREAU<br />
THE RECOGNIZED AUTHORITY SINCE 1915<br />
SUMAS, WASHINGTON (604) 820-7700<br />
CERTI-SPLIT<br />
PREMIUM GRADE<br />
100% Edge Grain<br />
H<strong>and</strong>split Red <strong>Cedar</strong> <strong>Shake</strong>s<br />
CEDAR SHAKE & SHINGLE BUREAU<br />
THE RECOGNIZED AUTHORITY SINCE 1915<br />
SUMAS, WASHINGTON (604) 820-7700<br />
CERTIGRADE CEDAR SHINGLES<br />
Number 1 Blue Label<br />
CERTIGRADE Red <strong>Cedar</strong> <strong>Shingle</strong>s<br />
- 100% Edge Grain - 100% All Clear -<br />
- 100% Heartwood -<br />
CEDAR SHAKE & SHINGLE BUREAU<br />
THE RECOGNIZED AUTHORITY SINCE 1915<br />
SUMAS, WASHINGTON (604) 820-7700<br />
CERTI-LABEL PRODUCTS<br />
(604) 820-7700<br />
(604) 820-7700<br />
(604) 820-7700<br />
These shakes have split faces <strong>and</strong> sawn backs. <strong>Cedar</strong> logs are first cut into<br />
desired lengths. Blanks or boards of proper thickness are split <strong>and</strong> then run<br />
diagonally through a b<strong>and</strong>saw to produce two tapered shakes from each<br />
blank. Available in Premium Grade (100% edge grain) or Number 1 Grade<br />
(Up to 20% flat grain allowed in each bundle).<br />
These shakes are sawn both sides. Premium <strong>and</strong> Number 1 Grades are the<br />
most common. Premium Grade is 100% edge grain, 100% clear <strong>and</strong> 100%<br />
heartwood. Number 1 Grade allows up to 20% flat grain in each bundle.<br />
Number 2 <strong>and</strong> 3 Grades are also available.<br />
Produced by h<strong>and</strong>, using a sharp bladed steel froe <strong>and</strong> a mallet. The natural<br />
shingle-like taper is achieved by reversing the block, end-for-end, with each<br />
split. Premium Grade only. (100% edge grain)<br />
Produced by machine or in the same manner as tapersplit shakes except<br />
that by splitting from the same end of the block, the shakes acquire the<br />
same thickness throughout. Premium Grade only. (100% edge grain)<br />
The premium grade of shingles for roofs <strong>and</strong> sidewalls. These top-grade<br />
shingles are 100% heartwood, 100% clear <strong>and</strong> 100% edge grain. Available<br />
in 16" or 18" or 24" lengths.<br />
A good grade for many applications. Not less than 10" clear on 16" shingles,<br />
11" clear on 18" shingles <strong>and</strong> 16" clear on 24" shingles. Flat grain <strong>and</strong><br />
limited sapwood are permitted in this grade.<br />
A utility grade for economy applications <strong>and</strong> secondary buildings. Not less<br />
than 6" clear on 16" <strong>and</strong> 18" shingles, 10" clear on 24" shingles.<br />
A utility grade for undercoursing of double coursed sidewalls only. Not a<br />
roofing material <strong>and</strong> not to be used as a starter course for roofs.<br />
1
2<br />
CERTI-GUARD<br />
PRESSURE- TREATED FIRE-RETARDANT SHAKES & SHINGLES<br />
CEDAR SHAKE & SHINGLE BUREAU<br />
CERTI-GUARD<br />
PRESSURE- TREATED FIRE-RETARDANT SHAKES & SHINGLES<br />
CEDAR SHAKE & SHINGLE BUREAU<br />
CERTI-LAST<br />
PRESERVATIVE TREATED CEDAR SHAKES & SHINGLES<br />
CEDAR SHAKE & SHINGLE BUREAU<br />
<strong>Roof</strong> Application Quick<br />
Reference Guide<br />
• Be sure that felt interlay paper on<br />
shakes does not extend below a line<br />
that is twice the exposure above the<br />
butt (i.e. a 24" shake at 10",<br />
exposure would have felt applied 20”<br />
above the butt).<br />
• Never interlay shingles with felt.<br />
• Keyways must not be aligned <strong>and</strong><br />
must be a minimum 1 1/2” offset<br />
from the course above.<br />
• DO NOT drive nail heads or staple<br />
crowns below wood surface.<br />
• Overdriving or underdriving the<br />
fasteners can seriously damage the<br />
integrity of your roofing system.<br />
R<br />
R<br />
CERTI-LABEL PRODUCTS<br />
R Pressure-Impregnated Treated Products<br />
Certi-label products can also be treated. Products are available either<br />
fire-retardant-treated OR preservative-treated. Special care must be taken to<br />
follow the treatment company’s recommended installation instructions.<br />
Certi-Guard Fire-Retardant Treated <strong>Cedar</strong> <strong>Shake</strong>s <strong>and</strong> <strong>Shingle</strong>s<br />
Premium <strong>and</strong> Number 1 Grades of Certi-Split shakes, Certi-Sawn shakes, <strong>and</strong><br />
Number 1 Grades of Certigrade shingles are available pressure-impregnated<br />
with fire retardants. Certi-Guard products may be used for Class A, B <strong>and</strong> C<br />
roof systems. Contact the treatment company for treatment warranty<br />
information, accessory product requirements (including recommended<br />
fastener types) <strong>and</strong> application details for treated cedar material. Local code<br />
jurisdictions have additional information regarding applications in specific<br />
areas.<br />
Certi-Last Preservative-Treated <strong>Cedar</strong> <strong>Shake</strong>s <strong>and</strong> <strong>Shingle</strong>s<br />
Premium <strong>and</strong> Number 1 Grades of Certi-Split shakes, Certi-Sawn shakes, <strong>and</strong><br />
Number 1 Grades of Certigrade shingles are available preservative-treated by<br />
pressure processes. This product is ideal in areas of high humidity. Specify the<br />
Certi-Last treating label for this extra protection. Contact the treatment<br />
company for treatment warranty information, accessory product requirements<br />
(including recommended fastener types) <strong>and</strong> application details for treated<br />
cedar material.<br />
Note: <strong>Cedar</strong>’s natural color varies as shown in these examples, yet without<br />
applying a paint or stain it will all weather to a beautiful gray.<br />
Photo: Celia Pearson
Sheathing<br />
<strong>Shake</strong>s <strong>and</strong> shingles may be applied over<br />
spaced sheathing. Spaced sheathing is usually<br />
1 x 4 or 1 x 6 softwood boards <strong>and</strong> shall not<br />
be less than 1 x 4 boards.<br />
Solid sheathing is recommended for shakes<br />
<strong>and</strong> may be required in seismic regions or<br />
under treated shakes <strong>and</strong> shingles. Solid<br />
sheathing is used in areas with wind-driven<br />
snow. Please note that the only solid sheet<br />
sheathing tested with Certi-label shakes <strong>and</strong><br />
shingles is plywood. Check with your local<br />
building official for plywood<br />
thickness/dimensions. Eave protection is used<br />
on the edge where 36" felt underlay is used<br />
<strong>and</strong> should extend up at least 24" beyond the<br />
exterior wall but it is not meant to cover the<br />
entire roof.<br />
Staggered Butt Applications<br />
Staggered butt applications are made by<br />
shortening the exposure less than the greater<br />
maximum exposure. No shakes or shingles<br />
shall be applied greater than the maximum<br />
exposure allowed. Check with local building<br />
codes for approval of this installation method.<br />
Note: Do not cover the entire deck with water<br />
proofing membrane. This will not allow<br />
shingles to breathe. See CSSB technical<br />
bulletin “Asphalt-Saturated Organic Felt”<br />
GENERAL DESIGN AND APPLICATION DETAILS<br />
Product should project 1 1/2 "<br />
beyond the fascia <strong>and</strong><br />
approximately 1"<br />
over the gable<br />
or rake end<br />
Gutter<br />
Fascia<br />
Rafter header<br />
Product should project 1 1/2 "<br />
beyond the fascia <strong>and</strong><br />
approximately 1"<br />
over the gable<br />
or rake end<br />
Certi-label shakes<br />
Rafter<br />
Eave protection<br />
(extend to rake edge)<br />
Spaced sheathing<br />
Figure 1: Spaced Sheathing<br />
For applications using varied exposures, the center of the<br />
sheathing board should be equal to the distance of the exposure.<br />
Gutter<br />
Fascia<br />
Rafter header<br />
Product should project 1 1/2 "<br />
beyond the fascia <strong>and</strong><br />
approximately 1"<br />
over the gable<br />
or rake end<br />
Gutter<br />
Fascia<br />
Rafter header<br />
Certi-label shakes<br />
Rafter<br />
Eave protection<br />
(extend to rake edge)<br />
Figure 2: Solid Sheathing<br />
Certi-label shingles<br />
Rafter<br />
Solid sheathing at eave<br />
2 x 4 spacers<br />
Eave protection<br />
(extend to rake edge)<br />
Solid sheathing<br />
Note: in areas of high humidity,<br />
nailing strips or a continuous<br />
ventilation product may be<br />
used, or Certi-Last treated<br />
shakes may be applied directly<br />
to the deck.<br />
1 x 4 or 1 x 6<br />
nailing strips<br />
Solid sheathing at eave<br />
Solid sheathing<br />
Figure 3: Spaced Over Solid Combination Sheathing<br />
This is the preferred system for shingle application, in areas with high humidity or where additional<br />
ventilation is required. When using Certi-Last products, they may be applied directly to the deck.<br />
3
4<br />
Certi-label <strong>Shake</strong>s<br />
A solid deck is recommended in seismic<br />
activity, hurricane <strong>and</strong> tornado regions <strong>and</strong> in<br />
areas where wind-driven snow is<br />
encountered. <strong>Roof</strong>ing felt system interlay<br />
between the shake courses is required<br />
whether the sheathing is spaced or solid. The<br />
felt interlay acts as a baffle that prevents<br />
wind-driven snow or other foreign material<br />
from entering the attic cavity during extreme<br />
weather conditions. The felt interlays also<br />
increase the roof's insulation value. The felt<br />
interlay system forces water to the surface.<br />
If spaced sheathing is used in shake<br />
application, the sheathing is usually 1 x 6<br />
boards spaced on centers equal to the<br />
weather exposure. (Table 4, Page 20) at<br />
which the shakes are to be laid - but never<br />
more than 7 ½” for 18” shakes <strong>and</strong> 10” for<br />
24” shakes on roof installations. When 1 x 4<br />
spaced sheathing is installed at 10” on<br />
center, additional 1 x 4 boards must be<br />
installed (i.e. maximum allowable spacing is<br />
approximately 3 ½” measured from edge to<br />
edge between the sheathing boards). Please<br />
note that the only solid sheet sheathing<br />
tested with Cert-label shakes & shingles is<br />
plywood. Check with your local building<br />
official for plywood thickness/dimensions.<br />
Special care should be taken when installing<br />
the felt interlays over spaced sheathing to<br />
ensure that an effective baffle is formed<br />
(Figure 1). The felt should be applied over<br />
the top portion of the shakes <strong>and</strong> extend on<br />
to the spaced sheathing so that the bottom<br />
edge of the felt is positioned at a distance<br />
above the butt equal to twice the weather<br />
exposure.<br />
Certi-label <strong>Shake</strong> Application<br />
<strong>Shake</strong>s, like shingles, are normally applied in<br />
straight, single courses. The following<br />
application details (Figure 4) must be<br />
observed.<br />
1. The starter course may be one or two<br />
layers of cedar shingles or shakes overlaid<br />
with the desired shake. A 15" shake is<br />
made expressly for starter <strong>and</strong> finish<br />
courses.<br />
2. Butts of first course shakes should project<br />
1 1/2" beyond the fascia <strong>and</strong> approximately<br />
1" over the gable or rake end.<br />
3. The CSSB recommends using an 18" wide<br />
strip of Type 30 ASTM Designation 226<br />
(ASTM D 226) or ASTM Designation 4869<br />
(ASTM D 4869) roofing felt laid over the<br />
GENERAL DESIGN AND APPLICATION DETAILS<br />
Two nails (only) for each<br />
shake approximately 3/4" from<br />
edge <strong>and</strong> approximately 1 1/2"<br />
above exposure line.<br />
Space shakes 3/8"<br />
to 5/8" apart<br />
Exposure<br />
Product should<br />
project 1 1/2"<br />
beyond the fascia<br />
<strong>and</strong> approximately 1"<br />
over the gable or rake end<br />
Adjacent course joints<br />
should be offset<br />
1 1/2" minimum<br />
Gutter<br />
Fascia<br />
Rafter header<br />
Figure 4: Certi-label <strong>Shake</strong> Application<br />
top portion of the shakes <strong>and</strong> extending on to<br />
the sheathing. (Check with your local building<br />
official for exact specifications in your area).<br />
The bottom edge of the felt should be<br />
positioned above the butt of the shake at a<br />
distance equal to twice the weather exposure.<br />
For example, 24" shakes, felt extends up<br />
14" onto the sheathing forcing water to<br />
the surface.<br />
4. Spacing between adjacent shakes should be<br />
a minimum of 3/8" <strong>and</strong> a maximum of 5/8”.<br />
5. <strong>Shake</strong>s shall be laid with a side lap of not<br />
less than 1 1/2” between joints in adjacent<br />
courses.<br />
The bottom edge of the felt should be positioned<br />
above the butt of the shake at a distance equal to<br />
twice the weather exposure. Never interlay shingles<br />
with felt.<br />
Starter course<br />
Rafter<br />
Eave protection ( extend to rake edge)<br />
6. Straight-split shakes should be laid with<br />
the froe-end (the end from which the<br />
shake has been split <strong>and</strong> which is<br />
smoother) towards the ridge.<br />
Notes:<br />
Plywood sheathing<br />
1) See page 19 for high humidity areas.<br />
2) For 3 ply Tapersawn <strong>Shake</strong> application,<br />
please see the CSSB technical bulletin<br />
“3 Ply Application”.<br />
Currently the only acceptable solid<br />
sheathing product tested for use with<br />
Certi-label shakes is plywood.<br />
Architect: Shope Reno Wharton, Photo: Robert Benson
Certi-label <strong>Shingle</strong>s<br />
There are two acceptable methods for<br />
application of spaced sheathing: One is to<br />
space 1 x 4 boards to coincide with the<br />
weather exposure (Table 2, Page 20) of the<br />
shingles (Figure 5). Thus, if the shingles are to<br />
be laid at 5 1/2" to the weather, the sheathing<br />
boards would also be spaced at 5 1/2" on<br />
center. In this method of application each<br />
shingle is nailed to the center of the 1 x 4<br />
board. With 7 1/2" weather exposures, the<br />
center of the sheathing board shall equal the<br />
distance of the weather exposure.<br />
Alternatively, although not commonly used, a<br />
breather-type underlayment, such as roofing<br />
felt, may be applied over either solid or<br />
spaced sheathing. Check with your local<br />
building official for their preference in your<br />
area.<br />
Please note that the only solid sheathing<br />
product tested for use with Certi-label shakes<br />
<strong>and</strong> shingles is plywood. Check with your<br />
local building official for plywood<br />
thickness/dimensions.<br />
Certi-label <strong>Shingle</strong> Application<br />
Regardless of style, the following basic<br />
application details (Figure 5) must be<br />
observed.<br />
1. <strong>Shingle</strong>s must be doubled or tripled at all<br />
eaves.<br />
2. Butts of first course shingles should project<br />
1 1/2" beyond the fascia <strong>and</strong> approximately<br />
1" over the gable or rake end.<br />
3. Spacing between adjacent shingles (joints)<br />
should be a minimum of 1/4" <strong>and</strong> a<br />
maximum of 3/8".<br />
4. Certi-label shingles shall be laid with a side<br />
lap not less than 1 1/2" between joints in<br />
adjacent courses, <strong>and</strong> not more than 10%<br />
shall be in direct alignment in alternate<br />
courses. Check with your local building<br />
official in your area.<br />
5. In lesser grade shingles (Figure 5a)<br />
containing both flat <strong>and</strong> vertical grain, joints<br />
should not be aligned with centerline of<br />
heart.<br />
6. Flat grain shingles wider than 8" should be<br />
split in two before nailing. Knots <strong>and</strong> similar<br />
defects should be treated as the edge of the<br />
shingle <strong>and</strong> the joint in the course above<br />
placed 1 1/2" from the edge of the defect.<br />
GENERAL DESIGN AND APPLICATION DETAILS<br />
For 4:12 slope <strong>and</strong> steeper, use<br />
Number 1 Grade shingles at 5",<br />
5 1/2" <strong>and</strong> 7 1/2” exposures for<br />
16", 18" <strong>and</strong> 24" shingles<br />
respectively. For lower roof<br />
slopes <strong>and</strong> lower product<br />
grades use reduced exposures<br />
(See Page 20)<br />
Alternate course<br />
joints should<br />
not align<br />
Space shingles<br />
1/4" - 3/8" apart<br />
Adjacent course joints<br />
should be offset<br />
1 1/2" minimum<br />
Gutter<br />
Product should project<br />
1 1/2 " beyond the fascia<br />
Fascia<br />
<strong>and</strong> approximately 1"<br />
over the gable or rake end<br />
Rafter header<br />
Figure 5: Certi-label <strong>Shingle</strong> Application<br />
1 1/2"<br />
Knot or<br />
similar defect<br />
Two nails (only) for each<br />
shingle approximately 3/4" from<br />
edge <strong>and</strong> approximately 1 1/2”<br />
above exposure line.<br />
First course doubled or tripled<br />
Rafter<br />
Centerline of heart<br />
Figure 5a: Course Alignment<br />
Spaced sheathing should<br />
be 1 x 4 or 1 x 6<br />
Solid wood sheathing<br />
Eave protection (extend to rake edge)<br />
NEW PIC<br />
Architect: Gaylord Grainger, Libby O'Brien-Smith Architects, Photo: Eduardo Calderon<br />
5
6<br />
The mansard is particularly well suited to<br />
renovation work on pitched roof houses<br />
because the upper story can be enlarged<br />
without adding extra height to the structure.<br />
The low downward slope of the mansard roof<br />
line acts visually to reduce the scale of a<br />
building <strong>and</strong> helps to eliminate a boxy<br />
appearance. This technique is used frequently<br />
on large commercial projects, particularly<br />
those near residential neighborhoods. It is<br />
also a common solution to the problem of<br />
avoiding a monotonous appearance on flatroofed<br />
frame apartment buildings.<br />
Properly used, a mansard roof can strengthen<br />
the design without substantially increasing<br />
construction costs. If raised up above the level<br />
of a built-up roof the mansard can screen out<br />
roof penetrations or mechanical equipment.<br />
The variety of mansard roofs is practically<br />
infinite. One of the most widely used (<strong>and</strong><br />
misused) roof designs, its proportions <strong>and</strong><br />
scale are very important <strong>and</strong> care should be<br />
taken to avoid a mansard roof line that is<br />
either too skimpy or too generous.<br />
Two of the most widely used roofing<br />
materials on the mansard roof are Certi-label<br />
cedar shakes <strong>and</strong> shingles. <strong>Cedar</strong> shakes, with<br />
their heavier texture <strong>and</strong> solid appearance,<br />
are perhaps more frequently specified for<br />
mansards although shingles are also used,<br />
particularly when a lighter scale is desired.<br />
The light weight <strong>and</strong> ease of application of<br />
Certi-label shakes <strong>and</strong> shingles contribute<br />
substantially to economical construction.<br />
<strong>Construction</strong> details for typical mansard roofs<br />
are shown in Figure 6.<br />
MANSARD ROOF DETAILS<br />
Two nails (only) for each<br />
shake approximately 3/4" from<br />
edge <strong>and</strong> approximately 1 1/2"<br />
above exposure line.<br />
Certi-label shakes<br />
Space shakes 3/8"<br />
to 5/8" apart<br />
The bottom edge of the felt should be<br />
positioned above the butt of the<br />
shake at a distance equal to<br />
twice the weather exposure.<br />
Never interlay shingles with felt.<br />
Product should project<br />
1 1/2 " beyond the fascia<br />
<strong>and</strong> approximately 1"<br />
over the gable or rake end<br />
Eave protection<br />
min. 36"<br />
Figure 6: Mansard <strong>Roof</strong><br />
Plywood Sheathing<br />
Photo: Murray Levin
The minimum roof slope on which Certi-label<br />
shakes are recommended is 4:12 <strong>and</strong> for<br />
Certi-label shingles, 3:12. It is possible,<br />
however, to apply Certi-label shakes or<br />
shingles successfully to solid sheathed roofs of<br />
lower slope providing a special method of<br />
application is followed (such as Figure 7),<br />
however shingles must be applied at a<br />
reduced exposure (page 20). Never interlay<br />
shingles with felt. The prescribed method<br />
provides a double roof on which the Certilabel<br />
shakes or shingles are applied to a<br />
lattice-like framework embedded in a<br />
bituminous surface coating.<br />
A hot mop or similar approved membrane<br />
should be applied over the roof deck. Consult<br />
your local building official for approved<br />
products in your area. With the final hot-mop<br />
application 2 x 4 spacers of Western Red<br />
<strong>Cedar</strong> or preservative treated lumber are<br />
embedded in the bituminous coating. These<br />
spacers are installed over the rafters <strong>and</strong><br />
extend from eave to ridge. Check with your<br />
local building official for their preference in<br />
your area.<br />
Next, 1 x 4 or 1 x 6 nailing strips, spaced<br />
according to the weather exposure selected<br />
for the Certi-label shakes or shingles, should<br />
be nailed across the spacers to form a latticelike<br />
nailing base. For example, if 24" shakes<br />
are to be installed at a weather exposure of<br />
10", the nailing strips would also be spaced at<br />
10" on centers. When 1 x 4 spaced sheathing<br />
is installed at 10" on center, additional 1 x 4<br />
boards must be installed.<br />
Finally, the Certi-label shakes or shingles are<br />
applied in the normal manner with a starter<br />
course at the eave <strong>and</strong> felt interlay between<br />
each course of shakes (Figure 7).<br />
Certi-label Hip And Ridge Details<br />
Intersecting roof surfaces at hips <strong>and</strong> ridges<br />
should be capped to ensure a weather-tight<br />
joint. Site-made or factory-assembled hip <strong>and</strong><br />
ridge units may be used, but both types must<br />
have alternate overlaps <strong>and</strong> concealed nailing<br />
(Figure 8). When ridge cap <strong>and</strong> field product<br />
are the same length <strong>and</strong> grade, the weather<br />
exposure of the ridge cap should be the same<br />
exposure as the field product of the roof.<br />
Nails must be longer than those used on the<br />
field of the roof <strong>and</strong> of sufficient length to<br />
penetrate 3/4" into or completely through the<br />
sheathing. Install a strip of felt, eave<br />
protection material or metal over hip or ridge<br />
under the ridge or hip cap. If longer or<br />
shorter ridge cap is used, adjust exposure<br />
accordingly.<br />
LOW SLOPE ROOF DETAILS, HIP AND RIDGE DETAILS 7<br />
18" felt interlay<br />
2 nails per shake<br />
24" Certi-label shakes<br />
at 10" exposure<br />
Product should project<br />
1 1/2 " beyond the fascia<br />
<strong>and</strong> approximately 1" over<br />
the gable or rake end<br />
Gutter<br />
<strong>Shake</strong> starter course<br />
36" felt underlay<br />
4" overlap of felt<br />
Solid sheathing<br />
Figure 7: Certi-label <strong>Shake</strong> Application to Low Slope <strong>Roof</strong>s<br />
Alternate<br />
overlap<br />
Fascia<br />
Rafter header<br />
Rafter<br />
Double starter course<br />
Solid sheathing at eave<br />
Choose material of uniform width between 4" <strong>and</strong> 5"<br />
(if making units with field material)<br />
Figure 8: Certi-label Hip <strong>and</strong> Ridge Application<br />
3<br />
2<br />
4<br />
2 x 4 spacers<br />
1<br />
1 x 4 or 1 x 6<br />
nailing strips<br />
Hot mop or similar<br />
approved membrane.<br />
Consult your local<br />
building official<br />
for approved products<br />
in your area.<br />
Cut back edge of shingles or shakes on a bevel<br />
Join ridge material with type 304 or 316 stainless steel fasteners<br />
See page 12 for fastener details.<br />
Notched<br />
Notch first piece of starter course
8<br />
Correct construction of roof junctures <strong>and</strong><br />
slope transitions is vital to ensure the integrity<br />
of the roof system. In the following cases,<br />
where metal flashing is employed, it should<br />
be no less than 26 gauge galvanized steel or<br />
acceptable equivalent. Check with your local<br />
building official for their preference in your<br />
area. It should be painted on both sides with a<br />
good metal or bituminous paint. Flashing<br />
materials should be painted after bending to<br />
maintain the integrity of the coating.<br />
Convex Juncture<br />
On this type of juncture (Figure 9) metal<br />
flashings should be installed to cover the top<br />
4" of the wall <strong>and</strong> the bottom 8" of the roof<br />
slope before the final course of Certi-label<br />
shakes or shingles is nailed to the top of the<br />
wall. A strip of wood molding can be applied<br />
after final wall course is installed. A double or<br />
triple starter course is then applied at the<br />
eave, with a 1 1/2" overhang over the outside<br />
wall trim. The roof can then be completed in<br />
the normal manner.<br />
Concave Juncture<br />
Metal flashings for the concave juncture are<br />
similar to those for the convex type. They<br />
should be installed to cover the top of the roof<br />
slope <strong>and</strong> the bottom 4" of the<br />
wall before the final course of Certi-label<br />
shakes or shingles is installed. The final roof<br />
course should be installed so that the tips fit<br />
as snugly as possible against the wall at the<br />
juncture. A double starter course should be<br />
applied at the start of the wall surface <strong>and</strong> the<br />
remaining wall courses applied in the<br />
recommended manner. If nails are not<br />
acceptable through exposed metal, metal clips<br />
can be used to hold down the flashing.<br />
<strong>Roof</strong> Transitions<br />
<strong>Roof</strong> transitions (Figure 10) require<br />
appropriate flashing, felt <strong>and</strong> product<br />
application. Changes in roof slope should be<br />
detailed in a similar manner as concave<br />
junctures, to ensure the integrity of the roof<br />
system. Solid sheathing is required above <strong>and</strong><br />
below the change in slope, metal flashing is<br />
required across the change in slope, <strong>and</strong> a 36"<br />
strip of starter felt is required on the upper<br />
slope, installed in the same fashion as at the<br />
eaves.<br />
ROOF JUNCTURE DETAILS<br />
Interwoven felt<br />
for shakes only<br />
36" starter felt<br />
Product should project<br />
1 1/2 " beyond the fascia<br />
<strong>and</strong> approximately 1" over<br />
the gable or rake end<br />
Metal flashing<br />
6" up - 6" below<br />
Solid sheathing<br />
Wood molding<br />
Metal flashing<br />
Sheathing<br />
Double or triple<br />
starter course<br />
Figure 9: Convex <strong>Roof</strong> Juncture<br />
Steeper slope roof<br />
Double starter course<br />
Lower slope roof<br />
Product should project<br />
1 1/2 " beyond the fascia <strong>and</strong><br />
approximately 1" over<br />
the gable or rake end<br />
Figure 10 Low Slope to Steep Slope <strong>Roof</strong><br />
Transition Detail - Certi-label shakes<br />
(Certigrade shingle application is similar but without felt interlay)<br />
Courtesy: Western Wood Products, Photo: John Spaulding
Apex Juncture<br />
On this roof juncture (Figure 11) metal<br />
flashing should cover the top 8" of the roof<br />
<strong>and</strong> the top 4" of the wall. It should be<br />
installed before the final course of Certi-label<br />
shakes or shingles is applied to the wall. The<br />
recommended sequence of application is to<br />
apply Certi-label shakes or shingles first to the<br />
wall then to the roof. The overhanging roof<br />
material is then trimmed flush with the wall.<br />
Finally, specially prepared ridge units are<br />
applied over the wall-roof juncture so that in<br />
each matching pair the roof piece overlaps<br />
the wall piece each time.<br />
Swept or Bell Eave<br />
When Certi-label shakes or shingles are to be<br />
applied to a swept or bell eave where the<br />
curvature is excessive, it may be necessary to<br />
soak them for a period (usually overnight) or<br />
steam them prior to installation. A double<br />
starter course is employed in the usual<br />
manner. Exposure is determined by the slope<br />
of the roof <strong>and</strong> the type of Certi-label shake or<br />
shingle selected. At lower pitches waterproof<br />
eave protection should be used.<br />
<strong>Roof</strong> Valley Flashing Detail<br />
Most roof leaks can occur where water is<br />
channelled off the roof or where the roof<br />
abuts a vertical wall or chimney. At these<br />
points, metal valleys <strong>and</strong> flashings are used to<br />
assist the Certi-label shakes <strong>and</strong> shingles in<br />
keeping the structure sound <strong>and</strong> dry.<br />
Structural members that join a roof should<br />
also be flashed at all intersecting angles to<br />
prevent leakage. Step flashing should extend<br />
under the Certi-label shakes <strong>and</strong> shingles, up<br />
the vertical surface, (one flashing installed on<br />
each course concealed under the covering<br />
course) <strong>and</strong> should be covered by a second<br />
layer of flashing (counter-flashing).<br />
Flashing should be pre-painted both sides<br />
using a good metal or bituminous paint<br />
(Figure 13a). Flashing strips which must be<br />
bent to sharp angles should be painted after<br />
bending. Metal flashing with baked-on enamel<br />
coating is available in some areas.<br />
Different flashing metals are available in<br />
different areas depending on climatic<br />
variations. It is good practice to use metals<br />
ROOF JUNCTURE DETAILS<br />
Ridge cap<br />
Last course<br />
over flashing<br />
Sheathing<br />
Metal<br />
flashing<br />
For excessive sweep<br />
shingles may be<br />
steam bent<br />
Double eave protection<br />
Figure 11: Apex <strong>Roof</strong> Juncture Figure 12 Swept or Bell Eave<br />
Note: For unusual roof applications contact<br />
the <strong>Cedar</strong> <strong>Shake</strong> & <strong>Shingle</strong> <strong>Bureau</strong> for a list of<br />
members who can assist you with specific<br />
questions.<br />
ROOF VALLEY FLASHING DETAILS<br />
that have proven their reliability under the<br />
specific conditions to be encountered. It is<br />
important that metal flashing have the same<br />
longevity as Western Red <strong>Cedar</strong>. Check with<br />
your local building official for their preference<br />
in your area.<br />
Eave felt should be<br />
lapped over the valley<br />
joint to give 3 levels<br />
of eave protection.<br />
(valley felt, eave felt<br />
<strong>and</strong> metal)<br />
Valley metal 8'0" long<br />
overlapped 6" at joints/<br />
painted both sides<br />
<strong>Roof</strong>ing felt<br />
Use minimum nails to hold<br />
metal in place<br />
Valley felt<br />
Metal to extend as far as<br />
shakes or shingles<br />
W valley metal<br />
Figure 13a: Valley Metal<br />
Open valley width 4" to 8"<br />
depending on water volume.<br />
Mark anticipated water lines<br />
(width of open valley) on valley<br />
sides with a chalk line.<br />
9<br />
Eave protection<br />
(extend to rake edge)<br />
Solid sheathing at eave
10<br />
Valleys: Certi-label <strong>Shingle</strong>s<br />
For roofs with slopes of 12:12 or greater, valley<br />
flashing should extend not less than 8" on each<br />
side of the valley centerline. For roof slopes<br />
less than 12:12, flashing should extend not less<br />
than 11” each side. Valley flashing should be<br />
center-crimped, painted, galvanized steel or<br />
aluminum. Valley metal should be underlayed<br />
with minimum Type 30 ASTM Designation 226<br />
(ASTM D 226) or ASTM Designation 4869<br />
(ASTM D 4869) roofing felt. <strong>Shingle</strong>s should<br />
not be applied with their grain parallel to the<br />
valley centerline <strong>and</strong> those extending into the<br />
valley should be cut at the correct angle<br />
(Figure 13b).<br />
Valleys: Certi-label <strong>Shake</strong>s<br />
On shake roofs it is recommended that a strip<br />
of Type 30 ASTM Designation 226 (ASTM D<br />
226) or ASTM Designation 4869 (ASTM D<br />
4869) roofing felt be installed over the<br />
sheathing <strong>and</strong> under the metal valley. Metal<br />
valleys should be center-crimped, painted,<br />
galvanized steel or aluminum <strong>and</strong> should<br />
extend not less than 11" on each side of the<br />
valley centerline. In some areas, however,<br />
flashing width requirements may differ <strong>and</strong><br />
local building codes should be consulted.<br />
<strong>Shake</strong>s should not be applied with their grain<br />
parallel to the valley centerline <strong>and</strong> those<br />
extending into the valley should be cut at the<br />
correct angle (Figure 13c).<br />
ROOF VALLEY FLASHING DETAILS<br />
1/2" folded<br />
back trim<br />
W valley metal<br />
Order of applying Certi-label<br />
shakes or shingles at valley:<br />
1. Stop course line here<br />
Figure 13b: Typical Saddle Flashing Detail<br />
1<br />
Figure 13c: Valley Product Application<br />
2<br />
2. Place pre-cut valley piece so<br />
that cut-angle is positioned<br />
on the valley guide chalk line<br />
with tip on the course line.<br />
3<br />
36" valley felt (left side)<br />
W valley metal lapped<br />
at ridge (2" lap)<br />
36" valley felt (right side)<br />
Keep nails well away from<br />
the center of valley<br />
3. Select product of the<br />
required width to complete<br />
the course of Certi-label<br />
shakes or shingles.<br />
W valley metal 1/2" crimp<br />
Figure 13d:<br />
<strong>Roof</strong> Valley Flashing Detail<br />
Figures 13a-13d: Flashing Details<br />
for <strong>Shake</strong> <strong>and</strong> <strong>Shingle</strong> Valleys<br />
Courtesy: Western Wood Products, Photo: John Spaulding<br />
Hidden felt
Step flashing<br />
3" laps<br />
1" minimum clearance<br />
around projection<br />
Nails should not<br />
penetrate flashing<br />
flange underneath<br />
Bottom apron<br />
flashing<br />
Typical chimney flashing<br />
not requiring soldering<br />
ROOF PROJECTION FLASHING DETAILS<br />
Figure 14a: Skylight Flashing Figure 14b: Skylight Installation<br />
Step flashing 3"<br />
minimum overlap<br />
Top, head, saddle,<br />
pan or cricket flashing<br />
Recommended step flashing width<br />
<strong>Shake</strong>s <strong>Shingle</strong>s<br />
Horizontal width 4" 2 1/2"<br />
Vertical width 3" 2 1/2"<br />
3" minimum<br />
6" minimum<br />
Caulking<br />
Keep edge of flange<br />
minimum 2" from<br />
edge of Certi-label<br />
shake or shingle joint Counter flashing<br />
Jack<br />
Plumbing stack<br />
Figure 14d: Typical Projection Flashing<br />
Step flashing interwoven<br />
with each course<br />
Certi-label<br />
product<br />
Certi-label product<br />
Figure 14c: Typical Projection Flashing<br />
Caulking<br />
Figures 14a-14e: Flashing Details for Typical <strong>Roof</strong> Projections<br />
Bottom or<br />
Apron flashing<br />
Head flashing<br />
3"<br />
6"<br />
Counter<br />
flashing<br />
Bottom apron<br />
flashing<br />
Solder joints<br />
Typical chimney<br />
flashing requiring<br />
soldering<br />
Certi-label shake<br />
or shingle joint<br />
Figure 14e: Typical Projection Flashing<br />
11
12<br />
Nails<br />
Each Certi-label shake or shingle shall be<br />
applied with two fasteners. Nails must be<br />
stainless steel-type 316 in locations within<br />
fifteen (15) miles of salt water (Ref. Stainless<br />
Steel Industry of North America-Washington,<br />
D.C., www.ssina.com). For locations outside<br />
the salt water zone - nails must be Type 304<br />
or 316 stainless steel, or hot-dipped zinc<br />
coated galvanized conforming to minimum<br />
2<br />
st<strong>and</strong>ard ASTM A 153 Class D (1.0 oz/ft ) or<br />
better. Stainless steel nails, although more<br />
expensive, offer the highest degree of<br />
corrosion resistance. Some nail manufacturers<br />
offer nails specifically for wood shake or<br />
shingle roof application. Contact the nail<br />
manufacturer for further information to<br />
ensure the nail used is correct for your<br />
application.<br />
Staples<br />
If you choose to use staples they must be<br />
stainless steel Type 316 in locations within<br />
fifteen (15) miles of salt water. (Ref. Stainless<br />
Steel Industry of North America-Washington,<br />
D.C., www.ssina.com). For locations outside<br />
of the salt water zone - stainless steel staples<br />
type 304 or 316 must be used. Each<br />
Certi-label shake or shingle shall be applied<br />
with two (2) staples. Staples must be 16 gauge<br />
with crowns 7/16'' minimum horizontal,<br />
maximum 3/4”' horizontal to the Certi-label<br />
shake or shingle butt.<br />
Fasteners<br />
Type of Certi-label Nail Type <strong>and</strong><br />
<strong>Shake</strong> or <strong>Shingle</strong> Minimum Length<br />
Certi-Split & Certi-Sawn <strong>Shake</strong>s Type (in)<br />
18" Straight-Split 5d Box 1 3/4<br />
18" <strong>and</strong> 24" H<strong>and</strong>split <strong>and</strong> Resawn 6d Box 2<br />
24" Tapersplit 5d Box 1 3/4<br />
18" <strong>and</strong> 24" Tapersawn 6d Box 2<br />
Certigrade <strong>Shingle</strong>s Type (in)<br />
16" <strong>and</strong> 18" <strong>Shingle</strong>s 3d Box 1 1/4<br />
24" <strong>Shingle</strong>s 4d Box 1 1/2<br />
Note: Longer fasteners of the same quality may be<br />
required for nailing ridge product<br />
ROOF FASTENER GUIDELINES<br />
The CSSB does not recommend the use<br />
of electro galvanized (EG) fasteners.<br />
YES<br />
Correct - flush with surface<br />
Location/Penetration<br />
Fasteners, two (2) per shake or shingle, shall<br />
be applied approximately 3/4” from the edge<br />
<strong>and</strong> approximately 1 1/2'' above the exposure<br />
line. Fasteners shall be long enough to<br />
penetrate into the solid wood sheathing at<br />
least 3/4” or all the way through. Minimum<br />
nail lengths are shown in the fastener chart<br />
below. Nails <strong>and</strong> staples must be driven flush<br />
with the surface of the Certi-label shake or<br />
shingle. Overdriving the fastener can split<br />
<strong>and</strong>/or distort the Certi-label shake or shingle.<br />
NO<br />
Underdriven<br />
NO<br />
Overdriven<br />
Important Notes:<br />
Overdriving or underdriving any<br />
fastener will affect the integrity of the<br />
roofing system. Fasteners utilized must<br />
be specific for use with wood shakes<br />
<strong>and</strong> shingles to prevent splitting <strong>and</strong><br />
other weakening factors.<br />
Pressure Impregnated Treated <strong>Shake</strong>s<br />
<strong>and</strong> <strong>Shingle</strong>s<br />
Specification of fasteners to be used with<br />
fire-retardant-treated (Certi-Guard) <strong>and</strong><br />
preservative-treated (Certi-Last) shakes or<br />
shingles must be obtained from the<br />
treatment company. Some types of<br />
fasteners may not be compatible with<br />
treated material.<br />
The information above is not intended to<br />
supersede local building codes.
Ventilation Guidelines<br />
The importance of good attic ventilation beneath<br />
the roof cannot be overemphasized. Such<br />
movement of air will prevent or inhibit<br />
condensation of moisture on the undersurface of<br />
the Certi-label shakes or shingles, or on the roof<br />
decks. Vents should be provided at the soffits<br />
(eaves) as well as at gable ends (screened to<br />
prevent ingress of insects), on roof by using attic<br />
roof ventilation or preferably the ridge lines with<br />
cross-ventilation desirable. A rule of thumb for<br />
adequate ventilation is that the ratio of total net<br />
free ventilation area to the area of the attic should<br />
be not less than 1:150, with compensation made<br />
for screens over vent apertures. In the case of a<br />
balanced system a 1 square foot per 300 square<br />
feet of floor area may be adequate ventilation.<br />
Check with your local building department. Attic<br />
fans may be beneficial by supplying additional<br />
movement of air in attic spaces. Several roof<br />
ventilation construction techniques are shown in<br />
Figures 15a-15c.<br />
Any modification to the vapor barrier system or<br />
addition of a vapor barrier system should only be<br />
done after consulting with your local building<br />
official or a building envelope specialist. In some<br />
areas, building envelope specialists are regulated<br />
by government. Please check with local building<br />
officials to see if there are professional<br />
requirements in your area.<br />
VENTILATION DETAILS<br />
Certi-label shakes or shingles<br />
(applied per specification)<br />
Continuous<br />
screened vent<br />
Continuous<br />
screened vent<br />
Air flow<br />
Insulation<br />
Figure 15a: Gable <strong>Roof</strong> With Attic<br />
Louvered vent<br />
at each end<br />
of attic<br />
Insulation<br />
Figure 15b: Cathedral Ceiling With Partial Attic<br />
Air flow Insulation<br />
<strong>Roof</strong> rafter or truss<br />
<strong>Roof</strong> rafter<br />
Louvered<br />
vent at each<br />
end of attic<br />
Certi-label shakes or shingles<br />
(applied per specification)<br />
<strong>Roof</strong> rafter<br />
Figure 15c: Shed <strong>Roof</strong><br />
Figures 15a-15c: Ventilation Details<br />
Air flow<br />
Ridge ventilation product<br />
Certi-label shakes or shingles<br />
(applied per specification)<br />
Air flow<br />
Air flow<br />
1-2" diameter screened<br />
vents each roof<br />
rafter space<br />
13<br />
Ridge ventilation<br />
product
14<br />
Ridge Vents<br />
The amount of venting depends upon the size<br />
of the roof, roof design/structure, (attic present<br />
or not, etc.) as well as local climatic conditions.<br />
Check with your local building official for<br />
requirements in your area. One rule of thumb<br />
for venting the attic area is 1 square foot per<br />
150 square feet of floor area. One half of this<br />
(1/2 square foot per 75 square feet of floor<br />
area) amount should be in the soffit or eave<br />
<strong>and</strong> one half (75 square feet) in the roof<br />
system. In the case of a balanced system 1<br />
square foot per 300 square feet of floor area<br />
may be adequate ventilation. Check with your<br />
local building official.<br />
Low Slope (6:12 or less)<br />
The CSSB recommends the installation of ridge<br />
ventilation product that allows for installation of<br />
pre-manufactured ridge applied over the vent<br />
material. There are many manufacturers of this<br />
design.<br />
Steep Slope (8:12 or greater)<br />
On steep slope roofs, the correct ridge<br />
ventilation products can actually facilitate the<br />
ease of installation of Certi-label ridge units.<br />
Always follow the manufacturer's installation<br />
instructions. The predominant ridge material<br />
manufactured today is for a low slope roof.<br />
However, by using a ridge ventilation product<br />
that is malleable <strong>and</strong> at least 8 1/2“ wide, the<br />
material can be installed across the minimum 3”<br />
of air space at the ridge to create a shallowing of<br />
the slope at the ridge. Care must be taken to<br />
caulk the ridge ventilation material to the<br />
Certi-label shakes or shingles. Proper nailing of<br />
the ridge units will create a serviceable<br />
application.<br />
Severe Climate Areas<br />
In all wind driven snow areas, the proper ridge<br />
ventilation product should have a screening<br />
effect to prevent snow infiltration (not louvered<br />
or baffled).<br />
VENTILATION DETAILS<br />
<strong>Roof</strong>ing felt<br />
Caulking<br />
Airflow<br />
through<br />
ridge<br />
Figure 16: Ridge Ventilation Detail<br />
®<br />
Certi-Ridge<br />
shake or shingle ridge<br />
Ridge ventilation<br />
product installed to<br />
manufacturer’s<br />
specifications<br />
Felt folded back<br />
Architect: Gaylord Granger, Libby O’ Brien-Smith Architects, Photo: Eduardo Calderon
Wood Deck<br />
Wood decks form an ideal base over which to<br />
apply Certi-label shakes or shingles, since they<br />
can be attached in the conventional manner.<br />
Rigid insulation raises the issue of how to<br />
fasten Certi-label shakes or shingles. The use<br />
of abnormally long nails driven through the<br />
Certigrade shingles, the insulation <strong>and</strong> into the<br />
deck below is generally unsatisfactory.<br />
Horizontal strapping will be required to<br />
overcome the fastening difficulties (Figure 17).<br />
When strapping is used, fewer nails penetrate<br />
through the insulation to the deck, <strong>and</strong> greater<br />
thermal efficiency is achieved by reducing the<br />
number of conductors. In addition, the lengths<br />
of the nails may be chosen to prevent the<br />
points from protruding through the deck<br />
where they may mar the inside face.<br />
If ice-damming is a potential problem or if<br />
reverse condensation is likely to occur, such as<br />
may be encountered in an ice arena, a cold<br />
roof system should be used in conjunction<br />
with horizontal strapping, <strong>and</strong> ventilation must<br />
be provided at the eaves <strong>and</strong> at the peak. In<br />
buildings such as ski cabins that may be<br />
subjected to heavy snow loads, it is usually<br />
necessary to fasten wood members (typically<br />
2 x 4 on edge) from ridge to eave on the roof<br />
deck <strong>and</strong> place the rigid insulation between.<br />
Strapping is then applied across the top of<br />
these members, giving a ventilated air space<br />
<strong>and</strong> avoiding compression of insulation<br />
(Figure 18). For additional details on cold roof<br />
systems please see page 17.<br />
The need for strapping can often be<br />
completely eliminated by the use of a false<br />
plywood deck, immediately over the<br />
insulation, to which the Certi-label shakes or<br />
shingles are directly fastened (Figure 19).<br />
Exterior-grade sheathing panels are ideal for<br />
this purpose, since they provide a strong,<br />
smooth surface. However, under certain<br />
conditions of slope <strong>and</strong> loading, there may be<br />
a tendency for the entire roof above the<br />
decking to creep downwards, bending the nail<br />
fastenings <strong>and</strong> compressing the insulation,<br />
thereby reducing its efficiency. In such cases, it<br />
is often desirable to install the vertical<br />
members as previously described.<br />
SPECIALTY ROOF DECK DETAILS<br />
Air space<br />
Figure 17: Specialty <strong>Roof</strong> Deck-Strapping Over Insulation<br />
Figure 18: Specialty <strong>Roof</strong> Deck-Vented <strong>Roof</strong><br />
Nails<br />
If the Certi-label shakes or shingles are nailed<br />
directly through rigid insulation, a number of<br />
problems may be encountered. For instance,<br />
the longer nails have thicker shanks which<br />
tend to split the Certi-label shakes or shingles.<br />
Certi-label shakes or shingles<br />
(applied per specification)<br />
Boards<br />
Rigid insulation<br />
Wooden deck<br />
Joist<br />
Certi-label shakes or shingles<br />
(applied as per specification)<br />
Boards<br />
Vertical lumber member<br />
Rigid insulation<br />
Wooden deck<br />
Joist<br />
Product movement may cause a reduction in<br />
insulation efficiency. For this reason, the use<br />
of strapping or a false plywood deck is again<br />
recommended.<br />
15
16<br />
Rigid Insulation<br />
Numerous types of rigid insulation are now in<br />
use, <strong>and</strong> may be made from exp<strong>and</strong>ed<br />
polystyrene beads, rigid urethane laminate,<br />
low density fiberboard, or from fast-setting<br />
liquids poured on-site. They vary in thickness<br />
up to more than 2" <strong>and</strong> in length <strong>and</strong> width<br />
depending upon the manufacturer. All these<br />
types are efficient insulators <strong>and</strong> are usually of<br />
sufficient density to hold the weight of a<br />
normal roofing material without the need for<br />
lumber bridging. If you live in an area where<br />
snowfall is prevalent, please consult your local<br />
building official for snow load requirements.<br />
For more technical<br />
information please contact<br />
our office at<br />
Tel: (604) 820-7700<br />
Fax: (604) 820-0266<br />
info@cedarbureau.com<br />
www.cedarbureau.org<br />
SPECIALTY ROOF DECK DETAILS<br />
Certi-label shakes or shingles<br />
(applied per specification)<br />
Exterior panels<br />
Rigid insulation<br />
Wooden deck<br />
Joist<br />
If shingles are applied over insulation <strong>and</strong><br />
ventilation is required, nailing strips may be<br />
applied under shingles (see figure 23b on page 19).<br />
®<br />
For areas of high humidity Certi-Last<br />
preservative treated product is recommended.<br />
Figure 19: Specialty <strong>Roof</strong> Deck-Panels Over Insulation<br />
Brindisi <strong>and</strong> Yaroscak Custom Builders, Inc. Architect: George Dumitru
Certi-label shakes <strong>and</strong> shingles are an<br />
excellent roofing material for cold weather<br />
areas that experience heavy snowfall <strong>and</strong><br />
severe temperature extremes. Certi-label<br />
shakes <strong>and</strong> shingles offer the advantages of<br />
durability, superior wind resistance <strong>and</strong> good<br />
thermal <strong>and</strong> acoustical properties. As with<br />
any other roofing material, however, their<br />
best performance depends upon proper<br />
design, sound construction practice <strong>and</strong><br />
correct installation.<br />
In cold weather areas <strong>and</strong> particularly in<br />
mountain regions that experience very heavy<br />
snowfall, the cold roof - or vented roof<br />
system - is recommended (Figures 20 & 21).<br />
The principle of this system is to allow a<br />
constant flow of cold air above the insulation<br />
but below the roofing material. With other<br />
roofing systems, ice buildup along the eaves<br />
can be a problem. Heat escapes from the<br />
insulation <strong>and</strong> melts snow, which runs down<br />
the roof to the cold overhangs where it<br />
freezes, causing water to back up <strong>and</strong><br />
sometimes penetrate the roof systems. A<br />
properly installed, vented cold roof<br />
eliminates this problem. Venting space<br />
should be sufficient to allow a free flow of air<br />
from eave to ridge.<br />
There are a number of important<br />
considerations that influence roof<br />
performance in areas of heavy snowfall,<br />
particularly mountain regions.<br />
Design, of course, is very important. The<br />
steeper the roof the better the performance.<br />
Chimneys should be located at the ridge or<br />
gable ends away from possible snow<br />
pressure on the slopes. Plumbing pipes<br />
should be located on inside walls <strong>and</strong> should<br />
be extended between the rafters <strong>and</strong> vented<br />
at the ridge. If this is not practical then<br />
plumbing vent pipes should be galvanized<br />
iron, well anchored inside the roof. (Plastic<br />
vent pipes extending through the roof may<br />
be dislodged by sliding snow.)<br />
COLD ROOF SYSTEM DETAILS<br />
Certi-label shakes or shingles<br />
(applied per specification)<br />
Double starter<br />
course<br />
Screen<br />
Vented space<br />
Spaced<br />
sheathing<br />
Rafter<br />
Insulation<br />
Certi-label shakes or shingles<br />
(applied per specification)<br />
Figure 20: Gable <strong>Roof</strong><br />
Decking<br />
Rigid insulation<br />
Vented space<br />
Figure 21: Shed <strong>Roof</strong><br />
Figures 20 & 21: Cold <strong>Roof</strong> Systems<br />
Ridge vent<br />
Cap<br />
Screen<br />
Trim<br />
17<br />
Architect: 3D Building, Photo: David Reeves Studio, Inc.
18<br />
Wide overhangs at the eaves should be avoided<br />
as they provide large cold areas for snow <strong>and</strong><br />
ice build-up. A strip of metal along the eaves<br />
helps shed ice quickly. Sliding ice <strong>and</strong> snow are<br />
constant hazards <strong>and</strong> should be given primary<br />
consideration in the total building design.<br />
Outside doors should not be located at the<br />
bottom of a roof slope. Entrances <strong>and</strong> all<br />
pedestrian traffic areas are better situated<br />
beneath the gable ends of the roof.<br />
Care must be taken in applying the sheathing<br />
boards to facilitate proper nailing. <strong>Shake</strong> or<br />
shingle side lap should be increased to 2". The<br />
entire roof must be laid with the same<br />
precautions as those taken for any other type of<br />
wood shake or shingle roof, with eave<br />
protection <strong>and</strong> an interlay felt between shakes.<br />
Care in cold roof design <strong>and</strong> installation will<br />
result in a sound roof system giving many years<br />
of service during severe extremes of winter<br />
temperatures <strong>and</strong> snowfall.<br />
COLD ROOF SYSTEM DETAILS<br />
Insulation<br />
Interior<br />
finish<br />
Vented space<br />
Screen<br />
Figure 22: Half Monitor <strong>Roof</strong><br />
Certi-label shakes or shingles<br />
(applied per specification)<br />
Screen<br />
Courtesy Goat Lake Forest Products Ltd. Photo: Kristy McKamey
SOLID DECK APPLICATION/HIGH HUMIDITY AREA DETAILS 19<br />
In areas of high humidity where<br />
solid sheathing is required:<br />
Following are 4 different suggested methods<br />
of application to increase longevity:<br />
1. Apply Certi-Last pressure-impregnated<br />
treated shakes or shingles directly to the<br />
sheathing. (Figure 23a)<br />
2. Apply vertical strips over the sheathing in<br />
alignment with the rafters below, then<br />
place horizontal furring strips on top of<br />
the vertical boards. (See Figure 23b).<br />
3. Apply horizontal furring strips to the<br />
deck, spaced at the exposure of the<br />
product.<br />
4. A continuous ventilation product may<br />
be used beneath the Certi-label roofing<br />
material (See Figure 23c).<br />
Note: Good ventilation is essential.<br />
Ridge <strong>and</strong> soffit vents are recommended.<br />
18" felt interlay<br />
2 nails per shake<br />
24" Certi-label shakes<br />
at 10" exposure<br />
<strong>Shake</strong><br />
starter course<br />
36" felt<br />
underlay<br />
(extend to rake edge)<br />
18" felt interlay<br />
2 nails per shake<br />
24" Certi-label shakes<br />
at 10" exposure<br />
Figure 23c: Continuous Ventilation Product<br />
(Option 4 Depicted)<br />
Two nails (only) for each<br />
shake approximately 3/4" from<br />
edge <strong>and</strong> approximately 1 1/2"<br />
above exposure line.<br />
Space shakes 3/8"<br />
to 5/8" apart<br />
Exposure<br />
Product should<br />
project 1 1/2"<br />
beyond the fascia<br />
<strong>and</strong> approximately 1"<br />
over the gable or rake end<br />
Adjacent course joints<br />
should be offset<br />
1 1/2" minimum<br />
<strong>Shake</strong><br />
starter course<br />
Gutter<br />
Fascia<br />
36" felt underlay<br />
(extend to rake edge)<br />
Figure 23b: Vertical Strips Over Solid Sheathing Application<br />
(Option 2 Depicted)<br />
4" overlap of felt Continuous ventilation<br />
product<br />
Solid sheathing<br />
Rafter header<br />
The bottom edge of the felt should be positioned<br />
above the butt of the shake at a distance equal to<br />
twice the weather exposure. Never interlay shingles<br />
with felt.<br />
Starter course<br />
Rafter<br />
®<br />
Figure 23a: Certi-Last shake application<br />
(Option 1 depicted)<br />
Eave protection<br />
(extend to rake edge)<br />
4" overlap of felt 2 x 4 spacers<br />
Solid sheathing at eave<br />
Plywood sheathing<br />
Solid sheathing<br />
1 x 4 or 1 x 6<br />
nailing strips<br />
Figures 23a - 23c: High Humidity Area Details<br />
Note: The above figures are<br />
depicting a shake<br />
application - Do not<br />
interlay shingles with felt.
20<br />
<strong>Shingle</strong> Coverage Table 1<br />
SHAKE TYPE, LENGTH AND THICKNESS<br />
COVERAGE AND EXPOSURE TABLES<br />
LENGTH AND<br />
Approximate coverage of one square (4 bundles) of shingles based on following weather exposures<br />
THICKNESS<br />
3 1/2" 4" 4 1/2" 5" 5 1/2" 6" 6 1/2" 7" 7 1/2"<br />
16" x 5/2" 70 80 90 100*<br />
18" x 5/2 1/4" 72 1/2 81 1/2 90 1/2 100*<br />
24" x 4/2" 73 1/2 80 86 1/2 93 100*<br />
NOTE: * Maximum exposure recommended for roofs.<br />
<strong>Shingle</strong> Exposure Table 2<br />
5 5 1/2 7 1/2 8 1/2 10<br />
18" x 1/2" H<strong>and</strong>split-<strong>and</strong>-Resawn Mediums (a)* – 75(b,f) 100(f,c) – –<br />
18" x 3/4" H<strong>and</strong>split-<strong>and</strong>-Resawn Heavies (a)* – 75(b,f) 100(f,c) – –<br />
18" x 5/8" Tapersawn* – Approx. 75(b) 100(f,c) – –<br />
24" x 3/8" H<strong>and</strong>split – – 75(e) – –<br />
24" x 1/2" H<strong>and</strong>split-<strong>and</strong>-Resawn Mediums – – 75(b) 85 100(c)<br />
24" x 3/4" H<strong>and</strong>split-<strong>and</strong>-Resawn Heavies – – 75(b) 85 100(c)<br />
24" x 5/8" Tapersawn – – 75(b) 85 100(c)<br />
24" x 1/2" Tapersplit – – 75(b) 85 100(c)<br />
18" x 3/8" Straight-Split – 65(b) 90(c) – –<br />
24" x 3/8" Straight-Split – – 75(b) 85 100(c)<br />
15" Starter-Finish course Use supplementary with shakes applied not over 10" weather exposure.<br />
(a) 5 bundIes will cover 100 sq. ft, roof area when used as starter-finish course at 10" weather<br />
exposure; 7 bundles will cover 100 sq. ft. roof area at 7 1/2" weather exposure; see footnote (d).<br />
(b) Maximum recommended weather exposure for 3-ply roof construction.<br />
(c) Maximum recommended weather exposure for 2-ply roof construction.<br />
(d) All coverage based on an average 1/2" spacing between shakes.<br />
(e) Maximum recommended weather exposure.<br />
*100 sq. ft. coverage is based on 12/12 pack, 5 bundle square, at 7 1/2" exposure.<br />
Maximum exposure recommended for roofs<br />
SLOPE LENGTH<br />
18" 24"<br />
4:12 <strong>and</strong> steeper 7 1/2" 10" (a)<br />
(a) 24" x 3/8" h<strong>and</strong>split shakes limited to 7 1/2" maximum weather<br />
exposure per UBC <strong>and</strong> IBC.<br />
Maximum exposure recommended for roofs<br />
LENGTH<br />
SLOPE<br />
Number 1 Blue Label Number 2 Red Label Number 3 Black Label<br />
16" 18" 24" 16" 18" 24" 16" 18" 24"<br />
3:12 to 4:12 3 3/4" 4 1/4 " 5 3/4" 3 1/2" 4" 5 1/2" 3" 3 1/2" 5"<br />
4:12 <strong>and</strong> steeper 5" 5 1/2" 7 1/2" 4" 4 1/2" 6 1/2" 3 1/2" 4" 5 1/2"<br />
<strong>Shake</strong> Coverage Table 3 see footnote (f) below<br />
<strong>Shake</strong> Exposure Table 4<br />
Approximate coverage (in sq. ft.) of one square, when shakes are applied<br />
with an average 1/2” spacing, at following weather exposures, in inches (d):<br />
(f) Note: While most shakes are packed in<br />
bundles of 12 courses each side (12/12) they<br />
may be packed 9/9. This will alter the number<br />
of bundles required to cover 1 square.<br />
For example: 18 "<br />
shake bundles 12/12 should<br />
cover 100 square feet at 7 1/2 " exposure. 9/9<br />
pack should give 75% coverage of a square.<br />
Check with your supplier to confirm specific<br />
packaging (bundle size) used for your order.<br />
Formula for calculating material at reduced exposures:<br />
Square footage divided by reduced coverage = total<br />
material required e.g. you are estimating a roof that<br />
measures 3200 square feet (32 squares). You have<br />
decided to put 16" Certigrade shingles (No.1 Blue Label<br />
or No.2 Red Label) at 4" exposure.<br />
The above coverage table (Table 1) tells you that a<br />
4-bundle square at 4" exposure covers 80 square feet.<br />
3200 divided by 80 = 40 squares of material
Please Note: ONLY experienced<br />
professionals who follow proper safety<br />
<strong>and</strong> workmanship practices should<br />
implement the information contained<br />
herein.<br />
Certi-label <strong>Cedar</strong> Is Naturally<br />
Long-Lasting<br />
<strong>Cedar</strong> shakes <strong>and</strong> shingles have been used<br />
for hundreds of years. They have proven<br />
their longevity in actual weather conditions,<br />
in all types of climates. <strong>Cedar</strong> shakes <strong>and</strong><br />
shingles contain oils that make them<br />
naturally decay resistant. Their insulative<br />
qualities, aesthetic appeal, <strong>and</strong> wind &<br />
impact resistance make Certi-label cedar<br />
shakes <strong>and</strong> shingles the natural choice for<br />
your roofing <strong>and</strong> siding material.<br />
Longevity Starts With A Quality<br />
Manufacturer<br />
Not all cedar products are alike. Purchasing<br />
cedar products with the "Certi" br<strong>and</strong> name<br />
on the bundle label guarantees you that the<br />
mill undergoes inspections by an<br />
independent third party inspection agency.<br />
Only <strong>Cedar</strong> <strong>Shake</strong> & <strong>Shingle</strong> <strong>Bureau</strong> member<br />
mills are allowed to label their products with<br />
the Certi-label. Each member mill's bundles<br />
will have the distinctive Certi-label tucked<br />
under the bundle strap. Locating Certi-label<br />
products is as close as your nearest<br />
computer or telephone. Contact the <strong>Cedar</strong><br />
<strong>Bureau</strong> for more information.<br />
Longevity Continues With A<br />
Quality Installation<br />
<strong>Roof</strong> construction plays a major role in<br />
determining the lifespan of cedar roofs.<br />
Proper design is absolutely critical to ensure<br />
long-term roof integrity. Proper installation<br />
will help maximize the life of cedar products.<br />
<strong>Cedar</strong> <strong>Bureau</strong> Approved Installers have met<br />
membership criteria <strong>and</strong> continue to prove<br />
themselves with each job they complete.<br />
Approved Installers offer a workmanship<br />
guarantee, references, <strong>and</strong> are the only<br />
contractors authorized to give homeowners<br />
the warranty administered by the <strong>Cedar</strong><br />
<strong>Bureau</strong>. Locating Approved Installers is as<br />
close as your nearest computer or<br />
telephone. Contact the <strong>Cedar</strong> <strong>Bureau</strong> for the<br />
names of members in your area.<br />
CEDAR CARE AND MAINTENANCE OVERVIEW<br />
Experienced care <strong>and</strong> maintenance<br />
professionals can make recommendations<br />
based on:<br />
• Zinc or copper strips nailed at the ridge<br />
cap can be effective to control moss.<br />
Reaction between rain <strong>and</strong> the zinc or<br />
copper forms a mild solution that is<br />
carried down sections of the roof. The<br />
optional use of these strips can be<br />
eliminated if you are using Certi-Last<br />
products.<br />
• Overhanging branches should be kept<br />
trimmed away from the roof. This will<br />
prevent leaves, small branches <strong>and</strong> other<br />
debris from building up <strong>and</strong> keeping the<br />
roof wet.<br />
• Gutters <strong>and</strong> downspouts need to be<br />
cleaned regularly, usually in the spring<br />
<strong>and</strong> fall. Downspouts (leaders) should run<br />
directly to the ground or to another gutter<br />
below. Never let a downspout drain<br />
directly onto a lower roof surface.<br />
• <strong>Cedar</strong> needs to breathe, <strong>and</strong> therefore<br />
needs to be kept clean. Do not allow<br />
leaves, branches or other debris to build<br />
up on the roof. Both surface areas <strong>and</strong><br />
keyways (spaces between shakes <strong>and</strong><br />
shingles) need to be kept clear.<br />
• Ensure ventilation is available, year round.<br />
Areas with louvers, ridge vents, roof vents,<br />
<strong>and</strong> soffit vents need to be kept clear <strong>and</strong><br />
never blocked off. Adequate ventilation<br />
ensures heat <strong>and</strong> moisture do not build<br />
up in the attic area. Adequate ventilation<br />
also prevents water from accumulating at<br />
the bottom of the roof <strong>and</strong> then freezing<br />
(ice damming).<br />
Certi-label <strong>Cedar</strong> Is Also Available<br />
With Pressure-Impregnated<br />
Treatment Process<br />
For even longer life span, where climate is a<br />
factor, <strong>Cedar</strong> <strong>Bureau</strong> members offer<br />
Certi-Last preservative-treated shakes <strong>and</strong><br />
shingles. These products are ideal for areas<br />
of high humidity.<br />
Certi-Last products are cedar shakes <strong>and</strong><br />
shingles that are factory pressure-treated by<br />
quality treaters who are members of the<br />
<strong>Cedar</strong> <strong>Bureau</strong>. Contact the treatment<br />
company for warranty details.<br />
Pressure-treated Certi-Guard or Certi-Last<br />
products should not receive after-market<br />
roof treatments without written permission<br />
from the manufacturer of such products.<br />
A Word About Topical Treatments<br />
For Installed <strong>Roof</strong>s<br />
There are hundreds of companies offering<br />
topical roof spraying <strong>and</strong> cleaning services.<br />
The <strong>Cedar</strong> <strong>Bureau</strong> has conducted an indepth<br />
study of care <strong>and</strong> maintenance<br />
systems, <strong>and</strong> provides the following<br />
summary:<br />
• Avoid the fly-by-night operation that has<br />
no permanent office, no workmanship<br />
guarantee, <strong>and</strong> no local references. Fly-bynight<br />
operations often gouge consumers<br />
for thous<strong>and</strong>s of dollars beyond the value<br />
of their service, leaving them with<br />
damaged roofs covered with unsuitable<br />
<strong>and</strong> sometimes dangerous treatment<br />
products.<br />
If you elect to have a topical treatment<br />
applied to your cedar roof, the <strong>Cedar</strong><br />
<strong>Bureau</strong> recommends the following:<br />
1. Check references (consumer, Better<br />
Business <strong>Bureau</strong>, Chamber of Commerce).<br />
2. Ask about the treatment product that is<br />
being used (more details follow).<br />
3. Ask to see the company's workmanship<br />
guarantee, license <strong>and</strong> workers'<br />
compensation coverage.<br />
Brindisi <strong>and</strong> Yaroscak Custom Builders, Inc.<br />
Architect: George Dumitru<br />
21
22<br />
Topical Treatment Products<br />
It is not within the <strong>Cedar</strong> <strong>Bureau</strong>'s m<strong>and</strong>ate to<br />
recommend br<strong>and</strong> names of topical roof<br />
treatment products. Consult with your local<br />
professionals for product information<br />
regarding cleaning <strong>and</strong> preserving cedar in<br />
your area. The <strong>Cedar</strong> <strong>Bureau</strong> does, however,<br />
recommend the following:<br />
DO use a topical treatment<br />
product that:<br />
• Offers a MSDS (Material Safety Data Sheet<br />
that lists product ingredients <strong>and</strong> safety<br />
precautions)<br />
• Is labeled as a cedar roof treatment product<br />
or has a letter from the manufacturer<br />
stating that treating cedar roofs is an<br />
appropriate use for this product<br />
• Is a water repellent, UV inhibitor, <strong>and</strong>/or<br />
EPA registered wood preservative<br />
• Has a manufacturer's performance<br />
guarantee<br />
DO NOT use a topical treatment<br />
product that:<br />
• Makes outrageous claims (such as a 10-year<br />
effectiveness)<br />
• Makes fire-retardant claims<br />
• Is a sealant, waterproofer or plasticizer<br />
• Contains unfortified linseed oil, diesel fuel<br />
or crank case oil<br />
The <strong>Cedar</strong> <strong>Bureau</strong> is aware of numerous<br />
bleaching <strong>and</strong> cleaning agents. Consumers are<br />
advised to heed the preceding topical<br />
treatment precautions before allowing such<br />
products to be applied to a cedar roof.<br />
CEDAR CARE AND MAINTENANCE OVERVIEW<br />
Powerwashing<br />
This is the most controversial issue in the care<br />
<strong>and</strong> maintenance industry. It is a fact that high<br />
pressure washing by inexperienced people<br />
will cause significant damage to any material.<br />
Some debris can easily be removed with<br />
garden hose pressure. Some contractors<br />
powerwash to clean roofs, while others do<br />
not. If powerwashing is used, the roof should<br />
receive a topical treatment to restore the roof.<br />
The <strong>Cedar</strong> <strong>Bureau</strong> recommends having a<br />
professional assess each job on an individual<br />
basis to determine if powerwashing is<br />
appropriate or not. Care <strong>and</strong> maintenance<br />
professionals know the proper procedures,<br />
which include factoring in:<br />
• Age, condition <strong>and</strong> environment of roof<br />
• Gallons sprayed per minute<br />
• Fan tip size<br />
• Distance spray nozzle is held from roof<br />
• Pressure per square inch <strong>and</strong> others…<br />
The Beauty Of <strong>Cedar</strong><br />
Another good thing about cedar is that it is<br />
possible to replace <strong>and</strong> repair parts of the<br />
roof, without worrying that your replacement<br />
shakes or shingles are significantly different in<br />
composition from your original shakes or<br />
shingles. Over the hundreds of years that<br />
cedar has been used, the product has<br />
remained unchanged…it's still cedar. As<br />
cedar advances to its mature stage, it is<br />
natural to expect some pieces to require<br />
replacement. Individual repairs are possible,<br />
<strong>and</strong> with prompt attention, proactive repairs<br />
can extend the life of your wise Certi-label<br />
cedar investment.<br />
Architect: Arnold Scribner & Associates, Photo: Erven Jourdan
This information has been designed to aid<br />
architects, consultants <strong>and</strong> builders in<br />
specifying Certi-label shakes <strong>and</strong> shingles. It<br />
suggests a st<strong>and</strong>ardized terminology <strong>and</strong> style<br />
for ordering in the hope of improving accuracy.<br />
It incorporates a general outline of the latest<br />
application information. Please note, however,<br />
that this is a specification guide only. The<br />
information in this manual is not intended<br />
to supercede local building codes. Refer to<br />
local building codes for more information.<br />
General Specification Data<br />
1. The contractor shall cover all roof<br />
surfaces with (specify one type of the<br />
following product) Certi-Split<br />
shakes/Certi-Sawn shakes/Certigrade<br />
shingles bearing the <strong>Cedar</strong> <strong>Shake</strong> & <strong>Shingle</strong><br />
<strong>Bureau</strong>'s official grade marked label.<br />
2. <strong>Shake</strong>s/shingles for roofs shall be (specify<br />
grade <strong>and</strong> length).<br />
3. <strong>Shake</strong>s/shingles for outer courses shall be<br />
(specify grade <strong>and</strong> length).<br />
4. <strong>Shake</strong>s/shingles for undercourses shall be<br />
(specify grade <strong>and</strong> length).<br />
5. <strong>Roof</strong> shakes/shingles shall be laid with a<br />
weather exposure of (specify in inches).<br />
<strong>Roof</strong> Application-Sheathing Boards<br />
6. Certi-Split shakes/Certi-Sawn shakes shall<br />
be applied over solid sheathing. A solid<br />
deck is recommended in seismic activity,<br />
hurricane <strong>and</strong> tornado regions <strong>and</strong> in<br />
areas where wind-driven snow is<br />
encountered <strong>and</strong> under pressure<br />
impregnated treated shakes <strong>and</strong> shingles.<br />
Please note that the only solid sheet<br />
sheathing tested with Cert-label shakes &<br />
shingles is plywood. Check with your local<br />
building official for plywood<br />
thickness/dimensions.<br />
Certi-Split shakes/Certi-Sawn shakes/<br />
Certigrade shingles may also be applied<br />
over spaced sheathing.<br />
7. All open sheathing shall be 1 x 4 or 1 x 6<br />
boards (minimum 1 x 4 for both shakes<br />
<strong>and</strong> shingles).<br />
SPECIFICATION GUIDELINES<br />
8. All solid sheathing shall be lumber or<br />
structural panels applied according to<br />
specifications of the American Plywood<br />
Association. Please note: the only solid<br />
sheet sheathing tested with shakes <strong>and</strong><br />
shingles is plywood. Check with your local<br />
building official for plywood thickness/<br />
dimensions.<br />
<strong>Roof</strong>ing Felt Interlay<br />
(for shakes only)<br />
9. Contractor shall apply a 36" wide strip of<br />
minimum Type 30 ASTM Designation 226<br />
(ASTM D 226) or ASTM Designation 4869<br />
(ASTM D 4869) roofing felt at the eave<br />
line. An 18" wide strip of Type 30 roofing<br />
felt shall be applied over the top portion of<br />
the Certi-label shakes <strong>and</strong> extend onto the<br />
sheathing. Bottom edge of felt shall be<br />
positioned at a distance above the butt<br />
equal to twice the weather exposure.<br />
Note: felt interlay between courses is not<br />
necessary when straight-split, or tapersplit<br />
shakes are applied in snow-free areas<br />
at weather exposures of less than onethird<br />
the total shake length (3-ply roof).<br />
More information regarding 3 Ply<br />
Tapersawn shake application is available in<br />
the Technical Bulletin “3-Ply Application”.<br />
Contact the CSSB for more information or<br />
visit www.cedarbureau.org<br />
<strong>Roof</strong>ing General Application Data<br />
10. Certi-label shakes/shingles shall be at<br />
least doubled at all eaves.<br />
11. Butts of the Certi-label shakes/shingles in<br />
the first course on roofs shall project 1 1/2"<br />
from the edge of roof eaves to insure<br />
proper spill into gutters <strong>and</strong> approximately<br />
1" at gable <strong>and</strong> rake edge.<br />
12. Certigrade shingles shall be spaced apart<br />
not less than 1/4", not more than 3/8".<br />
13. Certi-Split or Certi-Sawn shakes shall be<br />
spaced apart not less than 3/8", not more<br />
than 5/8".<br />
14. Premium <strong>and</strong> Number 1 Grade<br />
Certi-label shakes/shingles shall be<br />
applied with the weather exposures<br />
consistent with the following tables:<br />
Maximum weather exposure<br />
<strong>Shingle</strong> 3:12 to 4:12 4:12 <strong>and</strong><br />
length roof slope steeper<br />
16" 3 3/4" 5"<br />
18" 4 1/4" 5 1/2"<br />
24" 5 3/4" 7 1/2"<br />
<strong>Shake</strong> length <strong>and</strong> exposure<br />
18 " 7 1/2"<br />
24" 10"<br />
Note exception for resawn shakes:<br />
24" x 3/8" shake = 7 1/2"<br />
15. Chimney flashing shall extend up the<br />
chimney to a height not less than 3", up<br />
the roof slope to a point equal in<br />
height to the flashing on the chimney but<br />
never less than 1 1/2 times the Certi-label<br />
shake/shingle exposure. (All metal<br />
flashings should be painted.)<br />
Manufactured step-flashing:<br />
5" x 7" shingle = 2 1/2" wall, 2 1/2" roof<br />
8" x 12" shakes = 4" wall, 4 " roof<br />
16. Apron counter flashing shall extend<br />
to within 1" of the surface of the<br />
finished roof.<br />
Architect: Bill Latoza, Photo: Bill Latoza<br />
23
24<br />
17. Where saddles or crickets are formed in<br />
back of chimneys, curves or similar<br />
vertical surfaces, they shall be carried<br />
not less than 10" under the Certi-label<br />
shakes/shingles.<br />
18. Step flashing shall be used where vertical<br />
surfaces occur in connection with slopes.<br />
They shall be formed of separate pieces.<br />
Flashing shall extend horizontally not less<br />
than 3" <strong>and</strong> up the vertical wall so that<br />
they shall be lapped by the counter<br />
flashing not less than 4". It shall be<br />
installed in step fashion <strong>and</strong> each piece<br />
shall lap not less than 3" (one flashing<br />
installed on each course concealed under<br />
the covering course). If other than<br />
masonry is used the flashing shall extend<br />
up the wall not less than 3" behind the<br />
sheathing paper.<br />
19. Dormer flashings shall run 3" up under<br />
the sheathing paper <strong>and</strong> not less than 3"<br />
horizontally.<br />
20. Window caps <strong>and</strong> all other projections at<br />
points where rain water accumulates must<br />
be provided with flashings, such flashings<br />
must extend a distance of at least 3" up<br />
the wall behind the sheathing paper.<br />
21. Soil pipes: Metal shall extend no less than<br />
6" in all directions <strong>and</strong> shall be installed<br />
to lap <strong>and</strong> shed water to the Certi-label<br />
shakes or shingles below.<br />
Hips <strong>and</strong> Ridges<br />
22. All Certi-label shake/shingle hips <strong>and</strong><br />
ridges shall be of alternate overlap type<br />
applied at the same exposure as field of<br />
roof <strong>and</strong> with nails long enough to<br />
penetrate into sheathing at least 3/4”.<br />
Install a strip of felt, eave protection<br />
material or metal over hip or ridge under<br />
the ridge or hip cap. If longer or shorter<br />
ridge cap is used, adjust exposure<br />
accordingly.<br />
SPECIFICATION GUIDELINES<br />
Valleys<br />
23. Certi-label shakes/shingles extending into<br />
the valley shall be sawed to the proper<br />
miter.<br />
24. Do not lay shakes or shingles with grain<br />
parallel with the centerline of valleys.<br />
25. All valleys shall be installed with<br />
Certi-label shakes/shingles lapping the<br />
valley flashing not less than 7" on<br />
each side.<br />
26. On Certi-label shingle roofs of less than<br />
6:12 slope, flashing should extend at least<br />
11” on each side.<br />
27. For Certi-label shakes, metal valley sheets<br />
shall be center-crimped; of 20" minimum<br />
width; underlaid with a strip of Type 30<br />
ASTM Designation 226 (ASTM D 226) or<br />
ASTM Designation 4869 (ASTM D 4869)<br />
roofing felt over the sheathing, <strong>and</strong><br />
coated with a metal paint.<br />
28. Valley metals that have proved reliable in<br />
a particular geographic region should be<br />
selected. Copper flashing: check with local<br />
authorities on the durabilities of copper<br />
valleys in your area.<br />
Fasteners<br />
29. For projects within 15 miles of salt<br />
water – Certi-label roof shakes <strong>and</strong><br />
shingles shall be secured with two (2)<br />
stainless steel type 316 nails.<br />
For locations outside the 15 mile range<br />
of salt water – Certi-label roof shakes <strong>and</strong><br />
shingles shall be secured with two (2)<br />
stainless steel type 304 nails, or hot-dipped<br />
zinc coated galvanized nails conforming to<br />
minimum st<strong>and</strong>ard ASTM A 153 Class D<br />
2<br />
(1.0 oz/ft ) or better.<br />
Fasteners shall be long enough to<br />
penetrate into the solid wood sheathing<br />
at least 3/4” or all the way through.<br />
30. Nails shall be driven flush but not so that<br />
the nail head crushes the wood. They<br />
shall be placed approximately 3/4" to 1"<br />
from the side edges of the shakes/shingles<br />
<strong>and</strong> approximately 1 1/2" above the butt<br />
line of the following course.<br />
31. Each Certi-label roof shake/shingle shall<br />
be secured with two full-driven,<br />
corrosion-resistant fasteners.<br />
(Specify size <strong>and</strong> type.)<br />
<strong>Shingle</strong>s:<br />
32. Use 3d "box" nails for new roofs with 16"<br />
<strong>and</strong> 18" shingles.<br />
33. Use 4d "box" nails for new roofs with<br />
24" shingles.<br />
34. Use 5d "box" nails for over-roofing with<br />
16" <strong>and</strong> 18" shingles, <strong>and</strong> for hips<br />
<strong>and</strong> ridges.<br />
<strong>Shake</strong>s:<br />
35. Use 5d "box" nails for new roofs with<br />
18" straight-split shakes.<br />
36. Use 6d "box 2" nails for new roofs with<br />
18" <strong>and</strong> 24" h<strong>and</strong>split-<strong>and</strong>-resawn shakes.<br />
37. Use 5d "box" nails for new roofs with<br />
24" tapersplit.<br />
38. Use 6d "box 2" nails for new roofs with<br />
18" <strong>and</strong> 24" tapersawn.<br />
39. 6d nails are usually adequate for<br />
Certi-label shakes, but longer nails shall be<br />
used as Certi-label shake or shingle<br />
thickness or weather exposure dictates.<br />
40. Always ask the treatment company<br />
which fasteners are recommended for use<br />
with their pressure-treated Certi-label<br />
shakes or shingles. Some fasteners are not<br />
compatible with treated material.<br />
Ensure that fasteners used are accepted<br />
by your local Building Official.
1<br />
2<br />
3<br />
4<br />
5<br />
6<br />
7<br />
8<br />
1. The ” Certi ” Br<strong>and</strong> Name - Your Quality Assurance<br />
2. Product Grade<br />
3. Product Type<br />
4. Independent, 3rd<br />
5. This Number Shows Compliance with Total Quality<br />
Manufacturing System<br />
6. Mill Name, Location <strong>and</strong> Phone Number<br />
7. Industry Product Description<br />
HOW TO READ A CERTI-LABEL 25<br />
1<br />
H<strong>and</strong>split Red <strong>Cedar</strong> <strong>Shake</strong>s<br />
©1963,1998, 2002<br />
PACKING<br />
NUMBER 1 GRADE<br />
CEDAR SHAKE & SHINGLE BUREAU<br />
THE RECOGNIZED AUTHORITY SINCE 1915<br />
SUMAS, WASHINGTON (604) 820-7700<br />
Quality Control<br />
Agency Logo<br />
Mill Quality<br />
Certification Number<br />
Litho in Canada<br />
Mill Name<br />
Mill Location<br />
Mill Phone Number<br />
HEAVY RESAWS<br />
24" x 3/4"<br />
(610.0 mm X 19.0 mm)<br />
Party, Quality Control Agency<br />
Label ID Number<br />
004<br />
LIFETIME LIMITED WARRANTY AVAILABLE FROM CSSB MEMBER MANUFACTURER BELOW<br />
WHEN APPLIED BY A CSSB MEMBER APPROVED INSTALLER<br />
R<br />
Building Code<br />
St<strong>and</strong>ards<br />
Product Testing<br />
Numbers<br />
www.cedarbureau.org Country of Manufacture<br />
COVERAGE CHART<br />
2<br />
100 sq. ft. (9.3 m )<br />
BUNDLES EXPOSURE<br />
5 10" (250 mm)<br />
9<br />
10<br />
11<br />
12<br />
13<br />
14<br />
15<br />
8. Product Dimensions<br />
9. <strong>Cedar</strong> <strong>Bureau</strong> Label Number<br />
10. Building Code Compliance Numbers<br />
11. Product Performance Tests Passed<br />
12. Label Identification Number<br />
13. UPC Code<br />
14. Coverage Chart a nd Recommended Exposure<br />
15. Application Instructions on Reverse Side
Contact us for more information:<br />
US Address<br />
PO Box 1178<br />
Sumas, WA<br />
98295-1178<br />
TEL: 604-820-7700<br />
FAX: 604-820-0266<br />
This manual shows <strong>Cedar</strong> <strong>Shake</strong> & <strong>Shingle</strong> <strong>Bureau</strong> recommended procedures as of<br />
the manual’s print date. It is advisable to contact the <strong>Cedar</strong> <strong>Shake</strong> & <strong>Shingle</strong> <strong>Bureau</strong><br />
to ensure that you are using the latest available information.<br />
® ® ® ®<br />
The CSSB logo (”C” with shingles/shakes) , Blue Label , Certigrade , Certigroove ,<br />
® ® ® ® ® ®<br />
Certi-Cut , Certi-Guard , Certi-Last , Certi-Ridge , Certi-Sawn , Certi-Split , <strong>and</strong><br />
®<br />
Envirosmart are registered trademarks of the <strong>Cedar</strong> <strong>Shake</strong> & <strong>Shingle</strong> <strong>Bureau</strong>.<br />
TM<br />
Certi-label <strong>and</strong> other marks appearing in this manual are trademarks of the<br />
<strong>Cedar</strong> <strong>Shake</strong> & <strong>Shingle</strong> <strong>Bureau</strong>.<br />
R<br />
Canadian Address<br />
#2 – 7101 Horne St.<br />
Mission, BC<br />
V2V 7A2<br />
www.cedarbureau.org<br />
info@cedarbureau.com<br />
June 2011