Hiniker 9850 Manual - Snow Plow Stuff
Hiniker 9850 Manual - Snow Plow Stuff
Hiniker 9850 Manual - Snow Plow Stuff

Create successful ePaper yourself
Turn your PDF publications into a flip-book with our unique Google optimized e-Paper software.
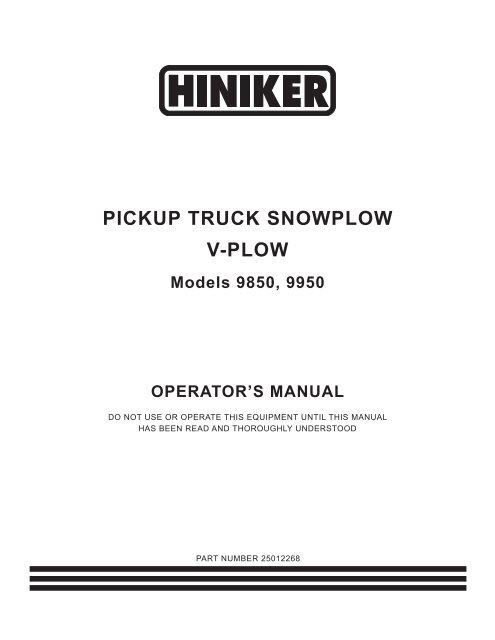
PICKUP TRUCK SNOWPLOW<br />
V-PLOW<br />
Models <strong>9850</strong>, 9950<br />
OPERATOR’S MANUAL<br />
DO NOT USE OR OPERATE THIS EQUIPMENT UNTIL THIS MANUAL<br />
HAS BEEN READ AND THOROUGHLY UNDERSTOOD<br />
PART NUMBER 25012268
TABLE OF CONTENTS<br />
Table of Contents 1<br />
25012268 5/07 <strong>Hiniker</strong>/25012268<br />
TO THE PURCHASER .................................................................................................................. 2<br />
SAFETY ......................................................................................................................................... 3<br />
OPERATING PROCEDURES ....................................................................................................... 4<br />
TROUBLE SHOOTING ................................................................................................................. 9<br />
MAINTENANCE ...........................................................................................................................11<br />
ASSEMBLY ................................................................................................................................. 13<br />
SYSTEM CHECK-OUT AND JOYSTICK CONFIGURATION ..................................................... 24<br />
SPECIFICATIONS ....................................................................................................................... 25<br />
WARRANTY ................................................................................................................................ 30
2 To The Purchaser<br />
This product is designed and manufactured to<br />
give years of dependable service when properly<br />
maintained and used for the purpose for which<br />
it is intended. Never allow anyone to operate<br />
this equipment until they fully understand the<br />
complete contents of this manual. It is the responsibility<br />
of owners who do not operate this<br />
equipment to ensure the operator is properly<br />
instructed and understands the contents of this<br />
manual. It is also the owner’s responsibility to<br />
ensure that anyone operating this equipment is<br />
mentally and physically capable of so doing.<br />
Important information is contained in this manual<br />
to help ensure safe and efficient operation.<br />
If you have any questions about this manual, or<br />
the equipment discussed herein, contact your<br />
<strong>Hiniker</strong> dealer.<br />
This is a safety alert symbol. It alerts<br />
an operator to information concerning<br />
personal safety. Always observe and<br />
heed these instructions, otherwise death or<br />
serious injury can result.<br />
All references to Left or Right are defined as<br />
viewing the plow from the cab of the truck.<br />
Instructions for raising and lowering the plow<br />
refer to the joystick controller as received from<br />
the factory. The raise and lower functions may<br />
be reversed to suit the preference of the operator<br />
by following the instructions on page 24 for<br />
switching the controller joystick and face plate.<br />
This Operator’s manual is shipped with this<br />
equipment. Contact your <strong>Hiniker</strong> dealer for additional<br />
copies.<br />
Always obtain original <strong>Hiniker</strong> service parts.<br />
Substitute parts could adversely affect equipment<br />
performance and warranty.<br />
Check that your dealer has forwarded the <strong>Hiniker</strong><br />
delivery report form along with the plow identification<br />
number because it helps maintain maximum<br />
service and warranty benefits. This does<br />
TO THE PURCHASER<br />
not put you on any mailing list, and information<br />
thereon is not available to others.<br />
Your snowplow’s identification number decal is<br />
at location (1) in the following illustration.<br />
DWG. NO. 5993<br />
Record the following information for later reference<br />
when obtaining service parts:<br />
Purchase Date<br />
Purchaser’s Name<br />
Dealer’s Name<br />
Machine I.D. No.
This is a safety alert symbol. It alerts<br />
an operator to information concerning<br />
personal safety. Always observe<br />
and heed these symbols and instructions,<br />
otherwise death or serious injury can result.<br />
Operator safety is a principle concern in equipment<br />
design and distribution. However, many<br />
accidents occur because a few seconds of<br />
thought, and a more careful approach to handling,<br />
were ignored. Accidents can be avoided<br />
by knowing and following the precautions cited<br />
in this manual.<br />
GENERAL SAFETY<br />
1. Read this manual thoroughly. Make sure<br />
the operator understands it and knows<br />
how to operate this equipment safely. This<br />
equipment can kill or injure an untrained or<br />
careless operator and bystanders. If you<br />
sell this equipment, ensure the new owner<br />
acknowledges receipt of this manual.<br />
2. This plow is intended for plowing snow<br />
only. <strong>Plow</strong>ing gravel, rocks, etc., or using<br />
the plow for any purpose other than plowing<br />
snow could result in harm to the operator or<br />
bystanders or cause damage to the plow or<br />
vehicle, and will void the warranty.<br />
3. Do not service or otherwise handle a plow<br />
in the raised position unless it is securely<br />
blocked against unexpected falling. Likewise,<br />
when servicing a plow with the wings<br />
extended, block wings to prevent unexpected<br />
wing movement due to accidental loss of<br />
hydraulic pressure or cylinder removal.<br />
4. Do not attempt to handle or service this<br />
equipment, or direct others to do the same,<br />
unless you know how to do it safely and<br />
have the proper tools for the job.<br />
5. Keep hands, feet, hair, and clothing away<br />
from moving parts.<br />
6. Do not alter the equipment to the extent of<br />
compromising safety or performance.<br />
SAFETY<br />
BEFORE OPERATION<br />
1. Discipline yourself to visually check for<br />
worn, damaged or cracked parts before<br />
starting use. Replace these with genuine<br />
<strong>Hiniker</strong> parts.<br />
2. Escaping hydraulic oil under pressure can<br />
penetrate the skin, causing serious injury.<br />
Do not use your hand to check for leaks.<br />
Use a piece of paper or cardboard to find<br />
suspected leaks.<br />
Tighten all connections before pressurizing<br />
hydraulic lines.<br />
If fluid is injected into the skin, get medical<br />
attention immediately to prevent serious infection.<br />
3. Check all controls and operating functions<br />
of the machine in a safe area before starting<br />
to work.<br />
DURING OPERATION<br />
1. Always wear seat belts when operating a<br />
motor vehicle.<br />
2. Ensure everyone is clear of the machine,<br />
especially away from blind areas of the operator,<br />
before starting, actuating hydraulics<br />
or operating this equipment.<br />
3. Do not plow snow at excessively high<br />
speeds.<br />
4. Avoid hitting objects that will damage your<br />
plow or truck.<br />
5. Set the brakes and stop the truck’s engine<br />
before adjusting or servicing your plow.<br />
AFTER OPERATION<br />
Safety 3<br />
1. Park the plow on a solid, level surface. Fully<br />
collapse the lift cylinder and use the stop<br />
plate, as described on page 7, before unhitching<br />
the plow to prevent the frame from<br />
falling forward.
4 Operating Procedures<br />
ATTACHING THE PLOW<br />
Attachment prongs on the truck should be mounted<br />
such that the bottom edge of the prongs measure<br />
about 10 inches above the ground. Prong<br />
receivers on the plow frame should remain parallel<br />
to the ground and at the correct height by<br />
fully retracting the lift cylinder with the upper lift<br />
links and bracing the frame with the stop plate<br />
before removing the plow from the truck (see<br />
“Removing the <strong>Plow</strong>”). Ideally, the prongs on<br />
the truck should lift the plow frame slightly when<br />
driving into the plow for attachment.<br />
Powdered graphite applied on the prongs will<br />
help the plow slide on and off more easily.<br />
Check that prongs are in line with the receivers<br />
before slowly driving into the plow. Set the parking<br />
brake in the truck to prevent it from creeping<br />
back out from the receivers.<br />
OPERATING PROCEDURES<br />
DWG. NO. 5995<br />
Remove the tab lock pin from the parking stand<br />
index plate to raise the stand to its highest position.<br />
Reinstall the pin in the plate for transport.<br />
Pull the latch handle into the clevis on the lift<br />
frame to force the sliders through the notches in<br />
the prongs and receivers. Pin the handle in the<br />
clevis with its klik pin. Failure to pin the handle in<br />
place may allow the plow to fall off the truck.<br />
Handle Pinned With <strong>Plow</strong> On Truck DWG. NO. 6003<br />
Plug in the three electrical connectors between<br />
the plow and the truck after latching the plow.<br />
The alignment tab on the 10-pin receptacle will<br />
mate with the slot in the mounting plate on the<br />
truck grill to ensure proper connection.<br />
Alignment Tab and Slot DWG. NO. 5232<br />
Check that the plow headlamps and turn signals<br />
are operational, and headlamps are aimed correctly.<br />
Test the lift and angling cylinders in a safe<br />
area before using the plow.<br />
To make alignment of the plow easier in the future,<br />
mark a point on the back of the LH headlamp,<br />
a point on the hood near the front of the<br />
truck and a point on the windshield that are in<br />
line when you are seated behind the steering<br />
wheel. Line up these three points when driving<br />
into the plow.
THE JOYSTICK CONTROLLER<br />
The joystick control box has slide switches for controlling<br />
power to the snowplow and for switching<br />
from the truck headlights to the headlights on the<br />
plow. The joystick controller raises and lowers the<br />
plow and angles the blade left or right. Two push<br />
buttons on the box are used to extend both wings<br />
to the scoop position or retract both wings to the<br />
V-position.<br />
NOTE: Drawings 4181 and 4163 show the raise<br />
and lower functions of the joystick controller as<br />
received from the factory. Functions may be reversed<br />
to suit the preference of the operator by<br />
following the instructions on page 24 for switching<br />
the controller joystick and face plate.<br />
The vehicle’s electrical power must be turned on<br />
before the control box will function.<br />
VEE<br />
Joystick Control Box DWG. NO. 4181<br />
Place the on/off switch on the joystick control box<br />
in the “On” position to supply power to the snowplow.<br />
A green light will indicate power is on.<br />
Move the headlight slide switch on the control box<br />
to the “<strong>Plow</strong>” position to change from the truck<br />
lights to the snowplow lights. Activate high beam/<br />
low beam and turn signal/parking lamps from the<br />
truck as you normally would without the plow attached.<br />
NOTE: When removing the plow, remember to<br />
place the headlight switch in the “Truck” position<br />
to return power to the truck’s headlights.<br />
Operating Procedures 5<br />
Raise and lower the plow by moving the joystick<br />
forward and backward. Hold the plow at an intermediate<br />
height by releasing the joystick from the<br />
“Raise” position when the plow reaches the desired<br />
height. Moving the joystick to the “Lower” position<br />
will lower the blade to the ground and allow<br />
the plow to “Float” along the contour of the ground<br />
while plowing snow. The green light on the control<br />
box will turn yellow to indicate the plow is in the<br />
float mode. Momentarily moving the joystick to the<br />
“Raise” position will remove the plow from the float<br />
mode and the yellow light will return to green.<br />
Raise the blade before working the wing functions<br />
of the plow to avoid resistance from the ground.<br />
Move the joystick left or right to angle the blade to<br />
that side. Push the left button on the control box to<br />
extend both wings into the scoop position. Push<br />
the right button to retract both wings into the Vposition.<br />
To hold the wings in position straight across the<br />
truck, start with the plow in the V-position, then<br />
push the left button on the control box to move<br />
both wings forward together and release the button<br />
when the wings are at the desired position.<br />
TRANSPORTING THE PLOW<br />
The extra weight of the snowplow on your truck<br />
will impair handling response and increase braking<br />
distance. The plow will also block some airflow to<br />
the vehicle’s cooling system, possibly causing the<br />
vehicle to overheat. Therefore, it is important not<br />
to exceed speeds above 45 mph when the plow is<br />
attached. Remove the plow if you must drive your<br />
truck for long distances when the temperature is<br />
warm.<br />
Fully raise the plow, then move the wings into the<br />
V-position before driving. Transport the plow with<br />
power to the joystick control box switched off to<br />
prevent accidental lowering of the plow. Never<br />
adjust the blade height or angle the wings while<br />
transporting the plow.
6 Operating Procedures<br />
PLOWING SNOW<br />
WARNING: Always wear a seat belt when<br />
plowing snow. Sudden contact with a hidden<br />
object can result in serious personal<br />
injury.<br />
Inspect areas to be plowed before snowfall for potential<br />
hazards, and mark obstructions with stakes that<br />
will be seen when snow covers the ground. Identify<br />
any emergency equipment and utility outlets that may<br />
need to be cleared in the event of a storm. Prepare<br />
a plan beforehand for clearing snow from tight or enclosed<br />
areas and locate sites for stacking snow.<br />
Level the plow in the scoop position by loosening<br />
the hardware through the front of the pushframe and<br />
through the diagonal braces to allow the plow to settle<br />
to the ground. Retighten the hardware once the<br />
plow is level.<br />
DWG. NO. 5996<br />
Adjust the skids at the back of the moldboard according<br />
to the surface to be plowed. The bottom of the<br />
skids should be about 1/2” below the cutting edge<br />
when plowing gravel roads or lots. Skids should be<br />
even with the cutting edge on hard surfaces such as<br />
asphalt or concrete.<br />
Always plow snow as it is accumulating. Wet snow<br />
may weigh about 12 pounds per cubic foot. The<br />
weight of snow being pushed by your plow may increase<br />
to several tons.<br />
Allowing snow depth to grow to unmanageable levels<br />
can cause difficult removal problems and can be<br />
costly in terms of wear on equipment.<br />
WARNING: Serious personal injury can result<br />
from plowing at excessive speeds, as<br />
well as costly damage to equipment and<br />
property, if an obstruction is encountered while<br />
plowing. Do not exceed 10 mph while plowing.<br />
<strong>Plow</strong> snow in the lowest truck gear to transfer maximum<br />
power to the cutting edge. Clear areas in front<br />
of buildings first. Backdrag snow away from buildings<br />
by driving to the building with the plow raised, then<br />
dropping the blade to pull snow away. Push snow to<br />
outer edges of the lot after snow is away from buildings.<br />
Begin clearing large lots by putting the plow in the Vposition<br />
and creating a single path. Roll snow to the<br />
outer edges of the lot by taking successive passes<br />
with the blade angled, or put the plow in the scoop<br />
position and push snow to the end of the lot. Break<br />
up hard snowbanks with the plow in the V-position.<br />
When plowing very deep snow, it may be necessary<br />
to raise the blade and shear off layers of snow until a<br />
working area is cleared. Work small areas in multiple<br />
passes to push snow to outer edges. Generally, 6<br />
inch snow can be plowed with the entire blade width;<br />
9 inch snow with 3/4 of the blade width; 12 inch snow<br />
with 1/2 of the blade width. Local conditions will determine<br />
how much work can be done before stalling<br />
or getting stuck.<br />
PARKING<br />
Lower the plow to the ground when parking your<br />
truck for a long period of time with the plow attached.<br />
Place the on/off switch in the “off’ position to prevent<br />
the plow from drawing power from the truck battery.<br />
The plow’s power unit may continue to draw electrical<br />
current from the truck battery if the control switch<br />
is left on; possibly resulting in insufficient charge to<br />
start the truck.<br />
REMOVING THE PLOW<br />
To remove the snowplow from your truck, park on a<br />
solid level surface with the blade straight across the<br />
truck. Lower the plow to the ground and leave the<br />
controller in the “float’ mode.<br />
Lower <strong>Plow</strong>, Leave Controller In “Float” DWG. NO. 4163
NOTE: The plow control box must be in the “float”<br />
mode to manually retract the lift cylinder rod. If the<br />
cylinder rod cannot be retracted with power on and<br />
the controller in float, loosen the packing nut on<br />
the lift cylinder up to 1 1/2 turns to reduce friction.<br />
Retracting the lift cylinder before removing the<br />
plow from the truck will orient the prong receivers<br />
correctly for reattaching the plow later. Failure to<br />
retract the lift cylinder rod will allow the lift frame<br />
to fall forward, possibly causing personal injury or<br />
damage to plow components.<br />
With the plow lowered to the ground and the controller<br />
in the “float” mode, push down on the upper<br />
lift links to full retract the lift cylinder rod.<br />
Retract Cylinder With Upper Lift Links DWG. NO. 6000<br />
Rotate the stop plate up to contact the spacer<br />
bushing on the lift cylinder bolt.<br />
Rotate Stop Plate DWG. NO. 6004<br />
Gently push back on the headlight bracket to tilt<br />
the frame back as far as possible, then release the<br />
bracket to allow the weight of the lift frame to lock<br />
the stop plate in place.<br />
Operating Procedures 7<br />
Push Lift Frame Back DWG. NO. 6005<br />
Swing the latch handle open until the sliders are<br />
fully removed from the attachment prongs.<br />
Swing Handle To Remove Sliders DWG. NO. 6008<br />
Lower the parking stand to the ground by removing<br />
the tab lock pin from the stand index plate, then<br />
swing the stand to the ground with the lever.<br />
Lower And Pin Parking Stand DWG. NO. 5999<br />
Reinstall the pin in the index plate through the hole<br />
in the lever to hold the stand in place.
8 Operating Procedures<br />
Disconnect the three electrical connectors by<br />
pulling them straight out from the receptacles.<br />
Do not twist the connectors. Twisting will damage<br />
the connector pins or the wiring harness.<br />
Disconnect Plugs DWG. NO. 5233<br />
Back inside the truck, return control of the headlights<br />
to the truck and switch power off on the<br />
snowplow control box, then slowly back the truck<br />
out from the plow.<br />
Turn Off Lights And Power DWG. NO. 4164<br />
NOTE: The stop plate will automatically fall forward<br />
as soon as the lift cylinder is fully extended<br />
for raising the blade prior to transporting the plow.<br />
If the snowplow won’t be used for an extended period<br />
of time, the prong weldment can be removed<br />
from the truck by removing the hex bolts that fasten<br />
it to the truck mount frame.
GENERAL<br />
1. Check to see that the motor is wired correctly<br />
with tight connections, for the proper<br />
voltage.<br />
2. Check reservoir oil level.<br />
PROBLEM<br />
1. <strong>Plow</strong> does not attach to vehicle<br />
2. Pump motor does not run<br />
3. Pump runs with joystick in<br />
neutral position<br />
4. <strong>Plow</strong> will not lower<br />
5. <strong>Plow</strong> will not raise or raises<br />
slowly, motor runs<br />
6. <strong>Plow</strong> does not remain<br />
raised with joystick in<br />
“neutral” position<br />
TROUBLE SHOOTING<br />
POSSIBLE CAUSE<br />
A. Receivers are tipped forward<br />
B. Prongs recoil out of receivers<br />
when attaching<br />
C. Park stand pinned too low<br />
A. Defective solenoid<br />
B. Defective pump motor<br />
C. Weak or defective battery<br />
D. Bad electrical connections<br />
E. Defective joystick control<br />
box<br />
F. Blown 10A fuse supplying<br />
power to control box<br />
A. Defective solenoid<br />
B. Defective joystick control<br />
box<br />
C. Wiring short<br />
A. Reversed wiring on valve<br />
block<br />
B. Defective joystick control<br />
box<br />
C. Defective lift return valve<br />
or coil<br />
A. Weak or defective truck<br />
battery<br />
B. Oil level low<br />
C. Hydraulic connection leak<br />
D. Lift valve not opening properly<br />
A. Leakage through pump<br />
check valve<br />
B. Leakage through solenoid<br />
lowering valve<br />
C. Internal leakage in cylinder<br />
D. Defective joystick control<br />
box.<br />
Trouble Shooting 9<br />
3. Check that wiring harness relay connections<br />
are wired correctly<br />
4. Check for external leakage at cylinders,<br />
hoses and power unit.<br />
REMEDY<br />
A. Fully collapse lift cylinder<br />
and rotate stop plate up to<br />
brace the lift frame before<br />
removing plow from truck<br />
B. Slowly drive into receivers<br />
and set parking brake<br />
C. Lower receivers by adjusting<br />
park stand.<br />
A. Replace solenoid<br />
B. Replace brushes or motor<br />
C. Charge or replace battery<br />
D. Clean and tighten connections<br />
E. Replace control box<br />
F. Replace fuse<br />
A. Replace solenoid<br />
B. Replace control box<br />
C. Locate and repair<br />
A. Correct wiring<br />
B. Replace control box<br />
C. Replace valve or coil<br />
A. Charge or replace battery<br />
B. Add oil (do not overfill)<br />
C. Tighten or redo connection<br />
D. Replace valve<br />
A. Clean valve, or replace<br />
B. Clean valve, or replace<br />
C. Repack or replace cylinder<br />
D. Replace control box
10 Trouble Shooting<br />
PROBLEM<br />
7. Angling cylinders relieve<br />
too easily or too difficultly<br />
while plowing<br />
8. Oil leaks from lift cylinder.<br />
9. Battery goes dead with<br />
power to the control box on<br />
and joystick in neutral position.<br />
10. Battery goes dead with<br />
power to the control box<br />
off.<br />
11. <strong>Plow</strong> lights are dim<br />
12. <strong>Plow</strong> does not clean-up<br />
snow from low areas<br />
13. In extremely cold temperatures,<br />
the oil in the hydraulic<br />
system is thickened,<br />
causing slow functioning of<br />
the plow<br />
14. Pump chatters when raising<br />
plow<br />
15. Oil running out of cap on<br />
hydraulic reservoir<br />
16. Vehicle overheats with the<br />
plow on<br />
17. <strong>Plow</strong> lights do not operate<br />
with plow attached<br />
18. Truck headlights do not operate<br />
properly with plow removed<br />
POSSIBLE CAUSE<br />
A. Relief pressure set too low<br />
or too high<br />
A. Loose packing<br />
B. Defective cylinder<br />
A. Short in wiring<br />
B. Short in valve coil(s)<br />
C. Defective joystick control<br />
box<br />
A. Short in wiring<br />
A. Bad connection(s)<br />
B. Lights not properly grounded<br />
A. Joystick controller in neutral<br />
A. Cold temperatures<br />
A. Hydraulic oil low<br />
A. <strong>Plow</strong>ing on steeply inclined<br />
terrain<br />
B. Too much oil<br />
A. Vehicle coolant level low<br />
B. Ice and snow buildup in<br />
grill<br />
C. Insufficient airflow to engine<br />
compartment<br />
A. Light switch on joystick<br />
control box in “truck” position<br />
B. Defective relay<br />
C. Faulty light switch on joystick<br />
control box<br />
D. Blown 10A fuse on vehicle<br />
accessory feed<br />
A. Light switch on joystick<br />
control box in “plow” position<br />
B. Defective relay<br />
REMEDY<br />
A. Have relief pressure adjusted<br />
by <strong>Hiniker</strong> snowplow<br />
dealer<br />
A. Tighten packing 1/8 turn<br />
B. Repack or replace cylinder<br />
A. Locate and repair<br />
B. Replace coil(s)<br />
C. Replace control box<br />
A. Locate and repair<br />
A. Repair connection<br />
B. Properly ground<br />
A. Controller should be in the<br />
down position (float)<br />
A. As the system warms, the<br />
oil will thin out and function<br />
normally.<br />
B. Select a recommended oil<br />
from the chart on Page 11<br />
for plowing in extremely<br />
cold temperatures.<br />
A. Add hydraulic oil until chattering<br />
stops. Do not overfill.<br />
A. Avoid excessive inclines or<br />
change direction of plowing<br />
B. Remove excess oil<br />
A. Add coolant<br />
B. Remove ice and snow<br />
C. Transport plow at lower<br />
speeds<br />
A. Move switch to “plow” position<br />
B. Replace relay<br />
C. Replace joystick control<br />
box<br />
D. Replace 10A fuse<br />
A. Move switch to “truck” position<br />
B. Replace relay
WARNING: Do not service or otherwise<br />
handle a plow in the raised position<br />
unless it is securely blocked<br />
against unexpected falling. Likewise, when<br />
servicing the plow with the wings extended,<br />
block wings to prevent unexpected wing<br />
movement due to accidental loss of hydraulic<br />
pressure or cylinder removal.<br />
Dependable snowplow operation is the result of<br />
following good maintenance procedures. Inspect<br />
your plow frequently to ensure that all parts are<br />
working smoothly, and develop a schedule for<br />
maintenance at required intervals.<br />
GENERAL<br />
Wash salt and dirt off the plow before storage.<br />
Touch-up any chips or scratches in the paint<br />
and apply a light coating of grease to extended<br />
cylinder rods to prevent corrosion.<br />
HYDRAULIC SYSTEM<br />
MAINTENANCE<br />
DWG. NO. 3066<br />
The majority of snowplow operational problems<br />
are caused by bad oil in the hydraulic system.<br />
Hydraulic oil should be changed every year for<br />
best performance. Select a high quality oil that<br />
is appropriate for the temperatures in which you<br />
will be plowing snow.<br />
Maintenance 11<br />
Change hydraulic oil with the wings in the<br />
V-position and the plow on the ground. Disconnect<br />
three electrical wiring harnesses from the<br />
power unit and uncouple five hydraulic lines.<br />
Unbolt the power unit from the plow, and remove<br />
it to a clean working area that can capture<br />
any spilled oil.<br />
Carefully unbolt the oil reservoir from the power<br />
unit and discard old oil.<br />
Clean the suction filter at the pump inlet and<br />
wipe any metal shavings off the magnet on the<br />
pump.<br />
Re-attach the reservoir onto the power unit and<br />
re-connect the power unit on the snowplow before<br />
adding new hydraulic oil.<br />
Pour hydraulic oil into the power unit reservoir<br />
until the oil level reaches the fill level.<br />
DWG. NO. 5847<br />
Raise and lower the plow, and cycle the wings<br />
to purge any air trapped in the system. Check<br />
the oil level with the plow on the ground and the<br />
wings retracted. Add oil to the fill level, if necessary,<br />
but do not overfill the reservoir.
12 Maintenance<br />
MECHANICAL COMPONENTS<br />
Prior to the operation of a new snowplow, or one<br />
which has been stored, inspect all hardware and<br />
verify proper torque on all bolts and nuts in accordance<br />
with the recommended torque specifications.<br />
GRADE 5 TYPE B & F LOCK NUT<br />
TORQUE VALUES<br />
Size Ft-lbs. N-m<br />
5/16” 13-18 17-25<br />
3/8” 23-33 31-44<br />
1/2” 58-82 79-112<br />
5/8” 117-165 158-223<br />
GRADE 5 BOLT TORQUE VALUES*<br />
Size Ft-lbs. N-m<br />
1/4” 8-12 11-16<br />
3/8” 29-41 39-56<br />
1/2” 73-103 99-140<br />
5/8” 146-206 198-279<br />
*Applications without lock nuts.<br />
Loose bolts can cause hole elongation and part<br />
failure resulting in dangerous operating conditions<br />
and equipment breakdown.<br />
Check all hardware periodically during the plowing<br />
season and keep tightened to specified<br />
torques. Replace worn bolts and lock nuts with<br />
grade 5 bolts and equivalent type B or type F<br />
lock nuts. Type B lock nuts are plain hex; type F<br />
lock nuts are flanged hex.<br />
Inspect wear of the cutting edges before every<br />
plowing season and frequently throughout the<br />
season. Replace cutting edges before wear is<br />
into wing or mast sections to avoid damage to<br />
these components.<br />
The 5/16” hex bolts in the latch sliders are factory<br />
retained with anaerobic threadlock. If removal<br />
or replacement of these bolts is necessary,<br />
purchase new bolts with threadlocker from<br />
your <strong>Hiniker</strong> dealer, or apply a commercially<br />
available threadlock, i.e., Loctite 242 (blue) to<br />
standard 5/16-18 x 3/4” grade 5 hex bolts before<br />
reassembly.<br />
ELECTRICAL MAINTENANCE<br />
Periodically check all electrical connections for<br />
proper fit and remove any contamination that<br />
may be present.<br />
To prevent contamination always place dust<br />
caps on connectors when not in use. This is<br />
particularly important when the plow is being<br />
stored. The use of dielectric grease is recommended<br />
to reduce corrosion of the contacts and<br />
to make connecting and disconnecting easier.<br />
Before each season check vehicle battery and<br />
electrical system for proper operation. A weak<br />
battery, dirty terminals, or faulty charging system<br />
may cause improper operation and possible<br />
failure of the joystick controller.
GENERAL INFORMATION<br />
WARNING: To prevent personal injury<br />
or death, be certain to keep clear of<br />
any parts that may drop when removing<br />
bundling straps, wires or brackets. Support<br />
heavy sections with hoist or blocks before<br />
removing wires or straps.<br />
In the following instructions, left and right machine<br />
references are defined as being viewed<br />
from the cab of the truck.<br />
Be certain that hydraulic hoses and electrical<br />
wires are safely routed and allow full motion of<br />
moving parts. Secure loose wires with plastic tie<br />
straps.<br />
Some components are fastened at incorrect locations<br />
for shipping purposes.<br />
All hardware should be tightened only enough<br />
to ensure safety during assembly. Torque hardware<br />
to specified values, as shown in the following<br />
chart, only after assembly has been completed.<br />
GRADE 5 TYPE B & F LOCK NUT<br />
TORQUE VALUES<br />
Size Ft-lbs. N-m<br />
5/16” 13-18 17-25<br />
3/8” 23-33 31-44<br />
1/2” 58-82 79-112<br />
5/8” 117-165 158-223<br />
GRADE 5 BOLT TORQUE VALUES*<br />
Size Ft-lbs. N-m<br />
1/4” 8-12 11-16<br />
3/8” 29-41 39-56<br />
1/2” 73-103 99-140<br />
5/8” 146-206 198-279<br />
* applications without lock nuts<br />
Replace worn bolts and lock nuts with<br />
grade 5 bolts and equivalent type B and type F<br />
lock nuts. Type B lock nuts are plain hex; type F<br />
lock nuts are flanged hex.<br />
PLOW ASSEMBLY<br />
PLOW ASSEMBLY<br />
V-<strong>Plow</strong> Assembly 13<br />
1. Lift the snowplow moldboard assembly to<br />
a clear level working area by hooking hoist<br />
chains through the two holes in the top plate of<br />
the center mast. The hoist should be capable<br />
of lifting at least 1,000 lb. loads.<br />
Remove two side markers and 5/16 inch hardware<br />
from the top of the moldboard, and set<br />
aside for assembly later. Save two sets of 5/16<br />
inch hex bolts, flat washers and lock nuts from<br />
the shipping brackets for assembling the side<br />
markers.<br />
2. Open the frame crate and set aside the power<br />
unit box, headlamp boxes and parts boxes for<br />
later assembly. Remove the frame assembly<br />
from the shipping crate to a piece of cardboard<br />
or other padding that will prevent scratches in<br />
the paint.<br />
Locate the 3/4 inch x 4-1/4 inch hex bolt, 3/4<br />
inch nylon insert lock nut and one 90 O O-ring/<br />
flare hydraulic fitting in the hardware bag in<br />
the parts box.<br />
Install the O-ring end of the 90 O fitting into the<br />
lift cylinder port so that the flared end points<br />
toward the rod end and is directed down about<br />
20 O from the cylinder centerline to provide<br />
clearance for installing the hose later.<br />
DWG. NO. 6009<br />
Swing the lift frame up to its working position<br />
and hold with a hoist or forklift. Bolt the upper lift
14 V-<strong>Plow</strong> Assembly<br />
links to the outside of the two lugs on the lift<br />
frame, then pin the lift cylinder between the<br />
two lugs on the frame assembly with the hardware<br />
provided.<br />
DWG. NO. 6007<br />
Rotate the stop plate assembled to the push<br />
frame up to contact the spacer bushing on<br />
the lift cylinder bolt. Gently push back on<br />
the upper lift frame tube, then release to allow<br />
the weight of the frame to lock the stop<br />
plate in place.<br />
3. Remove two 5/8 inch x 8 inch hex bolts<br />
from the front of the pushframe and save<br />
the hardware for reinstallation. Remove<br />
shipping straps from between the center<br />
mast and lugs on the back of the moldboard<br />
assembly. Discard the straps and save the<br />
hardware for reinstallation.<br />
DWG. NO. 6001<br />
Move the frame assembly to the back of the<br />
moldboard assembly and align three sets of<br />
holes at the front of the frame assembly with<br />
holes through the moldboard center mast.<br />
Place a flat washer onto the three hex bolts<br />
before inserting them through the holes.<br />
Secure the bolts with flat washers and lock<br />
nuts.<br />
Pin the parking stand to hold the square tubes<br />
of the pushframe parallel to the ground.<br />
DWG. NO. 6002<br />
The bottom surface inside the two prong receiver<br />
channels should measure about 10<br />
inches above the ground in the working position.<br />
Find two sets of upper and lower angle<br />
braces in the parts box. From the hardware<br />
bag, remove six 5/8 inch x 1 1/4 inch hex<br />
bolts and one 5/8 inch x 7 inch hex bolt.<br />
Also remove four 5/8 inch flat washers and<br />
seven 5/8 inch lock nuts.<br />
DWG. NO. 5994<br />
Refer to drawing 5994 and install the angle<br />
brackets between the center mast and the<br />
pushframe.
4. Remove two hydraulic cylinders from the<br />
parts box. From the hardware bag, remove<br />
two 90 O O-ring/flare hydraulic adapters and<br />
two 45 O O-ring/flare adapters.<br />
DWG. NO. 5998<br />
Install the butt end of the two cylinders between<br />
lugs on the pushframe using 3/4 inch<br />
x 3 1/2 inch hex bolts and lock nuts supplied.<br />
Pin the rod end of the cylinders between<br />
lugs on the back of the moldboard<br />
with clevis pins and cotter pins removed<br />
earlier.<br />
Turn the O-ring end of the two 45 O adapters<br />
into ports on the butt end of the cylinders<br />
so that the flared end of the adapters are<br />
directed forward.<br />
Turn the O-ring end of a 90 O adapter into the<br />
rod end of the LH cylinder so that the flared<br />
end is directed straight to the right. Turn the<br />
O-ring end of the second 90 O adapter into<br />
the rod end of the RH cylinder so that the<br />
flared end of the adapter is directed straight<br />
to the rear.<br />
5. Before assembling the power unit on the lift<br />
frame, scrape a small amount of paint from<br />
the two mount holes in the lift frame to provide<br />
a good electrical ground for the turn<br />
signals and parking lights.<br />
Mount the power unit on the lift frame with<br />
two 3/8 inch x 3/4 inch hex bolts and two 3/8<br />
inch lock washers. The plastic reservoir of<br />
the power unit should be to the left side of<br />
the of the plow (see following illustration).<br />
V-<strong>Plow</strong> Assembly 15<br />
DWG. NO. 5839<br />
Locate five straight O-ring/flare hydraulic<br />
adapters in the hardware bag. Turn the<br />
adapters into the five ports on the power<br />
unit.<br />
Identify four short hydraulic hoses and one<br />
longer hose in the parts box. Each hose has<br />
a swivel nut on each end that will assemble<br />
to the adapters installed in the cylinders<br />
and power unit. Straight hose ends will assemble<br />
to adapters in the cylinders and 90 O<br />
hose ends will assemble to adapters in the<br />
power unit. Route all of the hoses ahead of<br />
the lift frame tube.<br />
DWG. NO. 6011<br />
Connect port A on the power unit to the rod<br />
end of the RH wing cylinder, using one of<br />
the short hoses.<br />
Connect port B on the power unit to the butt<br />
end of the RH wing cylinder, using one of<br />
the short hoses routed through the hose<br />
loop.
16 V-<strong>Plow</strong> Assembly<br />
DWG. NO. 6010<br />
Connect port C on the power unit to the rod<br />
end of the LH wing cylinder using the long<br />
hose routed through the hose loop.<br />
Connect port D on the power unit to the butt<br />
end of the LH wing cylinder, using one of<br />
the short hoses.<br />
Connect port E on the power unit to the lift<br />
cylinder.<br />
DWG. NO. 5997<br />
Use a plastic tie strap to band the four wing<br />
cylinder hoses together as they hang vertically.<br />
Also band the two rod end hoses together<br />
just ahead of the hose loop.<br />
6. Before assembling the headlamp brackets on<br />
the lift frame tube, scrape a small amount of<br />
paint from the three holes in each bracket and<br />
the four holes in the frame tube to provide a<br />
good electrical ground for the turn signals and<br />
parking lights.<br />
Mount the headlamp brackets to the lift frame<br />
tube with four 3/8 inch x 2 inch carriage bolts<br />
and flanged lock nuts from the hardware bag<br />
in the parts box.<br />
Remove the LH and RH headlamps from their<br />
boxes and mount on the brackets with hardware<br />
from the headlamp boxes.<br />
Use plastic tie straps to band headlamp cables<br />
above and below the brackets at the<br />
locations shown to provide clearance for the<br />
power unit cover rods later.<br />
DWG. NO. 6012<br />
7. Identify the power cable assembly and wiring<br />
harness for the plow power unit in the electrical<br />
components parts box. A ground harness<br />
for solenoids on the power unit is in the power<br />
unit box.<br />
The power cable assembly has two cables<br />
with ring terminals on one end and a two pin<br />
connector on the other, and measures about<br />
38 inches long.<br />
The wiring harness has a ten pin connector<br />
and a three pin connector on one end and the<br />
other end has connectors labeled “DRIVER<br />
SIDE” and “PSNGR SIDE” for the headlamps,<br />
and six loose wires with spade receptacles<br />
and one wire with a ring terminal.<br />
The ground wire harness has a ring terminal<br />
and six spade receptacles on two wires.
DWG. NO. 5849<br />
Refer to drawing 5849. Attach the ring terminal<br />
of the solid red (or red striped) wire of the<br />
power cable assembly to the terminal on the<br />
motor at location 1.<br />
Fasten the ring terminal of the solid black wire<br />
of the power cable assembly, the black wire<br />
with the ring terminal on the plow harness, and<br />
the ring terminal of the ground wire harness to<br />
the terminal on the motor at location 2.<br />
Attach the coil ground wire harness as<br />
shown.<br />
DWG. NO. 6013<br />
Refer to drawing 6013. Use a plastic tie strap<br />
to band the plow wiring harness to the lift<br />
frame tube at location 3. Route wires to the<br />
power unit and headlamps, as shown.<br />
V-<strong>Plow</strong> Assembly 17<br />
DWG. NO. 5844<br />
Connect the Tan wire of the wiring harness<br />
to the spade terminal on solenoid S1.<br />
Connect the Pink wire to solenoid S2.<br />
Connect the Gray wire to solenoid S3.<br />
Connect the Brown wire to solenoid S4.<br />
Connect the Blue with White stripe wire to<br />
solenoid S5.<br />
Connect the Blue wire to solenoid S6.<br />
Connect the RH headlamp to the harness<br />
end labeled “PSNGR SIDE” and the<br />
LH headlamp to the end labeled “DRIVER<br />
SIDE”.
18 V-<strong>Plow</strong> Assembly<br />
WARNING: Disconnect truck battery<br />
before beginning electrical installation<br />
to avoid shock hazard.<br />
The pump solenoid, underhood wiring harness,<br />
power cable and joystick control box are located<br />
in the parts box shipped with the snowplow<br />
frame.<br />
NOTE: Fill electrical connectors with dielectric<br />
grease, and lightly coat ring and spade terminals<br />
before installation to prevent corrosion.<br />
8. Refer to drawing 3890. Lay the harness in<br />
it’s approximate position for final assembly<br />
with the 7-pin circular connector near the<br />
drivers side firewall, the 10-pin connector<br />
just left of center near the grill, the relays<br />
near the drivers side inner fender and the<br />
5-pin headlight connectors at the respective<br />
headlights.<br />
DWG. NO. 3890<br />
9. Determine the location of the vehicle battery.<br />
If the battery is located on the right<br />
(passenger) side or if there are two batteries<br />
configured as a 12 volt system then proceed<br />
to step 10. If the battery is located on<br />
the left side of the vehicle then the wiring<br />
harness will need to be modified.
Refer to drawing 3892. Remove the tape<br />
from the black corrugated loom at the<br />
points shown. Locate an Orange, Red, and<br />
two Black wires. These wires connect to the<br />
battery and pump solenoid. Remove the<br />
four wires from approximately 33 inches of<br />
the loom, making sure the Red and Black<br />
wires are long enough to connect to the battery.<br />
Tuck these wires back into the loom as<br />
shown in the drawing and retape the loom.<br />
10. If there is no access hole in the drivers side<br />
firewall then drill a 1 1/8 inch diameter hole.<br />
Route the 7-pin circular connector through<br />
the firewall into the cab compartment and<br />
install the 4 inch grommet in the hole, if required.<br />
V-<strong>Plow</strong> Assembly 19<br />
DWG. NO. 3892<br />
CAUTION: Ensure that the relays will<br />
clear any hood lift/spring mechanisms<br />
before installation.<br />
11. Select an area near the drivers side fender<br />
for the relays. Drill three 1/8” diameter<br />
holes and secure the relays with #8 x 1/2<br />
inch self-tapping screws from the hardware<br />
bag in the parts box.<br />
12. Splice the red with white stripe wire to the<br />
vehicle’s switched 12 volt auxiliary electrical<br />
circuit. This will prevent operation of the<br />
plow without the vehicle key being on. This<br />
wire controls the accessory relay that powers<br />
the control joystick and solenoids.<br />
13. Connect the joystick control box to the 7-pin<br />
connector inside the truck cab. Secure the<br />
box at a safe location in the cab with the<br />
strip of hook and loop fastener.
20 V-<strong>Plow</strong> Assembly<br />
WARNING: Ensure that the pump solenoid<br />
and associated wiring will clear<br />
any hood lift/spring mechanisms before<br />
installation.<br />
14. Select an area within 16 inches of the vehicle<br />
battery for the pump solenoid. Drill<br />
two 3/16 inch diameter holes and fasten the<br />
solenoid with two 1/4 inch X 1/2 inch long<br />
self tapping screws from the hardware bag<br />
in the parts box. Connect the Black wire to<br />
one of the small posts on the solenoid, connect<br />
the Orange wire to the remaining small<br />
post, polarity is not important.<br />
15. Safely route the 10-pin and 3-pin circular<br />
connectors through the grill of the vehicle<br />
to a location that will be easily accessible<br />
with the plow attached.<br />
16. Refer to drawing 3891. Install the underhood<br />
power cable by first connecting the<br />
ring terminal from the solid Black cable and<br />
the two Black wires from the harness to the<br />
minus (-) post of the vehicle’s battery. Connect<br />
the ring terminal from the solid Red (or<br />
Red striped) cable to the pump solenoid terminal,<br />
route the power cable to the grill near<br />
the 10-pin connector.<br />
Install the 24 inch Red power cable between<br />
the pump solenoid and the vehicle’s starter<br />
solenoid positive terminal. If the vehicle’s<br />
starter solenoid is not accessible, connect<br />
the Red (or Red striped) cable to the<br />
plus (+) terminal of the battery. Connect the<br />
Red fused wire to the positive terminal of<br />
the battery.<br />
17. Remove the plug mount plate kit from the<br />
hardware bag in the parts box.<br />
Refer to drawing 5295.<br />
DWG. NO. 3891<br />
Fasten the power cable connector to the<br />
clamp by inserting the #6 X 1 inch machine<br />
screw through the small hole in the<br />
connector, then through the center hole of<br />
the clamp. Secure the screw with a #6 lock<br />
nut.<br />
Fasten the clamp to the mount plate with<br />
the two #10 X 1-1/2 inch machine screws<br />
and #10 lock nuts supplied.<br />
Mount the 10-pin circular connector to the<br />
mount plate with four #6 X 1/2 inch screws<br />
and lock nuts such that the tab on the connector<br />
will be up, as shown.<br />
Mount the 3-pin circular connector to the<br />
mount plate with four #6 X 1/2 inch screws<br />
and lock nuts such that the tab on the connector<br />
will be up, as shown.<br />
Assemble the mount plate and connector<br />
covers to the vehicle grill with plastic ties.
18. Locate three blue connector splices in the<br />
hardware bag in the plow’s parts box.<br />
DWG. NO. 4165<br />
Using a blue splice, crimp the single brown<br />
wire from the underhood harness into the<br />
vehicle’s driver’s side parking light wire.<br />
Using a blue splice, crimp the single yellow<br />
wire from the underhood harness into the<br />
vehicle’s driver’s side turn signal wire.<br />
V-<strong>Plow</strong> Assembly 21<br />
DWG. NO. 5295<br />
Using a blue splice, crimp the single green<br />
wire from the underhood harness into the<br />
vehicle’s curbside turn signal wire.<br />
19. Select the proper headlight adapter for your<br />
vehicle, specific instructions are included<br />
with each kit.<br />
The headlight adapter kit consists of two<br />
identical adapters. Install the adapters according<br />
to the instructions included with the<br />
kit and connect to the 5-pin connectors of<br />
the underhood wiring harness.<br />
20. Secure all cables away from hot or moving<br />
components with cable ties.<br />
This completes the Electrical Installation.
22 V-<strong>Plow</strong> Assembly<br />
20. At this point, assemble the mount kit on the<br />
truck as described in the instructions supplied<br />
with each kit.<br />
Prongs from the truck mount kit should<br />
be at a height that will slightly lift the plow<br />
frame when attaching the plow.<br />
Apply powdered graphite on the prongs to<br />
help the plow slide on and off more easily.<br />
Prong receivers on the plow frame must be<br />
parallel to the ground before attaching the<br />
plow.<br />
DWG. NO. 6003<br />
Attach the plow onto the truck by driving the<br />
truck prongs into the receivers on the plow<br />
frame. Pull the latch handle into the frame<br />
clevis to move sliders through the notches<br />
in the prongs and receivers. Pin the handle<br />
in the clevis with its klik pin.<br />
DWG. NO. 5995<br />
Raise the parking stand to its highest position<br />
and repin.<br />
Connect the three electrical cables from<br />
the plow to their corresponding receptacles<br />
on the truck.<br />
DWG. NO. 5232<br />
21. Select an appropriate hydraulic oil from the<br />
accompanying chart.<br />
DWG. NO. 3066<br />
Pour hydraulic oil into the power unit reservoir<br />
until the oil level reaches the fill level.
DWG. NO. 5847<br />
Raise and lower the plow, and cycle the wings<br />
to purge any air trapped in the system. Check<br />
the oil level with the plow on the ground and<br />
the wings retracted.<br />
Add oil to the fill line, if necessary, but do not<br />
overfill the reservoir.<br />
NOTE: A new hydraulic lift cylinder may leak a<br />
small amount of oil until packings become saturated<br />
and produce a good seal. If leakage is excessive,<br />
or if leaking continues after initial cycling,<br />
tighten the cylinder packing nut in 1/8-turn increments<br />
until leaking stops.<br />
22. Check that the plow blade is level on the<br />
ground with the wings in the scoop position<br />
and the plow on the ground.<br />
DWG. NO. 5996<br />
Level the plow in the scoop position by loosening<br />
the hardware through the front of the<br />
pushframe and through the diagonal braces<br />
to allow the plow to settle to the ground. Retighten<br />
the hardware once the plow is level.<br />
V-<strong>Plow</strong> Assembly 23<br />
23. Fasten the power unit cover assembly onto<br />
the lift frame bracket with two 1/4 inch x 3/4<br />
inch carriage bolts, flat washers and lock<br />
nuts from the hardware bag in the parts box.<br />
Tighten the lock nuts so that the assembly<br />
is secure, yet the cover hinges freely.<br />
DWG. NO. 6014<br />
When the cover is closed, rods from the<br />
latch handles should extend behind the<br />
light brackets to hold the cover in place.<br />
24. Assemble side markers on the ends of the<br />
moldboard with 5/16 inch bolts, flat washers<br />
and lock nuts.<br />
DWG. NO. 6006
24 V-<strong>Plow</strong> Assembly<br />
SYSTEM CHECK-OUT<br />
NOTE: The power cable and wiring harnesses<br />
must be connected between the snowplow and<br />
truck to test the functions of the headlights and<br />
power unit. Vehicle ignition must be switched on.<br />
1. Move the headlight switch on the joystick controller<br />
to the “TRUCK” position and turn on<br />
the vehicle headlights. High and low beams<br />
should operate on the truck.<br />
2. Move the switch to the “PLOW” position.<br />
<strong>Plow</strong> lights should operate in both high and<br />
low beams. Vehicle headlights should be off.<br />
3. Test the parking lights and turn signals. Lights<br />
on the plow and truck should operate at the<br />
same time.<br />
4. In an area clear of bystanders, test joystick<br />
functions by raising and lowering the plow<br />
and angling side to side.<br />
Raise and lower functions may be reversed,<br />
as follows.<br />
JOYSTICK CONFIGURATION<br />
As supplied from the factory, the snowplow controller<br />
raises the plow when the joystick is pulled<br />
backward and lowers the plow when the joystick is<br />
pushed forward.<br />
These functions can be reversed by reassembling<br />
the joystick switch and face plate.<br />
To reverse the face plate, pry the plate away from<br />
the controller by inserting a small screwdriver<br />
along the side of the plate at location 1 in drawing<br />
5855. Flip the plate over, then reinstall by gently<br />
squeezing the long sides together and sliding the<br />
four tabs into slots in the controller top.<br />
To reverse the joystick switch, remove four screws<br />
from the back of the controller and remove the main<br />
circuit board assembly from the case halves.<br />
Gently pull on the edges of the small circuit board at<br />
the base of the joystick switch to remove the switch<br />
from the five pins on the main circuit board.<br />
Rotate the switch 90 O , then gently push the switch<br />
back onto the five pins.<br />
Insert the main circuit board assembly back into<br />
the case top, making sure the joystick is properly<br />
seated and the harness strain relief is inside the<br />
case.<br />
Reassemble the case with the four screws, checking<br />
that wires are not pinched between bosses.<br />
Test the controller on the snowplow or a plow tester<br />
to verify that raise and lower functions match<br />
arrows on the face plate.<br />
DWG NO. 5855
SPECIFICATIONS<br />
8 1/2’ <strong>Plow</strong> 9 1/2’ <strong>Plow</strong><br />
PLOW WIDTH - STRAIGHT 8’6” 9’6”<br />
PLOW WIDTH - “V” POSITION 7’9” 8’8”<br />
PLOW WIDTH - SCOOP POSITION 6’11” 7’10”<br />
PLOW WIDTH - ANGLED 30 O 7’4” 8’3”<br />
BLADE HEIGHT 30”<br />
CUTTING EDGE 3/8” X 6” 1084 Steel<br />
WEIGHT w/o SNOW DEFLECTOR<br />
(Does Not Include Weight Of Mount Kit)<br />
776 lb 814 lb<br />
HYDRAULIC OIL CAPACITY 2 1/2 QTS<br />
HIGH BEAM HEADLIGHT BULB One #H1 12V, 55W<br />
LOW BEAM HEADLIGHT BULB One #H7 12V, 55W<br />
TURN SIGNAL/PARKING BULB<br />
One #1157 Heavy Duty Double<br />
Contact 32/3 C.P<br />
WIRING HARNESS FUSE 10 AMP<br />
Specifications 25
26 Wiring Harness
Wiring Harness 27<br />
DWG NO. 5857
28 V-<strong>Plow</strong> Power Unit<br />
DWG NO. 5850
Power Unit Hydraulic Circuit Diagram 29<br />
DWG NO. 5851
30 <strong>Hiniker</strong> Warranty<br />
HINIKER SNOWPLOW LIMITED WARRANTY<br />
The only warranty <strong>Hiniker</strong> Company (<strong>Hiniker</strong>) gives and the only warranty that any <strong>Hiniker</strong> dealer is authorized to<br />
give on behalf of <strong>Hiniker</strong> is as follows: (NO EMPLOYEE OR REPRESENTATIVE IS AUTHORIZED TO CHANGE<br />
THIS WARRANTY IN ANY WAY OR GRANT ANY OTHER WARRANTY.)<br />
<strong>Hiniker</strong> warrants to the original purchaser of a <strong>Hiniker</strong> snowplow that <strong>Hiniker</strong> will repair or replace any defects<br />
in material and workmanship that occur within two years from date of retail delivery except the following items:<br />
<strong>Hiniker</strong> warrants that it will repair or replace any defects in materials or workmanship with respect to the paint<br />
finish, any accessories, and service parts and components for a period of one year from date of retail delivery.<br />
<strong>Hiniker</strong>’s obligation and liability under this warranty is expressly limited to repairing or replacing, at <strong>Hiniker</strong>’s option,<br />
at an authorized <strong>Hiniker</strong> dealer location, the defective parts at no charge to the original purchaser. HINIKER<br />
MAKES NO OTHER WARRANTY, EXPRESS OR IMPLIED AND MAKES NO WARRANTY OF MERCHANT-<br />
ABILITY OR OF FITNESS FOR ANY PARTICULAR PURPOSE.<br />
HINIKER’S OBLIGATION UNDER THIS WARRANTY SHALL NOT INCLUDE ANY TRANSPORTATION CHARG-<br />
ES TO OR FROM THE AUTHORIZED HINIKER DEALER LOCATION OR ANY LIABILITY FOR INCIDENTAL,<br />
INDIRECT OR CONSEQUENTIAL DAMAGE OR DAMAGES OF ANY KIND FOR LOST PROFITS OR DELAY.<br />
If requested by <strong>Hiniker</strong>, products or parts for which a warranty claim is made are to be returned freight prepaid<br />
to our factory. Any improper use, operation beyond rated capacity, substitution of parts not approved by <strong>Hiniker</strong><br />
Company, or any alteration or repair in such manner as in our judgment affects the product materially and adversely<br />
shall void this warranty.<br />
<strong>Hiniker</strong> reserves the right to make improvements or changes to any of it’s products without notice. Such improvements<br />
or changes shall not trigger any obligation by <strong>Hiniker</strong> to update, modify or change any products previously<br />
sold by <strong>Hiniker</strong>.<br />
HINIKER does not warrant the following:<br />
HINIKER WARRANTY<br />
1. Used products.<br />
2. Any product that has been repaired, modified or altered in a way not approved by <strong>Hiniker</strong> Company.<br />
3. Depreciation or damage caused by normal wear, lack of reasonable and proper maintenance, failure<br />
to follow Operators <strong>Manual</strong> Instructions, misuse, lack of proper protection during storage, or accident.<br />
4. Parts replacement and service necessitated by normal wear or maintenance including, but not limited<br />
to, cutting edges, hoses, snowplow skid shoes, blade marker guides and hardware.<br />
5. Paint finish damage caused by normal wear.<br />
<strong>Hiniker</strong> does not assume any liability for any damage to a motor vehicle resulting from the attachment or use of<br />
a <strong>Hiniker</strong> snowplow. Compliance with applicable motor vehicle regulations is the responsibility of the installer.<br />
Attachment of a <strong>Hiniker</strong> snowplow to a motor vehicle is at the risk of the purchaser.<br />
It is the responsibility of the original snowplow purchaser to verify the original date of purchase.<br />
A DELIVERY REPORT FORM must be filled out and received by <strong>Hiniker</strong> with 30 days of retail delivery at the address<br />
below to initiate the warranty coverage.<br />
HINIKER COMPANY<br />
58766 240th St.<br />
P.O. Box 3407<br />
MANKATO, MN 56002-3407<br />
PHONE (507) 625-6621 -- FAX (507) 625-5883<br />
www.hiniker.com