Table of Contents - OsteoMed
Table of Contents - OsteoMed
Table of Contents - OsteoMed

You also want an ePaper? Increase the reach of your titles
YUMPU automatically turns print PDFs into web optimized ePapers that Google loves.
14. Remove the distal K-wire or Holding Tak prior to compression screw<br />
placement.<br />
15. Using the depth gauge, select a Standard 2.7mm standard screw <strong>of</strong> appropriate length<br />
and insert it into the compression hole with the driver.<br />
16. Repeat steps 13-15 for the remaining compression holes, compressing the medial joints<br />
first and proceeding laterally.<br />
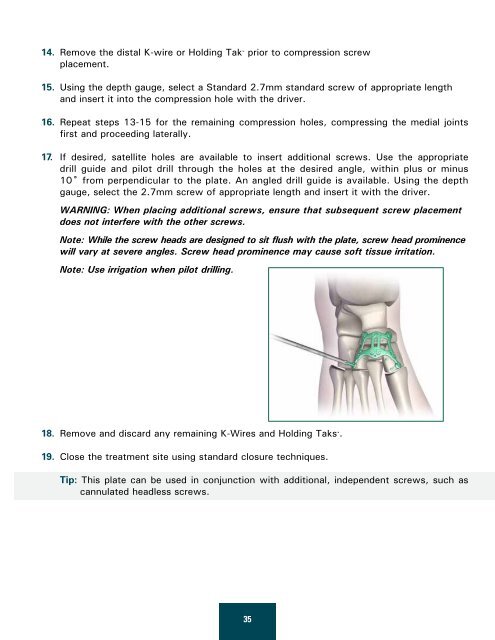
17. If desired, satellite holes are available to insert additional screws. Use the appropriate<br />
drill guide and pilot drill through the holes at the desired angle, within plus or minus<br />
10˚ from perpendicular to the plate. An angled drill guide is available. Using the depth<br />
gauge, select the 2.7mm screw <strong>of</strong> appropriate length and insert it with the driver.<br />
WARNING: When placing additional screws, ensure that subsequent screw placement<br />
does not interfere with the other screws.<br />
Note: While the screw heads are designed to sit flush with the plate, screw head prominence<br />
will vary at severe angles. Screw head prominence may cause s<strong>of</strong>t tissue irritation.<br />
Note: Use irrigation when pilot drilling.<br />
18. Remove and discard any remaining K-Wires and Holding Taks .<br />
19. Close the treatment site using standard closure techniques.<br />
Tip: This plate can be used in conjunction with additional, independent screws, such as<br />
cannulated headless screws.<br />
35