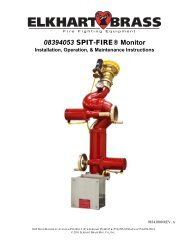
08394059 SPIT-FIRE® Monitor - Elkhart Brass
08394059 SPIT-FIRE® Monitor - Elkhart Brass
08394059 SPIT-FIRE® Monitor - Elkhart Brass
You also want an ePaper? Increase the reach of your titles
YUMPU automatically turns print PDFs into web optimized ePapers that Google loves.
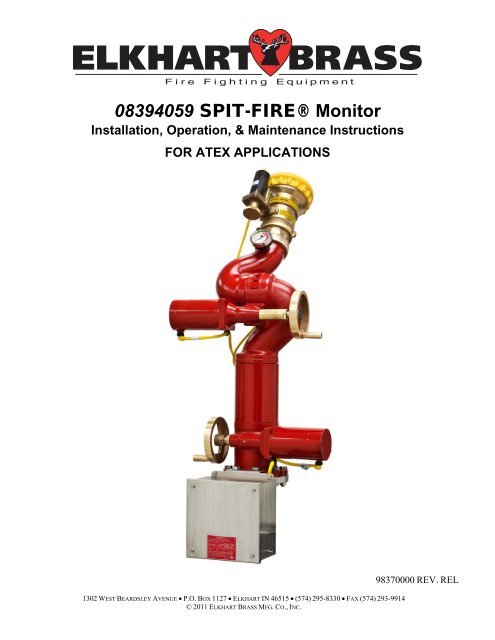
<strong>08394059</strong> <strong>SPIT</strong>-<strong>FIRE®</strong> <strong>Monitor</strong><br />
Installation, Operation, & Maintenance Instructions<br />
FOR ATEX APPLICATIONS<br />
1302 WEST BEARDSLEY AVENUE P.O. BOX 1127 ELKHART IN 46515 (574) 295-8330 FAX (574) 293-9914<br />
© 2011 ELKHART BRASS MFG. CO., INC.<br />
98370000 REV. REL
PRODUCT SAFETY<br />
Important:<br />
Before installing and operating this equipment, read & study this manual thoroughly. Proper<br />
installation is essential to safe operation. In addition, the following points should be adhered<br />
to in order to ensure the safety of equipment and personnel:<br />
All personnel who may be expected to operate this equipment must be thoroughly trained in its safe and<br />
proper use.<br />
Before flowing water from this device, check that all personnel (fire service and civilian) are clear of the<br />
stream path. Also confirm stream direction will not cause avoidable property damage.<br />
Become thoroughly familiar with the hydraulic characteristics of this equipment, and the pumping<br />
system used to supply it. To produce effective fire streams, operating personnel must be properly<br />
trained.<br />
Whenever possible, this equipment should be operated from a remote location to avoid exposing<br />
personnel to dangerous fire conditions.<br />
Always open and close valves supplying this equipment slowly, so that the piping fills with water<br />
slowly, thus preventing the possible occurrence of water hammer.<br />
After each use, and on a scheduled basis, inspect equipment per instructions in the maintenance section.<br />
Disconnect power prior to servicing controls.<br />
Any modifications to the electrical enclosure will destroy the IP-66 rating and void warranty coverage of<br />
the enclosure and all components within.<br />
All equipment must be installed in accordance with ATEX requirements (EN/IEC 60079-14) as<br />
appropriate and in areas where equipment classification is suitable.<br />
WARNING: Do not attempt to disconnect or work on any electrical equipment in this<br />
system unless power is removed or the area is known to be non-hazardous.<br />
MONITOR INFORMATION:<br />
SERIAL NUMBER: ______________________________<br />
DETAILS:<br />
__________________________________________________________________________________________<br />
__________________________________________________________________________________________<br />
__________________________________________________________________________________________<br />
2
TABLE OF CONTENTS<br />
I. CONTROL PANEL CALLOUT…………………...……………..………………..…….……..……..….4<br />
II. OVERVIEW…………………………………………………………………………………..……......…5<br />
III. INSTALLATION INSTRUCTIONS………………………………………………………..….…..…….6<br />
A. Component Mounting<br />
B. <strong>Monitor</strong> Cable Routing<br />
C. <strong>Monitor</strong> Safety Boot and Clamp Installation<br />
IV. SPECIFICATIONS……………………………………………………………….…...………...........…..9<br />
V. OPERATING INSTRUCTIONS………………………………………………….…...…..…..............…9<br />
VI. MAINTENANCE………………………………………………………………....………...….....….…10<br />
VII. MONITOR HYDRAULIC DATA…………………………………………………………………..….10<br />
VIII. ENGINEERING CHANGE REVISIONS EXPLANATIONS…………………………………………11<br />
*For our most up-to-date documentation and specifications, please visit our website at www.elkhartbrass.com<br />
3
I MONITOR CALLOUT<br />
Figure 1: <strong>Monitor</strong> Callout<br />
4
II OVERVIEW<br />
Spit-Fire® <strong>Monitor</strong> Features:<br />
Construction – All brass with vaned 4” waterway<br />
Mounting Flange – 4” 150 lbs. Flat-face ANSI flange (raised face flange available as option)<br />
Discharge – 3.5 N.H. Threaded male outlet<br />
Stream Shaper – Cat. #284-B <strong>Brass</strong> Shaper included<br />
Flow – 2000 GPM max flow @ 200 psi. max working pressure (7600 LPM @ 14 BAR)<br />
Motors – 120 VAC NEMA 4 rated synchronous motors (non-arcing)<br />
o Constant torque and current output in start, running, and stall<br />
o ATEX Certified to II 3 G c (Ex nA II T4)<br />
o Will not cause damage or increase in current when motor is stalled<br />
o Instantaneous start, stop, and reverse<br />
o Residual (Power Off) torque is always present<br />
o Long life and exceptional reliability<br />
o 120 VAC, 50/60 Hz., 1 Phase, 0.80 Amp current per motor<br />
Junction Box – NEMA #4X (IP-66) Water tight, corrosion resistant ATEX certified (Ex eII T6),<br />
enclosure with terminals, for hazardous locations. Stainless Steel Motor Cable Junction Box with<br />
bracket to attach to monitor flange base included<br />
Range of Motion – <strong>Monitor</strong> stop are factory set at 346° (+173° to -173° from front center) horizontal<br />
and 135° (+90° to -45°) vertical movement<br />
Rate of Horizontal Motion – 0.139 Sec/°<br />
Manual Override – Hand wheels provided for vertical and horizontal movements. Hand wheel will not<br />
rotate when monitor is operated electrically.<br />
CE ATEX Certified (Group II, Category 3) II 3 G c T3<br />
WARNING: Do not take cover off or disassemble <strong>Monitor</strong> Motors. If cover is/has been<br />
removed, the warranty is void and the service life of the motor is significantly reduced.<br />
5
III INSTALLATION INSTRUCTIONS<br />
A. Component Mounting<br />
<strong>Monitor</strong> Installation<br />
1. Attach companion flange to water supply pipe so that the bolt pattern will allow the monitor to be<br />
installed with the “straight ahead/neutral” position properly aligned. Alignment is correct when the<br />
“straight ahead/neutral” direction is centered between adjacent flange bolt holes.<br />
2. Install the monitor assembly on the water supply flange so that it matches up to a 4” – 150 lb. flat<br />
faced ANSI flange on the inlet of the monitor with a flange gasket between the flanges. Install<br />
motor cable junction box by aligning the two holed bracket with the flange mounting holes on the<br />
rear of the monitor. Secure the inlet flange with eight (8) 5/8 – 11 UNC Grade 5 hex head bolts.<br />
Torque bolts to 60-70 ft-lbs.<br />
3. Standpipe must be structurally strong enough to withstand reaction forces of the nozzle when<br />
discharging a straight stream at 90° of the standpipe tower. The formula for calculating nozzle<br />
reation is: [REACTION FORCE = 0.0505 x GPM x √ PSI]<br />
4. The inlet pressure at the base of the monitor must be high enough to allow for pressure loss<br />
through the monitor. To accomplish this use the pressure loss for GPM flowing and add to nozzle<br />
pressure. See figure 4 on page 10 for monitor hydraulic data.<br />
IMPORTANT: When installing monitor on a raised face flange or a wafer type butterfly valve, it is<br />
critical that bolts be tightened uniformly to prevent cocking of the monitor relative to the flange or valve. If the<br />
monitor becomes cocked, (see image below) the monitor cast flanged base will fracture and fail when the bolts<br />
on the "high" side are tightened<br />
6
B. <strong>Monitor</strong> Cable Routing<br />
For the Vertical & Nozzle cables to move freely without risk of binding:<br />
1. Ensure the vertical monitor motor cable is (A) routed behind the Mid-Mount Junction Box, and (B)<br />
includes a loop in the cable as shown in the image below.<br />
Routed<br />
Behind<br />
Loop<br />
2. The nozzle cable should be 21.5” from the upper cable restraint to the end of the nozzle plug. The<br />
cable must be tight between those two points, and the extra slack must only be between the upper<br />
cable restraint and the Mid-Mount Junction Box.<br />
Tight<br />
Cable<br />
Figure 2a: Step 1<br />
Figure 2b: Step 2<br />
Mid-Mount Junction Box<br />
Slack<br />
Upper Cable Restraint<br />
7
C. <strong>Monitor</strong> Safety Boot and Clamp Installation<br />
All Motor Cable Connections are provided with clamped safety boots. These boots must not be removed<br />
when monitor motor control panel is energized and area is hazardous.<br />
1. Install corrugated black plastic boot on cable connector as shown so split lines up with cable.<br />
2. Install clamp around top of Boot and connector swivel.<br />
3. Tighten clamp down around swivel and boot.<br />
Figure 3a: <strong>Monitor</strong> Motor Boots<br />
Figure 3b: Nozzle Motor Boots<br />
8
IV SPECIFICATIONS<br />
General Specs<br />
Input Power 120/240 VAC (50/60Hz.) 1 Phase<br />
Electrical Load 2 AMPS Per <strong>Monitor</strong> / 0.80 AMPS Per Motor<br />
<strong>Monitor</strong> Dimensions Ø23” x 52” h<br />
<strong>Monitor</strong> Weight Approx. 300 lbs<br />
Operating Temperature Range -40 o C to +85 o C<br />
ATEX Product Marking<br />
II 3 G c T3<br />
V OPERATING INSTRUCTIONS<br />
Spit-Fire® <strong>Monitor</strong>:<br />
One <strong>Monitor</strong> Control:<br />
This operator control panel has one set of switches and pilot lights to operate one monitor.<br />
<strong>Monitor</strong> Functions – (UP, DOWN, LEFT, & RIGHT) Are operated with spring return joysticks. This<br />
is accomplished by using the proper selector/pushbutton joystick to move the monitor the direction<br />
desired. When joystick is released, it will return to original (off) position and monitor movement will<br />
stop.<br />
<strong>Monitor</strong> Manual Control:<br />
1. Vertical Manual Override - Push hand wheel in to engage override. While holding hand wheel in,<br />
turn clockwise to raise nozzle and counter-clockwise to lower nozzle.<br />
2. Horizontal Manual Override - Push hand wheel in to engage override. While holding hand wheel in,<br />
turn clockwise to move monitor right and counter-clockwise to move monitor left.<br />
When monitor operation is completed, move monitor to designated park position.<br />
9
VI MAINTENANCE<br />
Monthly Inspection & Maintenance<br />
1. Cycle all monitor functions (LEFT, RIGHT, UP, DOWN) to insure that complete system is fully<br />
functional.<br />
Pressure Drop (PSI)<br />
Six-Month Inspection & Maintenance<br />
1. Grease monitor ball races through grease fittings located at each swivel joint. Recommended grease<br />
for Industrial Spit-Fire® monitors is MOBILITH SHC – 100, High Performance Synthetic Grease.<br />
Temperature range: -40°F (-26°C) to 400°F (250°C) or equal. Greasing procedures are as follows:<br />
a. In the lower grease fitting apply approx. 5-7 pumps of grease.<br />
b. In the upper grease fitting apply approx. 2-3 pumps of grease.<br />
2. Check motor control cables for wear and connectors for damage.<br />
3. Check motor cables for binding through full movement of monitor.<br />
4. Check all painted surfaces for chips or scratches and repaint as required.<br />
5. Visually check all electrical equipment.<br />
WARNING: Do not attempt to disconnect or work on any electrical equipment in this<br />
system unless power is removed or the area is known to be non-hazardous.<br />
VII MONITOR HYDRAULIC DATA<br />
55<br />
50<br />
45<br />
40<br />
35<br />
30<br />
25<br />
20<br />
15<br />
10<br />
5<br />
8394053 “<strong>SPIT</strong>FIRE” <strong>Monitor</strong><br />
Pressure Drop Data<br />
0<br />
200 400 600 800 1000 1200 1400 1600 1800 2000<br />
Flow (GPM)<br />
Figure 4: <strong>Monitor</strong> Friction Loss Chart<br />
10
VIII ENGINEERING CHANGE REVISION EXPLANATIONS<br />
11
12<br />
NOTES:__________________________________________________________________________________<br />
__________________________________________________________________________________________<br />
__________________________________________________________________________________________<br />
__________________________________________________________________________________________<br />
__________________________________________________________________________________________<br />
__________________________________________________________________________________________<br />
__________________________________________________________________________________________<br />
__________________________________________________________________________________________<br />
__________________________________________________________________________________________<br />
__________________________________________________________________________________________<br />
__________________________________________________________________________________________<br />
__________________________________________________________________________________________<br />
__________________________________________________________________________________________<br />
__________________________________________________________________________________________<br />
__________________________________________________________________________________________<br />
__________________________________________________________________________________________<br />
__________________________________________________________________________________________<br />
__________________________________________________________________________________________<br />
__________________________________________________________________________________________<br />
__________________________________________________________________________________________<br />
__________________________________________________________________________________________<br />
__________________________________________________________________________________________<br />
__________________________________________________________________________________________<br />
__________________________________________________________________________________________<br />
__________________________________________________________________________________________<br />
__________________________________________________________________________________________<br />
__________________________________________________________________________________________<br />
__________________________________________________________________________________________<br />
__________________________________________________________________________________________<br />
__________________________________________________________________________________________<br />
__________________________________________________________________________________________<br />
__________________________________________________________________________________________<br />
__________________________________________________________________________________________<br />
__________________________________________________________________________________________<br />
__________________________________________________________________________________________<br />
__________________________________________________________________________________________<br />
__________________________________________________________________________________________<br />
__________________________________________________________________________________________<br />
__________________________________________________________________________________________<br />
__________________________________________________________________________________________<br />
__________________________________________________________________________________________<br />
__________________________________________________________________________________________<br />
__________________________________________________________________________________________<br />
__________________________________________________________________________________________<br />
__________________________________________________________________________________________<br />
__________________________________________________________________________________________<br />
__________________________________________________________________________________________<br />
__________________________________________________________________________________________<br />
_______________________________________________________________________________


