Manual for Class D wheeled extinguishers.pdf - Amerex Corporation
Manual for Class D wheeled extinguishers.pdf - Amerex Corporation
Manual for Class D wheeled extinguishers.pdf - Amerex Corporation

You also want an ePaper? Increase the reach of your titles
YUMPU automatically turns print PDFs into web optimized ePapers that Google loves.
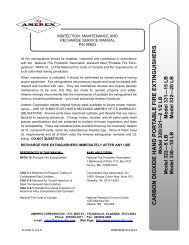
1. TO DEPRESSURIZE:<br />
a) Close the Argon cylinder valve.<br />
b) Carefully tip extinguisher over until it rests on both wheels and handle. (in this position much of the agent will<br />
remain in the cylinder.)<br />
c) Open the nozzle lever slowly to discharge all remaining agent and pressure. (be prepared <strong>for</strong> a nozzle recoil).<br />
d) Insure that all pressure has escaped be<strong>for</strong>e further disassembly.<br />
e) Return extinguisher to the upright position after complete depressurization.<br />
2. Carefully remove the fill cap. Detach discharge hose from the agent cylinder and the nozzle assembly from the<br />
hose. Blow out any chemical agent remaining in the hose. Clean hose and container fittings and gaskets.<br />
Replace gaskets as necessary.<br />
3. Inspect the cylinder interior following CGA Visual Inspection Standard, Pamphlet C-6.<br />
4. Per<strong>for</strong>m MAINTENANCE-SERVICE PROCEDURES 1 through 3, 6 and 7. All parts should be inspected, clean<br />
and replaced if necessary.<br />
5. Detach hose from the Argon cylinder, install the shipping cap, unscrew the wing nuts and remove the Argon<br />
cylinder from the extinguisher<br />
6. Fill the agent cylinder with the proper amount of <strong>Amerex</strong> <strong>Class</strong> D Powder (Model 680 – capacity 150 lbs., Super<br />
D [Sodium Chloride] or Model 681 – capacity 250 lbs. Copper). Lubricate the fill cap gasket. Install the fill cap<br />
and tighten securely.<br />
WARNING: REPLACE ANY CHEMICAL THAT IS CONTAMINATED OR CAKED. DO NOT OVERFILL THE<br />
EXTINGUISHER - THIS COULD CAUSE MALFUNCTION. NEVER MIX TYPES OF AGENTS.<br />
7. Install an <strong>Amerex</strong> P/N 10904 110 cu. ft. ARGON cylinder (pressurized to 2015 psi), remove the shipping cap,<br />
place on the extinguisher and attach the Argon hose. The Ring (safety) Pin and tamper indicator (lockwire seal)<br />
[“T” handle valve] or lead wire seal [handwheel valve] must be in place.<br />
8. Reattach the hose to the extinguisher (tighten hand tight plus a ¼ turn). Properly coil the hose onto the storage<br />
rack. Reattach the shutoff nozzle (and/or Extension Wand) firmly to the hose and store it in the mount with the<br />
shutoff lever in the CLOSED (<strong>for</strong>ward) position.<br />
9. Record the service date on the inspection tag and place the extinguisher in its proper location.<br />
TROUBLESHOOTING GUIDE<br />
WARNING: BEFORE ATTEMPTING TO CORRECT ANY LEAKAGE PROBLEM, BE SURE THAT THE AGENT CYLINDER<br />
IS COMPLETELY DEPRESSURIZED. ALWAYS USE CAUTION WHEN OPENING THE SHUTOFF NOZZLE,<br />
AGENT CLINDER CAP OR ANY OTHER CONNECTION AS A LEAKING ARGON VALVE SEAT MAY HAVE<br />
PRESSURIZED THE AGENT CONTAINER. REFER TO THE PREVIOUS PAGE IN THE RECHARGE PROCE-<br />
DURE FOR PROPER METHOD OF DEPRESSURIZATION.<br />
PROBLEM CORRECTIVE ACTION<br />
1. Argon cylinder gauge reads low or high. 1. Temperature may have affected the pressure reading.<br />
Temp. F 35° 70° 120°<br />
Temp. C 2° 21° 49°<br />
Recommended Pressure<br />
psig 1880 2015 2200<br />
mPa 13.0 13.9 15.2<br />
Minimum Pressure<br />
psig 1590 1700 1900<br />
mPa 11.0 11.7 13.1<br />
No corrective action is required if the pressure is within<br />
parameters stated above.