2 Slice Stainless Steel Toaster - Tempo (Aust)
2 Slice Stainless Steel Toaster - Tempo (Aust)
2 Slice Stainless Steel Toaster - Tempo (Aust)

You also want an ePaper? Increase the reach of your titles
YUMPU automatically turns print PDFs into web optimized ePapers that Google loves.
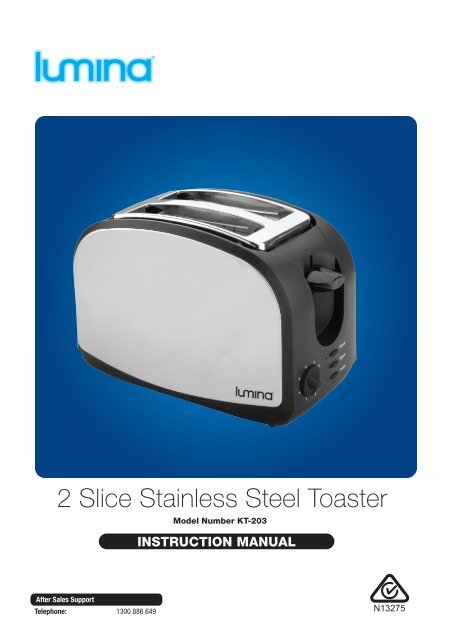
2 <strong>Slice</strong> <strong>Stainless</strong> <strong>Steel</strong> <strong>Toaster</strong><br />
After Sales Support<br />
Telephone: 1300 886 649<br />
Model Number KT-203<br />
INSTRUCTION MANUAL<br />
N13275
1<br />
Contents<br />
02 Warranty<br />
03 Welcome<br />
04 Important safety instructions<br />
06 Before first use<br />
07 Know your toaster<br />
08 Some tips for perfect toasting<br />
09 Features<br />
10 Cleaning the toaster<br />
After Sales Support<br />
Telephone: 1300 886 649
After Sales Support<br />
Telephone: 1300 886 649<br />
2 <strong>Slice</strong> <strong>Stainless</strong> <strong>Steel</strong> <strong>Toaster</strong><br />
Warranty Details<br />
The product is guaranteed to be free from defects in workmanship and parts<br />
for a period of 12 months from date of purchase. Defects that occur within this<br />
warranty period, under normal use and care, will be replaced or refunded at our<br />
discretion, solely at our option with no charge for parts and labour. The benefits<br />
conferred by this warranty are in addition to all rights and remedies in respect<br />
of the product that the consumer has under the Trade Practices Act and<br />
similar state and territory laws.<br />
2
3<br />
Welcome<br />
Congratulations on choosing to buy a Lumina ® product.<br />
All products brought to you by Lumina ® are manufactured to the highest<br />
standards of performance and safety, and, as part of our philosophy of customer<br />
service and satisfaction, are backed by our comprehensive 1 Year Warranty. We<br />
hope you will enjoy using your purchase for many years to come.<br />
After Sales Support<br />
Telephone: 1300 886 649
Important safety instructions<br />
Read this manual thoroughly before first use, even if you are familiar with this<br />
type of product. The safety precautions enclosed herein reduce the risk of fire,<br />
electric shock and injury when correctly adhered to.<br />
Keep the manual in a safe place for future reference, along with the completed<br />
warranty card, purchase receipt and carton. If applicable, pass these instructions<br />
on to the next owner of the appliance.<br />
Always follow basic safety precautions and accident prevention measures when<br />
using an electrical appliance, including the following:<br />
Electrical safety and cord handling<br />
• Make sure your outlet voltage and circuit frequency correspond to the<br />
voltage stated on the appliance rating label. If this is not the case, contact<br />
the after sales support line and do not use the toaster.<br />
• Do not use any other appliance at the same time on the same electrical<br />
circuit as it may overload the circuit and blow the fuse or circuit breaker.<br />
• To protect against fire and electric shock, do not immerse the cord, plug or<br />
the appliance itself in water or other liquid or spill liquids into the product.<br />
Do not expose the electrical connections to water. Never operate the toaster<br />
with wet hands<br />
• If the supply cord is damaged, it must be replaced by the manufacturer or its<br />
service agent or a similarly qualified person in order to avoid a hazard.<br />
• Do not kink or damage the power cord.<br />
• Do not operate any appliance with a damaged cord or plug, or after the<br />
appliance malfunctions, or when it has been damaged in any manner.<br />
Usage conditions and restrictions<br />
• This appliance is intended for domestic use only, which includes use in<br />
households, staff kitchen areas in shops, offices, on farms and in other<br />
working environments, by clients in hotels, motels, bed and breakfast<br />
establishments and other residential type environments.<br />
• Do not use the toaster for anything other than its intended purpose.<br />
• This product is not intended for commercial nor for outdoor use.<br />
• The use of accessories not recommended by the appliance manufacturer<br />
may result in fire, electric shock or personal injury.<br />
After Sales Support<br />
Telephone: 1300 886 649<br />
4
Important safety instructions<br />
5<br />
• Improper installation may result in the risk of fire, electric shock and or injury.<br />
• We assume no responsibility for any eventual damages caused by improper<br />
or faulty use.<br />
• This appliance is not intended to be operated by means of an external timer<br />
or separate remote control system.<br />
• This appliance is not intended for use by persons (including children) with<br />
reduced physical, sensory or mental capabilities, or lack of experience<br />
and knowledge, unless they have been given supervision or instruction<br />
concerning use of the appliances by a person responsible for their safety.<br />
• Children should be supervised to ensure they do not play with the appliance.<br />
Close supervision is necessary when any appliances is used by or near<br />
children.<br />
Using the toaster safely<br />
• Place the appliance on a flat surface when operating to avoid overturning.<br />
• Do not touch any hot surfaces.<br />
• Do not place the toaster on or near a hot gas or electric burner or a heated<br />
oven.<br />
• Do not insert oversized foods, metal foil packages or utensils into the toaster<br />
as they may create a fire or electrical hazard.<br />
• To avoid a fire risk, do not cover the toaster while it is being used.<br />
• Bread may burn, therefore do not use the toaster near or below flammable<br />
materials such as curtains, drapes, wall coverings and the like.<br />
• Do not insert any objects into the appliance.<br />
• When the appliance is not in use, switch it off and unplug it from the power<br />
supply.<br />
• Before cleaning, servicing, maintenance or moving the appliance, unplug the<br />
toaster from the power supply. Allow it to cool before handling.<br />
• Do not clean the toaster with metal scouring pads. Pieces can break off the<br />
pad and touch electrical parts, creating electrical hazards.<br />
• The unit has no user-serviceable parts contained inside. Do not attempt to<br />
repair, disassemble or modify the appliance.<br />
After Sales Support<br />
Telephone: 1300 886 649
Before first use<br />
• Read all safety instructions on the previous pages.<br />
• Remove all packaging materials from the appliance and dispose of them<br />
responsibly. Plastic wrapping can be a suffocation hazard for babies and<br />
young children, so make sure all packaging materials are out of reach of<br />
children.<br />
• Make sure the appliance is disconnected from the power supply.<br />
• Inspect the toaster and cord set for damage or wear before each use.<br />
• WARNING: Do not use the toaster if the appliance or its cord have been<br />
damaged or are not working properly. Contact the after sales<br />
support line.<br />
• Place the toaster on a flat, stable surface that can hold the toaster’s weight<br />
including the heaviest food likely to be toasted in it.<br />
• Do not place the toaster where heat, moisture or high humidity are<br />
generated, or near combustible materials.<br />
• Make sure the power supply cord does not run under the toaster or over any<br />
hot or sharp surface.<br />
• The power socket must be readily accessible so that in an emergency it can<br />
be easily switched off and the toaster unplugged.<br />
• Do not use the toaster outdoors.<br />
After Sales Support<br />
Telephone: 1300 886 649<br />
6
7<br />
Know your toaster<br />
1. 2 Toast slots<br />
The toaster can fit a maximum of<br />
two slices of bread for toasting.<br />
2. Crumb tray<br />
The crumb tray catches crumbs<br />
and loose pieces of bread. It slides<br />
out from the base for easy cleaning.<br />
3. Non-slip base<br />
Rubber on the base of the unit<br />
ensures it stays stable on the surface.<br />
The base is also cool to touch.<br />
4. Defrost<br />
2<br />
Use this function to evenly toast<br />
frozen slices of bread.<br />
1<br />
3<br />
2<br />
5. <strong>Toaster</strong> lever<br />
Push down the lever to lower the<br />
bread into the toaster.<br />
6. Reheat<br />
5<br />
8<br />
Use this function to reheat toasted<br />
bread without overcooking the toast.<br />
7. Stop/cancel button<br />
Use this function to stop the<br />
toasting procedure at any time.<br />
8. Toast browning dial<br />
Set your desired degree of<br />
browning with this easy-to-use dial.<br />
After Sales Support<br />
6<br />
7<br />
4<br />
Telephone: 1300 886 649
Some tips for perfect toasting<br />
Toasting is a combination of cooking and drying bread. As moisture levels differ<br />
from one bread to another, toasting times can vary.<br />
• For slightly dry bread, use a lower light/dark browning setting than normal.<br />
• For fresh bread or wholemeal bread, use a higher setting than normal.<br />
• Breads with very uneven surfaces (such as English muffins) will require a<br />
light/dark setting.<br />
• Thickly cut pieces of bread (including bagels) will take longer to toast,<br />
sometimes significantly longer, since more moisture must be evaporated<br />
from the bread before toasting can occur.<br />
• Very thick pieces may require two toasting cycles.<br />
• Before toasting bagels, slice each bagel into two equal halves.<br />
• When toasting raisin or other fruit bread, remove any loose raisins from the<br />
surface of the bread before placing the slices into the toaster. This will help<br />
prevent pieces from falling into the toaster or sticking on the guard wire in<br />
the slot.<br />
• Single slice toasting: If you are toasting a single slice of bread, select a<br />
lighter browning setting than usual. The toaster is designed to heat the<br />
whole toasting chamber for two slices. By reducing the time for toasting a<br />
single slice, it will not be over-toasted.<br />
• Pastries: Exercise caution when toasting pastries, the filling can become<br />
quite hot long before the surface of the pastry becomes brown.<br />
• Frozen breads: Frozen waffles, pancakes and bagels should be warmed<br />
using the defrost button. See also the section on the following page.<br />
After Sales Support<br />
Telephone: 1300 886 649<br />
8
Features<br />
9<br />
Defrost button<br />
1. The defrost button is designed to first defrost and then toast the bread,<br />
which extends the toasting cycle slightly.<br />
• Turn the light/dark browning selector to desired position:<br />
• Setting 1-2: bread and thinner frozen items such as frozen pancakes<br />
• Setting 3-4: pastries, frozen waffles and bagels<br />
• Setting 5-6: thicker frozen items such as bagels and hand cut bread<br />
slices<br />
2. Press the bread carriage lever down until it locks into position.<br />
3. When the cycle is complete, the bread carriage will raise up the toast.<br />
4. If at any time during the cycle you wish to stop the defrosting before it is<br />
finished, simply press the stop/cancel button.<br />
Reheat button<br />
1. Insert slices of bread.<br />
2. Press the bread carriage lever down until it locks into position.<br />
3. Press the reheat button.<br />
4. When the cycle is complete, the bread carriage will raise up the toast.<br />
5. If at any time during the cycle you wish to stop the reheating before it is<br />
finished, simply press the stop/cancel button.<br />
After Sales Support<br />
Telephone: 1300 886 649
Cleaning the toaster<br />
Always disconnect the toaster from the power outlet and allow it to cool before<br />
cleaning the toaster.<br />
IMPORTANT: When cleaning outside surfaces of the toaster, do not use a metal<br />
scouring pad or abrasive material to avoid scratching the surfaces.<br />
Clean the crumb tray often to avoid build-up of crumbs.<br />
Cleaning the crumb tray<br />
1. Unplug the toaster from the wall outlet and allow it to cool.<br />
2. Hold the toaster upright over a waste bin. Slide out the crumb tray and<br />
empty it.<br />
3. Wipe the tray with a slightly damp cloth. To remove stubborn spots, use<br />
a nylon or plastic scouring pad dampened in soapy water and squeezed<br />
almost dry.<br />
4. Dry the crumb tray thoroughly before sliding it back into position. Ensure that<br />
the tray is fully slotted back into place before operating the toaster.<br />
CAUTION: Never immerse toaster in water or any liquid.<br />
After Sales Support<br />
Telephone: 1300 886 649<br />
10
11<br />
After Sales Support<br />
Telephone: 1300 886 649