2-SHELF WORKBENCH W/DRAWER - Northern Tool + Equipment
2-SHELF WORKBENCH W/DRAWER - Northern Tool + Equipment
2-SHELF WORKBENCH W/DRAWER - Northern Tool + Equipment

Create successful ePaper yourself
Turn your PDF publications into a flip-book with our unique Google optimized e-Paper software.
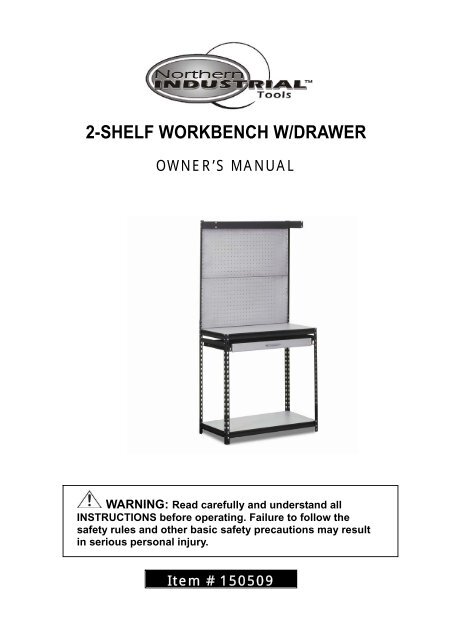
2-<strong>SHELF</strong> <strong>WORKBENCH</strong> W/<strong>DRAWER</strong><br />
OWNER’S MANUAL<br />
WARNING: Read carefully and understand all<br />
INSTRUCTIONS before operating. Failure to follow the<br />
safety rules and other basic safety precautions may result<br />
in serious personal injury.<br />
Item # 150509
Thank you very much for choosing a NORTHERN TOOL + EQUIPMENT CO., INC. Product! For<br />
future reference, please complete the owner’s record below:<br />
Model: _______________ Purchase Date: _______________<br />
Save the receipt, warranty and these instructions. It is important that you read the entire manual<br />
to become familiar with this product before you begin using it.<br />
This machine is designed for certain applications only. <strong>Northern</strong> <strong>Tool</strong> + <strong>Equipment</strong> cannot be<br />
responsible for issues arising from modification. We strongly recommend this machine is not<br />
modified and/or used for any application other than that for which it was designed. If you have<br />
any questions relative to a particular application, DO NOT use the machine until you have first<br />
contacted <strong>Northern</strong> <strong>Tool</strong> + <strong>Equipment</strong> to determine if it can or should be performed on the<br />
product.<br />
For technical questions please call 1-800-222-5381.<br />
SAFETY INSTRUCTIONS<br />
These units should be placed on a level surface. Failure to do so can result in poor product<br />
performance or create a possible safety hazard. This unit should be securely anchored to a wall or<br />
floor with suitable fasteners, which are included. Do not use this unit for anything other than the<br />
manufactures intended purpose. DO NOT STAND ON ANY PART OF THE UNIT, OR USE IT AS A<br />
LADDER. Evenly distribute the weight on each level and always keep the heavier loads on the<br />
bottom. Use care when working with metal parts. Do not exceed the maximum capacity of 300 lbs.<br />
for each shelf. Keep children away; do not allow them to play with or crawl/climb on unit.<br />
GENERAL INSTRUCTIONS<br />
Assembly is done with the rivets of the beams and braces fitting into the slots of the post. A rubber<br />
mallet may be used on the beams and braces to seat the rivets properly. A hammer can also be<br />
used providing one uses a cloth or a block of wood between the hammer head and the parts to<br />
prevent damage. Tap gently and be sure the rivets are straight and fully engaged. Periodically<br />
inspect the general condition of the rack for loose frame connections, undistributed loads, shelving<br />
deformations and any other conditions that may affect the rack’s stability and performance.<br />
ASSEMBLY INSTRUCTION<br />
Required <strong>Tool</strong>s (Rubber Mallet, Philips Screwdriver, Wrench)<br />
Step 1: (Note: Post are directional. The slot must point down.)<br />
Take one (1) 38 3/8” bottom back post (top end has a half slot hole), and one (1) 36” top right<br />
back post (top has slot holes, bottom has rivets) and create a coupled back post. Take one (1)<br />
17 1/8” brace (shelf ledge up), and one (1) 35” front post and attach the rivets of the brace to<br />
the top two (2) holes of the front post. Take the coupled back post and attach the opposite rivets<br />
to the holes so the brace is level. Tap brace down to seat. Attach the bottom 17 1/8” brace to<br />
the front post skipping one (1) hole from the bottom, and the opposite end level to the<br />
coupled back post. Tap brace down to seat. Take one(1) drawer mount and insert the rivets two<br />
Page 2 of 5
(2) slot hole below the 17 1/8” top brace on both ends, and tap to seat. Repeat steps for the<br />
opposite end assembly.<br />
STEP 2<br />
Take Four (4) 35 1/8” beams with the shelf ledge facing up. And attach two (2) even with the<br />
end assembly’s bottom braces, and two (2) even with the braces at the top. Install one (1) back<br />
35” Flat beam with the bend facing down, to the top holes of the top back posts. Take the two<br />
(2) support extensions, and install one (1) 35”beam with the bend facing down, to the front<br />
holes of the top support extensions to create the top shelf assembly. Take the support<br />
extension’s rivets of the assembly, and install the top shelf assembly even with the rivets of the<br />
35” back Flat beam of the unit.<br />
STEP 3<br />
Place the two (2) halves of the peg board to the inside of the back post of the work bench. Align<br />
the holes of the peg board to holes on the back post, Fasten using the nuts and bolts provided.<br />
Take two (2) drawer slides, one (1) silver and one (1) black 31” Flat drawer braces. With the<br />
bend facing down, insert the rivets of the black brace into the slot and half slot holes located<br />
on the back end of the drawer slides. Insert the laminated shelf, and install the silver front<br />
Page 3 of 5
drawer brace to the front of the drawer slides. Install the drawer assembly to the drawer mounts<br />
slides of the unit.<br />
STEP 4<br />
Install the handle to the front drawer brace, and add the laminate shelves to the top shelf, bottom<br />
shelf, and work surface to finalize the assembly of the workbench. Optional anchor hardware is<br />
supplied with this unit so the unit can be fastened to a wall if necessary. See instructions for<br />
installing anchor hardware.<br />
Anchor Hardware Instructions<br />
Wood Stud Installation- Drill an applicable small pilot hole even with the hole of the post into<br />
the wood stud. Use a drill or screwdriver, and fasten the screw and washer through the hole of<br />
the post, and into the wood stud.<br />
Wall Board Installation- Drill an applicable hole even with the hole of the post into the wall<br />
board. Insert the wall anchor into the wall board. Use a drill or screw driver, and fasten the screw<br />
and washer through the hole of the post, and into the wall anchor.<br />
Page 4 of 5
Parts List<br />
Description Qty. Part Number Part Size<br />
Top Back Post Right 1 RUPTSPR3702S 36"<br />
Top Back Post Left 1 RUPTSPL3702S 36"<br />
Bottom Back Post 2 RUPTSP3802S 36 3/8"<br />
Front Post 2 RUPT3502S 35"<br />
Braces 4 RUBE1702 17 1/8"<br />
Beams 4 RUBE3502 35 1/8"<br />
Left Top Support Extension 1 RWTE0802L 9"<br />
Right Top Support Extension 1 RWTE0802R 9"<br />
Top Shelf Flat Beam 2 RMBE3502 35"<br />
Left Drawer Mount 1 SVRWDM1705L N/A<br />
Right Drawer Mount 1 SVRWDM1705R N/A<br />
Left Drawer Slide 1 SVRWDS1403L N/A<br />
Right Drawer Slide 1 SVRWS1403R N/A<br />
Front Drawer Shelf Brace 1 SVRWDB3102F 31"<br />
Back Drawer Shelf Brace 1 SVRWDB3102B 31"<br />
Steel Peg Board 2 SPGBE1536 16 3/8" ×35 3/4"<br />
Laminate Sheleves 2 RPB21836LM 17 1/2" ×35 1/2"<br />
Laminate Drawer Shelf 1 RPB31011LM 11 3/4" ×31"<br />
Laminate Top Shelf 1 RPB2369LM 9"×35 1/2"<br />
Nuts, Bolts 8 NB8 N/A<br />
Handle 1 HDL1000 N/A<br />
Wall Anchor, Screw, Washer 2 N/A N/A<br />
Post Connector 1 N/A N/A<br />
For replacement parts and technical questions, please call 1-800-222-5381.<br />
<strong>Northern</strong> <strong>Tool</strong> + <strong>Equipment</strong> Co., Inc.<br />
2800 Southcross Drive West<br />
P.O. Box 1499 Burnsville, MN 55337-0499<br />
Made in China<br />
Page 5 of 5