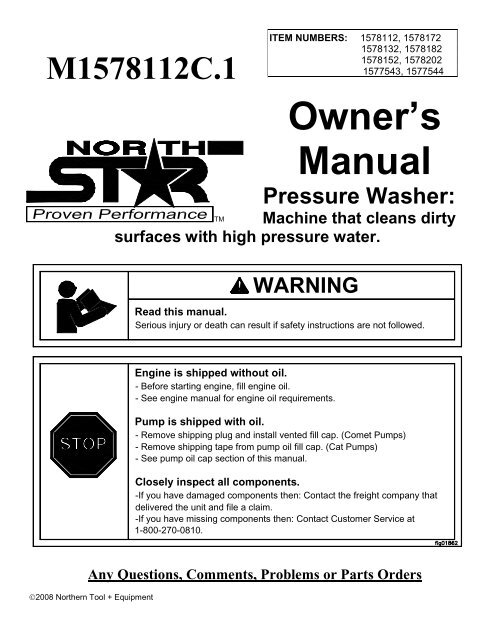
Owner's Manual - Northern Tool + Equipment
Owner's Manual - Northern Tool + Equipment
Owner's Manual - Northern Tool + Equipment

You also want an ePaper? Increase the reach of your titles
YUMPU automatically turns print PDFs into web optimized ePapers that Google loves.
M1578112C.1<br />
�2008 <strong>Northern</strong> <strong>Tool</strong> + <strong>Equipment</strong><br />
ITEM NUMBERS: 1578112, 1578172<br />
1578132, 1578182<br />
1578152, 1578202<br />
1577543, 1577544<br />
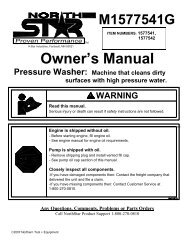
Owner’s<br />
<strong>Manual</strong><br />
Pressure Washer:<br />
TM Machine that cleans dirty<br />
surfaces with high pressure water.<br />
WARNING<br />
Read this manual.<br />
Serious injury or death can result if safety instructions are not followed.<br />
Engine is shipped without oil.<br />
- Before starting engine, fill engine oil.<br />
- See engine manual for engine oil requirements.<br />
Pump is shipped with oil.<br />
- Remove shipping plug and install vented fill cap. (Comet Pumps)<br />
- Remove shipping tape from pump oil fill cap. (Cat Pumps)<br />
- See pump oil cap section of this manual.<br />
Closely inspect all components.<br />
-If you have damaged components then: Contact the freight company that<br />
delivered the unit and file a claim.<br />
-If you have missing components then: Contact Customer Service at<br />
1-800-270-0810.<br />
Any Questions, Comments, Problems or Parts Orders
Hazard Signal Word Definitions<br />
Call NorthStar Product Support 1-800-270-0810<br />
2
Hazard Signal Word Definitions<br />
3
Table of Contents<br />
Important Safety Rules ......................................…. 4,5<br />
Warning Label Locations ...................................…. 6<br />
Assembly Instructions…………………………………... 7-9<br />
Machine Component Identification……………………. 10<br />
Pump Oil Cap and Pump Component Identification… 11<br />
Operation Instructions ........................................… 12-16<br />
Water Supply……………….……………………………. 12<br />
Start-Up/Shut-Down Instructions………………………. 13<br />
Spray Gun Safety Lock and Attaching the Lance……. 14<br />
Installing Nozzles and Quick Connect hoses………… 15<br />
Applying Chemicals..……………………………………. 16<br />
Maintenance and Storage..................................…. 17-19<br />
Maintenance Mode and Maintenance Schedule…. 17<br />
Pump Oil Change….………………………………… 18<br />
Long Term Storage………………………………….. 19<br />
Winter Storage……………………………………….. 19<br />
Troubleshooting ...................................……...........…. 20<br />
Specifications .....................….................................… 21<br />
Parts Exploded View .................................................. 22,23<br />
Pump Exploded Views………………………………….. 24,25<br />
4
Important Safety Rules<br />
WARNING<br />
1.) Read owner's manual completely.<br />
Serious injury or death can result if safety instructions are not followed. You must be<br />
16 or older to operate this machine. Keep untrained people away.<br />
2.) Skin puncture hazard.<br />
High pressure fluid can inject under skin resulting in serious injury including<br />
amputation. Do not direct spray at people or animals.<br />
-If skin injection happens, seek IMMEDIATE surgical treatment.<br />
-Do not check for leaks with hand. Instead, use a piece of cardboard to check for<br />
leaks.<br />
-Do not use unit if exterior hose damage is evident. Make sure all fittings are tight<br />
before starting. Relieve system pressure before servicing.<br />
-Know how to stop engine and bleed pressures quickly. Be thoroughly familiar with<br />
the controls.<br />
-Make sure accessories meet the unit's temperature and pressure limits.<br />
-Stop engine, bleed pressure, and engage spray gun safety lock before leaving unit<br />
unattended.<br />
3.) Risk of fire and explosion.<br />
Hot exhaust fumes from engine can cause fire. Gasoline is highly flammable and<br />
explosive. You can be burned or seriously injured when handling fuel.<br />
-Position muffler at least 7 feet from combustible objects.<br />
-Before adding fuel, stop the engine and keep heat, sparks, and flame away. Do not<br />
add fuel when engine is running or still hot. No smoking near engine.<br />
-Do not pump fuel directly into engine at gas station. Static charge can build and<br />
ignite fuel. Use a UL approved fuel container to transfer gas to the engine. Wipe up<br />
fuel spills immediately.<br />
-Only store and handle fuel outdoors. Gasoline vapors can ignite if they collect<br />
inside an enclosure. Explosion can result.<br />
-Do not change or add to exhaust system. Fire can result.<br />
-Do not change or add fuel tanks or fuel lines. Fire can result.<br />
-Before each use, check fuel tank and fuel lines for leaks. Any fuel leak is a fire<br />
hazard. Fix any fuel leaks before starting engine.<br />
-During transportation take precautions to make sure pressure washer will not tip<br />
over and cause a fuel leak fire hazard.<br />
4.) Poisonous gas.<br />
This machine gives off carbon monoxide, a poisonous gas that can kill you. You<br />
CANNOT smell it, see it, or taste it.<br />
-ONLY run machine outdoors and away from air intakes.<br />
-NEVER run machine inside homes, garages, sheds, or other semi-enclosed spaces.<br />
These spaces can trap poisonous gases, EVEN IF you run a fan or open doors and<br />
windows.<br />
If you start to feel sick, dizzy, or weak while using this machine, shut it off and get to<br />
fresh air RIGHT AWAY. See a doctor. You may have carbon monoxide poisoning.<br />
Save These Instructions<br />
5
Important Safety Rules<br />
WARNING<br />
5.) Risk of exposure to dangerous chemicals.<br />
Serious injury or death can result if chemical manufacturer instructions are not<br />
followed.<br />
-Wear protective gloves when handling and cleaning with chemicals.<br />
-Understand all safety hazards and first aid for all chemicals being used.<br />
-When cleaning filters, check if chemicals have been used and take any<br />
precautions that are recommended by the chemical manufacturer.<br />
-Different chemicals may interact dangerously with each other, always follow<br />
chemical manufacturer directions before switching chemicals.<br />
-Calculate the correct amount of chemical to mix, dispose of excess chemical<br />
per the manufacturer instructions.<br />
-Never spray flammable liquids.<br />
6.) Risk of electrocution.<br />
Electricity can kill you. Keep water away from electrical outlets and electrical<br />
devices.<br />
7.) Flying objects.<br />
Small particles may fly out while spraying. Wear safety glasses. Serious eye<br />
injury can occur.<br />
Make sure nozzle is secure before squeezing trigger. If nozzle is not secure it<br />
will become a projectile.<br />
8.) Fall hazard.<br />
Pressure washer creates puddles and slippery surfaces. Keep good footing<br />
and balance. Serious injury can occur.<br />
-Wear footwear cabable of maintaining a good grip on wet surfaces.<br />
-Gun kicks back. Hold with both hands.<br />
-Do not overreach or stand on unstable supports.<br />
-Do not stand on ladders or scaffolding.<br />
-Do not place pressure washer on soft or unstable ground.<br />
CAUTION<br />
1.) Hot muffler.<br />
You can be burned by muffler. Do not touch.<br />
6
START-UP INSTRUCTIONS<br />
1. Attach garden hose.<br />
2. Attach pressure hose.<br />
3. Attach gun and lance.<br />
4. Turn water supply ON.<br />
5. Squeeze trigger to<br />
purge air from pump.<br />
6. Insert nozzle.<br />
7. Start engine.<br />
WARNING<br />
1.) Skin puncture hazard. Do<br />
not direct spray at people or<br />
animals. Seek IMMEDIATE<br />
surgical treatment.<br />
2.) Risk of fire and explosion.<br />
Do not add fuel when engine is<br />
running or still hot.<br />
3.) Breathing hazard.<br />
Poisonous fumes from engine<br />
can kill you. Do not operate<br />
indoors even if ventilated.<br />
4.) Risk of electrocution.<br />
Keep water away from electric<br />
outlets and electric devices.<br />
5.) Read owner's manual.<br />
Serious injury or death can<br />
result if safety instructions are<br />
not followed.<br />
�2008 <strong>Northern</strong> <strong>Tool</strong> + <strong>Equipment</strong> 800-270-0810<br />
Warning Label Locations<br />
SHUT-DOWN INSTRUCTIONS<br />
1. Turn engine OFF.<br />
2. Turn water supply OFF.<br />
3. Squeeze trigger to<br />
relieve system pressure.<br />
4. Remove garden hose.<br />
5. Remove pressure hose.<br />
6. Turn fuel valve OFF<br />
(if equipped).<br />
Part No. 38570<br />
Call 1-800-270-0810 to order new labels.<br />
Instruction Label: Part No. 32538<br />
Warning Label: Part No. 38570 (includes hot<br />
muffler caution located on engine)<br />
7
I.) Unpack<br />
Assembly Instructions<br />
Your pressure washer is shipped in two boxes. Separate and identify the components found in both<br />
boxes.<br />
Engine/Pump/Base Assembly<br />
Lance<br />
Handle<br />
Spray Gun<br />
* Depending in model, components may appear differently than illustrated<br />
Pressure Hose<br />
Hardware Bag<br />
Any Questions, Comments, Problems or Parts Orders<br />
Call NorthStar Product Support 1-800-270-0810<br />
8
II.) Hardware Bag<br />
Vented fill cap<br />
1578112, 1578132,<br />
1577543,1577544<br />
Vented dipstick<br />
1578152 only<br />
T- Handle Knob – Qty 2<br />
Part # 38578<br />
Assembly Instructions<br />
Flange Nut – Qty 2<br />
Part # 82019<br />
Nylock Nut – Qty 2<br />
Part # 777495<br />
Nozzle – Qty 2 or 5<br />
Varies by model<br />
Carriage Bolt – Qty 2<br />
Part # 82233<br />
Gun Hook – Qty 1<br />
Part # 38509<br />
Hose Hook – Qty 1<br />
Part # 779761<br />
FIG1860<br />
Grommet – Qty 5<br />
Part # 35198<br />
9
III.) Handle Assembly<br />
Assembly Instructions<br />
1.) Attach handle to base with two carriage bolts and t-handle knobs.<br />
2.) Spin a flange nut backwards onto the gun hook. (see hook detail)<br />
3.) Mount the hose hook onto the handle and gun hook onto base as shown.<br />
4.) Insert grommets into the holes on the handle nameplate.<br />
5.) Press nozzles into grommets according to the colors indicated on the handle decal.<br />
Gun Hook Detail<br />
Flange nut<br />
Gun Hook<br />
Nozzles<br />
(Quantities vary<br />
by model)<br />
Flange nut<br />
Hose hook<br />
(Position A)<br />
T-handle knob<br />
Handle<br />
Grommets<br />
Nylock nut<br />
Carriage bolts<br />
Hose hook<br />
(Position B)<br />
GC models only<br />
10
Machine Component Identification<br />
*Note: Item 1578132 shown, location of components on other models vary slightly<br />
1.) Handle. Designed for easy cart<br />
movement.<br />
2.) Hose Hook. Store hose on hook.<br />
(Position depends on model, see<br />
Assembly Instructions section.)<br />
3.) Pressure Hose. Attach quick<br />
couplers to gun and water outlet.<br />
4.) Chemical Hose. Submerge in<br />
cleaning solution.<br />
5.) Water Pump. Inspect for<br />
loose/broken parts prior to each use.<br />
6.) Engine. Honda engine provides<br />
years of reliable use.<br />
7.) Gun Hook. Store gun on hook.<br />
8.) Nozzles. Change nozzles for<br />
different spray patterns<br />
9.) Spray Gun. Always use two hands<br />
for safe operation.<br />
10.)Trigger. Actuate to allow<br />
pressurized water to flow out of<br />
spray gun.<br />
11
Pump Oil Cap and Pump Component Identification<br />
12
Operation Instructions<br />
Water Supply<br />
1.) Make sure the water supply is clean. Debris can cause excess pump wear and reduce<br />
performance.<br />
2.) An insufficient water supply will damage your pump. Make sure the water supply is steady and is<br />
20% over the rated flow of your pump. Use a stopwatch to time how long it takes to fill a 5 gallon<br />
bucket with your garden hose. The bucket must fill faster than the times listed in the table below.<br />
Model Time to fill 5 gallon bucket<br />
1577543 100 seconds<br />
1577544 100 seconds<br />
1578112 100 seconds<br />
1578132 84 seconds<br />
1578152 72 seconds<br />
1578172 100 seconds<br />
1578182 84 seconds<br />
1578202 72 seconds<br />
3.) The water supply garden hose must have an inside diameter of at least 5/8”. If the hose is more<br />
than 100 ft. long, the diameter must be at least 3/4”.<br />
4.) Never use a reservoir tank as a water source. Drawing water out of a tank may cause pump<br />
cavitation and damage to your pump. This pressure washer is designed for a pressurized water<br />
source such as a city water faucet. However, the water source pressure must not exceed 115 psi<br />
(8 bar).<br />
5.) Always use a flexible rubber hose for your water supply. Do not use rigid piping.<br />
13
Start-Up Instructions<br />
1. Attach garden hose to water inlet.<br />
2. Attach pressure hose to water outlet and gun.<br />
3. Attach spray gun to lance.<br />
4. Turn water supply ON.<br />
5. Squeeze trigger to purge air from pump.<br />
6. Insert nozzle.<br />
7. Start engine.<br />
Operation Instructions<br />
Shut-Down Instructions<br />
1. Turn engine OFF.<br />
2. Turn water supply OFF.<br />
3. Squeeze trigger to relieve system pressure.<br />
4. Remove garden hose.<br />
5. Remove pressure hose.<br />
6. Turn fuel valve OFF (if equipped).<br />
WARNING<br />
Skin puncture hazard.<br />
High pressure fluid can inject under skin resulting in serious injury including<br />
amputation. Do not direct spray at people or animals.<br />
-If skin injection happens, seek IMMEDIATE surgical treatment.<br />
-Do not check for leaks with hand. Instead, use a piece of cardboard to check for<br />
leaks.<br />
-Do not use unit if exterior hose damage is evident. Make sure all fittings are tight<br />
before starting. Relieve system pressure before servicing.<br />
-Know how to stop engine and bleed pressures quickly. Be thoroughly familiar with<br />
the controls.<br />
-Make sure accessories meet the unit's temperature and pressure limits.<br />
-Stop engine and bleed pressures before leaving unit unattended.<br />
14
Spray Gun Safety Lock<br />
Operation Instructions<br />
When not spraying, use the spray gun safety lock to prevent accidental high pressure discharge.<br />
* Note: Depending on model, gun may appear differently.<br />
Attaching the Lance<br />
Tighten spin-on coupler hand tight.<br />
Note: The o-rings make the seal so there is no need to tighten with a wrench.<br />
lance<br />
spray gun<br />
spray gun safety lock<br />
spin-on coupler<br />
15
Operation Instructions<br />
Installing Nozzles<br />
To install a nozzle pull back the collar and push the nozzle into the coupler. Once the connection<br />
is made, pull on the nozzle to make sure it is secure.<br />
nozzle<br />
collar<br />
collar completely<br />
pushed out.<br />
CORRECT INCORRECT<br />
WARNING<br />
Flying objects.<br />
Make sure nozzle is secure before squeezing trigger. If nozzle is not secure it will become a<br />
projectile. Serious injury can occur.<br />
Attach Quick Connect Couplers<br />
-To install the hose onto the pump, pull back the collar and push the hose into the coupler on the<br />
pump.<br />
-To install the hose onto the spray gun, pull back the collar on the spray gun and push the hose<br />
into the coupler on the spray gun.<br />
pump<br />
hose<br />
coupler lance<br />
collar NOT completely<br />
pushed out.<br />
spray gun<br />
Once the connections are made, pull on the hose to make sure it is secure.<br />
16
Operation Instructions<br />
Applying Chemicals<br />
1.) Install the black nozzle to spray chemicals onto the cleaning surface.<br />
2.) Start the pressure washer according to the start-up instructions.<br />
3.) Submerge the chemical hose in cleaning solution. (See Pump Component Identification section<br />
for chemical injector location.)<br />
4.) Squeeze the spray gun trigger. The chemical injector will draw the chemical into the water<br />
stream.<br />
5.) Apply chemicals evenly onto the cleaning surface. Allow the chemicals to react with the dirt, then<br />
clean at high pressure with green nozzle.<br />
6.) Never use more chemical than is necessary to clean the surface.<br />
7.) To clean the chemical injector, draw water through the strainer until all the chemical is purged<br />
from the system.<br />
Pump<br />
Chemical Hose<br />
Cleaning Solution<br />
Strainer<br />
WARNING<br />
Risk of exposure to dangerous chemicals.<br />
Pump Outlet<br />
Pump Inlet<br />
Serious injury or death can result if chemical manufacturer instructions are not<br />
followed.<br />
-Wear protective gloves when handling and cleaning with chemicals.<br />
-Understand all safety hazards and first aid for all chemicals being used.<br />
-When cleaning filters, check if chemicals have been used and take any<br />
precautions that are recommended by the chemical manufacturer.<br />
-Different chemicals may interact dangerously with each other, always follow<br />
chemical manufacturer directions before switching chemicals.<br />
-Calculate the correct amount of chemical to mix, dispose of excess chemical<br />
per the manufacturer instructions.<br />
-Never spray flammable liquids.<br />
17
Maintenance and Storage<br />
Maintenance Mode<br />
Before performing any maintenance on the pressure washer, it must be placed in maintenance mode.<br />
1.) Turn off engine.<br />
2.) Turn off water supply.<br />
3.) Squeeze trigger to relieve system pressure.<br />
4.) Shut off fuel valve.<br />
5.) Unplug spark plug wire from spark plug, (see engine owners’ manual).<br />
Maintenance Schedule<br />
What to Check When To Check What to Do<br />
Inlet Filter Each Use Visually inspect and clean inlet filter with clear water.<br />
Visually inspect pressure hose and hose couplings. Replace<br />
Pressure Hose Each Use hose if any of the following is evident:<br />
hose coupling is damaged, wire mesh is exposed or<br />
damaged, hose is permanently kinked or flattened, outer<br />
hose cover is blistered or loose.<br />
Bolts Each Use Tighten any loose bolts.<br />
Engine Oil See engine manual See engine manual for oil change instructions<br />
Pump Oil After 1 st 50hrs, Change pump oil. See pump oil change instructions on next<br />
then 3mo/500hr page.<br />
18
Comet BXD 2530 Pump<br />
fill cap<br />
Oil capacity: 4.3 oz. (.13L)<br />
Cat 3DNX25GSI Pump<br />
fill cap<br />
drain plug<br />
sight glass<br />
Oil capacity: 8.5 oz. (.25L)<br />
Maintenance and Storage<br />
Pump Oil Change<br />
1) Place a suitable container below the pump to catch the used oil.<br />
sight glass<br />
(other side)<br />
VRX:<br />
Remove the bolts that connect the pump to the engine. Remove fill<br />
cap and rotate pump upside down.<br />
All other pumps: Remove drain plug.<br />
2) Allow the used oil to drain completely.<br />
VRX: Rotate pump to the upright position, and reinstall mounting bolts.<br />
All other pumps: Reinstall drain plug.<br />
3) Please dispose of used oil in a manner that is compatible with the environment. We suggest you<br />
take used oil in a sealed container to you local recycling center or service station for reclamation. Do<br />
not throw it in the trash, pour it on the ground or down the drain.<br />
4) With the pump in a level position add oil to the pump (see capacities below). For Comet pumps: Use<br />
Universal Tractor Transmission Oil (part# COCP2101) or Mobil1 15W50 synthetic oil. For Cat<br />
pumps: Use SAE 30 non-detergent oil or Cat pump oil item # 22158.<br />
VRX: Add specified capacity.<br />
All other pumps: Fill to middle of sight glass.<br />
drain plug<br />
Comet AXD 3032 Pump Comet ZWD3540 Pump<br />
Oil capacity: 5.7 oz. (.17L)<br />
Cat 3SPX30G1I Pump<br />
Oil capacity: 10.2 oz. (.30L)<br />
Comet VRX 2528G Pump<br />
fill cap<br />
fill cap<br />
drain plug<br />
sight glass<br />
sight glass<br />
fill cap<br />
drain plug<br />
Oil capacity: 3.4 oz. (.10 L)<br />
fill cap<br />
sight glass drain plug<br />
Oil capacity: 10.3 oz. (.30L)<br />
Cat 66DX35G1I Pump<br />
fill cap<br />
drain plug<br />
sight glass<br />
Oil capacity: 18 oz. (.53L)<br />
19
Long Term Storage<br />
Maintenance and Storage<br />
Follow the engine owner’s manual for storing the engine.<br />
Winter Storage<br />
Protect your pump, hose, and gun from freezing.<br />
Items needed: 12” piece of garden hose or equivalent, funnel and RV antifreeze (approximately 6 oz.)<br />
1.) Follow the storage instructions listed above.<br />
2.) Disconnect spark plug cable. Make sure the engine start switch is OFF and the fuel valve is OFF.<br />
3.) Attach the garden hose with funnel to the pump inlet (see illustration).<br />
4.) Pour RV antifreeze into the funnel, pull the engine recoil until antifreeze comes out the pump<br />
outlet.<br />
5.) Drain all water from the high pressure hose. Depress trigger on gun and drain all water out of<br />
gun/lance.<br />
Water Inlet<br />
Hose<br />
Funnel<br />
RV Antifreeze<br />
20
Troubleshooting<br />
Problem<br />
Engine will not start SOLUTION: A,B<br />
Low/Surging pressure or no water flow SOLUTION: C,D,E,F,G,H<br />
No chemical injection SOLUTION: I,J,K,L<br />
Cause Solution<br />
A- Low oil shutdown See engine manual for oil requirements<br />
B- Engine starting instructions not followed See engine manual for starting instructions<br />
C- Insufficient water supply See water supply section of this manual<br />
D- Plugged pump inlet filter See maintenance section of this manual<br />
E- Wrong nozzle Make sure high pressure nozzle is being used<br />
F- Plugged nozzle Remove nozzle, check for blockage<br />
G- Worn nozzle Replace nozzle<br />
H- Leak in pressure hose Replace pressure hose<br />
I- Wrong nozzle Make sure chemical nozzle is being used<br />
J- Back pressure from extra long discharge hose Try shorter hose<br />
K- Leak in chemical siphon hose Replace hose – use hose clamps if necessary<br />
L- Chemical strainer not submerged Make sure strainer is completely submerged<br />
Any Questions, Comments, Problems or Parts Orders<br />
Call NorthStar Product Support 1-800-270-0810<br />
21
Specifications<br />
1578112 1578172<br />
PSI (bar) 3000 (207) PSI (bar) 3000 (207)<br />
GPM (l/min) 2.5 (9.4) GPM (l/min) 2.5 (9.4)<br />
Max Water Temp 140�F (60�C) Max Water Temp 140�F (60�C)<br />
Noise Level 78 dB Noise Level 78 dB<br />
Dimensions<br />
34” x 21” x 38”<br />
Dimensions<br />
34” x 21” x 38”<br />
L x W x H<br />
(864mm x 534mm x 965mm) L x W x H<br />
(864mm x 534mm x 965mm)<br />
Weight 97 lb (44kg) Weight 96 lb (44kg)<br />
1578132 1578182<br />
PSI (bar) 3200 (220) PSI (bar) 3300 (227)<br />
GPM (l/min) 3.0 (11.3) GPM (l/min) 3.0 (11.3)<br />
Max Water Temp 140�F (60�C) Max Water Temp 140�F (60�C)<br />
Noise Level 82 dB Noise Level 82 dB<br />
Dimensions<br />
34” x 21” x 38”<br />
Dimensions<br />
34” x 21” x 38”<br />
L x W x H<br />
(864mm x 534mm x 965mm) L x W x H<br />
(864mm x 534mm x 965mm)<br />
Weight 120 lb (55kg) Weight 123 lb (56kg)<br />
1578152 1578202<br />
PSI (bar) 4000 (275) PSI (bar) 4000 (275)<br />
GPM (l/min) 3.5 (13.2) GPM (l/min) 3.5 (13.2)<br />
Max Water Temp 140�F (60�C) Max Water Temp 140�F (60�C)<br />
Noise Level 82 dB Noise Level 82 dB<br />
Dimensions<br />
34” x 21” x 38”<br />
Dimensions<br />
34” x 21” x 38”<br />
L x W x H<br />
(864mm x 534mm x 965mm) L x W x H<br />
(864mm x 534mm x 965mm)<br />
Weight 141 lb (64 kg) Weight 147 lb (67 kg)<br />
1577543 1577544<br />
PSI (bar) 2800 (193) PSI (bar) 3000 (207)<br />
GPM (l/min) 2.5 (9.4) GPM (l/min) 2.5 (9.4)<br />
Max Water Temp 140�F (60�C) Max Water Temp 140�F (60�C)<br />
Noise Level 75 dB Noise Level 82 dB<br />
Dimensions<br />
34” x 21” x 38”<br />
Dimensions<br />
34” x 21” x 38”<br />
L x W x H<br />
(864mm x 534mm x 965mm) L x W x H<br />
(864mm x 534mm x 965mm)<br />
Weight 77 lbs Weight 83 lbs<br />
The manufacturer reserves the right to make improvements in design<br />
and/or changes in specifications at any time without incurring any<br />
obligation to install them on units previously sold.<br />
22
Item Numbers:<br />
1578112,1578172,<br />
1578132,1578182,<br />
1578152,1578202,<br />
1577543, 1577544<br />
Revision C.1<br />
Parts Exploded View<br />
* Depending on model, components may appear differently.<br />
23
Parts Exploded View<br />
REF# PART# DESCRIPTION QTY MODEL<br />
1 38509 Gun Hook 1 all<br />
2 779826 Decal 1 all<br />
3 35198 Grommet 5 all<br />
4 780223 Handle 1 all<br />
5 779761 Hose hook 1 all<br />
6 38578 Knob 2 all<br />
7 779924 Base 1 all<br />
8 2278 Wheel 2 all<br />
9 305200 Wheel Retainer 2 all<br />
1578112, 8172, 8132,<br />
8182, 8182, 8202<br />
1577543, 7544<br />
10<br />
38525<br />
38524<br />
50’ Pressure Hose<br />
25’ Pressure Hose<br />
1<br />
11 777915 Hose Quick Couple Nipple 1 all<br />
12 777914 Hose Quick Coupler 1 all<br />
13 313107 Spray Gun Quick Coupler 1 all<br />
14 779168 Spray Gun Handle 1<br />
15 22622 Lance w/ Quick Connect 1<br />
1578112, 8172, 8132,<br />
8182, 8182, 8202<br />
1578112, 8172, 8132,<br />
8182, 8182, 8202<br />
1578112, 8172, 8132,<br />
8182, 8182, 8202<br />
1577543, 7544<br />
16<br />
779165<br />
38527<br />
Spray Gun 1<br />
17 779166 Lance 1 all<br />
18 777904 Nozzle Quick Coupler 1 all<br />
38530 Nozzle 2 Pack #3.0<br />
1577543, 7544<br />
19 38531 Nozzle 5 Pack #3.0<br />
1 1578112,8172<br />
38532 Nozzle 5 Pack #3.5<br />
1578132,8182,8152,8202<br />
20 2212 Chemical Strainer 1 all<br />
21 777165 Braided Chemical Hose 3 ft all<br />
22 2215 Rubber Foot 2 all<br />
60590 Honda GX 160 Engine<br />
1578112,8172<br />
39115 Honda GX 270 Engine<br />
1578132,8182<br />
25 601091 Honda GX 390 Engine<br />
1 1578152,8202<br />
60599 Honda GC 160 Engine<br />
1577543<br />
38522 Honda GC 190 Engine<br />
1577544<br />
A1578112 Pump Assembly<br />
1578112 & 1577544<br />
A1578172 Pump Assembly<br />
1578172<br />
A1578132 Pump Assembly<br />
1578132<br />
26 A1578182 Pump Assembly<br />
1 1578182<br />
A1578152 Pump Assembly<br />
1578152<br />
A1578202 Pump Assembly<br />
1578202<br />
A1577543 Pump Assembly<br />
1577543<br />
24
Pump Exploded View<br />
A1578112 A1578172 A1578132<br />
A1578182 A1578152<br />
A1578202 A1577543<br />
25
Pump Exploded View<br />
REF# PART# DESCRIPTION QTY MODEL<br />
779828 Comet BXD 2530G Pump<br />
1578112<br />
1577544<br />
38518 Cat 3DNX Pump 1578172<br />
26<br />
779829<br />
777654<br />
Comet AXD Pump<br />
Cat 3SPX Pump<br />
1<br />
1578132<br />
1578182<br />
778164 Comet ZWD Pump 1578152<br />
38520 Cat 66DX Pump 1578202<br />
779827 Comet VRX 2528G Pump<br />
1577543<br />
27 777915 Quick Connect Outlet Plug 1 All<br />
28<br />
4027<br />
38596<br />
Inlet Filter Washer<br />
3/8” Inlet Filter<br />
1<br />
1578112,8132,<br />
8152, 7543<br />
1578172,8182<br />
35169 1/2” Inlet Filter<br />
1578202<br />
29 777340 ¼” x ¼” Hose Barb Fitting 1<br />
1578172,8112,<br />
8202<br />
30 777834 ¼” Hose Clamp 2<br />
1578172,8182,<br />
8202<br />
31 777165 ¼” PVC Hose 12”<br />
1578172,8182,<br />
8202<br />
32 38584 Easy Start Valve 1<br />
1578172,8182,<br />
8202<br />
33 777347 3/8” Street Tee 1<br />
1578172,8182,<br />
8202<br />
34<br />
35918<br />
777836<br />
Thermal Valve 1<br />
1578172,8182<br />
1578202<br />
35 22393 Pop Off Valve 1 1578182, 8202<br />
44 777410 3/8 Street elbow<br />
3<br />
1<br />
1578182<br />
1578202<br />
26
ITEM NUMBERS:1578112, 1578172<br />
1578132, 1578182<br />
1578152, 1578202<br />
1577543, 1577544<br />
FIG02216<br />
Packaged By:_________<br />
*This page is to help ensure that the factory includes all components in the<br />
manual bag.<br />
8152<br />
OIL<br />
8112, 8132<br />
7543, 7544<br />
27