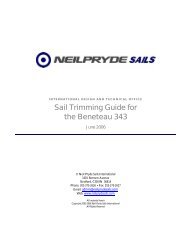
Sail Trimming Guide for the Beneteau 323 - Neil Pryde Sails
Sail Trimming Guide for the Beneteau 323 - Neil Pryde Sails
Sail Trimming Guide for the Beneteau 323 - Neil Pryde Sails

You also want an ePaper? Increase the reach of your titles
YUMPU automatically turns print PDFs into web optimized ePapers that Google loves.
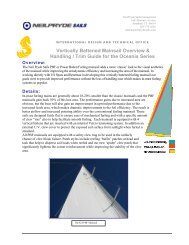
INTERNATIONAL DESIGN AND TECHNICAL OFFICE<br />
<strong>Sail</strong> <strong>Trimming</strong> <strong>Guide</strong> <strong>for</strong><br />
<strong>the</strong> <strong>Beneteau</strong> <strong>323</strong><br />
July 2007<br />
© <strong>Neil</strong> <strong>Pryde</strong> <strong>Sail</strong>s International<br />
1681 Barnum Avenue<br />
Strat<strong>for</strong>d, CONN 06614<br />
Phone: 203-375-2626 • Fax: 203-375-2627<br />
Email: admin@neilprydesails.com<br />
Web: www.neilprydesails.com<br />
All material herein<br />
Copyright 20062007 <strong>Neil</strong> <strong>Pryde</strong> <strong>Sail</strong>s International<br />
All Rights Reserved
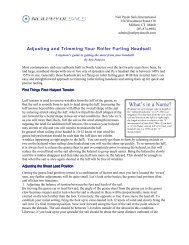
HEADSAIL OVERVIEW:<br />
The <strong>Beneteau</strong> Oceanis <strong>323</strong> built in <strong>the</strong> USA and supplied with <strong>Neil</strong> <strong>Pryde</strong> <strong>Sail</strong>s is equipped with a 116% overlapping headsail.<br />
The sail is designed to sheet inside of <strong>the</strong> shroud base, allowing very good sheeting angles <strong>for</strong> all-around per<strong>for</strong>mance. As <strong>the</strong><br />
sail is relatively high aspect (tall and not very wide) <strong>the</strong> genoa car position is critical to good per<strong>for</strong>mance and does not take<br />
much in terms of adjustment <strong>for</strong> different settings.<br />
The following features are built into <strong>the</strong>se headsails:<br />
• The size is optimized to sheet correctly to <strong>the</strong> factory track when fully deployed and when reefed.<br />
• Reef ‘buffer’ patches are fitted at both head and tack, which are designed to distribute <strong>the</strong> loads on <strong>the</strong> sail when reefed.<br />
• Reefing marks located on <strong>the</strong> starboard side of <strong>the</strong> tack buffer patch provide a visual mark <strong>for</strong> setting up pre-determined<br />
reefing locations. See drawing below right.<br />
• A telltale ‘window’ at <strong>the</strong> leading edge of <strong>the</strong> sail located about 19%<br />
of <strong>the</strong> luff length above <strong>the</strong> tack of <strong>the</strong> sail and is designed to allow <strong>the</strong><br />
helmsperson to easily see <strong>the</strong> wind flowing around <strong>the</strong> leading edge of<br />
<strong>the</strong> sail when sailing upwind and close-hauled. The tell-tales are red<br />
and green, so that one can quickly identify <strong>the</strong> leeward and wea<strong>the</strong>r<br />
telltales.<br />
• A draft stripe helps to visualize sail shape/depth.<br />
Genoa Car Location:<br />
• There is a ‘flat’ (no nonskid) on <strong>the</strong> deck at <strong>the</strong> shroud base. This flat<br />
angles aft towards <strong>the</strong> shrouds. Our zero point is <strong>the</strong> aft edge of this<br />
flat as illustrated to <strong>the</strong> left. This is going to be our ‘zero’ point <strong>for</strong><br />
positioning <strong>the</strong> Genoa lead car.<br />
• The aft end of <strong>the</strong> car has a spring knob that can be lifted up to<br />
disengage <strong>the</strong> pin that holds <strong>the</strong> car in place. When moving <strong>the</strong> car,<br />
always move <strong>the</strong> ‘lazy’ sheet, so that <strong>the</strong>re is not a load on <strong>the</strong> jib<br />
sheet or car when making adjustments. Lift <strong>the</strong> pin and slide <strong>the</strong> car<br />
<strong>for</strong>ward or aft.<br />
• There are evenly spaced holes on <strong>the</strong> genoa track (<strong>for</strong>e and aft) that <strong>the</strong><br />
adjustment pin of <strong>the</strong> car will lock into place.<br />
• All our measurements will be from <strong>the</strong> ‘zero’ point to <strong>the</strong> FRONT of<br />
<strong>the</strong> car.<br />
Why Mark The Lead Position:<br />
You will find that once <strong>the</strong> initial trim settings are made to <strong>the</strong> genoa lead (car)<br />
position (which is critical to good per<strong>for</strong>mance) <strong>the</strong> cars will not require much<br />
movement <strong>for</strong>e and aft <strong>for</strong> different conditions. However, as one furls <strong>the</strong><br />
headsail <strong>for</strong> reefing, <strong>the</strong> sail moves <strong>for</strong>ward and <strong>the</strong> clew elevates slightly as a<br />
result. This changing dynamic requires <strong>the</strong> genoa lead position to be adjusted<br />
ensuring proper trim when sailing with this now smaller sail. In marking <strong>the</strong><br />
location of <strong>the</strong> cars on <strong>the</strong> deck so that <strong>the</strong>y coincide with <strong>the</strong> reefing marks on<br />
<strong>the</strong> genoa you will take <strong>the</strong> guesswork out of setting <strong>the</strong> leads when reefing.<br />
The lazy genoa car can quickly and easily be moved <strong>for</strong>ward to <strong>the</strong> pre-marked<br />
location and <strong>the</strong>n during a slow tack <strong>the</strong> genoa reefed to <strong>the</strong> coinciding mark at<br />
<strong>the</strong> tack. The sail trim will be properly set on <strong>the</strong> new tack. When measuring<br />
<strong>the</strong> lead positions (as described below) we suggest that you mark <strong>the</strong> track at <strong>the</strong> <strong>for</strong>ward edge of <strong>the</strong> genoa car. You can do this<br />
with permanent marker, tape or some sort of self-adhesive ‘dots’. The marks should be on <strong>the</strong> deck as track mounted tape/marks<br />
can be rubbed off by <strong>the</strong> car.<br />
"Flat" on deck<br />
Measurement Start<br />
Point<br />
Towards <strong>the</strong> Bow<br />
Shrouds<br />
Overhead view of track<br />
Drawing is not to scale<br />
Bottom half of headsail with reef marks at tack<br />
Page 2 2
MARKING THE LEAD POSTION:<br />
Full Size:<br />
When your genoa is completely unfurled <strong>for</strong> sailing, <strong>the</strong> <strong>for</strong>ward<br />
edge of <strong>the</strong> genoa car should be 1’-1” / 330mm aft of <strong>the</strong> ‘flat’ or<br />
zero point. This will be your ‘all-purpose’ lead position.<br />
• This will be appropriate <strong>for</strong> wind strengths of 6-10 knots<br />
true wind.<br />
• <strong>Sail</strong>ing in less than 6 knots of true wind move <strong>the</strong> lead<br />
position <strong>for</strong>ward one hole making <strong>the</strong> genoa more<br />
powerful <strong>for</strong> <strong>the</strong>se conditions.<br />
• In more than 12 knots of wind, you may move <strong>the</strong> lead aft<br />
one hole (de-powering <strong>the</strong> sail slightly) or begin to<br />
consider reefing <strong>the</strong> headsail.<br />
• The genoa should be sheeted so that <strong>the</strong>re is sufficient<br />
tension on <strong>the</strong> sail to bring <strong>the</strong> leech to about midway at<br />
<strong>the</strong> spreader. Note that in very light air, you can sail with<br />
<strong>the</strong> leech fur<strong>the</strong>r outboard or more ‘open’ which will help<br />
keep <strong>the</strong> slow moving air attached to <strong>the</strong> sail and working<br />
<strong>for</strong> you. In heavier air, <strong>the</strong> same open leech will help to depower<br />
<strong>the</strong> sail.<br />
First Reef Mark:<br />
With <strong>the</strong> genoa furled to <strong>the</strong> first ‘reefing’ mark just aft of <strong>the</strong> tack<br />
of <strong>the</strong> sail, <strong>the</strong> lead car should be moved <strong>for</strong>ward until it is 8.5” /<br />
215mm aft of <strong>the</strong> ‘flat’ or zero point.<br />
The leech should still be at <strong>the</strong> mid-point of <strong>the</strong> spreader, but will<br />
have moved fur<strong>the</strong>r <strong>for</strong>ward as you reef.<br />
Second Reef Mark:<br />
With <strong>the</strong> genoa furled to <strong>the</strong> second and deepest ‘reefing’ mark, <strong>the</strong><br />
lead car should be moved <strong>for</strong>ward until it is 2” /51mm <strong>for</strong>ward of<br />
<strong>the</strong> zero point.<br />
Conditions that require this third reef will be quite windy and<br />
depending on your com<strong>for</strong>t level may be put in place anywhere<br />
from 20knots on up. This position will keep <strong>the</strong> foot of <strong>the</strong> sail<br />
quite tight, flattening <strong>the</strong> shape <strong>for</strong> good breezy per<strong>for</strong>mance.<br />
Car location with sail reefed to first mark<br />
Leech trim, closed hauled and with full size sail<br />
Track location with full size sail<br />
Car location with sail is reefed to second mark, note it is <strong>for</strong>ward of out<br />
zero point<br />
Page 3 3
Genoa Notes:<br />
Generally, sail trim is a bit of science, a bit of feel and a bit common sense. As a<br />
basic rule, we like to say that if it looks right, it probably is. Your <strong>Neil</strong> <strong>Pryde</strong> sails<br />
are designed, tuned, and tested <strong>for</strong> each specific model and as such, you will be able<br />
to achieve proper trim using this guide.<br />
Occasionally, you might find that <strong>the</strong> leech flutters a bit. If this happens, it’s usually<br />
that <strong>the</strong> sheet tension is not tight enough (you need to winch <strong>the</strong> sail in a bit tighter).<br />
However, if <strong>the</strong> boat becomes over-powered (healing excessively), you should<br />
consider reefing <strong>the</strong> sail at this time. Assuming you have <strong>the</strong> leads in <strong>the</strong> right<br />
location and <strong>the</strong> sheet tension is correct, but <strong>the</strong> sail still has a bit of flutter, you<br />
should adjust <strong>the</strong> leechline to keep <strong>the</strong> leech from fluttering.<br />
The first photo shows <strong>the</strong> leechline pocket opened to reveal <strong>the</strong> leechline, snubbing<br />
eyes, cleat and <strong>the</strong> ‘tail’ pocket. The snubbing eyes help to take <strong>the</strong> load from <strong>the</strong><br />
line making cleating and un-cleating an easy task. The ‘tail pocket is on <strong>the</strong> inside of<br />
<strong>the</strong> leechline cover and you can put <strong>the</strong> excess leechline tail into this pocket be<strong>for</strong>e<br />
closing <strong>the</strong> cover. To adjust, take up <strong>the</strong> line by pulling downward just above <strong>the</strong><br />
eyelets, taking up <strong>the</strong> slack in <strong>the</strong> line just below <strong>the</strong> cleat. Pull <strong>the</strong> line until <strong>the</strong><br />
flutter stops. Cleat <strong>the</strong> line and insert <strong>the</strong> tail into <strong>the</strong> pocket and close <strong>the</strong> flap.<br />
Leechline, cleat and ‘tail’ pocket<br />
Reefing Notes:<br />
Reefing <strong>the</strong> mainsail, headsail or both in combination allows <strong>the</strong> skipper to keep <strong>the</strong><br />
trim of <strong>the</strong> boat in a more upright mode. This is a safer, more com<strong>for</strong>table and faster<br />
way to sail in strong breezes. In addition, reefing <strong>the</strong> sails importantly affects <strong>the</strong> balance of <strong>the</strong> boat and can increase or decrease<br />
<strong>the</strong> amount of wea<strong>the</strong>r helm that develops at <strong>the</strong> wheel. The timing and sequence of reefing is up to <strong>the</strong> skipper of <strong>the</strong> boat to<br />
consider and will vary from skipper to skipper, as some conditions or preference in how <strong>the</strong> boat is sailed in reefing conditions<br />
are variable. With this in mind, <strong>the</strong> following points are general observations.<br />
1. The ‘balance’ of helm is regulated through mast rake, <strong>for</strong>e and aft. This will be preset during <strong>the</strong> initial commissioning.<br />
a. More mast rake aft will move <strong>the</strong> sailplan center of ef<strong>for</strong>t aft, in effect putting more loads on <strong>the</strong> sails aft of <strong>the</strong><br />
keel. This will <strong>the</strong>n in turn ‘pivot’ <strong>the</strong> boat around <strong>the</strong> keel, bringing <strong>the</strong> bow into <strong>the</strong> wind.<br />
b. Mast rake <strong>for</strong>ward and <strong>the</strong> opposite is true, <strong>the</strong> balance moves <strong>for</strong>ward and <strong>the</strong> boat will gain neutral or lee<br />
helm.<br />
2. Wea<strong>the</strong>r helm is desirable in all sailing yachts. It keeps <strong>the</strong> bow into <strong>the</strong> wind while sailing upwind and improves your<br />
VMG to wea<strong>the</strong>r.<br />
a. In 10 to 12 knots of wind with <strong>the</strong> sails fully deployed we expect to have <strong>the</strong> helm just slightly above neutral or<br />
with a small amount of helm. This means in releasing <strong>the</strong> wheel, <strong>the</strong> boat will (depending on wind, sea<br />
conditions and boat trim) slowly come into <strong>the</strong> wind.<br />
3. As you reef <strong>the</strong> sails, you are also going to affect <strong>the</strong> balance or center of ef<strong>for</strong>t on <strong>the</strong> sailplan.<br />
a. Reefing <strong>the</strong> genoa will reduce <strong>the</strong> area of this sail and in turn moves <strong>the</strong> center of ef<strong>for</strong>t aft, increasing helm.<br />
b. Reefing <strong>the</strong> mainsail first, will move <strong>the</strong> center of ef<strong>for</strong>t <strong>for</strong>ward and decrease <strong>the</strong> wea<strong>the</strong>r helm.<br />
With <strong>the</strong>se points in mind, we generally recommend that in <strong>the</strong> case of <strong>the</strong> <strong>323</strong>, <strong>the</strong> mainsail should be reefed to <strong>the</strong> first reef in<br />
<strong>the</strong> classic or just be<strong>for</strong>e <strong>the</strong> top-most batten with <strong>the</strong> PBF mainsail when first shortening sail. This will ensure a balanced helm<br />
as <strong>the</strong> breeze initially builds. In 15 knots true wind, you will need <strong>the</strong> mainsail reefed and <strong>the</strong> genoa reefed to <strong>the</strong> first reef mark<br />
and though you may be somewhat underpowered initially, as sailors we find it safer to assume <strong>the</strong> wind will continue to build<br />
and it is always more prudent to reef earlier than later. Should <strong>the</strong> wind decrease, increasing <strong>the</strong> sail area is easily accomplished<br />
by deploying <strong>the</strong> genoa so it can be full sized again.<br />
Assuming <strong>the</strong> breeze continues to build into <strong>the</strong> upper teens, it is important to have a sense of how much wea<strong>the</strong>r helm you have.<br />
If you find yourself fighting to keep <strong>the</strong> bow down (<strong>the</strong> boat continually wanting to come up hard into <strong>the</strong> wind) <strong>the</strong>n you need to<br />
reduce <strong>the</strong> mainsail area ei<strong>the</strong>r by furling <strong>the</strong> mainsail in-mast additionally or going to <strong>the</strong> second reef in <strong>the</strong> Classic mainsail.<br />
This will establish <strong>the</strong> balance back to <strong>the</strong> helm and also decrease <strong>the</strong> total net area, making <strong>the</strong> boat more upright and<br />
com<strong>for</strong>table.<br />
Page 4 4
MAINSAIL TRIM:<br />
The following points on mainsail trim apply both to <strong>the</strong> Furling and Classic mainsail, as <strong>the</strong> concepts are <strong>the</strong> same. Mainsail trim<br />
falls into two categories, upwind and downwind.<br />
Upwind<br />
1. Upwind in up to about 8 knots true wind <strong>the</strong> traveler<br />
can be brought to wea<strong>the</strong>r of centerline. This ensures<br />
that <strong>the</strong> boom will be close centerline and <strong>the</strong> leech of<br />
<strong>the</strong> sail in a powerful upwind mode.<br />
2. The outhaul should be eased 2” / 50mm at <strong>the</strong> stopper,<br />
easing <strong>the</strong> foot of <strong>the</strong> mainsail away from <strong>the</strong> boom<br />
about 8”/200mm<br />
3. Mainsheet tension should be tight enough to have <strong>the</strong><br />
uppermost tell tail on <strong>the</strong> leech streaming aft about<br />
50% of <strong>the</strong> time in <strong>the</strong> 7-12 true wind range. For those<br />
with furling mainsails <strong>the</strong> action of furling and<br />
unfurling <strong>the</strong> sail can play havoc with keeping <strong>the</strong><br />
telltales on <strong>the</strong> sail and you may need to replace <strong>the</strong>m<br />
from time to time.<br />
You will find that <strong>the</strong> upper tell tail will stall and fold<br />
over to <strong>the</strong> wea<strong>the</strong>r side of <strong>the</strong> sail about 50% of <strong>the</strong><br />
time in 7-12 knots. However, if <strong>the</strong> top tell tail is<br />
folding over to leeward, <strong>the</strong> mainsheet tension is too<br />
Mainsail outhaul eased <strong>for</strong> light air upwind trim<br />
loose and it needs to be brought in tighter.<br />
4. In 8-12 knots <strong>the</strong> outhaul should be brought in ½ of light air setting and <strong>the</strong> traveller lowered to half <strong>the</strong> distance to<br />
centerline.<br />
5. With <strong>the</strong> mainsheet tension set, <strong>the</strong> boom-vang should be tensioned until it is just snug.<br />
6. In over 12 knots, <strong>the</strong> upper tell tail should be flowing almost all <strong>the</strong> time.<br />
7. As <strong>the</strong> wind builds above <strong>the</strong> 12-knot range you will need to de-power <strong>the</strong> boat to keep her on her lines and to reduce<br />
wea<strong>the</strong>r helm. Start by getting <strong>the</strong> outhaul all <strong>the</strong> way on and <strong>the</strong>n let <strong>the</strong> traveler down in additional 3" /76mm<br />
increments until <strong>the</strong> boat balances. If <strong>the</strong> action of lowering <strong>the</strong> traveler to balance <strong>the</strong> helm causes <strong>the</strong> mainsail to<br />
backwind, this means it is time to consider reefing <strong>the</strong> mainsail.<br />
Downwind<br />
1. With <strong>the</strong> boom-vang set as outlined above <strong>the</strong> mainsail will have close to <strong>the</strong> right trim <strong>for</strong> downwind sailing.<br />
2. As soon as <strong>the</strong> sails are eased and sailing lower downwind angles (even as little as 3 0 ) ease <strong>the</strong> traveler down in 3"<br />
increments until <strong>the</strong> boat balances and drives well.<br />
3. Bearing off 12 0 and deeper, <strong>the</strong> traveler should be all <strong>the</strong> way out and at this point start to ease <strong>the</strong> mainsheet. The leech<br />
tension should correct assuming <strong>the</strong> boom-vang was tightened as above. At this point all your telltales will be flowing<br />
aft.<br />
4. With a battened mainsail (Classic), one normally keeps <strong>the</strong> top batten parallel to <strong>the</strong> boom while off <strong>the</strong> wind. Achieve<br />
this with <strong>the</strong> boom vang keeping <strong>the</strong> leech adjusted and <strong>the</strong> telltales flowing aft. Obviously, without <strong>the</strong> battens (furling<br />
mainsails) you will need to eyeball it. If <strong>the</strong> top batten or sail is falling off to leeward from this position, tighten <strong>the</strong><br />
vang to bring it back in line with <strong>the</strong> boom.<br />
With <strong>the</strong> leech trimmed this way, both tell tails should fly aft 95% of <strong>the</strong> time.<br />
Page 5 5
SAIL CARE:<br />
Both mainsails and headsails will get dirty with time and use. A primary source is air pollution which deposits filth on <strong>the</strong><br />
standing rigging. The sails in turn will pick this up when <strong>the</strong>y come in contact with shrouds, mast and spreaders. This obviously<br />
affects <strong>the</strong> headsail to a greater degree as it is dragged across <strong>the</strong> rigging with each tack and gybe. We recommend a yearly<br />
cleaning ei<strong>the</strong>r on your own or through a commercial sail cleaner or sail loft.<br />
Roller Furling Mainsails are equipped with a small label on <strong>the</strong> starboard clew of <strong>the</strong> sail. This is designed as a ‘marker’ that will<br />
indicate when <strong>the</strong> mainsail is furled inside <strong>the</strong> mast enough so that <strong>the</strong> U.V. cover on both sides of <strong>the</strong> sail will protect <strong>the</strong> sail. It<br />
is imperative that <strong>the</strong> sail be furled so that <strong>the</strong> label is clearly inside <strong>the</strong> mast, thus protecting <strong>the</strong> sailcloth from harmful U.V.<br />
which will damage <strong>the</strong> sailcloth quickly.<br />
Furling Label on starboard side of mainsail clew patch<br />
Mainsail with label furled inside mast and sail furled correctly.<br />
Mainsail with label and sail exposed; INCORRECTLY furled<br />
** Special thanks to Eric <strong>for</strong> letting us use his beautiful <strong>323</strong> ‘Dauntless’ and <strong>the</strong> good lads at Great Hudson <strong>Sail</strong>ing in doing <strong>the</strong> documentation<br />
<strong>for</strong> this guide. **<br />
Page 6 6