Service Manual - Dana Corporation
Service Manual - Dana Corporation
Service Manual - Dana Corporation

You also want an ePaper? Increase the reach of your titles
YUMPU automatically turns print PDFs into web optimized ePapers that Google loves.
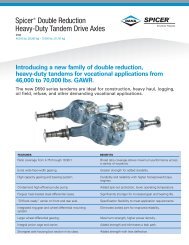
Differential Carrier Overhaul<br />
Assemble Drive Pinion ("Slip-fit" outer pinion bearing) (con't)<br />
4. Press inner bearing cone on<br />
pinion.<br />
IMPORTANT: To prevent bearing<br />
damage, use suitable sleeve that<br />
only contacts inner race of bearing<br />
cone.<br />
7. Install pinion outer bearing<br />
cone. Do not install oil seal until<br />
bearing adjustment is complete.<br />
NOTE: At this stage in assembly,<br />
check pinion bearing preload<br />
described in Adjustment Section<br />
of this manual for "slip-fit" outer<br />
pinion bearing (Page 15).<br />
5. Select existing or nominal bearing<br />
spacer and install on pinion.<br />
On 19, 20, 23, 26, 30 Series axles,<br />
also install spacer washer.<br />
8. With pinion installed and bearing<br />
preload adjustment complete, install<br />
oil seal with a press. Use properlysized<br />
sleeve to fit seal to prevent<br />
distortion during installation.<br />
6. Install bearing cage on drive<br />
pinion.<br />
NOTE: Prior to installation of<br />
flange (or yoke), lubricate oil seal<br />
lip and make sure flange (or yoke)<br />
is clean and dry.<br />
9. Install flange, flat washer and<br />
nut (flat washer is used only on<br />
13, 15, 16, 17, 18, 20, 21, 22 Series<br />
axles). Tighten nut to correct<br />
torque (see chart).<br />
NOTE: 15130.16130.17130 series axles<br />
do not use flat washers.<br />
Torque Chart<br />
„<br />
27