DIGIPASS SSO Authentication for CITRIX SmartAccess end ... - Vasco
DIGIPASS SSO Authentication for CITRIX SmartAccess end ... - Vasco
DIGIPASS SSO Authentication for CITRIX SmartAccess end ... - Vasco

You also want an ePaper? Increase the reach of your titles
YUMPU automatically turns print PDFs into web optimized ePapers that Google loves.
Figure 7: Policy configuration (4)<br />
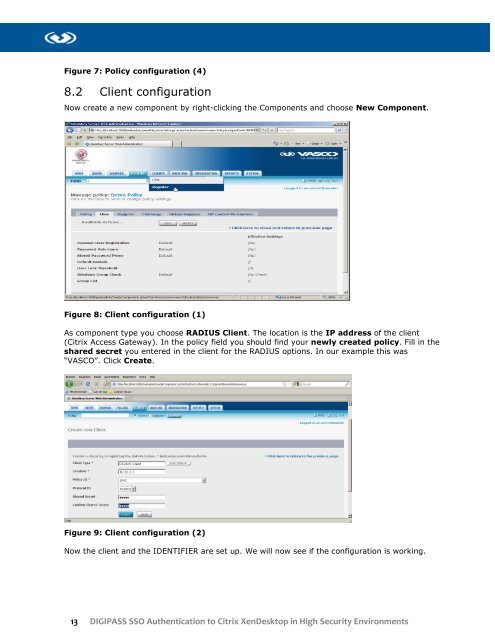
8.2 Client configuration<br />
Now create a new component by right-clicking the Components and choose New Component.<br />
Figure 8: Client configuration (1)<br />
As component type you choose RADIUS Client. The location is the IP address of the client<br />
(Citrix Access Gateway). In the policy field you should find your newly created policy. Fill in the<br />
shared secret you entered in the client <strong>for</strong> the RADIUS options. In our example this was<br />
“VASCO”. Click Create.<br />
Figure 9: Client configuration (2)<br />
Now the client and the IDENTIFIER are set up. We will now see if the configuration is working.<br />
13 <strong>DIGIPASS</strong> <strong>SSO</strong> <strong>Authentication</strong> to Citrix XenDesktop in High Security Environments


![KB [100006] - Vasco](https://img.yumpu.com/12539350/1/184x260/kb-100006-vasco.jpg?quality=85)