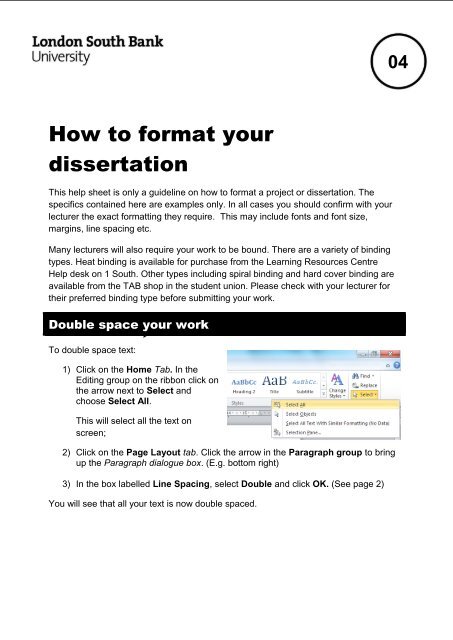
How to format your dissertation - My LSBU
How to format your dissertation - My LSBU
How to format your dissertation - My LSBU

You also want an ePaper? Increase the reach of your titles
YUMPU automatically turns print PDFs into web optimized ePapers that Google loves.
<strong>How</strong> <strong>to</strong> <strong>format</strong> <strong>your</strong><br />
<strong>dissertation</strong><br />
This help sheet is only a guideline on how <strong>to</strong> <strong>format</strong> a project or <strong>dissertation</strong>. The<br />
specifics contained here are examples only. In all cases you should confirm with <strong>your</strong><br />
lecturer the exact <strong>format</strong>ting they require. This may include fonts and font size,<br />
margins, line spacing etc.<br />
Many lecturers will also require <strong>your</strong> work <strong>to</strong> be bound. There are a variety of binding<br />
types. Heat binding is available for purchase from the Learning Resources Centre<br />
Help desk on 1 South. Other types including spiral binding and hard cover binding are<br />
available from the TAB shop in the student union. Please check with <strong>your</strong> lecturer for<br />
their preferred binding type before submitting <strong>your</strong> work.<br />
Double space <strong>your</strong> work<br />
To double space text:<br />
1) Click on the Home Tab. In the<br />
Editing group on the ribbon click on<br />
the arrow next <strong>to</strong> Select and<br />
choose Select All.<br />
This will select all the text on<br />
screen;<br />
2) Click on the Page Layout tab. Click the arrow in the Paragraph group <strong>to</strong> bring<br />
up the Paragraph dialogue box. (E.g. bot<strong>to</strong>m right)<br />
3) In the box labelled Line Spacing, select Double and click OK. (See page 2)<br />
You will see that all <strong>your</strong> text is now double spaced.<br />
04
<strong>How</strong> <strong>to</strong> <strong>format</strong> <strong>your</strong> <strong>dissertation</strong><br />
Exceptions<br />
The following should be changed <strong>to</strong> single spacing by selecting the relevant text and<br />
following the instructions above.<br />
1) Long quotations;<br />
2) Table and figure captions,<br />
descriptions and footnotes;<br />
3) List of references, literature<br />
cited, bibliography, etc.<br />
4) Some reference lists may be<br />
single-spaced, but a double<br />
space should be added<br />
between each reference.<br />
Setting <strong>your</strong> margins<br />
If you are binding <strong>your</strong> <strong>dissertation</strong>, it is a good idea <strong>to</strong> set a larger margin on the left<br />
hand side. <strong>How</strong>ever, some markers prefer that you set the margins equally. Check<br />
with <strong>your</strong> tu<strong>to</strong>r/marker.<br />
1) Select the Page Layout tab;<br />
2) Click on Margins;<br />
3) Select required margin, from the list or choose Cus<strong>to</strong>m Margins… <strong>to</strong> create<br />
<strong>your</strong> own.<br />
Fonts<br />
It is recommended that you use a serif face, (one with additional detail on the strokes<br />
of the letters). Your faculty may have a recommended face, but the following is used<br />
as an example:<br />
Times New Roman 12pt<br />
This is a highly legible font which is installed on all machines. This should be the<br />
default typeface when you start typing.<br />
Changing <strong>your</strong> font<br />
1) Click on Home Tab. In the Editing group, click on Select Select All.<br />
Page | 2<br />
This will select all the text on screen;
<strong>How</strong> <strong>to</strong> <strong>format</strong> <strong>your</strong> <strong>dissertation</strong><br />
2) Under the Home Tab in the Font group use the drop-down menu and select<br />
Times New Roman.<br />
In Word 2010 when you highlight a font type or size you will see a preview of<br />
how it looks on the screen.<br />
3) Select “12” from the font size drop-down menu.<br />
Page Numbers<br />
Page numbering is relatively simple if you are producing a document which runs from<br />
page 1 <strong>to</strong> page 50, but if you have a title page, introduction, or table of contents you<br />
don't want page numbers <strong>to</strong> appear.<br />
Creating sections<br />
The first step is <strong>to</strong> divide <strong>your</strong> paper in<strong>to</strong> sections that<br />
<strong>your</strong> computer will recognise. The first one will be the<br />
title page. It is easier <strong>to</strong> do this after you have created<br />
<strong>your</strong> title page text.<br />
1) Go <strong>to</strong> the bot<strong>to</strong>m of <strong>your</strong> title page and place<br />
<strong>your</strong> cursor after the very last word;<br />
2) On the Page Layout tab, in the Page Setup<br />
group, click Breaks.<br />
3) Select Next Page, as shown in the picture. You<br />
have created a section break!<br />
Now, in the mind of the computer, <strong>your</strong> title page is an<br />
individual element, separate from the rest of <strong>your</strong><br />
paper.<br />
If you have a table of contents, separate that from <strong>your</strong><br />
paper in the same manner: type up <strong>your</strong> contents, and then create a section break at<br />
the end.<br />
Creating page numbers<br />
We will create the page numbers in the footer of <strong>your</strong> document. In order for this <strong>to</strong><br />
display properly, make sure you have set <strong>your</strong> Page Margins <strong>to</strong> their defaults.<br />
1) Place <strong>your</strong> cursor on the first page of <strong>your</strong> text, or the page where you want<br />
<strong>your</strong> page numbers <strong>to</strong> begin;<br />
2) Go <strong>to</strong> Insert click on Page Number and select Bot<strong>to</strong>m of the Page and<br />
choose which kind you want from the selection.<br />
Page | 3
<strong>How</strong> <strong>to</strong> <strong>format</strong> <strong>your</strong> <strong>dissertation</strong><br />
You’re not finished yet! You will see that the page numbers appear on all pages,<br />
including <strong>your</strong> title page! This is because Word thinks you want each section <strong>to</strong> appear<br />
the same. You will need <strong>to</strong> <strong>format</strong> <strong>your</strong> page numbers for each section.<br />
Special Page Numbers<br />
Now you see that you can manipulate, delete,<br />
and change page numbers everywhere on <strong>your</strong><br />
paper, but you must do this section by section.<br />
To create special page numbers for <strong>your</strong><br />
introduc<strong>to</strong>ry pages, such as <strong>your</strong> table of<br />
contents and list of illustrations:<br />
1) Make sure that you break the connection<br />
between the title page and the<br />
introduction pages, (see Creating<br />
Sections on page 3)<br />
2) Go <strong>to</strong> the first introduction page, and<br />
create special page numbers (i and ii are<br />
most common) by selecting the one you<br />
want from the Number <strong>format</strong> box.<br />
Creating a Table<br />
Tables are a great way of displaying in<strong>format</strong>ion in a small space. Remember: Rows<br />
go across the page, Columns go down the page and cells are the intersection of the<br />
two.<br />
1) Place <strong>your</strong> cursor at the location you want <strong>your</strong> table;<br />
2) Select Insert Table Insert Table;<br />
3) Choose the size for <strong>your</strong> table in the Column and Row fields;<br />
4) Your table is now created.<br />
In Word 2010 when a table is created Table Tools will appear above the ribbon.<br />
There are two additional tabs underneath; the Design and Layout tabs which you can<br />
use <strong>to</strong> <strong>format</strong> <strong>your</strong> table.<br />
You can click on the table created <strong>to</strong> make this tab appear if it is not showing.<br />
Formatting <strong>your</strong> table<br />
After you have entered data in<strong>to</strong> <strong>your</strong> table, you may wish <strong>to</strong> remove the border, for<br />
example when using it <strong>to</strong> keep <strong>your</strong> details aligned on screen. To remove this<br />
<strong>format</strong>ting:<br />
1) Click on the Design tab underneath Table Tools.<br />
Page | 4
<strong>How</strong> <strong>to</strong> <strong>format</strong> <strong>your</strong> <strong>dissertation</strong><br />
2) Click on Borders then select Borders and Shading dialog box<br />
3) In the Borders and Shading dialog box, select None <strong>to</strong> turn off all borders.<br />
You can also use this dialog box <strong>to</strong> change the appearance of <strong>your</strong> table<br />
borders and shade the table body.<br />
4) When you are ready, click OK.<br />
Copying a table from Excel <strong>to</strong> Word<br />
The easiest way is as follows:<br />
1) Open <strong>your</strong> Excel workbook;<br />
2) Drag the mouse over the area you want <strong>to</strong> copy;<br />
3) Select Copy from the Home tab;<br />
4) Open <strong>your</strong> Word document;<br />
5) Select Paste from the Home tab.<br />
This will paste <strong>your</strong> table at the current cursor insertion point. <strong>How</strong>ever, you will<br />
probably find that it is <strong>to</strong>o wide for <strong>your</strong> Word document. As a rule of thumb, it is best<br />
<strong>to</strong> make <strong>your</strong> table no more than seven cells across, as this will go over the Word<br />
document’s printable area.<br />
Creating a Table of Contents<br />
If you want <strong>to</strong> insert a Table of Contents in<strong>to</strong> <strong>your</strong> document, follow these instructions<br />
remembering <strong>to</strong> leave a blank page for the Table of Contents <strong>to</strong> be inserted. It is<br />
strongly recommended that you create a dummy Table of Contents <strong>to</strong> practise with,<br />
before inserting one in<strong>to</strong> <strong>your</strong> document.<br />
1) Before creating a<br />
table of contents<br />
make sure all of<br />
the headings you<br />
want <strong>to</strong> include<br />
have been given<br />
a Heading style.<br />
a) Highlight the text<br />
b) Select one of the built-in<br />
Heading styles from this list.<br />
Heading 1 – Main headings<br />
Heading 2 – Sub-headings<br />
Etc.<br />
Page | 5
<strong>How</strong> <strong>to</strong> <strong>format</strong> <strong>your</strong> <strong>dissertation</strong><br />
2) Place the cursor on the page where the Table of Contents is <strong>to</strong> go.<br />
3) The following dialogue box will open<br />
a) Tick boxes here for<br />
<strong>your</strong> table of contents <strong>to</strong><br />
Show page numbers<br />
and . <strong>to</strong> Right align page<br />
numbers.<br />
b) Select a Format<br />
for <strong>your</strong> Table of<br />
Contents.<br />
c) Select the correct number<br />
of Levels for <strong>your</strong> table of<br />
contents, depending on the<br />
number of Heading Styles<br />
you used in <strong>your</strong> document.<br />
Page | 6<br />
a. Click on<strong>to</strong> the<br />
References tab<br />
located on the<br />
ribbon<br />
b. Select Table<br />
of Contents<br />
c. Select Insert Table<br />
of Contents<br />
d) Select Use<br />
hyperlinks<br />
instead of<br />
page numbers.<br />
This option will<br />
allow you <strong>to</strong><br />
have hyperlink<br />
headings
<strong>How</strong> <strong>to</strong> <strong>format</strong> <strong>your</strong> <strong>dissertation</strong><br />
5) When you have made the appropriate changes click on the OK but<strong>to</strong>n.<br />
6) To view <strong>your</strong> Table of Contents in the document click on the File menu and<br />
select Print and you will see it on the left of the screen.<br />
Dissertation Chapter Headings<br />
Follow these instructions <strong>to</strong> include different headings in <strong>your</strong> MS Word Document<br />
without dividing the document in<strong>to</strong> individual chapters.<br />
1) Select Header from the Insert tab.<br />
Choose which kind you want from<br />
the dropdown list e.g. Blank<br />
2) Double click inside the Header section and then type <strong>your</strong> Chapter heading,<br />
e.g. Introduction. (See below)<br />
3) Click on the Close Header and Footer <strong>to</strong> return <strong>to</strong> the document. (See below)<br />
4) To create a new chapter, e.g. Methodology, place <strong>your</strong> cursor at the beginning<br />
of the next chapter in the main document. Next, select the Page Layout tab<br />
and click on Breaks<br />
Page | 7
<strong>How</strong> <strong>to</strong> <strong>format</strong> <strong>your</strong> <strong>dissertation</strong><br />
5) When the Break dialogue box appears,<br />
select Next page under the Section break<br />
types.<br />
6) To change the Header of the next chapter so that it is not repeated from the<br />
previous chapter, i.e. from Introduction in<strong>to</strong> Methodology, double click on the<br />
header. In the Header section you will see the following:<br />
7) Before the next Chapter heading is changed, ensure that the Link <strong>to</strong><br />
Previous but<strong>to</strong>n has been deselected. Click this but<strong>to</strong>n once <strong>to</strong> deselect. (See<br />
below)<br />
8) Delete the current chapter heading in section 2 and type in the new<br />
heading, Methodology. The Header section should now look like this:<br />
9) Click on the Close but<strong>to</strong>n.<br />
Page | 8<br />
NOTE: The ‘Same as<br />
Previous’ message is<br />
missing from the<br />
bot<strong>to</strong>m rt-hand corner
<strong>How</strong> <strong>to</strong> <strong>format</strong> <strong>your</strong> <strong>dissertation</strong><br />
10) Repeat these steps <strong>to</strong> add more chapter headings within <strong>your</strong> document.<br />
Inserting images correctly<br />
When you insert a picture in<strong>to</strong> word, you place a copy of that file in Word. Copying and<br />
pasting, inserting a hyperlink and so on often require that the original image is in the<br />
same place as it was when you created the document. If Word cannot find the file, it<br />
will display a grey box with a red X in the corner.<br />
Therefore, it is safest <strong>to</strong> insert <strong>your</strong> picture directly. In order <strong>to</strong> do this:<br />
1) Place <strong>your</strong> cursor where you want <strong>to</strong> insert the picture;<br />
2) Select Insert Picture;<br />
3) Navigate <strong>to</strong> the image you wish <strong>to</strong> insert. If it is on the internet, you will need <strong>to</strong><br />
save the image from there, first by right-clicking in <strong>your</strong> browser and selecting<br />
Save Image As… You will then be able <strong>to</strong> insert it;<br />
4) Click OK. The image will appear onscreen.<br />
If you need <strong>to</strong> manipulate the image, right-click on it and select Size and position....<br />
You will then be able <strong>to</strong> set the position relative <strong>to</strong> the text, and align it. If you want <strong>to</strong><br />
align it <strong>your</strong>self, select Other for Alignment.<br />
Further in<strong>format</strong>ion<br />
Visit the Communication skills development page<br />
https://my.lsbu.ac.uk/page/communication-skills-development<br />
<strong>How</strong> <strong>to</strong> do <strong>your</strong> Referencing Using the Harvard System (HS 30)<br />
https://my.lsbu.ac.uk/assets/documents/library/h2g-library-30.pdf<br />
<strong>How</strong> <strong>to</strong> do <strong>your</strong> Referencing: the OSCOLA System (Law Resources) (HS 29)<br />
https://my.lsbu.ac.uk/assets/documents/library/h2g-library-29.pdf<br />
<strong>How</strong> <strong>to</strong> do <strong>your</strong> Referencing: Numeric Style (Faculty of Engineering) (HS 28)<br />
https://my.lsbu.ac.uk/assets/documents/library/h2g-library-28.pdf<br />
Database of <strong>LSBU</strong> <strong>dissertation</strong>s which have been granted a <strong>dissertation</strong> (searchable)<br />
http://www.lsbu.ac.uk/library/search/SearchMain.shtml<br />
Tel: 020 7815 6678/6679<br />
Email: llr-itsupport@lsbu.ac.uk<br />
Produced by LLR 09/2012<br />
Page | 9