Retractable pH/ORP Sensors - Emerson Process Management
Retractable pH/ORP Sensors - Emerson Process Management
Retractable pH/ORP Sensors - Emerson Process Management
Create successful ePaper yourself
Turn your PDF publications into a flip-book with our unique Google optimized e-Paper software.
MODEL 396R <strong>pH</strong>/<strong>ORP</strong> SECTION 6.0<br />
MAINTENANCE<br />
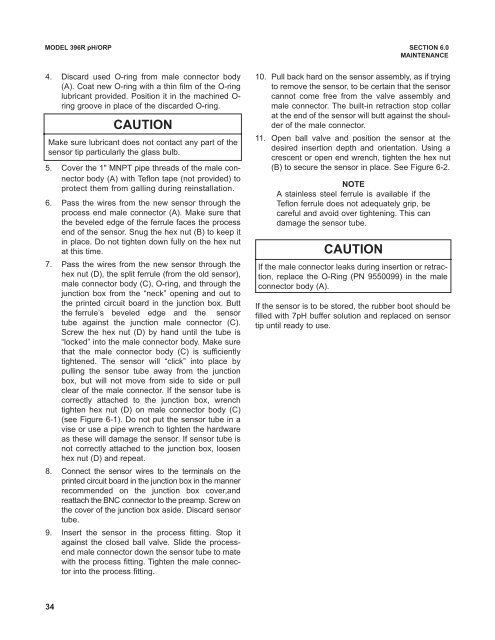
4. Discard used O-ring from male connector body<br />
(A). Coat new O-ring with a thin film of the O-ring<br />
lubricant provided. Position it in the machined Oring<br />
groove in place of the discarded O-ring.<br />
34<br />
CAUTION<br />
Make sure lubricant does not contact any part of the<br />
sensor tip particularly the glass bulb.<br />
5. Cover the 1" MNPT pipe threads of the male connector<br />
body (A) with Teflon tape (not provided) to<br />
protect them from galling during reinstallation.<br />
6. Pass the wires from the new sensor through the<br />
process end male connector (A). Make sure that<br />
the beveled edge of the ferrule faces the process<br />
end of the sensor. Snug the hex nut (B) to keep it<br />
in place. Do not tighten down fully on the hex nut<br />
at this time.<br />
7. Pass the wires from the new sensor through the<br />
hex nut (D), the split ferrule (from the old sensor),<br />
male connector body (C), O-ring, and through the<br />
junction box from the “neck” opening and out to<br />
the printed circuit board in the junction box. Butt<br />
the ferrule’s beveled edge and the sensor<br />
tube against the junction male connector (C).<br />
Screw the hex nut (D) by hand until the tube is<br />
“locked” into the male connector body. Make sure<br />
that the male connector body (C) is sufficiently<br />
tightened. The sensor will “click” into place by<br />
pulling the sensor tube away from the junction<br />
box, but will not move from side to side or pull<br />
clear of the male connector. If the sensor tube is<br />
correctly attached to the junction box, wrench<br />
tighten hex nut (D) on male connector body (C)<br />
(see Figure 6-1). Do not put the sensor tube in a<br />
vise or use a pipe wrench to tighten the hardware<br />
as these will damage the sensor. If sensor tube is<br />
not correctly attached to the junction box, loosen<br />
hex nut (D) and repeat.<br />
8. Connect the sensor wires to the terminals on the<br />
printed circuit board in the junction box in the manner<br />
recommended on the junction box cover,and<br />
reattach the BNC connector to the preamp. Screw on<br />
the cover of the junction box aside. Discard sensor<br />
tube.<br />
9. Insert the sensor in the process fitting. Stop it<br />
against the closed ball valve. Slide the processend<br />
male connector down the sensor tube to mate<br />
with the process fitting. Tighten the male connector<br />
into the process fitting.<br />
10. Pull back hard on the sensor assembly, as if trying<br />
to remove the sensor, to be certain that the sensor<br />
cannot come free from the valve assembly and<br />
male connector. The built-in retraction stop collar<br />
at the end of the sensor will butt against the shoulder<br />
of the male connector.<br />
11. Open ball valve and position the sensor at the<br />
desired insertion depth and orientation. Using a<br />
crescent or open end wrench, tighten the hex nut<br />
(B) to secure the sensor in place. See Figure 6-2.<br />
NOTE<br />
A stainless steel ferrule is available if the<br />
Teflon ferrule does not adequately grip, be<br />
careful and avoid over tightening. This can<br />
damage the sensor tube.<br />
CAUTION<br />
If the male connector leaks during insertion or retraction,<br />
replace the O-Ring (PN 9550099) in the male<br />
connector body (A).<br />
If the sensor is to be stored, the rubber boot should be<br />
filled with 7<strong>pH</strong> buffer solution and replaced on sensor<br />
tip until ready to use.


