User Guide - SMC
User Guide - SMC
User Guide - SMC

You also want an ePaper? Increase the reach of your titles
YUMPU automatically turns print PDFs into web optimized ePapers that Google loves.
Hardware Installation<br />
10<br />
Hardware Installation<br />
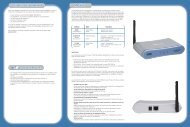
1. Select the Site – Choose a location for your Wireless Ethernet<br />
Bridge. Usually, the best location is at the center of your<br />
wireless coverage area, if possible within line-of-sight of all<br />
wireless devices.<br />
2. Place the Wireless Ethernet Bridge in a position that gives it<br />
maximum coverage. Normally, the higher you place the<br />
antenna, the better the performance.<br />
3. Position the antennas in the desired positions. For more<br />
effective coverage, position the antennas along different axes.<br />
For example, try positioning the antennas around 45 to 90<br />
degrees apart. (The antennas emit signals along the toroidal<br />
plane – and thus provide more effective coverage when<br />
positioned along different axes.)<br />
4. If used in Wireless Bridge mode, connect the Ethernet cable<br />
to the RJ-45 socket of the device will communicate wirelessly<br />
with an access point.<br />
5. If used in Access Point mode, connect the Ethernet cable –<br />
The <strong>SMC</strong>2870W can be wired to an Ethernet network through<br />
an Ethernet device such as a hub or a switch using category<br />
3, 4, or 5 UTP Ethernet cable and an RJ-45 connector.<br />
6. Connect the power cable – Connect the power adapter cable<br />
to the 5 VDC power socket on the rear panel. Warning: Use<br />
only the power adapter supplied with the <strong>SMC</strong>2870W.<br />
7. Check the LED’s on the front of the unit to make sure the<br />
adapter is turned on properly and the status is okay.