

Chairside - Glidewell Dental Labs
Chairside - Glidewell Dental Labs
Chairside - Glidewell Dental Labs

Create successful ePaper yourself
Turn your PDF publications into a flip-book with our unique Google optimized e-Paper software.
have really come around to no-prep veneers. As our technicians and the ceramics have improved, I have been<br />
getting much better results on a much wider variety of cases. There are still those cases, however, where some<br />
minimal enamelplasty can make a big difference in final esthetics. I usually have a conversation with the patient<br />
to determine if they are set on no-prep veneers or open to minimal-prep veneers. It’s a little ironic because no-prep<br />
patients don’t want their teeth touched, but it would be impossible to ever remove the veneers without prepping tooth<br />
structure. I am comfortable with both and I welcome patient input when planning these cases.<br />
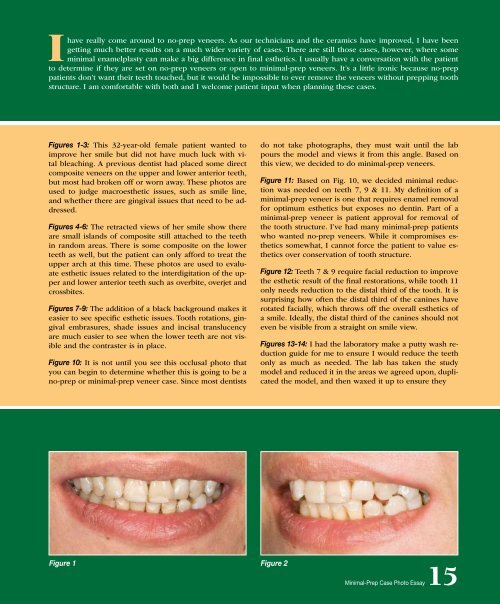
Figures 1-3: This 32-year-old female patient wanted to<br />
improve her smile but did not have much luck with vital<br />
bleaching. A previous dentist had placed some direct<br />
composite veneers on the upper and lower anterior teeth,<br />
but most had broken off or worn away. These photos are<br />
used to judge macroesthetic issues, such as smile line,<br />
and whether there are gingival issues that need to be addressed.<br />
Figures 4-6: The retracted views of her smile show there<br />
are small islands of composite still attached to the teeth<br />
in random areas. There is some composite on the lower<br />
teeth as well, but the patient can only afford to treat the<br />
upper arch at this time. These photos are used to evaluate<br />
esthetic issues related to the interdigitation of the upper<br />
and lower anterior teeth such as overbite, overjet and<br />
crossbites.<br />
Figures 7-9: The addition of a black background makes it<br />
easier to see specific esthetic issues. Tooth rotations, gingival<br />
embrasures, shade issues and incisal translucency<br />
are much easier to see when the lower teeth are not visible<br />
and the contraster is in place.<br />
Figure 10: It is not until you see this occlusal photo that<br />
you can begin to determine whether this is going to be a<br />
no-prep or minimal-prep veneer case. Since most dentists<br />
Figure 1 Figure 2<br />
do not take photographs, they must wait until the lab<br />
pours the model and views it from this angle. Based on<br />
this view, we decided to do minimal-prep veneers.<br />
Figure 11: Based on Fig. 10, we decided minimal reduction<br />
was needed on teeth 7, 9 & 11. My definition of a<br />
minimal-prep veneer is one that requires enamel removal<br />
for optimum esthetics but exposes no dentin. Part of a<br />
minimal-prep veneer is patient approval for removal of<br />
the tooth structure. I’ve had many minimal-prep patients<br />
who wanted no-prep veneers. While it compromises esthetics<br />
somewhat, I cannot force the patient to value esthetics<br />
over conservation of tooth structure.<br />
Figure 12: Teeth 7 & 9 require facial reduction to improve<br />
the esthetic result of the final restorations, while tooth 11<br />
only needs reduction to the distal third of the tooth. It is<br />
surprising how often the distal third of the canines have<br />
rotated facially, which throws off the overall esthetics of<br />
a smile. Ideally, the distal third of the canines should not<br />
even be visible from a straight on smile view.<br />
Figures 13-14: I had the laboratory make a putty wash reduction<br />
guide for me to ensure I would reduce the teeth<br />
only as much as needed. The lab has taken the study<br />
model and reduced it in the areas we agreed upon, duplicated<br />
the model, and then waxed it up to ensure they<br />
Minimal-Prep Case Photo Essay15


