Operators guide v3851-4981 - Vinten Radamec
Operators guide v3851-4981 - Vinten Radamec
Operators guide v3851-4981 - Vinten Radamec

You also want an ePaper? Increase the reach of your titles
YUMPU automatically turns print PDFs into web optimized ePapers that Google loves.
<strong>Vinten</strong> <strong>Radamec</strong><br />
HPM<br />
<strong>Operators</strong> Guide<br />
V3851-<strong>4981</strong><br />
Robotic Camera Control Systems
Head Processing Module<br />
<strong>Operators</strong> Guide<br />
Original Instructions<br />
Publication Part No. V3851-<strong>4981</strong> Issue 2
Copyright © Vitec Group plc 2009<br />
All rights reserved throughout the world. No<br />
part of this document may be stored in a<br />
retrieval system. transmitted, copied or<br />
reproduced in any way including, but not<br />
limited to, photocopy, photograph, magnetic<br />
or other record without the prior agreement<br />
and permission in writing of Vitec Group plc.<br />
Trademarks<br />
<strong>Vinten</strong> <strong>Radamec</strong>® and <strong>Vinten</strong>® are<br />
registered trademarks of the Vitec Group plc.<br />
Important information about this document<br />
Information contained in this document is<br />
subject to change. Camera Dynamics<br />
Limited reserves the right, without notice, to<br />
make changes in equipment design or<br />
performance as progress in engineering,<br />
manufacturing or technology may warrant.<br />
Published by:<br />
Technical Publications Department<br />
William <strong>Vinten</strong> Building<br />
Western Way<br />
Bury St Edmunds<br />
Suffolk IP33 3TB<br />
UK<br />
Tel: +44 1284 752 121<br />
Fax: +44 1284 750 560
Understanding these instructions<br />
Safety - Read This First<br />
English<br />
The original instructions presented in this operators <strong>guide</strong> were written in English, and subsequently<br />
translated into other languages. If you are unable to understand these instructions, contact <strong>Vinten</strong><br />
<strong>Radamec</strong> or your distributor to obtain a translation of the original instructions (EU Countries).<br />
БЪЛГАРСКИ<br />
Оригиналните инструкции, представени в настоящото ръководство на производителя, бяха<br />
написани на английски език, а след това - преведени на други езици. Ако не разбирате тези<br />
езици, свържете се с <strong>Vinten</strong> <strong>Radamec</strong> или с Вашия дистрибутор, за да получите оригиналните<br />
инструкции (за страните от Европейския съюз).<br />
Česky<br />
Pokyny uvedené v této operátorské příručce byly původně napsány anglicky a následně byly<br />
přelo_eny do ostatních jazyků. Nerozumíte-li těmto pokynům, kontaktujte společnost <strong>Vinten</strong> <strong>Radamec</strong><br />
nebo svého distributora, abyste získali překlad originálních pokynů (členské státy EU).<br />
Danish<br />
De originale instruktioner, der præsenteres i denne betjeningsvejledning, er skrevet på engelsk og<br />
derefter oversat til andre sprog. Hvis du ikke forstår disse instruktioner bedes du kontakte <strong>Vinten</strong><br />
<strong>Radamec</strong> eller vor forhandler for at få en oversættelse af de originale instruktioner (EU-lande).<br />
Deutsch<br />
Die Originalanleitung in diesem Bedienungshandbuch wurde auf Englisch verfasst und anschließend<br />
in andere Sprachen übersetzt. Bei Verständnisproblemen in einer der übersetzten Sprachen<br />
kontaktieren Sie bitte <strong>Vinten</strong> <strong>Radamec</strong> oder Ihren Fachhändler; dort erhalten Sie eine Übersetzung<br />
der ursprünglichen Anleitung (EU-Staaten).<br />
Eesti<br />
Käesoleva kasutajajuhendi algtekst on koostatud inglise keeles ning seejärel tõlgitud teistesse<br />
keeltesse. Kui juhend osutub teie jaoks arusaamatuks, võtke juhendi emakeelse tõlke hankimiseks<br />
ühendust <strong>Vinten</strong> <strong>Radamec</strong>i või kohaliku esindajaga (Euroopa Liidu riigid).<br />
Ελληνικά<br />
Οι αρχικές οδηγίες αυτού του οδηγού για το χειριστή συντάχθηκαν στα Αγγλικά και μεταφράστηκαν στη<br />
συνέχεια σε άλλες γλώσσες. Εάν δυσκολεύεστε να καταλάβετε αυτές τις οδηγίες, επικοινωνήστε με τη<br />
<strong>Vinten</strong> <strong>Radamec</strong> ή το διανομέα σας για να λάβετε μια μετάφραση των αρχικών οδηγιών (Χώρες ΕΕ).<br />
Español<br />
Las instrucciones originales que se indican en esta guía del operador se han redactado en inglés y<br />
posteriormente se han traducido a otros idiomas. Si no entiende estas instrucciones, póngase en<br />
contacto con <strong>Vinten</strong> <strong>Radamec</strong> o con su distribuidor para obtener una traducción de las instrucciones<br />
originales (para países de la UE).<br />
Français<br />
Les instructions originales présentées dans ce <strong>guide</strong> d'utilisation ont été écrites en anglais puis<br />
traduites dans d'autres langues. Si vous ne comprenez pas ces instructions, contactez <strong>Vinten</strong><br />
<strong>Radamec</strong> ou votre revendeur pour obtenir une traduction des instructions originales (pour les pays de<br />
l'UE).<br />
Gaeilge<br />
Scríobhadh na treoracha bunaidh don treoirleabhar oibritheora seo as Béarla, agus aistríodh iad go<br />
teangacha eile ina dhiaidh sin. Mura bhfuil tú in ann na treoracha seo a thuiscint, téigh i dteagmháil le<br />
<strong>Vinten</strong> <strong>Radamec</strong> nó le do dháileoir, chun aistriúchán de na treoracha bunaidh a fháil (Tíortha an AE).<br />
Italiano<br />
Le istruzioni originali presentate in questa guida per l'operatore sono in lingua inglese e<br />
successivamente tradotte nelle altre lingue. Qualora le istruzioni non fossero disponibili nella lingua<br />
desiderata, potete contattare <strong>Vinten</strong> <strong>Radamec</strong> o il vostro distributore per ricevere la traduzione delle<br />
istruzioni originali (Paesi UE).<br />
Publication Part No. V3851-<strong>4981</strong> Issue 2 3
Latviešu<br />
Šajā operatora rokasgrāmatā iekļautie norādījumi sākotnēji tika sarakstīti angļu valodā un pēc tam<br />
pārtulkoti citās valodās. Ja nesaprotat šos norādījumus svešvalodā, sazinieties ar <strong>Vinten</strong> <strong>Radamec</strong> vai<br />
tirgotāju, lai saņemtu norādījumu tulkojumu (kādā no ES dalībvalstu valodām).<br />
Lietuvių<br />
Šiame operatoriaus vadove pristatomos pirminės instrukcijos parašytos anglų kalba ir vėliau išverstos<br />
į kitas kalbas. Jei šių instrukcijų nesuprantate, susisiekite su „<strong>Vinten</strong> <strong>Radamec</strong>“ arba savo platintoju ir<br />
gaukite pirminių instrukcijų vertimą (ES šalies kalba).<br />
Magyar<br />
A kezeloi útmutatóban található utasítások angol nyelven íródtak, és utólag fordították azokat más<br />
nyelvekre. Ha nem érti ezen utasításokat, kérjük, vegye fel a kapcsolatot a <strong>Vinten</strong> <strong>Radamec</strong>nel vagy<br />
a helyi képviselettel, és igényelje az eredeti utasítások fordítását (EU országok).<br />
Malti<br />
L-istruzzjonijiet originali ippreżentati f'din il-gwida ta' operaturi kienu miktuba bl-Ingliż, u sussegwentement<br />
maqluba fl-lingwi ohra. Jekk ma tistax tifhem dawn l-istruzzjonijiet, ikkuntattja lil <strong>Vinten</strong> <strong>Radamec</strong><br />
jew id-distributur tieghek biex tikseb traduzzjoni ta' l-istruzzjonijiet originali (Pajjiżi ta' UE).<br />
Nederlands<br />
De oorspronkelijke instructies in deze bedieningshandleiding zijn geschreven in het Engels en<br />
vervolgens in andere talen vertaald. Als het onmogelijk is deze instructies te begrijpen, neemt u<br />
contact op met <strong>Vinten</strong> <strong>Radamec</strong> of met uw distributeur om een vertaling te bemachtigen van de<br />
oorspronkelijke instructies (EG-landen).<br />
Polski<br />
Oryginalne instrukcje zamieszczone w niniejszym podręczniku operatora zostały napisane w języku<br />
angielskim, a następnie przetłumaczone na inne języki. Jeśli nie rozumieją Państwo tych instrukcji,<br />
prosimy skontaktować się z siedzibą lub dystrybutorem <strong>Vinten</strong> <strong>Radamec</strong>, aby uzyskać tłumaczenie<br />
oryginalnych instrukcji (kraje UE).<br />
Português<br />
As instruções originais apresentadas no guia do operador foram escritas em Inglês e traduzidas para<br />
outros idiomas. Se não conseguir compreender estas instruções contacte a <strong>Vinten</strong> <strong>Radamec</strong> ou o seu<br />
distribuidor para obter a tradução das instruções originais (Países da UE).<br />
Română<br />
Instrucţiunile originale prezentate în acest ghid pentru operatori au fost scrise în limba engleză, şi<br />
traduse ulterior în alte limbi. În cazul în care nu înţelegeţi aceste instrucţiuni, contactaţi <strong>Vinten</strong> <strong>Radamec</strong><br />
sau distribuitorul dumneavoastră pentru a obţine o traducere a instrucţiunilor originale (Ţările<br />
UE).<br />
Slovensky<br />
Pôvodné pokyny, uvedené v tomto návode na obsluhu, boli napísané v anglictine a následne<br />
preložené do iných jazykov. Ak nerozumiete týmto pokynom, obrátte sa na spolocnost <strong>Vinten</strong><br />
<strong>Radamec</strong> alebo vášho distribútora, aby vám zaslal preklad originálnych pokynov (krajiny EÚ).<br />
Slovenščina<br />
Originalno besedilo teh navodil za uporabo je bilo napisano v angleščini in prevedeno v ostale jezike.<br />
Če ne razumete teh navodil, se obrnite na podjetje <strong>Vinten</strong> <strong>Radamec</strong> ali lokalnega zastopnika, ki vam<br />
bo posredoval originalna navodila (velja za dr_ave EU).<br />
Suomi<br />
Tähän käyttäjän oppaaseen sisältyvät ohjeet on kirjoitettu alun perin englanniksi ja käännetty sitten<br />
muille kielille. Ellet ymmärrä näitä ohjeita, ota yhteyttä <strong>Vinten</strong> <strong>Radamec</strong>iin tai jälleenmyyjään ja pyydä<br />
alkuperäisten ohjeiden käännöstä (EU-maat).<br />
Svenska<br />
Instruktionerna i denna handbok skrevs ursprungligen på engelska och har sedan översatts till flera<br />
språk. Om du inte förstår dessa instruktioner, kontakta <strong>Vinten</strong> <strong>Radamec</strong> eller din återförsäljare för en<br />
ny översättning av originalinstruktionerna (EU-länder).<br />
4 Head Processing Module <strong>Operators</strong> Guide
Safety <strong>guide</strong>lines<br />
Warning symbols in this <strong>guide</strong><br />
Where there is a risk of personal injury or injury to others, comments appear highlighted<br />
by the word WARNING!—supported by the warning triangle symbol.<br />
Where there is a risk of damage to the product, associated equipment, process or<br />
surroundings, comments appear highlighted by the word CAUTION!<br />
Warning symbols on the product<br />
The following warning symbols may appear on the product.<br />
On encountering the<br />
warning triangle and open<br />
book symbols it is<br />
imperative that you consult<br />
the operators <strong>guide</strong> before<br />
using this product or<br />
attempting any adjustment<br />
or repair.<br />
Where there is a risk of<br />
exposure to laser radiation,<br />
comments appear<br />
supported by the laser<br />
warning triangle symbol.<br />
Publication Part No. V3851-<strong>4981</strong> Issue 2 5
Important safety instructions<br />
1. Take heed of warnings and instructions<br />
You should read all of the safety instructions<br />
before operating the equipment. Retain this<br />
operators <strong>guide</strong> for future reference and adhere<br />
to all warnings in the <strong>guide</strong> or on the<br />
equipment. Do not attempt to operate this<br />
equipment if you do not understand how to<br />
operate it.<br />
2. Usage Statement<br />
Do not use this product for any other purpose<br />
other than that specified in this usage<br />
statement. The <strong>Vinten</strong> <strong>Radamec</strong> HPM is<br />
designed for use in television studios to<br />
interface with the <strong>Vinten</strong> ‘E’ pan/tilt heads and<br />
pedestals for use with studio VR systems. The<br />
HPM is intended to be used by television<br />
camera operators within an indoor studio<br />
environment.<br />
3. Water, moisture and dust<br />
Protect the product from water, moisture and<br />
dust. The presence of electricity near water can<br />
be dangerous. Do not use the product near<br />
water and take care that liquids are not spilled<br />
onto the equipment. For outdoor applications,<br />
only use products that are specifically designed<br />
for outdoor usage.<br />
4. Climate<br />
The equipment should not be used outside the<br />
operating limits. Refer to the Technical<br />
Specifications for the operating range of the<br />
equipment.<br />
5. Cleaning<br />
We encourage regular cleaning of the product.<br />
• Do not use oil or grease on any exposed part of<br />
the equipment. This is unnecessary and traps dirt<br />
which acts as an abrasive.<br />
• Do not use solvent or oil based cleaners,<br />
abrasives or wire brushes to remove<br />
accumulations of dirt as these damage the<br />
protective surfaces. To clean mechanical<br />
surfaces, use only detergent based cleaners.<br />
• External electrical connection ports should only<br />
be cleaned with a semi-stiff brush or a clean, dry<br />
air supply.<br />
6. Servicing<br />
You should not attempt to service the<br />
equipment. Contact Camera Dynamics Ltd or<br />
your local distributor to arrange servicing.<br />
Maintenance beyond that detailed in this <strong>guide</strong><br />
must be performed by competent personnel in<br />
accordance with the procedures in the<br />
Technical or Maintenance Manual for the<br />
equipment.<br />
7. Notes about Robotic equipment<br />
Display prominent warning signs in studios,<br />
alerting personnel that robotic equipment is<br />
present and may move without warning. Ensure<br />
personnel remain a minimum of 1 m (40 inches)<br />
clear of robotic equipment in use.<br />
<strong>Operators</strong> must familiarise themselves with the<br />
resulting working envelope of robotic products<br />
including all ancillary equipment (lens, zoom<br />
and focus controls, viewfinder, prompter etc.),<br />
to prevent inadvertent collisions.<br />
Only operate robotic products remotely when<br />
you can see them to avoid harm to personnel<br />
and collisions with obstacles and other hazards.<br />
8. Power sources<br />
Only connect the equipment to a power supply<br />
of the type described in the Technical<br />
Specifications or as marked on the equipment.<br />
9. Cables<br />
Always ensure that all power and auxiliary<br />
communications cables are routed so that they<br />
do not present any danger to personnel. Take<br />
care when routing cables in areas where robotic<br />
equipment is in use.<br />
6 Head Processing Module <strong>Operators</strong> Guide
Certificates and Compliances<br />
This product conforms to the following European Directives:<br />
89/336/EEC The Electromagnetic Compatibility Directive<br />
Other certification<br />
FCC:<br />
CFR 47:2006 Class A<br />
EN 61000-6-4:2001 Electromagnetic compatibility - Part 6-4: Generic standard -<br />
Emission standard for industrial environments.<br />
EN 61000-6-2:2001 Electromagnetic compatibility - Part 6-2: Generic standards -<br />
Immunity standard for industrial environments.<br />
EN 61000-3-2:2000 Electromagnetic compatibility (EMC) - Part 3-2: Limits - Limits<br />
for harmonic current emissions (equipment input current up to and including 16A per<br />
phase.<br />
EN 61000-3-3:1995 Electromagnetic compatibility (EMC) - Part 3: Limits - Section 3:<br />
Limitation of voltage in public low voltage supply systems, for equipment with rated<br />
current
Technical specifications<br />
Weight (including HPM mounting bracket) . . . . . . . . . . . . . . . . . . . . . . . . . . . . . . . . . . . . . . . . . . . 1.68 kg (lb)<br />
Height (not including optional power supply unit and fixing . . . . . . . . . . . . . . . . . . . . . . . . . . 12.0 cm (4.72in.)<br />
Length . . . . . . . . . . . . . . . . . . . . . . . . . . . . . . . . . . . . . . . . . . . . . . . . . . . . . . . . . . . . . . . . . . . 22.1 cm (8.70in.)<br />
Width (not including optional power supply unit and fixing) . . . . . . . . . . . . . . . . . . . . . . . . . . 11.8 cm (4.65in.)<br />
Current . . . . . . . . . . . . . . . . . . . . . . . . . . . . . . . . . . . . . . . . . . . . . . . . . . . . . . . . . . . . . . . . . . . . . . . . 2.5 Amps<br />
Power input . . . . . . . . . . . . . . . . . . . . . . . . . . . . . . . . . . . . . . . . . . . . . . . . . . . . . . . . . . . . . . . . . . . . . . 12V DC<br />
Shock insulation . . . . . . . . . . . . . . . . . . . . . . . . . . . . . . . . . . . . . . . . . . . . . . . . . . . . . Class I (basic insulation)<br />
Supported protocol . . . . . . . . . . . . . . . . . . . . . . . . . . . . . . . . . . . . . . . . . . . . . . . . . . . RS422 (D1 data packet)<br />
Specifications are subject to change without notice.<br />
WARNING!<br />
This product has basic insulation only (class I) and for safety requires<br />
an earth connection ('ground' in the U.S.A.).<br />
8 Head Processing Module <strong>Operators</strong> Guide
Contents<br />
Safety - Read This First . . . . . . . . . . . . . . . . . . . . . . . . . . . . . . . . . . . . . . . . . . . . . . . . . . . . . . . . . . . . . . . . 3<br />
Safety <strong>guide</strong>lines. . . . . . . . . . . . . . . . . . . . . . . . . . . . . . . . . . . . . . . . . . . . . . . . . . . . . . . . . . . . . . . . . . 5<br />
Important safety instructions. . . . . . . . . . . . . . . . . . . . . . . . . . . . . . . . . . . . . . . . . . . . . . . . . . . . . . . . . 6<br />
Certificates and Compliances . . . . . . . . . . . . . . . . . . . . . . . . . . . . . . . . . . . . . . . . . . . . . . . . . . . . . . . . . . . 7<br />
Caring for the environment by recycling . . . . . . . . . . . . . . . . . . . . . . . . . . . . . . . . . . . . . . . . . . . . . . . . 7<br />
Technical specifications. . . . . . . . . . . . . . . . . . . . . . . . . . . . . . . . . . . . . . . . . . . . . . . . . . . . . . . . . . . . . . . . 8<br />
Introduction . . . . . . . . . . . . . . . . . . . . . . . . . . . . . . . . . . . . . . . . . . . . . . . . . . . . . . . . . . . . . . . . . . . . . . . . . 11<br />
Lens feedback. . . . . . . . . . . . . . . . . . . . . . . . . . . . . . . . . . . . . . . . . . . . . . . . . . . . . . . . . . . . . . . . . . . 11<br />
<strong>Vinten</strong> <strong>Radamec</strong> PDA . . . . . . . . . . . . . . . . . . . . . . . . . . . . . . . . . . . . . . . . . . . . . . . . . . . . . . . . . . . . . 11<br />
Figure . . . . . . . . . . . . . . . . . . . . . . . . . . . . . . . . . . . . . . . . . . . . . . . . . . . . . . . . . . . . . . . . . . . . . . . . . . . . . . 12<br />
Operation . . . . . . . . . . . . . . . . . . . . . . . . . . . . . . . . . . . . . . . . . . . . . . . . . . . . . . . . . . . . . . . . . . . . . . . . . . . 14<br />
Installing the HPM. . . . . . . . . . . . . . . . . . . . . . . . . . . . . . . . . . . . . . . . . . . . . . . . . . . . . . . . . . . . . . . . 14<br />
Fitting to the head . . . . . . . . . . . . . . . . . . . . . . . . . . . . . . . . . . . . . . . . . . . . . . . . . . . . . . . . . . . . . . . . 14<br />
Power connections . . . . . . . . . . . . . . . . . . . . . . . . . . . . . . . . . . . . . . . . . . . . . . . . . . . . . . . . . . . . . . . 15<br />
Genlock connections. . . . . . . . . . . . . . . . . . . . . . . . . . . . . . . . . . . . . . . . . . . . . . . . . . . . . . . . . . . . . . 16<br />
Ethernet connection . . . . . . . . . . . . . . . . . . . . . . . . . . . . . . . . . . . . . . . . . . . . . . . . . . . . . . . . . . . . . . 16<br />
Head connection. . . . . . . . . . . . . . . . . . . . . . . . . . . . . . . . . . . . . . . . . . . . . . . . . . . . . . . . . . . . . . . . . 16<br />
Lens encoder connection . . . . . . . . . . . . . . . . . . . . . . . . . . . . . . . . . . . . . . . . . . . . . . . . . . . . . . . . . . 16<br />
Lens serial connection . . . . . . . . . . . . . . . . . . . . . . . . . . . . . . . . . . . . . . . . . . . . . . . . . . . . . . . . . . . . 17<br />
<strong>Vinten</strong> <strong>Radamec</strong> PDA connection. . . . . . . . . . . . . . . . . . . . . . . . . . . . . . . . . . . . . . . . . . . . . . . . . . . . 17<br />
VR connection. . . . . . . . . . . . . . . . . . . . . . . . . . . . . . . . . . . . . . . . . . . . . . . . . . . . . . . . . . . . . . . . . . . 17<br />
Cable Clamp . . . . . . . . . . . . . . . . . . . . . . . . . . . . . . . . . . . . . . . . . . . . . . . . . . . . . . . . . . . . . . . . . . . . 17<br />
Switching on . . . . . . . . . . . . . . . . . . . . . . . . . . . . . . . . . . . . . . . . . . . . . . . . . . . . . . . . . . . . . . . . . . . . 17<br />
Resetting the HPM . . . . . . . . . . . . . . . . . . . . . . . . . . . . . . . . . . . . . . . . . . . . . . . . . . . . . . . . . . . . . . . 18<br />
9 Head Processing Module <strong>Operators</strong> Guide<br />
Page
Contents (Cont) Page<br />
Maintenance . . . . . . . . . . . . . . . . . . . . . . . . . . . . . . . . . . . . . . . . . . . . . . . . . . . . . . . . . . . . . . . . . . . . . . . . 19<br />
General . . . . . . . . . . . . . . . . . . . . . . . . . . . . . . . . . . . . . . . . . . . . . . . . . . . . . . . . . . . . . . . . . . . . . . . . 19<br />
Routine checks . . . . . . . . . . . . . . . . . . . . . . . . . . . . . . . . . . . . . . . . . . . . . . . . . . . . . . . . . . . . . . . . . . 19<br />
Cleaning . . . . . . . . . . . . . . . . . . . . . . . . . . . . . . . . . . . . . . . . . . . . . . . . . . . . . . . . . . . . . . . . . . . . . . . 19<br />
Adjustments . . . . . . . . . . . . . . . . . . . . . . . . . . . . . . . . . . . . . . . . . . . . . . . . . . . . . . . . . . . . . . . . . . . . 20<br />
Parts List . . . . . . . . . . . . . . . . . . . . . . . . . . . . . . . . . . . . . . . . . . . . . . . . . . . . . . . . . . . . . . . . . . . . . . . . . . . 21<br />
Publication Part No. V3851-<strong>4981</strong> Issue 2 10
Introduction<br />
The <strong>Vinten</strong> <strong>Radamec</strong> Head Processing Module (HPM) (Figure 1) has been designed to integrate with<br />
Vector 950E or Vision 250E pan and tilt heads, Canon and Fujinon lenses and Quattro-SE pedestal,<br />
coordinating encoder output from all axes for VR applications. The HPM mounts directly to the<br />
<strong>Vinten</strong> ‘E’ pan and tilt head, receiving power and a Genlock signal from a studio source, and<br />
supplying power, ethernet and Genlock signals to the Quattro-SE pedestal and outputting VR data to<br />
the studio.<br />
Lens feedback<br />
Canon and Fujinon lenses (with encoder output) and externally mounted <strong>Vinten</strong> <strong>Radamec</strong> lens<br />
encoders are supported by the HPM—to coordinate VR software with lens movements.<br />
<strong>Vinten</strong> <strong>Radamec</strong> PDA<br />
The HPM is configured using the <strong>Vinten</strong> <strong>Radamec</strong> PDA, which not only formats communication<br />
settings with the VR system, but also calibrates the connected <strong>Vinten</strong> ‘E’ pan and tilt head and<br />
Quattro-SE pedestal. For more information please refer to the <strong>Vinten</strong> <strong>Radamec</strong> PDA <strong>Operators</strong> Guide<br />
(Publication Part No. V4015-4980).<br />
Publication Part No. V3851-<strong>4981</strong> Issue 2 11
(18)<br />
(17)<br />
(16)<br />
(15)<br />
(14)<br />
Figure<br />
Figure 1 <strong>Vinten</strong> <strong>Radamec</strong> HPM<br />
12 Head Processing Module <strong>Operators</strong> Guide<br />
(1)<br />
(2)<br />
(3)<br />
(4)<br />
(5)<br />
(6)<br />
(7)<br />
(8)<br />
(9)<br />
(10)<br />
(13) (12) (11)
<strong>Vinten</strong> <strong>Radamec</strong> HPM<br />
(Fig 1)<br />
(1). . . . . . . . . . . . . . . . . . . . . . . . . . . . . . . . . . . . . . . . . . . . . . . . . . . . . . . . . . . Power input socket<br />
(2). . . . . . . . . . . . . . . . . . . . . . . . . . . . . . . . . . . . . . . . . . . . . . . . . . . . . . . . . . . . .HPM reset button<br />
(3). . . . . . . . . . . . . . . . . . . . . . . . . . . . . . . . . . . . . . . . . . . . . . . . . . . . . . . . . . . . . Genlock sockets<br />
(4). . . . . . . . . . . . . . . . . . . . . . . . . . . . . . . . . . . . (Optional) power supply unit, power input connector<br />
(5). . . . . . . . . . . . . . . . . . . . . . . . . . . . . . . . . . . . . . . . . . . . . . . . . . . . . . . . Head mounting bracket<br />
(6). . . . . . . . . . . . . . . . . . . . . . . . . . . . . . . . . . . . . . . . . . . . . . . . . . . . . . . . . . . Lens encoders port<br />
(7). . . . . . . . . . . . . . . . . . . . . . . . . . . . . . . . . . . . . . . . . . . . . . . . . . . . . . . . . . . Head encoders port<br />
(8). . . . . . . . . . . . . . . . . . . . . . . . . . . . . . . . . Head mounting screws (Vector 950E version illustrated)<br />
(9). . . . . . . . . . . . . . . . . . . . . . . . . . . . . . . . . . . . . . . . . . . . . . . . . . . . . . . . . . . . . . Lens serial port<br />
(10). . . . . . . . . . . . . . . . . . . . . . . . . . . . . . . . . . . . . . . . . . . .Base coms (ethernet) port (to pedestal)<br />
(11). . . . . . . . . . . . . . . . . . . . . . . . . . . . . . . . . . . . . . . . . . . . . . . . . . . .Genlock socket (to pedestal)<br />
(12). . . . . . . . . . . . . . . . . . . . . . . . . . . . . . . . . . . . . . . . . . . . . . . . Power output socket (to pedestal)<br />
(13). . . . . . . . . . . . . . . . . . . . . . . . . . . . . . . (Optional) power supply unit, power output lead (to HPM)<br />
(14). . . . . . . . . . . . . . . . . . . . . . . . . . . . . . . . . . . . . . . . . . . . . . . . . . . . . . . . . . . . . . . Cable clamp<br />
(15). . . . . . . . . . . . . . . . . . . . . . . . . . . . . . . . . . . . . . . . . . . . . . . . . . . . . . . . . . VR data output port<br />
(16). . . . . . . . . . . . . . . . . . . . . . . . . . . . . . . . . . . . . . . . . . . . . . . . . . PDA Comms and charging port<br />
(17). . . . . . . . . . . . . . . . . . . . . . . . . . . . . . . . . . . . . . . . . . . . . . . . . . . . . . . . . Power on / off switch<br />
(18). . . . . . . . . . . . . . . . . . . . . . . . . . . . . . . . . . . . . . . . . . . . . . . . . . . Power / diagnostic indicators<br />
Publication Part No. V3851-<strong>4981</strong> Issue 2 13
Installing the HPM<br />
Operation<br />
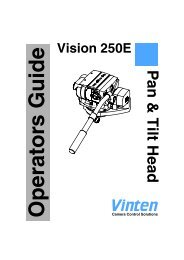
The <strong>Vinten</strong> <strong>Radamec</strong> HPM seamlessly integrates with a Vector 950E or Vision 250E pan/tilt head<br />
and Quattro-SE pedestal. Please refer to the relevant operators <strong>guide</strong>s for detail on safely setting up<br />
the pan/tilt head and pedestal.<br />
Fitting to the head<br />
The HPM is supplied with a mounting bracket (5) which attaches to fixing holes on the pan and tilt<br />
head. If fitting the HPM to a Vector 950E head, position the head mounting bracket (5) as shown in<br />
(Figure 2) and attach securely in place using the four fixing screws (8).<br />
(14)<br />
(4)<br />
If fitting the HPM to a Vision 250E head (Figure 3), proceed as follows:<br />
(5)<br />
Figure 2 Fitting to a Vector 950E head<br />
Remove the four fixing screws (8) in the corners of the pan encoder plate (20), leaving the two<br />
central fixing screws (19) in place, retaining the pan encoder plate (20).<br />
Leave the pan encoder plate (20) in place and position the head mounting bracket (5) on top as<br />
shown in (Figure 3).<br />
Attach the head mounting bracket (5) securely in place using the four fixing screws (8).<br />
14 Head Processing Module <strong>Operators</strong> Guide<br />
(8)
CAUTION! When fitting a Vision 250E pan and tilt head/HPM configuration to a<br />
Quattro-SE pedestal, ALWAYS fit the adapter ring kit (3354-900SP)<br />
between the head and the pedestal weight tray—to avoid trapping<br />
the ethernet, power and genlock cables.<br />
(5)<br />
(8)<br />
Power connections<br />
Figure 3 Fitting to a Vision 250E head<br />
WARNING!<br />
Do NOT attempt to lift and carry the pan and tilt head via the HPM mounting<br />
bracket (5).<br />
Connect a standard IEC power cable to the HPM power supply unit’s input connector (4). The output<br />
of the HPM power supply unit (13) is then fed through the cable clamp (14) and around the side of<br />
the HPM, connecting to the power input socket (1).<br />
NOTE: Also ensure that the (input) power lead (4) is secured by the cable<br />
clamp (14) to prevent the HPM suddenly losing power if the cable<br />
becomes snagged (Figure 2).<br />
Publication Part No. V3851-<strong>4981</strong> Issue 2 15<br />
(19)<br />
(20)
Alternatively, a 12V power supply can be sourced from the camera or other power supply unit via a<br />
standard 4 pin XLR cable.<br />
CAUTION! Using alternative power sources will invalidate the system EMC<br />
liability.<br />
The power output socket (12) supplies power to the Quattro-SE pedestal via the pedestal’s cable<br />
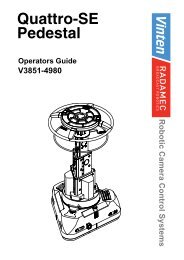
management system. For more information please refer to the Quattro-SE Pedestal <strong>Operators</strong> Guide<br />
(Publication Part No. V3851-4980).<br />
CAUTION! Do NOT attempt to power other external devices from the HPM<br />
power output socket (12). Damage may occur to the HPM if any<br />
device other than the Quattro-SE pedestal is connected.<br />
Genlock connections<br />
The Genlock signal synchronises encoder feedback from the various axes with the TV camera,<br />
ensuring that movement data is timed correctly in the VR software application.<br />
There are three identical Genlock sockets on the HPM unit, but the location of each one suits different<br />
applications. The Genlock socket on the rear of the unit (11) should be used to connect to the Quattro-<br />
SE pedestal via the cable management system. One of the two Genlock sockets (3) on the front side<br />
of the HPM unit is used to connect the external studio Genlock signal—the other socket is a spare.<br />
Ethernet connection<br />
Connect the base Comms port (10) to the ethernet port on the Quattro-SE pedestal via the cable<br />
management system. For more information please refer to the Quattro-SE Pedestal <strong>Operators</strong> Guide<br />
(Publication Part No. V3851-4980).<br />
Head connection<br />
The head encoders cable connects the head encoders port (7) to the encoder connector on the Vector<br />
950E or Vision 250E pan and tilt head. For more information please refer to either the Vector 950E<br />
<strong>Operators</strong> Guide (Publication Part No. V4004-4980) or the Vision 250E <strong>Operators</strong> Guide<br />
(Publication Part No. 3793-8).<br />
Lens encoder connection<br />
If required, <strong>Vinten</strong> <strong>Radamec</strong> externally mounted lens encoder devices can be connected to the lens<br />
encoders port (6) with an appropriate cable.<br />
16 Head Processing Module <strong>Operators</strong> Guide
Lens serial connection<br />
The lens serial port (9) is not currently utilized.<br />
<strong>Vinten</strong> <strong>Radamec</strong> PDA connection<br />
The <strong>Vinten</strong> <strong>Radamec</strong> PDA configures, calibrates and coordinates all devices connected to the HPM.<br />
Connect the <strong>Vinten</strong> <strong>Radamec</strong> PDA to the PDA Comms port (16) using the supplied PDA cable. For<br />
more information please refer to the <strong>Vinten</strong> <strong>Radamec</strong> PDA <strong>Operators</strong> Guide (Publication Part No.<br />
V4015-4980).<br />
VR connection<br />
The VR data port (15) provides output for the studio VR system. The RS422 pin designations are as<br />
follows:<br />
Pin<br />
HPM<br />
The data is outputted in the <strong>Vinten</strong> <strong>Radamec</strong> D1 data packet.<br />
Cable Clamp<br />
All cables can be fed through and secured using the cable clamp (14) to keep the system tidy and<br />
prevent connectors/ports from being damaged if a cable becomes snagged.<br />
Switching on<br />
Function<br />
Pin<br />
VR Computer<br />
Function<br />
2 RXD- / RXA VR specified TXD- / TXA<br />
6 RXD+ / RXB VR specified TXD+ / TXB<br />
3 TXD- / TXA VR specified RXD- / RXA<br />
7 TXD+ / TXB VR specified RXD+ / RXB<br />
CAUTION! Ensure that connected cables do not become entangled around the<br />
pan axis, due to the possible continuous 360° rotation of the head.<br />
Once all connections have been made, the HPM can be switched on using the power switch (17).<br />
Publication Part No. V3851-<strong>4981</strong> Issue 2 17
Resetting the HPM<br />
In the unlikely event that the HPM becomes unresponsive, the unit can be reset by using a suitable<br />
pointer (e.g. a pen) to press the reset button (2).<br />
18 Head Processing Module <strong>Operators</strong> Guide
General<br />
Maintenance<br />
The <strong>Vinten</strong> <strong>Radamec</strong> HPM is robustly made to high engineering standards and little attention is<br />
required to maintain serviceability save regular cleaning. Refer to the appropriate section in the<br />
Technical Manual if any defect is apparent. Adjustments and repairs should be carried out only by a<br />
trained and competent person.<br />
Routine checks<br />
During use, check the following:<br />
Check that cables do not become entangled around the pan axis. Rotate the Vector 950E head as<br />
necessary to free the cables.<br />
Check that all cables are connected properly. Re-fit cables if necessary.<br />
No further routine maintenance is required.<br />
Cleaning<br />
WARNING!<br />
Always check cables for signs of damage. Damaged cables may cause<br />
injury to personnel and/or damage the equipment.<br />
WARNING!<br />
1. Disconnect power from the product before cleaning.<br />
2. This product has been designed for indoor use. Protect from<br />
water, moisture and dust.<br />
Publication Part No. V3851-<strong>4981</strong> Issue 2 19
During normal use the only cleaning required should be a regular wipe over with a lint-free cloth.<br />
Dirt accumulated during storage or periods of disuse may be removed with a semi-stiff brush.<br />
Particular attention should be paid to all the connection ports (1, 3, 6, 7, 9, 10, 11, 12, 13, 15, 16).<br />
CAUTION! 1. DO NOT use solvent- or oil-based cleaners, abrasives or wire<br />
brushes to remove accumulations of dirt as these damage the<br />
protective surfaces. To clean mechanical surfaces, use only<br />
detergent-based cleaners.<br />
Adjustments<br />
2. External electrical connection ports should only be cleaned<br />
with a semi-stiff brush or a clean, dry air supply.<br />
Other than periodically checking the head fixings (8), no other adjustments are required.<br />
20 Head Processing Module <strong>Operators</strong> Guide
Parts List<br />
The following list includes the main assemblies and optional accessories. For further information<br />
regarding repair or spare parts, please contact <strong>Vinten</strong> <strong>Radamec</strong> or your local <strong>Vinten</strong> <strong>Radamec</strong><br />
distributor.<br />
For information on-line, visit our website at<br />
Main assemblies<br />
<strong>Vinten</strong> <strong>Radamec</strong> HPM options:<br />
www.vintenradamec.com.<br />
<strong>Vinten</strong> <strong>Radamec</strong> HPM (Vector 950E mounting) . . . . . . . . . . . . . . . . . . . . . . . . . . . . . . . . . . . . . . .V3851-1009<br />
<strong>Vinten</strong> <strong>Radamec</strong> HPM (Vision 250E mounting) . . . . . . . . . . . . . . . . . . . . . . . . . . . . . . . . . . . . . . .V3851-1032<br />
Associated assemblies or options<br />
Power supply unit . . . . . . . . . . . . . . . . . . . . . . . . . . . . . . . . . . . . . . . . . . . . . . . . . . . . . . . . . . . . . .V3851-1031<br />
<strong>Vinten</strong> <strong>Radamec</strong> PDA . . . . . . . . . . . . . . . . . . . . . . . . . . . . . . . . . . . . . . . . . . . . . . . . . . . . . . . . . . .V4015-0002<br />
PDA cable . . . . . . . . . . . . . . . . . . . . . . . . . . . . . . . . . . . . . . . . . . . . . . . . . . . . . . . . . . . . . . . . . . . .V3990-5036<br />
Canon lens cable (20-pin virtual port). . . . . . . . . . . . . . . . . . . . . . . . . . . . . . . . . . . . . . . . . . . . . . .V3980-5014<br />
Fujinon lens cable (20-pin EXP port, encoder and serial). . . . . . . . . . . . . . . . . . . . . . . . . . . . . . . .V3980-5020<br />
Canon/Fujinon lens cable (12-pin port). . . . . . . . . . . . . . . . . . . . . . . . . . . . . . . . . . . . . . . . . . . . . .V3980-5029<br />
Head encoders cable . . . . . . . . . . . . . . . . . . . . . . . . . . . . . . . . . . . . . . . . . . . . . . . . . . . . . . . . . . .V3980-5006<br />
Vector 950E pan and tilt head . . . . . . . . . . . . . . . . . . . . . . . . . . . . . . . . . . . . . . . . . . . . . . . . . . . . .V4004-0001<br />
Vision 250E pan and tilt head . . . . . . . . . . . . . . . . . . . . . . . . . . . . . . . . . . . . . . . . . . . . . . . . . . . . . . . . . 3793-3<br />
Adapter ring kit . . . . . . . . . . . . . . . . . . . . . . . . . . . . . . . . . . . . . . . . . . . . . . . . . . . . . . . . . . . . . . . 3354-900SP<br />
Quattro-SE pedestal, with large steering ring and moulded steering indicators . . . . . . . . . . . . . . .V3851-0001<br />
Quattro-SE pedestal, with large steering ring and rivet steering indicators . . . . . . . . . . . . . . . . . .V3851-0002<br />
Publication Part No. V3851-<strong>4981</strong> Issue 2 21