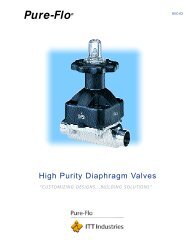
PFMM-WFI-99 - Pure-Flo
PFMM-WFI-99 - Pure-Flo
PFMM-WFI-99 - Pure-Flo

You also want an ePaper? Increase the reach of your titles
YUMPU automatically turns print PDFs into web optimized ePapers that Google loves.
ATTENTION !<br />
Sur les modèles équipés d’un engrenage pour<br />
potentiomètre, ne pas essayer de fermer la<br />
vanne si le chapeau du boîtier a été enlevé et<br />
l’écrou limiteur de course n’est pas en place,<br />
car le potentiomètre risquerait d’être<br />
endommagé.<br />
If a test fixture is not available, the following<br />
procedure may be used:<br />
FOR ELASTOMER DIAPHRAGMS ONLY:<br />
1. Remove pressure from the line containing<br />
the valve.<br />
2. Remove bonnet bolts and nuts. Remove the<br />
bonnet and unscrew the diaphragm from the<br />
compressor.<br />
3. Replace the bonnet on the valve body<br />
(without a diaphragm).<br />
4. Replace two bonnet bolts and nuts on<br />
opposite sides of the bonnet, hand tight.<br />
5. Turn the handwheel until the compressor<br />
touches the weir. The valve will not close<br />
further.<br />
6. Screw the travel stop nut down until it seats<br />
on the spacer. The travel stop is now<br />
adjusted.<br />
7. Remove the bonnet from the valve body.<br />
Screw a diaphragm into the compressor<br />
hand tight. Then back it off until the bolt<br />
holes in the diaphragm and bonnet flange<br />
register.<br />
8. Rotate the handwheel counterclockwise just<br />
enough to permit flange area of diaphragm<br />
to rest flat against flange area of bonnet.<br />
9. Replace the bonnet, which now includes the<br />
diaphragm, on the valve body. The bonnet<br />
should be opened one-half to one turn of the<br />
handwheel. Tighten the bonnet nuts in<br />
accordance with Section 1.0.2.<br />
If a test fixture is not available for valves with<br />
PTFE diaphragms, use the following procedure:<br />
1. Loosen the travel stop nut.<br />
2. Turn handwheel clockwise until the initial<br />
resistance of the diaphragm seating is felt.<br />
From this point, turn the handwheel another<br />
5/8 turn.<br />
3. Turn the travel stop nut down until it bottoms<br />
on the spacer.<br />
3.0 MAINTENANCE<br />
3.1 Periodically inspect condition of external<br />
valve parts. Replace all parts showing<br />
excessive wear or corrosion. On sealed<br />
bonnet valves, back off the v-notch vent plug<br />
2 or 3 turns.<br />
<br />
When the process fluid is hazardous or corrosive,<br />
extra precautions should be taken. The user should<br />
employ appropriate safety devices and should be<br />
prepared to control a leak of the process fluid. Fluid<br />
5<br />
seeping from the plug indicates a diaphragm<br />
failure. Replace diaphragm immediately. Failure to<br />
follow these instructions could result in serious<br />
personal injury or death, and property damage.<br />
<br />
Lorsque le fluide de traitement est dangereux ou<br />
corrosif, prendre des précautions supplémentaires.<br />
L’utilisateur doit utiliser des dispositifs de sécurité<br />
appropriés et être prêt à prendre les mesures qui<br />
s’imposent en cas de fuite ou d’écoulement vers<br />
l’extérieur. Un suintement de fluide autour du<br />
bouchon indique une défaillance du diaphragme<br />
qu’il faut alors remplacer immédiatement.<br />
L’inobservation de ces instructions risque de<br />
provoquer des blessures graves ou la mort, ainsi<br />
que des dommages.<br />
3.2 If body-diaphragm seating area leaks,<br />
depressurize system and open valve slightly.<br />
Tighten bonnet nuts as described in Section<br />
1.0.2. If leakage continues, diaphragm<br />
replacement is required.<br />
3.3 If leakage is occurring around the<br />
handwheel, spindle, or through a bonnet<br />
weep hole, the diaphragm is ruptured and<br />
must be replaced.<br />
3.4 DIAPHRAGM REPLACEMENT:<br />
1. Remove pressure from line containing the<br />
valve. Rotate handwheel clockwise to just<br />
close valve.<br />
2. Remove bonnet nuts.<br />
3. Lift off bonnet and unscrew diaphragm from<br />
compressor by turning counterclockwise.<br />
4. Replacement diaphragm should be identical<br />
size and grade as original diaphragm. See<br />
Figure 3 for location of size and grade<br />
marking. Thread new diaphragm into<br />
compressor hand tight, then back off until<br />
bolt holes in diaphragm register with bolt<br />
holes in bonnet flange.<br />
NOTE: For PTFE plastic diaphragms,<br />
remove elastomer backing cushion with<br />
plastic diaphragm. Replace elastomer<br />
backing cushion with each new plastic<br />
diaphragm.<br />
PTFE diaphragms are molded in the closed<br />
position, but should be inverted to the open<br />
position prior to installation to ensure<br />
complete (correct) thread engagement. To<br />
invert, press with thumbs at center bottom of<br />
diaphragm while retaining with fingers at the<br />
diaphragm edge. This is also acceptable for<br />
the elastomer diaphragm.<br />
5. Rotate handwheel counterclockwise just<br />
enough to permit flange area of diaphragm<br />
to rest flat against flange area of bonnet.<br />
6. Replace valve bonnet on body and tighten<br />
bonnet nuts hand tight.<br />
7. Close valve fully by rotating handwheel<br />
clockwise; then back off one-half to one full<br />
turn of handwheel. Tighten bonnet nuts<br />
evenly with a wrench (in accordance with<br />
Section 1.0.2).