

RiscStation R7500 Welcome Guide
RiscStation R7500 Welcome Guide
RiscStation R7500 Welcome Guide

Create successful ePaper yourself
Turn your PDF publications into a flip-book with our unique Google optimized e-Paper software.
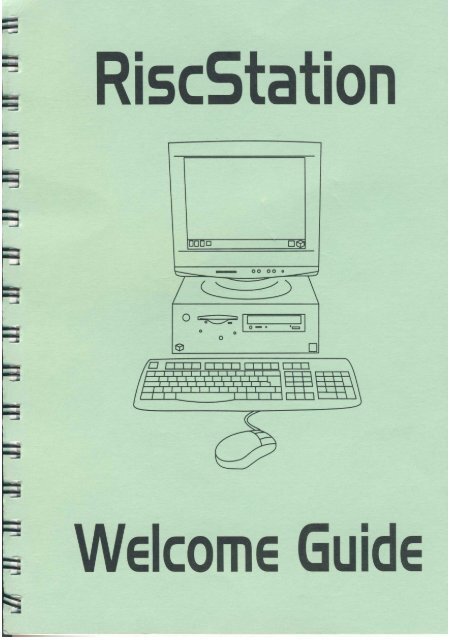
<strong>R7500</strong><br />
<strong>Welcome</strong> <strong>Guide</strong><br />
IMPORTANT NOTICE:<br />
This product is not intended for use as a critical component in life support devices or any<br />
system in which failure could be expected to result in personal injury.<br />
<strong>RiscStation</strong> Ltd. accept no liability for loss of data or the consequences as a result, direct or<br />
otherwise, of using this equipment.<br />
1
<strong>Guide</strong>lines for safe operation<br />
The equipment described in this guide is intended for use only as a personal computer. It<br />
should not be used for other purposes. It is important that the installation and its operation<br />
are carried out in accordance with the instructions provided in this guide. Please observe the<br />
following guidelines in the interests of continued safe and reliable operation, .<br />
Electrical Safety<br />
• This equipment must be earthed (grounded) to prevent the hazard of electrical shock.<br />
• The equipment should be installed near to the mains power outlet, which should be readily<br />
accessible.<br />
• If the plug supplied is not suitable for use in your country, please consult your supplier.<br />
• Do not attempt to open any display or monitor, whether supplied with this equipment or not.<br />
• Do not operate this equipment if any cables are damaged.<br />
• Switch off and unplug the equipment and any accessories before opening the unit (e.g. to install an<br />
upgrade).<br />
• Switch off and unplug the unit if you are not going to use it for a few days.<br />
Installation<br />
• This equipment is for indoor use only (in a dust-free and dry environment).<br />
• Do not expose this equipment to sudden extremes in temperature, direct sunlight, or other heat<br />
sources.<br />
• Stand the equipment on a level, hard surface allowing enough space for air to circulate when in use.<br />
• Locate the equipment in such a way that it does not present a hazard or interfere with other<br />
equipment.<br />
• Ensure that any wires or cables are routed sensibly so that they cannot be snagged or tripped over.<br />
Do not tug or twist any wires or cables, or use them to hang or lift any of the equipement.<br />
• The equipment should only be used with the covers secured.<br />
• Keep the machine at a room temperature of +5°C to +35°C (+41° tp +95° Farenheit) and a relative<br />
humidity of 10% to 80% (non-condensing).<br />
• Keep any plastic bags used in the packaging away from children and animals.<br />
• Keep the original packaging in case you need to transport the equipment.<br />
• The computer is designed for desktop use only.<br />
2
Precautions in use<br />
• Do not spill liquid on the equipment. If you do, turn the equipment off immediately and take it to<br />
your supplier for assessment.<br />
• Do not drop the equipment or subject it to exessive jarring or bumping.<br />
• Do not cover, obstruct, or poke objects into the equipment.<br />
UK Information<br />
Since the colours of the cores in the AC power lead of this equipment might not correspond exactly to the coloured<br />
markings identifying the terminals in your plug, proceed as follows:<br />
• The core which is coloured green and yellow must be connected to the terminal in the plug<br />
coloured green and yellow, or marked by the letter E or by the earth symbol .<br />
• The core which is coloured blue must be connected to the terminal coloured black or marked with<br />
the letter N.<br />
• The core which is coloured brown must be connected to the terminal coloured red or marked with<br />
the letter L.<br />
The mains lead supplied with the power supply unit is already fitted with a moulded plug incorporating a 5A fuse.<br />
If you need to replace the fuse in the mains plug supplied, then you must use a 5A fuse, ASTA-approved to<br />
BS1362.<br />
Information for Australia and New Zealand<br />
This equipment should be fitted with a plug that complies with the requirments of AS3112-1990 and NZ 198-1967.<br />
If the plug fitted does not fit your socket outlet, it should be removed and disposed of. A suitable alternative plug<br />
should then be fitted, following the instructions provided with it.<br />
As the colours of the cores in the main cord of this equipment might not correspond to the coloured<br />
markings identifying the terminals in your plug, proceed as follows:<br />
• The core which is coloured green and yellow must be connected to the terminal in the plug which<br />
is marked E or labelled green.<br />
• The core which is coloured blue must be connected to the terminal whicn is marked N.<br />
• The core which is coloured brown must be connected to the terminal which is marked P or A.<br />
Never use an unapproved mains plug. In the event of damage to the mains plug, replace it with another approved<br />
to the above national standard (or one approved for your socket outlet) and wired as detailed above.<br />
If in any doubt, please contact a qualified electrician able to complete the task for you.<br />
3
<strong>Welcome</strong> !<br />
Thank you for choosing the <strong>RiscStation</strong> <strong>R7500</strong>. This <strong>Welcome</strong> <strong>Guide</strong> is intended to be of<br />
most use to those who are using a RISC OS computer for the first time. Much of the advice<br />
given in this document will apply to other RISC OS computers but it has been written with<br />
the <strong>RiscStation</strong> <strong>R7500</strong>Lite specifically in mind. If you are already familiar with RISC OS,<br />
then you might also like to read on if only to refresh your memory of the basics. Users of<br />
previous versions of RISC OS might just wish to familiarise themselves with those features<br />
new in RISC OS 4, see Appendix A.<br />
The following areas will be covered:<br />
Chapter Subject<br />
1 Unpacking and setting up<br />
2 Switching on<br />
3 The RISC OS desktop<br />
4 Using the mouse<br />
5 Windows<br />
6 Menus and dialogue boxes<br />
7 Discs and disc drives<br />
8 Using the keyboard<br />
9 Using applications<br />
10 Files and directories<br />
11 Printing<br />
12 Switching off<br />
Appendix A: Configuration<br />
Appendix B: Write-protecting your Configuration<br />
Appendix C: Virus protection<br />
Appendix D: ASCII character codes<br />
Appendix E: Glossary of terms<br />
Appendix F: Pin-outs (back panel connections)<br />
Appendix G: Troubleshooting<br />
4
Unpacking<br />
1. Unpacking and Setting Up<br />
When unpacking your new <strong>RiscStation</strong> <strong>R7500</strong> computer, take care not to bump or knock the<br />
equipment. Any sudden impact could cause damage, so handle your new computer carefully.<br />
Unpack onto a sturdy, flat surface. It is a good idea to keep the packaging in which your<br />
computer (and any accessories) arrived; this is useful for re-packing at a later date should<br />
you need to transport the equipment.<br />
Warning: The packaging contains plastic bags which can be dangerous<br />
and might cause suffocation, especially in the hands of children. For safety,<br />
ensure these are kept well out of reach.<br />
Checklist<br />
With your <strong>RiscStation</strong> <strong>R7500</strong>, you should have the following items:<br />
• This <strong>Welcome</strong> <strong>Guide</strong><br />
• Backup System CD<br />
• Computer Base Unit ('Tower' or 'Desktop' style)<br />
• Keyboard<br />
• Three-buttoned Mouse<br />
• Mains cables<br />
• Registration Card<br />
• Monitor/Display (if purchased with system)<br />
• Speakers (with some models)<br />
• Software pack (where applicable)<br />
Refer to the enclosed packing list for a precise list.<br />
Please check that you have all of the above items. If there is anything listed which you do<br />
not have, or if any of the the listed items is damaged, please contact your supplier as soon as<br />
possible.<br />
Please take a few minutes to fill in your Registration Card and send it back to <strong>RiscStation</strong><br />
Ltd. (UK) or <strong>RiscStation</strong> Australasia, as appropriate, so that you can be sent any updates in<br />
the future.<br />
5
Choosing where to set up your computer<br />
It is likely that you might want to use your computer often and for extended periods of time,<br />
therefore it is recommended that you position it in a location and aspect which will be<br />
comfortable for you.<br />
To reduce the risk of strain, choose a desk and chair which will allow you to sit comfortably<br />
with your keyboard in front of you on a level with your elbows and your monitor at eye level.<br />
Arrange the base unit so that there is no strain on the cable connections and so that you have<br />
easy access to the CD and floppy disc drives. Place your mouse on a mouse mat to one side<br />
of the keyboard, where it is free to move without restriction, allowing space at the other side<br />
of the keyboard for referring to documents such as this <strong>Welcome</strong> <strong>Guide</strong>.<br />
This is meant as a guide only, the simple message being that, if you intend working for<br />
extended periods of time, do make yourself comfortable.<br />
Setting up the computer<br />
The various input, output, and control devices which connect to your computer (such as<br />
keyboard, mouse, and monitor) are peripherals. Each of these peripherals connects to the<br />
computer via a socket known as a port. These ports are grouped together at the back of the<br />
computer base unit. In simple terms, you control the computer using the mouse and keyboard<br />
(input) and experience the results of your actions using the monitor, printer, or speakers (<br />
output).<br />
Take care when connecting any peripherals that you do not use excessive force. Most<br />
connectors have small metal pins which, unless treated with care, can easily be damaged.<br />
You should situate your computer in a suitable location which allows ventilation around th<br />
base unit, is not in direct sunlight, and is not at risk of exposure to moisture.<br />
6
Peripheral connections (ports)<br />
Your peripherals connect to the computer via the ports at the back of the machine<br />
Before you switch on...<br />
Connect the mouse and keyboard to the computer<br />
Plug the mouse connector into the socket, at the back of the computer, identified by a<br />
symbol for the mouse and the keyboard connector into the socket indicated by a picture of a<br />
keyboard. These connections are of the same type and should operate in either socket but it<br />
is recommended that the keyboard be connected via the lower socket and the mouse via the<br />
upper socket (on the 'Desktop' model) or the left socket (on the 'Tower' model). If you wish<br />
to make use of the support for waking the computer up on various events such as the press of<br />
a 'wake' button on the keyboard, then the keyboard and mouse must be connected this way<br />
round. Be careful to ensure that the connector is inserted the right way around, the 'top' of<br />
the plug is indicated by an arrow moulded into it.<br />
Connect the monitor to the computer<br />
Connect the monitor video-signal cable to the socket. This connection is unique and so the<br />
cable will fit in only one socket. The connector also has screws for ensuring that the<br />
connector stays in place. When making connections with screws do not over-tighten.<br />
7
Connect the printer to the computer<br />
If you have a printer, you can connect your printer using a standard parallel printer cable to<br />
the parallel printer port. Other peripheral devices such as scanners or zip drives can also be<br />
connected via the parallel port. As well as the printer being physically connected to the<br />
computer, you will also have to setup the software which communicates with the printer; this<br />
will be covered later in the section on Printing.<br />
Equipment check<br />
Be sure to check that there are no trailing wires or cables which might cause obstruction or<br />
pose a possible risk of tripping anyone (even if a person is not injured, equipment can be<br />
pulled off desks and damaged easily). Try to keep cabling neat and tidy - it is easier to<br />
manage and less likely to cause accidents. Also it is a good idea to ensure you have easy<br />
access to the mains power switch on the wall in case of extreme emergency.<br />
Allow space around your computer equipment for cooling ventilation.<br />
Connect the computer to the mains power supply<br />
If the plug supplied is not suitable for the power supply in your country, please consult your<br />
supplier. Do not attempt to repair or replace the mains cord yourself - refer to your supplier<br />
instead. Do not operate this equipment if any cables are damaged.<br />
Once your peripherals are connected, connect the computer base unit to the mains electricity<br />
using the cable supplied. When the cable is connected and the mains power is switched on,<br />
there is a small voltage permanently fed to the motherboard to allow certain parts of the<br />
computer to remain live. This will be evident by the green power light flashing<br />
intermittently.<br />
Even before you press the 'power-on' switch it can be 'woken' at any time by an appropriate<br />
signal via the keyboard, the network, the modem (if present), or the power switch (of course)<br />
, as desired and configured. When the computer is powered up fully, the green light will be<br />
on continuously.<br />
8
Switch on ('power on')<br />
2. Switching On<br />
In order to switch on the computer for use, press the 'power' button, as indicated, and release.<br />
Boot procedure<br />
When you switch the computer on you will see the following as it goes through its start up<br />
procedure (known as 'booting'):<br />
• a black screen which shows<br />
and then reports the various essential software components being added in the<br />
start up sequence. This is accompanied by a system 'beep'.<br />
9
• a welcome banner, acknowledging the combined efforts and<br />
contributions from Pace Micro Technologies plc, RISCOS Ltd., and<br />
<strong>RiscStation</strong> Ltd.<br />
• the computer enters the desktop, ready for use.<br />
10
3: The RISC OS desktop<br />
When using your RISC OS computer, the main screen display you will see and use for most<br />
operations is known as the desktop. This can also be referred to as a WIMP environment,<br />
which is an acronym for Windows, Icons, Menus, and Pointer, all of which are used when<br />
operating any computer in its desktop.<br />
At the bottom of the screen is the Icon Bar.<br />
The icons (pictures) on the left-hand side of the Icon Bar give you access to the computer's<br />
various storage areas. Those on the right-hand side allow you to dynamically change aspects<br />
of the computer during operation, this is also where most application icons sit when active.<br />
You may click SELECT, the left button on the mouse, with the mouse pointer on any of the<br />
icons on the left-hand side of the Icon Bar to open a filer window showing a directory listing<br />
for that device - for example, click SELECT once on the hard disc icon to open a window to<br />
see and access the content of the hard disc.<br />
11
Icons<br />
Each object in a filer window is represented by an icon. There are three types of filer icon:<br />
Files, Folders, and Applications.<br />
- this is the icon for a drawfile (notice how the picture depicts the type of file it<br />
represents)<br />
- this is the icon for a spritefile (notice how the picture depicts the type of file it<br />
represents)<br />
- this is the icon for a text file (notice how the picture depicts the type of file it<br />
represents)<br />
Files (the icons used to represent files give an indication of the type of file by the<br />
picture used). Notice the up-turned, bottom right-hand corner indicating that these are files (<br />
documents).<br />
- this is the icon for a closed folder / directory<br />
- this is the icon for an open folder / directory<br />
Folders (all folders look alike). Folders (or directories) can be created to give your<br />
hard disc order. Folders can be created within other folders to make a heirarchical structure.<br />
When a folder is opened it's icon changes to that of an open folder.<br />
- this is the icon for the !Draw application which creates and edits drawfiles<br />
(notice the similarity between the application icon and the application's<br />
associated file icon, above).<br />
12
- this is the icon for the !Paint application which creates and edit sprites (<br />
notice the similarity between the application icon and the application's<br />
associated file icon, above).<br />
- this is the icon for the !Edit application which creates and edits text files<br />
(notice the similarity between the application icon and the application's<br />
associated file icon, above).<br />
Applications (the term 'application' has several meanings but generally, an<br />
application is a collection of files which have been grouped together inside a folder and<br />
which function co-operatively to perform a certain function - e.g. running a program. An<br />
application can be identified by an exclamation mark at the start of its name ! and an<br />
application icon/picture to identify the program's function. The names of some files, usually<br />
those within an application folder, might also begin with an exclamation mark).<br />
Device Icons<br />
A 'device' is an object such as a hard disc or floppy disc drive. Each icon on the left hand<br />
side of the Icon Bar relates to a specific device. If you want to view or access the content of<br />
a CD ROM, then click SELECT on the CD ROM icon, for example.<br />
CD ROM<br />
Hard disc<br />
Floppy disc<br />
Shared (Ethernet network) discs<br />
ROM-based resources*<br />
RAM Disc**<br />
13
Some devices, such as the hard disc, are physical whereas others, such as a RAMDisc, are<br />
virtual (or, in the case of a ShareFS mount, a portal of another computer's physical or virtual<br />
device being shared over the network and then accessed remotely).<br />
*These ROM-based resources are resident in the Read-Only Memory chips inside the<br />
computer and cannot be erased. They hold the majority of the information required to allow<br />
the computer to function (the operating system). Supplementary resources and software<br />
applications are kept on the hard disc and are utilised in a structured manner when booting<br />
or at any point when using the computer. Click SELECT on the ROMAPPS icon on the Icon<br />
Bar to access those applications held in ROM.<br />
**Random Access Memory Filing System - temporary storage space in the computer's<br />
memory which is lost when the power is switched off incorrectly referred to as a 'RAMdisc'.<br />
Application Icons<br />
The right-hand side of the Icon Bar is generally used to show when a computer program (<br />
also known as an application) is active, by displaying its icon there, and also to allow you to<br />
control the properties of the screen display using the Display Manager, or to manage the<br />
computer's active memory allocation using the Task Manager (these last two features are<br />
always present on the Icon Bar).<br />
The Display Manager allows you to change the size of screen area and the depth of colour<br />
being displayed. The RISC OS 4 cube allows access to the computer's dynamic areas where<br />
you can allocate memory to specific tasks.<br />
Other application icons will appear on the Icon Bar when made active by the user).<br />
14
What is a Mouse ?<br />
4. Using the Mouse<br />
A mouse, in computer terms, is a hand-held control device. The mouse has a ball on its under<br />
side. When the mouse is moved on a flat surface, the ball is rotated and sensors inside the<br />
mouse recognise in which direction the mouse has moved and relay that information to the<br />
computer. The pointer on the screen moves relative to the movements of the mouse.<br />
Holding and moving the Mouse<br />
Hold the mouse in your dominant (writing) hand with the curved side in your palm and the<br />
flat under side (where the mouse-ball is) down on a flat surface. Position the mouse with the<br />
mouse buttons at your fingertips, and the cable which connects to the computer leading away<br />
from you with enough freedom for it to be moved around. Whilst you are getting used to<br />
using the mouse, it is a good idea to line up the movement of the mouse with the positioning<br />
of the monitor so that when you move the mouse forwards, away from you (towards the<br />
monitor), the pointer on screen moves towards the top of the screen and when you pull the<br />
mouse back, towards you (away from the monitor), the pointer on screen moves down<br />
towards the bottom of the screen. Equally, as you move the mouse to the right the pointer on<br />
screen will move towards the right hand side and as you move it to the left the pointer will<br />
move to the left - this will help you to associate the correct movements of the mouse with the<br />
desired movement of the pointer on screen. The pointer on screen will not disappear off the<br />
screen. The edges of the Desktop area act as a boundary for the pointer. If the pointer does<br />
disappear (it can be hidden from view when you are typing on the keyboard, for example), or<br />
it is not easily spotted at first glance, then a small movement of the mouse should be enough<br />
to make it appear of draw your attention to its location.<br />
15
The mouse buttons<br />
The mouse used with all RISC OS computer systems, has three buttons. Each of these buttons<br />
has a particular role to play. The button which does most of the work is named SELECT; the<br />
middle button, when clicked, always produces a menu, and so is called the MENU button;<br />
and the remaining button is known as ADJUST, because it performs a number of alternative<br />
functions complimentary to the other two. Using the mouse configuration tool (described<br />
later) you can set the mouse to be either for left-handed or right-handed users (by swapping<br />
the mouse buttons so the SELECT falls under the index finger of your dominant hand)<br />
Mouse techniques<br />
Pressing and releasing a mouse button down is known as 'clicking' it. In fact, when you<br />
depress a mouse button you will probably hear a 'clicking' sound. You click a mouse button<br />
to activate the function of that button when the pointer is over the desired area of the screen.<br />
a short time (configurable using the Mouse configuration tool) the pointer will revert to the<br />
default icon. If you click the mouse a second time whilst the pointer icon is in its doubleheaded<br />
state, then this is considered a double-click.<br />
For example,<br />
A single click of SELECT on a device icon on the Icon Bar (such as the Hard disc, or Floppy<br />
disc) will open a filer directory window showing the content of that device.<br />
A single click of SELECT on an application icon on the Icon Bar will open a (new)<br />
document for that particular program.<br />
A single click of MENU will open a menu of options (the MENU button always opens a<br />
menu on the screen - where the pointer is located at the time of your clicking the MENU<br />
button determines what the menu relates to (clicking MENU on the Floppy disc icon, for<br />
example, will open a menu list of options relating to the Floppy disc drive).<br />
A single. click of ADJUST will select an item (as SELECT does) but subsequent selections<br />
using ADJUST will add to the selection allowing you to select more than one object (this<br />
applies to both files and directories in filer directory windows and also multiple objects within<br />
a document such as separate vector-based shapes in a drawfile.<br />
16
As a general rule, for items which are resident on the Icon Bar (either permanently, or after<br />
they have been made active), you would click a mouse button just once. For items not on the<br />
Icon Bar you would 'typically' click twice (to activate programs, load documents, open<br />
directories etc.). If you double-click on an application icon on the Icon Bar then you will<br />
open two documents for that program - unless you were intending to open more than one<br />
document, a single click will suffice. When opening directory folders, if you open the<br />
directory using SELECT then the sub-directory filer windows is opened keeping the<br />
original (the 'parent') also open on screen. If you open a directory using ADJUST then, as<br />
the sub-directory is opened, the parent directory is closed (which can help to keep the<br />
desktop clear of too many windows - you can have many windows open on screen at the<br />
same time, it is simply easier and less confusing to have as few as possible and as many as<br />
necessary windows open on screen simultaneously).<br />
Double-clicking with <br />
Double-clicking on an application whilst holding down the key opens the<br />
application directory rather than activating the program. This allows you to access resources<br />
within the application. Double-clicking on a file whilst also holding down the < SHIFT> key<br />
will open that file into a text editor rather than load the file into an application which would<br />
usually handle that type of file. You can double-click using SELECT or ADJUST.<br />
You can drag an icon from a filer directory window or from a 'save as' box by clicking either<br />
SELECT or ADJUST on the icon, keeping the mouse button held down as you move the<br />
pointer to the desired location, then releasing the mouse button. This sounds more<br />
complicated than it really is. This is known as 'Drag and Drop'. When you click and hold<br />
SELECT or ADJUST over an icon, the new icon will appear under the pointer which is a<br />
transparent version of the original icon (if more than one icon is selected then the<br />
group of objects has been selected).<br />
These are the same as double-clicking:<br />
• If you drag an application's icon to the Icon Bar then that program will be made<br />
active.<br />
17
• If you drag a directory icon to the Icon Bar then that directory will be opened.<br />
• If you drag a document (file) icon to the Icon Bar then that file will be<br />
opened (if a suitable program has been 'seen' by the computer, which can<br />
handle the type of file you are activating - i.e. if you drag a spritefile to the<br />
Icon Bar then !Paint will be activated to allow you to view and edit that file).<br />
If you drag an icon (directory, application, or file) from one filer directory window to another<br />
then that object will be copied from its original location (the 'source') to the new one ('<br />
destination').<br />
If you drag an icon (directory, application, or file) from one filer directory window to<br />
another, but holding down the SHIFT key on the keyboard as you do so, then that object will<br />
be moved to the new one (in other words, it will be 'shifted' - the object is copied from the '<br />
source' location to the 'destination' then the 'source' is deleted - this is useful for moving and<br />
organizing the content of your computer's storage devices (re-shuffling data on hard discs or<br />
floppy discs, for example).<br />
Using SELECT will keep the windows of the source object open whereas using ADJUST to<br />
perform these dragging operations will close the source directory window as part of the<br />
process.<br />
In a very short space of time all of this will become second nature as you regularly use your<br />
computer and become more familiar with it.<br />
Mouse maintenance<br />
As with any mechanical device which has moving parts, with increased use, the mouse can<br />
collect dirt and grime and assorted particles which can prevent it from working at its best. If<br />
left to accumulate, this can noticibly impair the performance of the mouse (which is generally<br />
the primary means of controlling the computer).<br />
On the underside of the mouse, with a simple twist of the plastic casing, you can remove the<br />
mouse ball and access the rollers in order to clean them.<br />
It is possible to clean the mechanical parts of the mouse using a cotton bud, for example, or<br />
you could purchase a mouse-cleaning kit from your local dealer (either is suitable).<br />
18
What is a window?<br />
5. Windows<br />
A window is an area of the screen which has been reserved by a program or filer for a<br />
specific purpose. It is a means of focussing on a particular aspect of the computer's current<br />
function. This might be to allow you to access applications or files and make them active, or,<br />
once you've made a file or application active, it is used to focus your attention on the<br />
document or application being processed. When you click on the hard disc to see its content,<br />
a filer window will be opened. When a program is active and you click on the application<br />
icon on the Icon Bar, a document window will be opened.<br />
Features of windows<br />
Around each window are 'window tools'. These tools allow you to control each window and<br />
organise and arrange the desktop as you use it. The window tools are always the same type<br />
for each window. When a particular window is the current focus of input, then that window's<br />
tools will be highlighted in yellow. You can have many windows open in the desktop at any<br />
one time. These windows will be stacked one in front of the other. It is possible to shuffle<br />
through the stack to bring a particular window to the front. The window which is the current<br />
focus of input or selection does not have to be the one at the front of the stack. Windows can<br />
be shuffled in the order of the stack using SELECT or ADJUST, where desired, on the Back<br />
Icon, the Title Bar, the Toggle Size Icon, or the Resize Icon. A window can sit in front of the<br />
Icon Bar and obscure your view of or access to it - this allows you to utilise the whole of the<br />
screen area when desired.<br />
19
The Title Bar is at the top of the window and shows the name of the document or folder (the<br />
leafname) which is preceded by it's location (the pathname). As an example, the leafname for<br />
the folder on the hard disc where you would find some helpful utilities would be 'utilities' and<br />
the pathname would refer to the hard disc 'Harddisc' and what you would see in the Title Bar<br />
would be "IDEFS::HardDisc.$.Utilities". 'IDEFS' refers to the main filing system to which<br />
the hard disc is connected; 'HardDisc' is that name which has been given to the hard disc (<br />
which can be renamed if you prefer); the '$' sign indicates the root of the device' directory;<br />
and each folder within the hierarchical structure is separated by a '.' (full-stop).<br />
When an active document window is the current focus of input, its title bar is highlighted in<br />
yellow.<br />
Click SELECT on the Back icon of a window to move that window to the back of the stack.<br />
You will only notice the effect of doing this if there is more than one window open on screen<br />
and they overlap.<br />
Click SELECT on the Close icon to close a window. If the window you are closing is a<br />
20
document window, created using a program (rather than a filer directory window) then you<br />
will be asked if you want to save that document before closing it, if you have not done so<br />
already. Once a document window has been closed you cannot retrieve it (unless you saved it<br />
before closing). Clicking ADJUST on the Close icon of a filer directory window will close<br />
that window and open the parent directory (note that the main 'root' directory has no parent to<br />
open). So, if you have opened directories and sub-directories using ADJUST (which closes<br />
the parent directories as you go) you can reverse the process (and open the parent directories)<br />
using ADJUST on the Close icon. This is also the case if you close a document window using<br />
ADJUST; the document's parent directory window is opened.<br />
The Toggle Size icon will toggle (alternate) between the window's current size and its largest<br />
size on screen. A document window or a filer directory window can be made to shrink to a<br />
small size or expand to fill the screen using the Toggle Size icon - this is useful when you are<br />
manipulating multiple windows. Remember that you can have many windows open on screen<br />
at any one time and that these windows are in a stack - even if there is a window filling the<br />
screen, there might well be other windows behind it in the stack, which you might want to<br />
access quickly. Toggling the size of a window is a quick and easy way of getting to all the<br />
other windows or to the Icon Bar.<br />
Iconising a window means reducing the whole window down to just an icon on the pinboard<br />
(backdrop). Once a window has been iconised it can be re-opened by simply double-clicking<br />
on the icon. This option is not enabled by default. It can be activated via the configuration<br />
application in the Windows section. Holding down and clicking on the Close Icon<br />
performs the same function. The presence of this icon as part of the general window<br />
furniture is configurable and might not be enabled as standard.<br />
Practising manipulating windows<br />
Changing a window's size<br />
Click and hold SELECT or ADJUST on the Resize Icon and drag the window to the desired<br />
size (either smaller or larger, wherever possible). Doing this with SELECT will also bring<br />
that window to the front of the stack. Using ADJUST will allow the window to retain its<br />
position in the stack.<br />
21
Moving a window<br />
Move a window using SELECT or ADJUST on the Title Bar and dragging the window to<br />
the desired position on screen. As before, doing this with SELECT will also bring that<br />
window to the front of the stack: using ADJUST will allow the window to retain its position<br />
in the stack.<br />
Off the screen<br />
Windows are not bound by the edges of the desktop. They can be moved 'off the screen.<br />
However, since you can only move a window by its Title Bar and the mouse pointer is<br />
bound by the edges of the desktop, it is not possible to move a window fully off the screen -<br />
there will always be a small part of it you can 'get hold of. Moving windows off the screen is<br />
configurable as to whether of not windows are allowed off screen and, if so, in which<br />
direction.<br />
Covering the Icon Bar with a window<br />
If a window obscures the Icon Bar, and you want to access the Icon Bar, press and hold the<br />
key, then press and release the key and release the key to bring<br />
the Icon Bar to the front of the stack. Press once more to toggle the Icon<br />
Bar back to its previous position in the stack. The computer can also be configured so that<br />
when the mouse is brought to the bottom of the screen and held there momentarily the Icon<br />
Bar is brought to the front of the stack. This option is active by default and can be<br />
deactivated in the Mouse section of the computer's configuration. Here you can also specify<br />
how long you must hold the pointer at the bottom of the screen before the Icon Bar pops to<br />
the front. If this options is disabled in the Mouse configuration, you can still use the <<br />
SHIFT> key combination.<br />
Bringing windows to the front<br />
In order to bring a particular window to the front of the stack, click SELECT on its Title<br />
Bar or Resize icon (or Toggle Size icon, but that also changes the size of the window).<br />
Closing windows<br />
Click SELECT or ADJUST on the Close icon to close a window. Use ADJUST to<br />
simultaneously open the parent filer directory window. If you wish to close the active<br />
window (the window whose focus is active has its window tool sprites highlighted in<br />
yellow) you can alternatively use a keyboard short-cut by holding down the key,<br />
pressing and releasing the key, then releasing (if supported by the application<br />
software being used) - sometimes this option can be more convenient than using the mouse.<br />
If you try to close a document window where the document has not been saved,<br />
22
then the filer will ask if you want to save that document before closing.<br />
Scrolling<br />
Up the right side of many windows (and along the bottom of most document window) is a<br />
Scroll bar. You can drag this bar up or down (or left or right) to view more of the content of a<br />
window. These Scroll Bars are proportional in that the size of the Scroll Bar represents the<br />
amount of content visible in a window relative to the overall amount of the window's content.<br />
If the Scroll Bar occupies the whole of the side (or bottom) of a window, then that window is<br />
being viewed at its fullest - all the content of that window is visible: if the Scroll Bar is very<br />
small relative to the whole side of the window, then there is more content in the window than<br />
can be displayed on screen. Scroll Bars may be dragged using SELECT or ADJUST. If you<br />
drag a Scroll bar using SELECT then you will move the window's content in the direction of<br />
that scroll bar only (i.e. either horizontally OR vertically) but if you drag a Scroll Bar using<br />
ADJUST then you control both the horizontal AND vertical movement at the same time.<br />
Click on a Scroll icon (up, down, left, or right) with single clicks of the mouse to move a<br />
window's content in the appropriate direction. Using SELECT will move it in the direction<br />
in which the Scroll icon points: using ADJUST will move it in the opposite direction (this<br />
saves having to move the pointer large distances since you can use the same Scroll icon to<br />
move in two directions). The Scroll Bar(s) will move accordingly to show the relative<br />
position of the window's visible content as you use the Scroll icons.<br />
Scrolling screen by screen<br />
Since the Scroll Bar represents the visible content of a window, rather than scrolling through<br />
a window's content using the Scroll icons or by dragging the Scroll Bars, alternatively you<br />
can jump to the next portion of the window's content by clicking either side of the Scroll Bar<br />
(according to which direction you wish to scroll or jump). To do this, click above or below<br />
the vertical Scroll Bar, or to the left or to the right of the horizontal Scroll bar, where<br />
appropriate, to jump a whole screen's worth of window content in one go. Using SELECT,<br />
for example, clicking above the vertical scroll bar will move the window content up whereas<br />
using ADJUST will move the window content down.<br />
23
Moving through a file<br />
If the file you are scrolling through is, say, a text file, you might consider using the up, down, left, and<br />
right arrow (cursor) keys or the 'Page Up', 'Page Down'. 'Home' (top), or 'End' (bottom) keys to navigate<br />
through the document, as an alternative method.<br />
24
Menus<br />
Displaying a menu<br />
6. Menus and dialogue boxes<br />
Click MENU anywhere in the desktop to open a menu. Menus are contextual, that is to say<br />
where the pointer is at the time you click the MENU button determines what kind of menu<br />
will be opened and so what options will be available to you. Clicking MENU on an icon on<br />
the Icon Bar will open a menu relating to that device or application whereas clicking MENU<br />
in a filer directory window or on the background to the desktop will open a menu relating to<br />
the 'filer' or the 'pinboard' respectively.<br />
Choosing from a menu<br />
Once you have opened a menu (by clicking the MENU button) you choose a menu option<br />
by clicking either SELECT or ADJUST. If you use SELECT then the menu option is<br />
chosen and the menu will disappear: if you use ADJUST to make your selection then the<br />
menu option is chosen but the menu will remain open on screen for you to make further<br />
selections.<br />
Choosing a submenu<br />
Some menus have sub-menus. A sub-menu is a secondary menu which offers further options<br />
for a particular menu item. To open a sub-menu simply move the pointer to the arrow which<br />
indicates the existence of a sub-menu and the sub-menu will open. Menus can have more<br />
than one sub-menu. To move back to a parent menu, simply move the pointer back (without<br />
clicking any mouse buttons). When you want to make multiple selections from sub-menus it<br />
is useful to use ADJUST (which keeps the menu on screen after a selection has been made)<br />
to save having to open the menus again.<br />
25
What is a dialogue box?<br />
A dialogue box is a window which opens on screen with which you are required to interact<br />
This might be for saving a document, changing the computer's settings, or accepting warning<br />
or information message.<br />
Icons in dialogue boxes<br />
A 'Writable Icon' is where you have the opportunity to enter text into a window in order to<br />
label an object, such as a file or directory, or to enter a configuration option into the computer'<br />
s setting.<br />
Where a program has options for you to select from, you might be presented with an Option<br />
icon - another name for this might be a 'tick box' - if you wish to choose such an option, you<br />
simply put a tick in the box.<br />
Due to the flexibility of RISC OS which allows for user customisation, some application<br />
software might activate their own preferred icons temporarily superimposing them over the<br />
ones built into the operating system. - such modifications can affect any or all sprites used in<br />
the desktop. This can be prevented by selecting the 'Protect ROM Sprites' in the Windows<br />
configuration tool.<br />
Where you are presented with a number of options from which you may only select only one,<br />
you will be presented with a Radio icon (for example, if there are two options, you may only<br />
select EITHER one OR the other).<br />
26
When you have the opportunity to choose a specific number for a particular option, then<br />
there will be 'up' and 'down' or 'left' and 'right' arrows so that you can scroll through a series<br />
of numbers until you reach the desired choice. You might also have the option of entering a<br />
numerical value via a Writable icon rather than having to scroll through each and every<br />
integer.<br />
If you are asked to select from a prescribed list of options, then you will see the Menu icon.<br />
Clicking SELECT on a Menu icon will reveal a drop-down list of options from which you<br />
may make your selection.<br />
Applying the changes you've made<br />
When you see a button, inside a window, which says 'OK' you may either click on it using<br />
SELECT. Some applications will allow you to press the key or the<br />
key on the keyboard to confirm your acceptance of the default function.<br />
Cancelling a dialogue box<br />
If you wish to cancel a dialogue box, either click on the 'Cancel' button (which is usually<br />
found alongside the 'OK' button) or press the key. Alternatively, if the dialogue box<br />
27
7. Discs and disc drives<br />
A floppy disc is a rigidly cased plastic disc coated in a thin film of magnetic meterial which is<br />
used to record data. Because the magnetic film is very delicate, do not slide back the cover on<br />
the disc.<br />
Floppy discs<br />
Inserting and ejecting floppy discs<br />
Hold the floppy disc so that the metal disc is on the underside and the metal shutter is facing<br />
the floppy disc drive slot (there should also be an arrow in one corner of the top side of the<br />
floppy disc which points in the direction of the floppy disc drive slot).<br />
Gently push the floppy disc into the drive until it clicks into place (use fingertips to push it<br />
in all the way). Once it has clicked into place, it is ready for use.<br />
Before ejecting a floppy disc make sure that you 'dismount' it. Since the floppy disc is a<br />
removable storage medium, and the computer remembers the disc's content (until you<br />
dismount it or switch off the computer) in order to make repeated access of the disc easier<br />
and faster, so you should tell the computer that the floppy disc is being removed otherwise it<br />
retains the information relating to the content of a disc even after is has been taken out. To<br />
Dismount a floppy disc, click MENU on the floppy disc icon on the Icon Bar, move up the<br />
list to the Dismount option and click SELECT.<br />
To eject the floppy disc, push the button which is next to the floppy disc drive. This is<br />
mechanical so you will need to push it in all the way and then the floppy disc will come back<br />
out<br />
If you floppy disc gets stuck in the floppy disc drive, see the troubleshooting section.<br />
28
Looking after floppy discs<br />
Since floppy discs use magnetism, anything which has an effect on magnetism can have an<br />
effect on floppy discs (which can lead to loss or corruption of data). Keep your floppy discs<br />
away from excessive heat or cold, strong sunlight, magnetic fields (there is a magnet inside<br />
your computer monitor), and keep them free from dust. If your floppy discs do gather dust<br />
or dirt, it can be transferred onto the heads inside the floppy disc drive mechanism and cause<br />
failure unless cleaned. If a floppy disc becomes damaged (for example the shutter might get<br />
bent out of shape) discard it - otherwise it could cause damage to your disc drive.<br />
Accessing information on discs<br />
On the left-hand side of the Icon Bar you will see the floppy disc drive icon. When a floppy<br />
disc is properly inserted into the drive, click SELECT on the floppy disc drive icon to open a<br />
filer directory window showing the content of that floppy disc. You can access the<br />
information stored on a floppy disc in just the same way as you would access information<br />
from the hard disc (or any filer directory window relating to other storage devices) Files can<br />
be saved or copied to floppy disc (or deleted) and directory structures can be created,<br />
deleted, or moved in the usual way.<br />
Write-protecting a floppy disc<br />
Every floppy disc has a small almost-square hole in the hard plastic casing which you can<br />
see right through (on a High-Density floppy disc there are two holes: one is for 'writeprotecting'<br />
the information and the other is to identify to the computer that it is a highdensity<br />
disc rather than low-density).<br />
On the underside of the floppy disc you will see a small, plastic tab which can slide back or<br />
forth to cover the write-protect hole or allow you to see through it. This tab clicks into<br />
position leaving the hole either open or closed (and the floppy disc either protected or<br />
unprotected respectively). It should not be left loose midway.<br />
29
When the write-protect tab is 'open' then the floppy disc is protected and although data can<br />
be read from the disc, it cannot be deleted from the disc or updated, and the disc cannot be<br />
formatted. When the write-protect tab is closed then the floppy disc is unprotected and you<br />
are able to delete data, write new data, and format (or re-format) the disc.<br />
Formatting a floppy disc<br />
You can wipe the content of floppy discs clean (i.e. make them blank) and set them up in<br />
particular 'formats' for use with this or other computers. If you want to transfer information<br />
between a RISC OS computer and DOS, Windows, or Mac OS PCs then you should use the<br />
DOS format option since all of these computers can understand floppy discs using this<br />
format. RISC OS can also use the Atari format but this is less commonplace. The native<br />
RISC OS format is quicker for reading from and writing to. The setting up of a floppy disc<br />
for use with a particular computer is known as 'formatting' it. Most floppy discs come<br />
preformatted for DOS (some are available unformatted).<br />
In order to format a floppy disc:<br />
• Put a blank floppy disc (or one whose content you are not worried about losing)<br />
into the floppy disc drive (make sure it goes in all the way and clicks into place).<br />
The write-protect tab must be closed to enable you to write to the disc.<br />
• Click MENU on the floppy disc drive icon on the Icon Bar.<br />
30
• Move up the list of options to 'Format' and follow the arrow to the right to open<br />
the submenu.<br />
• Either select from the list of RISC OS ADFS floppy disc formats or move to the<br />
bottom option in the list 'Other formats' then open the next submenu to select<br />
from DOS or Atari formats. When you have found the type of format you wish<br />
to apply to the floppy disc, click SELECT on that option. You may also give the<br />
floppy disc a name or label by clicking in the box and deleting the<br />
• If you are presented with an error message saying "The disc is write protected.<br />
Move the write-protect tab and try again." then you should do just that.<br />
As the floppy disc is being formatted the process window will show a red progress bai which,<br />
once completed, will then be followed by a green progress bar as it verifies the formatted<br />
disc.<br />
Once both cycles have completed you are prompted to click on the 'OK' button to finish the<br />
format procedure.<br />
Floppy disc formats' and storage sizes<br />
Floppy discs are limited in that they have a small capacity (less than 2MegaBytes) and they<br />
are quite slow at accessing the information stored on them but they are useful for their<br />
portability in that you can use them to transfer information from one computer to another.<br />
There are two main types of floppy disc: high-density (HD) and double-density (DD). Quite<br />
simply, high-density discs can be formatted to a higher capacity than double-density discs.<br />
WARNING: Only format high-density discs to high-density formats<br />
and low-density disc to low-density formats.<br />
You should not 'cross-format' (under-format or over-format). This means that if you have<br />
double-density floppy discs you should not try to format them to a high-density format. If<br />
31
you try to cross-format then the format procedure will fail and the disc will need to be<br />
suitably reformatted. Cross-formatted floppy discs are at risk of data loss.<br />
Low-density formats include:<br />
ADFS 640K<br />
ADFS 800K (D)<br />
ADFS 800K (E)<br />
ADFS 800K (E+)<br />
DOS 360K (5¼" discs rarely used) DOS 720K<br />
Atari 60K<br />
Atar 720K<br />
High-density (HD) formats include:<br />
ADFS 1600K (F)<br />
ADFS 1600K (F+)<br />
DOS 1.2M (5¼" discs rarely used) DOS 1.44M<br />
With additional software, you can also read and write direct to Apple Macintosh-formatted<br />
floppy discs.<br />
Renaming a floppy disc<br />
Floppy discs may be given names of up to ten characters in length. It is useful to give floppy<br />
discs meaningful names to help identify their content or purpose. You will see the name of<br />
the floppy disc in the Title Bar of the filer directory window of that disc.<br />
Click MENU on the floppy disc drive icon on the Icon Bar. Move up the list of options to '<br />
Name disc' and follow the arrow to the submenu where a writable-icon window will appear.<br />
Type the name by which you wish the floppy disc to be known into the writable-icon window<br />
and either click SELECT on the window or just press<br />
.<br />
32
Making backup copies of floppy discs<br />
Copying the content of one floppy disc onto another for safe-keeping is known as making a '<br />
backup'. In order to make an exact duplication of a floppy disc, you should first ensure that<br />
the both the source disc (the original) and the destination disc (the copy) are the same type of<br />
format (if the formats do not match, then you might be prompted to insert additional discs in<br />
order to back up all the data held on the source disc).<br />
To check the format type for a particular floppy disc:<br />
• Click MENU on the floppy disc drive icon on the Icon Bar<br />
• Move up the list to the 'Format' option and follow the arrow to open the 'Format'<br />
submenu<br />
• Move up the 'Format' submenu list to the 'Current format' option and follow the<br />
arrow to its submenu<br />
The computer will then interrogate the floppy disc to check its current format and then report<br />
it to you in a window.<br />
It is a good idea to write-protect your source disc before you start the backup procedure so<br />
that no data is accidentally lost (just in case you have the wrong disc in the drive at a crucial<br />
moment).<br />
Reformat the destination floppy disc to match the source disc if necessary (not the other way<br />
around, or else you'll lose the data you're trying to backup) then click MENU on the floppy<br />
disc drive icon on the Icon Bar, move up the list to the 'Backup' option and click SELECT on<br />
it. The computer will then instruct you to put in each disc in turn (source and destination) so<br />
that it can make a backup copy for you.<br />
33
Hard Disc<br />
The hard disc in your <strong>RiscStation</strong> computer is connected via the EIDE interface on the<br />
motherboard. It has been pre-formatted for you using the RISC OS 4 F+ format which,<br />
amongst other benefits, allows it to use long filenames. For further details on altering the<br />
configuration of the hard disc or setting up additional device on the EIDE interface, please<br />
consult the appropriate guide which can be found on the the hard disc itself (and also on the<br />
accompanying CD ROM) in the Reference directory.<br />
Click on the hard disc icon on the Icon Bar with SELECT or ADJUST to open the root<br />
filer directory window.<br />
Your hard disc will have already been formatted and essential software installed for you.<br />
Re-formatting the hard disc (as with floppy disc) will wipe it clean of the information on<br />
the disc. Once formatted, the information which was previously on the hard disc cannot be<br />
recovered.<br />
WARNING: Do not format you hard disc unless you are certain of<br />
what you are doing - if in doubt contact your supplier.<br />
The tool for managing (and formatting) your EIDE devices, such as you hard disc, can be<br />
found via the usual configuration tool (see APPENDIX A) in the Discs option.<br />
A guide to using the EIDE discs configuration tool can be found within the Reference<br />
folder in the root of the hard disc.<br />
34
CDFS<br />
CDFS (Compact Disc Filing System) supports green and white book Video CDs (MPEG<br />
discs). These were particularly common with the Philips CDi multimedia console.<br />
CDFS can use the MimeMap module to look up filetypes from filename extensions (this is<br />
as a secondary course of action if the standard CDFS tables don't contain a mapping). The<br />
MimeMap translation file (found in !Boot.Resources.!Internet.files) contains all manner of<br />
translation information between file extensions, filetypes and internet MIME data types.<br />
It is intended that the MimeMap file be the single location of such mapping information, so<br />
that any application can benefit from the information stored there. This prevents the need for<br />
each application to have its own translation table.<br />
DOSFS<br />
In line with CDFS above, DOSFS utilises the MimeMap module to expand its database of<br />
file extensions to filetype translations. See the information above for more detail on the<br />
MimeMap system.<br />
35
8. Using the keyboard<br />
The keyboard is the main source of input of information into the computer. The layout of the<br />
keyboard follows the convention of the typewriter with a few additional keys such as the<br />
function keys (labelled 'fl' through to 'f12') along the top, some directional control keys to the<br />
right hand side of the main layout, and the numeric keypad (which is like a calculator) at the<br />
far right. The following is to explain the function and use of the keys which might be new to<br />
you.<br />
A quick tour of the keyboard<br />
The Escape key is used to interrupt certain programs or to cancel query, error, or warning<br />
boxes which occasionally pop up on screen. It is located at the top left-hand corner of the<br />
keyboard.<br />
Function keys (those labelled Fl, F2, F3...etc. through to F12, along the top of the keyboard)<br />
are usually used by individual programs and software applications and have specific<br />
functions when used in conjunction with specific software titles which will be outlined in<br />
their own user instructions. In general terms, some of these keys have designated functions<br />
which tend to remain constant in their use, no matter what the program or application - these<br />
keys can, and often are, re-assigned by different software applications but, typically:<br />
• pressing brings up a 'save as' window in a document so that you can give<br />
you work a filename and save a copy to disc for future reference.<br />
• pressing opens the 'search' window in a (WP) document so that you can go<br />
straight to a word within a document rather than scrolling through until you find<br />
it by eye.<br />
• pressing enables you to enter the Command Line Interface (CLI) where<br />
you take a step out of the RISC OS Desktop into an environment where you can<br />
type in commands direct (the mouse does not function at the CLI) - this is used<br />
mainly by experienced users.<br />
36
The 'Delete' key (also referred to as 'Del') deletes the character before (to the left of) the<br />
cursor. It has the same function (in RISC OS) as the 'backspace' key.<br />
Return is used to send information to the computer for it to process. For example, when<br />
making a new directory you would use the mouse to choose to make the new directory via a<br />
menu inside a filer directory window, type in the name, and then press < RETURN>, or if<br />
you enter the CLI (Command Line Interpreter) to give the computer an instruction you would<br />
then press to make it so. In word-processing it is used as the 'carriage return'<br />
where it forces a move to the next line down in a document (which is a throwback to<br />
typewriters where the carriage literally had to return to the right hand side of the typewriter<br />
so that you could type the next line).<br />
When Caps Lock is pressed it toggles (switches on or off) the use of lower or upper case<br />
type ('upper case' again a reference to its use in describing the mechanics of typewriters). A<br />
light at the top right-hand side of the keyboard shows the status of Caps Lock. If the light is<br />
on then Caps Lock is on: if the light is off then Caps Lock is off. If you wanted to write a<br />
whole passage of text in capital letters then you would press Caps Lock once and continue<br />
typing the text as normal; when you want to return to using lower case lettering, simply<br />
press Caps Lock once again.<br />
When typing, in order to access the characters which are shown at the top of each key on<br />
the keyboard (or to type 'upper case' characters rather then 'lower case' or vice versa) you<br />
37
should hold down the key then press the corresponding key to get the character<br />
you desire.<br />
For example pressing the '7' key (on the 'top row' of the keyboard) produces a '7' whereas<br />
holding down then pressing '7' produces the character '&'.<br />
Where upper and lower case alphabetical characters are concerned, using will<br />
allow you to type upper case characters (capital letters) when Caps Lock is off and lower<br />
case character (small letters) when Caps Lock is on.<br />
can also be used in combination with other keys to provide additional functionality.<br />
, like , by itself, does nothing - rather it is used in conjunction with other<br />
keys to perform certain functions.<br />
, like and , by itself, does nothing - rather it is used in conjunction<br />
with other keys to perform certain functions. One main feature of using the < ALT> key is, in<br />
conjunction with the numeric keypad, to access characters which do not appear on the<br />
keyboard such as ©, ®, , and letters with accents as found in foreign languages (ä, ë, ï, ö,<br />
ü, for example). These are known as ASCII characters and can be accessed by typing in the<br />
appropriate ASCII code whilst holding down the key (see Appendix D).<br />
Alternatively you can use the !Chars program which reside in the 'Apps' directory on the hard<br />
disc and which can be accessed through the Apps icon on the Icon Bar - sometimes, though,<br />
it can be quicker to use the keyboard short-cuts.<br />
In RISC OS the 'End' key deletes the character after (to the right of) the cursor.<br />
38
Pressing the key on the keyboard will automatically bring up on screen the option<br />
to print from the currently active application or document (if the particular application<br />
supports this). A quick way to print, therefore, might be to press then < RETURN><br />
and (assuming you printer software is running and set up properly) the document currently<br />
being worked on is sent to the printer.<br />
is usually used to escape from a process under certain circumstances. Usually. it<br />
would be used in conjunction with the , , or keys.<br />
The Cursor Keys (arrow keys) are used to move the cursor around a document. They are<br />
also used by many games for controlling the actions of the game. The Cursor Keys can also<br />
be used in conjunction with and . In a word processing application, for<br />
example, holding down and repeatedly pressing a cursor key would highlight a<br />
portion of text whereas holding down and repeatedly pressing a cursor key would<br />
move the cursor in large steps (a word at a time, say).<br />
Numeric Keys<br />
The keys of the numeric keypad can be used as a calculator with the calculator application<br />
software which comes included with your computer. This capability is useful because the<br />
numbers are neatly arranged in close proximity to allow you to enter lengthy sequences of<br />
numbers easily and speedily. When used in conjunction with the<br />
key, they also enable access to the ASCII code characters which do not appear on<br />
the keyboard. See APPENDIX D.<br />
39
Special key combinations<br />
Key combinations using , , and have been mentioned. Here are a<br />
few of the more common key combinations, used by many software applications, which you<br />
might find useful.<br />
+'X' eXtract or cut<br />
+'C' Copy<br />
+'V' Paste<br />
+'U' - Underline (in a word processor)<br />
- Clear Writable Icon text<br />
+ Close active window<br />
+ Stop an active task or software application<br />
+ Toggle the Icon Bar to the front or back of the<br />
stack<br />
+ Open a task window (CLI in the Desktop)<br />
++ Shutdown<br />
+Power-On Perform a 'Soft reset' (if CMOS is unprotected)<br />
+Power-On Perform a 'Hard reset' (if CMOS is unprotected)<br />
As an example, if you had typed in a document, a letter for instance, and saved already, and<br />
your Printer software was active: you could save, print, then close it quite quickly and easily<br />
by using the following combination in sequence:<br />
,,,,+<br />
When to use the keyboard<br />
In general, the keyboard is used for direct input of information into the computer (the mouse<br />
40
is generally used to control the computer).<br />
9. Using applications<br />
What are applications?<br />
An application is a collection of program files and resources which, together, form a cooperative<br />
set of instructions and (usually) a user interface in order to perform a specific task.<br />
To give an example, a Word Processor application will consist of the program itself to<br />
process the information whch is typed into the computer, a user interface for the person<br />
doing the typing to control (along with the graphical resources and templates for doing this),<br />
and a dictionary for checking spelling - amongst various other utilities. This is the same for<br />
any computer platform. Where RISC OS is concerned, it is all contained, typically, within a<br />
single application directory. There are many different applications, for performing a wide<br />
variety of tasks. Games, too, are software applications.<br />
Starting an application<br />
Simply double-click SELECT on an application's icon in order to activate it. In the vast<br />
majority of instances, when active, the application icon with appear toward the right-hand<br />
side of the Icon Bar and its functionality can be control from the icon. Some applications<br />
might not place an icon on the Icon Bar, other might simply function running in the<br />
background.<br />
Using applications<br />
Let's take !Help, for example. It is a useful program to provide basic interactive help for the<br />
user. Click SELECT on the ROMAPPS icon on the Icon Bar and the filer directory window<br />
will open showing the applications in ROM (and also those added as part of the boot<br />
sequence so that they can be accessed quickly via the 'Apps' icon). In this window you will<br />
find the !Help application, double-click SELECT (or ADJUST) on it to load the<br />
application. Once an application is active its icon will appear on the Icon Bar, in this<br />
instance it will be on the right-hand side. Click MENU on its icon on the Icon Bar and you<br />
will see three options listed: Info (leading to a submenu telling you about the program),<br />
Suspend (which stops the programs helpful information from popping up continually but still<br />
keeps the application active - when this application is suspended, it's blue icon turns to grey<br />
in colour), and Quit (which will 'kill' the application). Some applications will have additional<br />
options in the application icon menu but almost all will definitely have Info and Quit.<br />
41
Continuing with !Help as an illustration, clicking SELECT or ADJUST on the !Help icon on<br />
the Icon Bar will re-activate the interactive help (its icon is shown in full colour, blue) and<br />
clicking SELECT or ADJUST on the icon will suspend it again (the icon will become '<br />
greyed out'). Whilst you are getting to know RISC OS, it might be useful to have the !Help<br />
application active. Some programs make great use of the interative help application so that it<br />
works alongside to help you learn what functions that program has. Go back to the Apps icon<br />
on the icon bar and load !Draw. As with !Help, the icon will appear on the Icon Bar. Now,<br />
with !Help active, click SELECT on the !Draw icon on the Icon Bar to open a new document<br />
window and move the pointer around the toolbar, which runs up the left-hand side of the<br />
window - notice how the !Help application identifies for you the function of each tool, it can<br />
provide similar help for other programs (provided they have been written to utilise !Help).<br />
Using more than one application window<br />
!Help does not have its own document windows, rather it has pop-up labels to identify the<br />
name or function of other items in the desktop. !Draw, on the other hadn, is a good example<br />
of a program which creates documents. Clicking SELECT on the !Draw application icon on<br />
the Icon Bar opens a new document window. You are not restricted to only one window per<br />
application open at any one time, nor are you restricted to running only one application at a<br />
time. It is possible to have multiple windows open and also to have lots of different<br />
applications running simultaneously - the only restriction is the amount of working space (<br />
RAM) you have to operate in (which can be upgraded to 256MegaBytes, physically) and<br />
your own ability to juggle several operations at once.<br />
42
Although the computer will multi-task operations, there can be only one focus for input at<br />
any time.<br />
Quitting applications<br />
To quit an active application, move the pointer over the active application icon on the Icon<br />
Bar, click MENU, move up the list to the 'Quit' option and then click SELECT to quit. With<br />
some software title, if you have any open documents in that application which have not been<br />
saved (or which have had alterations made to them since the last time you saved) you will be<br />
prompted to save by the appearance of a dialogue box asking if you want to save the<br />
document, discard it, or cancel the instruction to quit.<br />
43
Once an application has been quit, the 'working space' memory (RAM) which it occupied<br />
when it was active becomes available once more for use by other programs and applications.<br />
The Boot application<br />
The Boot application is a structured collection of files, directories, and applications which the<br />
computer recognises and implements sequentially on startup. It also contains the means for<br />
configuring the computer's settings according to personal preference or desired functionality.<br />
Once the computer has 'booted' properly and is operating in the Desktop, double-clicking<br />
SELECT on !Boot will activate the computer's configuration program. Although RISC OS<br />
resides primarily in ROM (the operating system software is held in Read-Only Memory<br />
chips) supplementary resources, resident on the hard disc, can be added to provide extended<br />
functionality or personalised customisation. Within the Boot application are stored shared<br />
system resources such as Font (letter-type redrawing) information, for example. Resources<br />
such as Fonts can be updated and added to via the machine's configuration application.<br />
44
10. Files and directories<br />
Just like a filing cabinet in an office, you can organise the content of your computer's hard<br />
disc (or any other writable filing system) by storing your files in folders (directories).<br />
When you open a folder/directory its icon changes to show that is is open and a new filer<br />
directory window appears displaying the content of that folder. When the folder is closed, the<br />
directory folder icon changes back to that of a closed folder.<br />
A closed filer directory folder icon:<br />
An open filer directory folder icon:<br />
Creating a new directory<br />
• Open the filer directory window in which you want the new directory to be<br />
created.<br />
• Position the pointer inside that filer directory window.<br />
• Click MENU and move down the list to the 'New directory' option.<br />
• Follow the arrow to the submenu and type in a name for the new directory in the<br />
writable-icon (alternatively, you might choose to use the default name 'Directory'<br />
for the new directory).<br />
If a directory already exists with the same name then nothing will happen. You will not be<br />
presented with any error message and you will not do any harm to the existing structure or<br />
directory content.<br />
45
Saving (and loading) a file<br />
When a document is ready to be saved (either upon completion, saving it for future reference<br />
or distribution, or part-way through, so that it might be continued with at a future time),<br />
• open the filer directory window where you want to save your file<br />
• click MENU in the document window and follow the menu options to find the '<br />
Save as' box (it's precise positioning in the main menu might differ slightly from<br />
application to application).<br />
• drag the document icon from the 'Save as' box and drop it into the filer directory<br />
window (it can be dropped anywhere inside the window)<br />
When it comes to loading a file, simple double-click SELECT (or ADJUST) on the file icon<br />
and it will be loaded into the application which created it. If there is more than one<br />
application present on your computer which can handle the same type of file, then it could be<br />
loaded into whichever the system has seen first or whichever is already active. To specify an<br />
application to load a file into, you can drag the file icon onto the active application icon on<br />
the Icon Bar.<br />
Copying (and moving) a file (or directory) to another<br />
location<br />
• Open both the source and destination filer directory windows so that both are<br />
visible in the Desktop (and so that you can see the icon for the file or directory<br />
you wish to copy).<br />
• Using SELECT, drag and drop the object you want to copy from the source<br />
location to the destination.<br />
In order to move (shift) the object rather than copy it, hold down the key as you<br />
perform the 'drag and drop' process.<br />
46
Deleting files and directories<br />
In order to delete an object (or a collection of objects) be they files or directories or both,<br />
• select them using SELECT or ADJUST appropriately<br />
• click MENU in the filer directory window where they are located<br />
• move to the 'selection' option and follow the arrow the the submenu<br />
• then click SELECT on the 'Delete' option<br />
Both copying/moving and deletion processes can be done to multiple files or directories (<br />
and any mixture of them).<br />
Long filenames and large numbers of files per directory<br />
Your hard disc will have been set up during the manufacture build to use the new F+ format.<br />
The F+ disc format, which is a feature of RISC OS 4, supports long filenames (you may give<br />
a file a name of any length but the pathname must not exceed 255 characters in length - if<br />
you try to give a file a name whereby its full pathname uses more than 255 characters then<br />
you will get the error message "Path length too long for Filer" to remedy this either rename<br />
the file using a shorter name or move it higher up the filer heirarchy where the pathname<br />
will use fewer character whilst retaining the same filename). You may not use 'illegal'<br />
characters such as £ $ % & in naming files since these are used by RISC OS. Whilst<br />
enjoying the ability to give your files and directories long names (which can help in<br />
identifying their content) you may also store as many item within any directory as you like (<br />
up to about 80,000 items).<br />
Compatibility with non-RISC OS 4 machines<br />
RISC OS 4 is fully compatible with old-format discs, so you can plug an older format RISC<br />
OS disc straight into your RISC OS 4 machine without problems.<br />
If you wish to format a floppy disc so that it is compatible with a RISC OS 3.7 or earlier<br />
machine, simply select "F format" for high density discs or "E format" for low density ones.<br />
Don't use the "+" variants if you wish your discs to be accessible on all RISC OS machines.<br />
Note that the Acorn A3000 and older models can only read low-density (e.g. 800K) formats,<br />
properly formatted on low-density discs.<br />
47
Compatibility with applications<br />
RISC OS 4's support for the F+ disc format retains as much compatibility as possible with<br />
older software. You might find some older applications (eg. the Impression family of word<br />
processing software application from Computer Concepts) which restrict you to 10<br />
characters when saving, but they have no problems accessing long filename documents or<br />
running from a new format hard disc. If you find any incompatabilities with the software<br />
you are trying to run, please contact your computer supplier or the software distributor/<br />
author to obtain a more recent version.<br />
Changing a file or directory name<br />
If you hold down the Alt key on the keyboard and click on a filename in a filer window, a<br />
white box will appear around it, and you will be able to edit it using the cursor keys.<br />
Saving/Dragging to disc icons<br />
You can save or drag a file to the disc icons to the left of the Icon Bar, and your computer<br />
will save the file to that disc. This can be especially useful if you have a RAM disc set up, as<br />
this feature makes it an ideal temporary location for downloaded files or incomplete work. At<br />
present, this feature has not been implemented to work with EIDE (IDEFS) [or SCSI] - the<br />
RiseStation <strong>R7500</strong> uses IDEFS as its hard disc filing system so you will not be able to use<br />
this feature in conjunction with the hard disc. It will work with RAMFS, MEMFS, and ADFS<br />
(floppy discs).<br />
Set Directory on the Filer menu<br />
Pressing the Menu mouse button over a Filer window displays the Filer menu. There is an<br />
option Set Directory which sets the "CSD" (Currently Selected Directory) to that folder. This<br />
is particularly helpful to programmers or people running non-desktop applications, as the<br />
CSD is always the first place the computer looks for files. In addition, many applications will<br />
save to the CSD if they aren't given a full location, making it much easier to set your "work"<br />
directory and save straight into it.<br />
48
Confirm Deletes on Filer menu<br />
On the Options sub-menu of the Filer menu is the Confirm Deletes setting. With this set, all<br />
copies, renames and other non-dangerous actions will be carried out without asking you for<br />
confirmation, but file deletions will prompt you before taking place.<br />
Spaces in filenames<br />
If you want to insert a blank space into a filename, hold the Alt key when pressing the space<br />
bar. This will actually be a "hard space".<br />
Structure<br />
As you use your computer and create new files you will, no doubt, wish to store them (on<br />
your hard disc) for future reference. With RISC OS 4's flexibility in allowing an almost<br />
unlimited number of items within each filer directory and permitting very long filenames it<br />
would be easy for your hard disc to become cluttered and disorganised. It is recommended<br />
that some structure be applied to the content of your hard disc to keep your files and<br />
directories in line with a structured system so that you can quickly and easily find the<br />
documents and resources you need when you need to get at them. We do not impose a<br />
method of organising your hard disc, each user will have their own preferred system of<br />
filing in mind.<br />
You might choose to organise you files according to type (all Drawfiles together, all textfiles<br />
together, etc.) or maybe group files according to their subject matter (correspondances in<br />
one folder, drawing in another, etc.). The choices is entirely yours -here are a couple of<br />
examples to guide you:<br />
49
The best advice is to keep things as simple and logical as possible to make it easier for you<br />
to find the information you wish to keep and retrieve.<br />
50
11. Printing<br />
RISC OS uses a generic printer driver software application which will enable you to connect<br />
to a wide range of makes and models of printer. Essentially, the application comes blank by<br />
default and you then tell it what make and model of printer you are using, since different<br />
users have different printing requirements. A selection of printer definition files is provided<br />
which will allow you to set up your computer to communicate with many of the more<br />
popular printers available.<br />
Load !Printers<br />
The application software !Printers which comes supplied with your <strong>RiscStation</strong> computer is<br />
version 1.62. This is located via the Apps icon on the Icon Bar. Double-clicking SELECT on<br />
the !Printers application icon will make the printer driver software active. When it is active,<br />
it will sit on the Icon Bar towards the left-hand side. If the Printers application icon on the<br />
Icon Bar is greyed-out and says 'printers' underneath it then it has not been set up yet, or the<br />
settings which might have been implemented have not been saved, so you will need to set it<br />
up for your particular make and model of printer and save the settings for subsequent<br />
occasions.<br />
Once your !Printers application has been configured appropriately, and the configuration<br />
options have been saved, then the Printers icon will appear on the Icon Bar in colour.<br />
Load a printer driver<br />
In order for the printer to understand the information being sent to it, the Printers application<br />
needs to be set up using the information from an appropriate printer definition file. Inside<br />
the 'Printing' directory on the hard disc is a directory named 'Printers' which contains these<br />
printer definition files. Locate the printer definition file which matches your make and<br />
model of printer (if there is not an exact match, your printer supplier should be able to<br />
recommend a suitable printer definition file for you to use), double-click on the selected<br />
printer definition file and those settings will become active. You may use more that one<br />
printer definition at any one time.<br />
In order to keep things simple at this stage, simply loading the appropriate printer definition<br />
file is adequate for the time-being. When you are ready to make further alterations to the<br />
printing configuration, you can consult the online manual (User <strong>Guide</strong>) on your hard disc.<br />
51
Save the settings<br />
Click MENU on the printers application icon on the Icon Bar, move up the list to the 'Save<br />
setting' option and click SELECT.<br />
Different ways of starting the printing process<br />
Printing a file using the Print menu option<br />
The long-hand way of printing a document is to position the pointer inside the document<br />
window, click MENU, locate the 'Print' option (which might be in a submenu depending on<br />
the application being used), and then click with SELECT to open the print dialogue box.<br />
Printing a file using the Print Scrn key on the keyboard<br />
Pressing the key on the keyboard will bring up on screen the printer dialogue box<br />
for the application in which you are currently working. When this window appears you will<br />
have the option of printing (for which you can simply press ), adding certain<br />
conditions such as how many pages and orientation etc. depending on the application, or<br />
cancelling the print command.<br />
Another method of printing (drag and drop)<br />
If you have a document which you have saved to disc (hard disc or floppy disc...) then you<br />
can simply drag the file from its filer directory window onto the active printers application<br />
icon on the Icon Bar to send it straight to the printer. If it needs to (and if it can locate it) the<br />
computer will automatically load the appropriate application to enable any application<br />
resources it might require.<br />
52
12. Switching off the computer<br />
In order to prevent any possibility of data loass or corruption to the hard disc, it is<br />
recommended that the following method of shutting down the computer be followed.<br />
Normal shutdown procedure<br />
When you have finished using you computer and are ready to switch it off, the proper<br />
procedure for shutting the machine down is:<br />
• Move the pointer to the RISC OS 4 CUBE on the right-hand side of the Icon Bar<br />
and click MENU on it. Move up the list to the 'Shutdown' option and click<br />
SELECT. If you are presented with a confirmation dialogue box (according to<br />
the configuration of the machine - using the Configuration tool, you can choose<br />
whether or not to have a shutdown warning) then press 'Shutdown' or 'Cancel' as<br />
required. (Alternatively, you could use the combination of keys +<<br />
SHIFT>+ as a shortcut).<br />
• Now switch off the computer by pressing in (and holding) the Power button until<br />
you hear the TWO beeps (you will also hear the hard drive stop spinning).<br />
• If you attempt to shutdown whilst there are still applications active with unsaved<br />
data, then you will be prompted by an dialogue box to confirm your actions since<br />
the content of the computer's working memory is not retained when the power is<br />
turned off - only files which have been saved to disc will be kept.<br />
• You are also able to shutdown, and optionally stwich off (go into standby mode)<br />
at the same time, at a pre-determined time using the Power Management<br />
application software either in the Utilities directory on the hard disc/CD ROM,<br />
or available via the <strong>RiscStation</strong> website.<br />
53
Summary<br />
The intention of this <strong>Welcome</strong> <strong>Guide</strong> has been to get you started with your new <strong>RiscStation</strong><br />
<strong>R7500</strong> computer.<br />
For further guidance, please consult the online User <strong>Guide</strong> which can be found on the hard<br />
disc (there is also a copy on the backup system CD which accompanies your computer). This<br />
is in HTML format and can be read using the web browser provided.<br />
As you progress and develop your skills and interest in using your RISC OS computer, you<br />
might consider joining a local 'Acorn' User Group, reading one or more of the popular RISC<br />
OS speciality magazines or other relevant publications, or even subscribing to the various<br />
RISC OS (Acorn) newsgroups on the Internet.<br />
Do not be afraid to ask your local <strong>RiscStation</strong> dealer for advice and assistance, they'll be<br />
more than happy to help.<br />
We hope you will enjoy and benefit from using your new <strong>RiscStation</strong> computer.<br />
54
APPENDIX A: Configuration<br />
The RISC OS 4 configuration tool gives you great control over your system, making it easy<br />
for you to set up the machine according to your own personal preference. In addition, it<br />
allows 3rd party developers to add their own windows to simplify the setting up of<br />
peripherals and expansion cards or other enhancements.<br />
To launch the Configure tool, double click on the !Boot folder in the root directory of your<br />
main hard disc.<br />
Pressing the Menu mouse button over the main window allows you to load and save the<br />
whole set of CMOS (internal to your computer) settings, to make it easier to bring back your<br />
system should it be necessary to reset it to its factory defaults.<br />
You can also load the !Help utility and reset your machine back to its factory settings.<br />
The Boot Tool<br />
This offers a way of setting up how your system boots up. The Boot sequence tool consists<br />
of four sections:<br />
Clicking on each button opens a window allowing you to drag in applications and<br />
directories. If you drag a directory to one of these windows, the effect will be<br />
applied to everything in that folder. Note that you will have to reboot for changes<br />
to take effect.<br />
55
The four options are:<br />
Add to Apps: Allows you to drag in applications or folders of applications, to add<br />
them to your Apps folder available from the Apps Icon Bar icon.<br />
Look at: Applications and folders dragged to the Look at window will be "<br />
booted" when your system starts up. This means that your computer<br />
will have "seen" these applications whenever you start your<br />
computer up in future, so that documents will load into the correct<br />
programs when you double click on them.<br />
Run: This allows you to choose which applications are automatically<br />
loaded every time you start your computer.<br />
Install: Slightly different from the other options, this enables you to upgrade<br />
your !Boot should a new version be released by <strong>RiscStation</strong> Ltd.<br />
Finally, the Desktop boot file button allows you alter your startup file manually.<br />
Taking the Add to Apps window as an example, it works as follows:<br />
The majority of the window is taken up by a scrolling list of applications and directories.<br />
Those shown in grey ("greyed out") are special folders or applications which your system<br />
needs. You cannot remove these.<br />
Dragging an application or folder to the window will add it to the list. In the example above,<br />
the !Zap application (a textual file editor) has been added, in this case to the Apps folder,<br />
which you can open from the Apps icon to the left of the Icon Bar at the bottom of your<br />
screen. Notice that it is not in a standard place on the hard disc - in the MyApps sub-<br />
56
directory of the root directory of the hard disc. The Add to Apps utility allows us to make<br />
the !Zap application appear in the Apps folder, even though it has been placed in its own<br />
folder elsewhere on the hard disc. Added applications should not be stored on floppy or CD,<br />
as the discs may not be available later.<br />
The !Zap application has been added by the user and is not part of the standard system<br />
settings, so it is shown in colour. This means that you can click on it, and press the Remove<br />
selection button to remove it from your Apps folder again.<br />
In the past, the only way to achieve this function was to place a copy of the application in<br />
one of the folders shown in grey by hand, but thanks to the Boot Configure tool, the process<br />
is much easier.<br />
Both the Look at and Run windows work in exactly the same way. System folders/<br />
applications are shown in grey and cannot be removed, whilst applications and folders can<br />
be added/removed by the user and are shown in colour.<br />
The Discs tool<br />
Your <strong>RiscStation</strong> computer uses the EIDE interface (not the basic IDE interface as in most<br />
RISC OS computers). The 'IDE hard discs' and 'SCSI discs' options are greyed since they are<br />
not present in this computer. The Simtec/Wonderworks EIDE interface is integrated into the<br />
motherboard and will automatically recognise and mount properly formatted discs.<br />
A detailed guide to using the !IDETooI application can be found on the hard disc (and on<br />
the backup CD ROM).<br />
As memory prices continue to plummet, it is not unusual to find RISC OS computers with<br />
larger quantities of memory - 32, 64 or 128MegaBytes machines are quite common. Since<br />
RISC OS applications are, in the main, quite small in terms of RAM requirements, it can be<br />
very useful to allocate a few megabytes of memory to a RAM disc. This is a disc which<br />
57
loses it contents when your machine is rebooted or turned off, but which is extremely fast<br />
and makes an ideal "temporary" storage space, especially when coupled with RISC OS 4's "<br />
save to icon on the Icon Bar" feature. Once you have enabled the RAM disc, you can set its<br />
size in the field below.<br />
Buffers<br />
The final section of the Discs window is the Buffers box. The first option - ADFS folder<br />
cache - refers to the amount of memory used to remember the contents of directories via<br />
ADFS. This makes accessing folders (from floppy discs) much faster.<br />
The ADFS buffers option has a similar performance benefit. ADFS discs in your computer<br />
can have key bits of data buffered in your computer's memory to speed up the accessing of<br />
files.<br />
Finally, CDFS buffers are very similar to ADFS buffers, except that they cache data from<br />
CDs, making CD access much quicker.<br />
The Filer tool<br />
• Large icons shows files with full-size icons and is the usual way of looking at<br />
files on your discs.<br />
• Small icons uses quarter size icons to allow you to fit more icons on your screen,<br />
whilst<br />
• Full info uses a list view to show all the details about file size, time created and<br />
type of file.<br />
• The sorting options are a matter of taste as to which you prefer. The default is to<br />
sort alphabetically by name.<br />
58
Below these options are the default settings for file operations - copy, delete, move etc. You<br />
can choose whether you wish to<br />
• Confirm all operations, only deletes or none at all.<br />
• Verbose specifies whether a detailed window is displayed showing<br />
information on the operation in progress.<br />
• Force specifies whether copy/move operations should always overwrite<br />
anything they are copied on top of, whilst<br />
• Newer prevents overwriting of more recent files by older ones.<br />
• Faster speeds up the operations by giving the system less time to multitask.<br />
The maximum display widths for filenames sets the number of characters shown in filer<br />
windows.<br />
If you disable multitasking file operations, you will be unable do anything during file<br />
operations, so don't disable it unless you're sure.<br />
The Fonts tool<br />
The Desktop font is used to display all text on windows and menus. It is very much a matter<br />
of personal preference which font you choose.<br />
The Cache bitmaps and Anti-alias options are inter-related. You cannot anti-alias<br />
sizes above that for which you cache bitmaps. Cacheing a font causes it to be remembered at<br />
a particular size and weight in memory, making drawing much faster. Anti-aliasing causes<br />
the curved edges of fonts to "blur" slightly making them look much smoother and more<br />
elegant. Although anti-aliasing is only supposed to make a difference at point sizes up to<br />
about 40 point, the effect is still evident and pleasing at much larger sizes. Those shown are<br />
the maximum settings (255) which means that fonts displayed up to a point size of 255 will<br />
be drawn smoothly by the computer. The effort required by anti-aliasing means a small<br />
59
performance hit, but this is not significant on modern machines.<br />
Sub-pixel anti-aliasing goes one step further than normal anti-aliasing by smoothing text<br />
together at very small font sizes. This allows kerning to appear correct in such circumstances<br />
when a single pixel is too large a measure. You should be aware that it can slow the operating<br />
system if set to a large value and is rarely needed for sizes much above 8 point. It also uses a<br />
lot of RAM.<br />
The initial and limit values for the font cache specify how much memory is allocated to<br />
remembering fonts to speed up the drawing of them. The initial font cache will always be<br />
allocated, but as more weights are used, it may grow to the value set as the limit. Setting No<br />
font cache limit will allow the cache to grow as needed.<br />
The Help tool<br />
This tool is provided to allow you to set up the !Help context-sensitive help utility. You can<br />
choose which font is used to display help messages, how long you have to leave your pointer<br />
over things before the help is displayed, and whether or not "common" messages about<br />
windows, scrollbars and other desktop features are displayed.<br />
RISC OS 4 provides an online Help system which provides context-sensitive help on icons,<br />
windows, and menus displaying help at the pointer. The !Help utility is fully compatible with<br />
all existing "helpful" applications tried.<br />
In addition, the !Help utility allows you to disable the more common RISC OS 4 help<br />
messages, making it much less intrusive. The Help Configure tool can be used to set which<br />
font is to be used by the !Help utility, whether common messages are shown or not, and the<br />
time delay before the help appears.<br />
To start up the new !Help, open the Apps folder from your Icon Bar, and double click on !<br />
Help or, in the Configuration window, click MENU to open the Confiuration menu, then<br />
click SELECT on "Help..." to launch the !Help application. You can now point to anything<br />
that you wish to receive information about. To trigger the help message, you must leave your<br />
pointer motionless for a brief (adjustable) period until the information appears.<br />
60
When active, the !Help application sits on the right-hand side of the Icon Bar. The help it<br />
provides can be suspended by clicking either SELECT or ADJUST on the icon which will<br />
become greyed-out when suspended and return to its usual blue colour when active.<br />
Alternatively, you can click MENU on the !Help icon on the Icon Bar and SELECT the "<br />
Suspend" option (a tick will be shown against the menu option when it is suspended, as well<br />
as the icon itself becoming greyed-out).<br />
Help on the !Help utility itself looks like this:<br />
The Hard disc Lock tool<br />
This tool allows you to protect your hard disc with a password. It also prevents the<br />
computer's configuration settings from being changed without the password having been<br />
entered. Discs which are protected only allow access to the "Public" folder (and certain<br />
other areas where some applications need to write temporary or configuration files).<br />
When setting a password you must provide it twice for confirmation. You can lock and<br />
unlock a disc, or change its password. The status of the disc is shown at the top of the<br />
window.<br />
61
Setting the password to nothing unlocks a disc "permanently" (persistently) as opposed to for<br />
that session only, until a new password is set. In general, you should only consider locking<br />
your system if you need to restrict others from deleting content from your hard disc or from<br />
altering the computer's settings, otherwise it is better left unlocked.<br />
The Mouse tool<br />
62
• Mouse Speed<br />
The first icon is a slider to allow you to set how rapidly your mouse moves. At larger screen<br />
resolutions you might well want to set this to a slightly faster value in order to travel around<br />
the screen without running out of mouse mat!<br />
• Mouse type<br />
The PS2 option is selected by default. This is how the mouse physically connects to the<br />
computer.<br />
• Right-handed mouse buttons<br />
Tick this option for right-handed mouse button, deselect it for left-handed mouse buttons.<br />
For a right-handed user SELECT falls under the index finger and is the left mouse button:<br />
for a left-handed user SELECT still falls under the index finger but is now the right mouse<br />
button.<br />
• Drag delay<br />
The Drag delay is the length of time that you have to hold your mouse button down before a<br />
drag is initiated if you don't move your mouse.<br />
• Drag start distance<br />
The Drag start distance is the alternative way of initiating a drag, and determines how far<br />
you have to move your mouse to start one.<br />
• Double click delay<br />
The Double click delay is the maximum time between clicks that is allowed to register as a<br />
double click.<br />
• Double click cancel distance<br />
The cancel distance is the movement required between the first and second click before the<br />
second click is automatically deemed to be a new click rather than the second half of a<br />
double click.<br />
• Open submenus automatically<br />
Open submenus automatically determines whether the computer opens sub-menus for you if<br />
you rest for a while on a menu option.<br />
63
• Bring Icon Bar forward automatically<br />
The Icon Bar to front option sets how long you have to leave your pointer at the bottom of<br />
the screen before the Icon Bar pops to the front of the stack.<br />
The Network tool<br />
This Configure tool allows you to set up all aspects of inter-computer communication. It is<br />
primarily designed around Local Area Networks (LANs) and internet access via the built-in<br />
Ethernet network port (through a router or other gateway). Dialup Internet access should be<br />
configured elsewhere, such as in your internet/modem logon software.<br />
There are three separate sections<br />
• AUN<br />
This stands for Acorn Universal Networking and is designed to support Acorn's AUN Level<br />
4 networking structure. These are often found in schools.<br />
• Access<br />
This is the peer-to-peer networking protocol used by RISC OS machines. It allows drives<br />
and printers to be shared around a local network. It is quick and easy to set up, and is the<br />
system of choice for many small RISC OS networks.<br />
• Internet<br />
The section which applies to the setting up of TCP/IP networks. This is more complex than<br />
either of the above, but is necessary if you envisage multi-platform networking, especially if<br />
you are planning networked Internet access.<br />
For further details on network configuration, please consult your Network Administrator or<br />
local dealer / supplier.<br />
64
The Pinboard tool<br />
This window provides all the options necessary to set up your Pinboard backdrop and the<br />
behaviour of pinned items.<br />
The <strong>R7500</strong> comes supplied with a range of standard "tiles" - attractive low-memory images<br />
which tile nicely to produce a clean, crisp background to the desktop. They are provided in<br />
both dark and light varieties.<br />
Alternatively, you can provide your own image, which can be centred on the backdrop,<br />
scaled to fit it, or tiled side by side, up and down. You can use both sprites and JPEGs (and<br />
if you are running ImageFS 2 it will allow the use of almost any type of image). If you plan<br />
to use a high colour image in a low colour depth mode, then you may wish to convert it with<br />
!ChangeFSl beforehand, as this usually gives better colour rendition through dithering.<br />
If you are short on memory, or simply want a non-intrusive background, you can specify a<br />
non-patterned, plain colour.<br />
Holding down the shift key when closing a window reduces it to an icon on the Pinboard (<br />
known as iconising). You can iconise to the various corners of the screen, and to the Icon<br />
Bar, making it much simpler to find iconised windows. You can set this in the Pinboard<br />
Configure tool or from the Pinboard menu: Options -> Iconise windows.<br />
65
In addition to this positioning, you can enable an Iconise button on all windows by setting the<br />
appropriate option in the Windows Configure tool. Whenever you click on this button, the<br />
window will be iconised. Simply double-click SELECT on an iconised window to reopen it.<br />
• Tidy<br />
If you highlight a group of icons on the Pinboard, you can use the Tidy option on the<br />
Selection menu to tidy them to a particular corner of the screen. You can also specify if they<br />
are tidied horizontally or vertically. The location you tidy to can be set via the Options<br />
menu. This makes it much easier to organise your Pinboard.<br />
• Changing the text colour<br />
If you have a very light background selected, having the text associated with pinboard icons<br />
displayed in white can make them difficult to see. To improve visibility, RISC OS 4 allows<br />
you to set the colour used in the Pinboard Configure tool.<br />
• Single colour backdrops<br />
You can now choose a colour from the Pinboard Configure tool and achieve an attractive<br />
backdrop without any of the memory overheads associated with background graphics.<br />
Grid lock forces pinned icons to a grid spacing, and the colour used for the text below<br />
pinned icons can also be set.<br />
66
The Screen tool<br />
The top half of this window allows the selection of monitor type, colour depth and resolution.<br />
If your monitor isn't listed, don't be afraid to use one of the other definitions, as there is<br />
nothing inherently monitor-specific in the files. However, if you are using a monitor type that<br />
doesn't match your actual display, you should refer to the documentation supplied with your<br />
monitor to make sure that you don't select a resolution/refresh rate which might exceed the<br />
specifications.<br />
RISC OS 4 features a standardised Screensave protocol. This allows screen savers to be<br />
plugged into your system easily. A range of savers is supplied as standard with RISC OS 4.<br />
Some screen savers may have options associated with them. Click the Settings . . .<br />
button to alter these.<br />
Below this you can select the length of time taken before the screen saver is activated. Please<br />
note that if you are running single-tasking applications (ie. those that run full screen out of<br />
the desktop) you will only see the standard "black screen" saver.<br />
Some software applications have an "autosave" or "autosave with prompt" feature. This<br />
might prevent the activation of the screensaver or the screensave might prevent autosave<br />
functions operating.<br />
67
The Sound Setup tool<br />
Since all RISC OS machines have built-in sound systems, there is very little to change here.<br />
In general RISC OS will autodetect what sound hardware is fitted to your machine. A tick<br />
box option allows you to set the master clock rate to 44.1KHz ifor improved playback quality<br />
of sampled audio (e.g. from a music CD).<br />
The System tool<br />
If an application comes with its own !System folder, drag it here to update the !System folder<br />
on your hard disc: the new modular software contained within the new !System folder will be<br />
copied into the correct place in the active !System folder inside your !Boot structure. You<br />
should only have one !System folder on your computer.<br />
68
The Windows tool<br />
With a visual operating system as RISC OS 4, it is inevitable that the configuration options<br />
for the windows themselves be one of the most extensive.<br />
Starting at the top left, the Solid dragging box controls which dragging options have "<br />
instant effect solid dragging" and which merely drag an outline box. The outline box<br />
requires less processing power, but your <strong>RiscStation</strong> computer will give smooth solid<br />
dragging.<br />
To the right of these options you can set which sides of the display allow windows to slide<br />
off-screen. Disabling this makes the workable area of the Desktop much smaller.<br />
When your Icon Bar becomes full, it will scroll left and right when you move the pointer to<br />
each end. The Icon bar scrolling settings allow you to set the scroll speed and<br />
acceleration.<br />
Underneath these options are a variety of other visual settings:<br />
• Cover icon bar on full size toggle<br />
Specifies whether or not windows overlap the icon bar at the bottom of the screen when you<br />
click on the toggle size (maximise) button at the top right hand corner of windows.<br />
69
• Textured window backgrounds<br />
Sets whether windows have a marbled background or are displayed as plain grey.<br />
• Beep when an error occurs<br />
When an error occurs the computer will issue a warning sound (a beep').<br />
• Instant-effect buttons<br />
With this enabled, clicking the left mouse button over window frame icons (eg. close, send to<br />
back, scroll etc.) results in the action occurring the moment the button is depressed. With it<br />
unset, the action doesn't take place until the mouse button is released. This provides an<br />
escape if you accidentally click on a button you wish you hadn't (eg. close) since you can<br />
move the mouse away with the button still held down to cancel.<br />
• Protect ROM icon<br />
Some legacy applications come supplied with low resolution versions of the standard desktop<br />
sprites, and try to load them in on top of the RISC OS 4 set. With this option ticked, the<br />
standard sprites will never be replaced, protecting your high resolution icons.<br />
• Iconise button<br />
With this option selected, windows will be displayed with a button to iconise them in the top<br />
right hand corner, just next to the toggle size (maximise/minimise) button.<br />
• Desktop shutdown warning<br />
Controls whether or not an "Are you sure" warning is given when you try to shut your<br />
computer down.<br />
• 3D window borders<br />
This gives all dialogue boxes (windows without scroll bars) and menus an attractive 3D edge.<br />
Disable this if you prefer a more simple look.<br />
• Textured menus<br />
This option applies a texture to menus. It can either be the standard window backdrop or<br />
other user added textures.<br />
70
• Alternative menu background<br />
Gives menus an alternative, paler texture which makes them look more like textured<br />
equivalents of the traditional white menus. It also distinguishes them from other windows,<br />
which is generally desirable.<br />
• No icon boxes in windows<br />
Allows or prevents icons consisting of text and sprites to be plotted where the text is given a<br />
solid background overlaying the window background texture.<br />
• No icon boxes on pinboard<br />
This is the more visible incarnation of the No icon boxes option above. If you chose a<br />
pinboard backdrop which wasn't grey, little grey boxes would appear around all the text<br />
beneath the icons. Thisoption solves the problem for the pinboard and other similar<br />
windows. Note that the only time you might want the grey boxes is if the text colour you<br />
have selected isn't visible with your background graphic. However, it might be easier just to<br />
change the text colour in the Pinboard setup tool.<br />
• Fully 3D icon bar<br />
Without this option set, the 3D window borders would only be set on the top and bottom of<br />
the icon bar (because a full icon bar can scroll left and right). With it set, the left and right<br />
edges also become 3D.<br />
• Window border colours<br />
With this window, you can set the colours of the 3D edges of windows and menus. This can<br />
be useful if you are using your own tiles for these.<br />
The Display Manager<br />
This is the screen icon second from the right hand side of the Icon Bar. It allows you to<br />
choose which screen resolution, colour depth and refresh rate you wish to run at.<br />
Click on the icon to open the settings window.<br />
71
You can now see and select the refresh rate you wish to run your screen at via the third icon<br />
down.<br />
There are several reasons why you might wish to change the refresh:<br />
• Your monitor may be struggling to display the screen at the present refresh rate.<br />
• Your monitor may be able to handle a higher refresh rate (giving a less flickery<br />
picture) than the current setting.<br />
• At high resolutions, you may not be able to get the maximum colour depth and<br />
the highest refresh rate. Sometimes dropping down the refresh rate will allow a<br />
greater number of colours to be shown without losing desktop space by<br />
switching to a lower resolution.<br />
• You might have used up all of the available bandwidth. Reducing the refresh<br />
rate lowers the amount of memory required to generate the display.<br />
You will also notice that when you click the Change button to switch to the selected mode,<br />
the screen fades out, then in again.<br />
If you set the monitor type incorrectly the display might look greatly distorted or you might<br />
simply get no picture displayed at all, please take a look at the Troubleshooting section at<br />
the back of this guide to remedy matters if this happens.<br />
Euro support<br />
Unlike earlier versions of RISC OS, RISC OS 4 supports the Euro symbol in all the standard<br />
ROM fonts. This gives you access to serif (Trinity), sans-serif (Homerton) and monospaced<br />
(Corpus) versions of the symbol in all the common weights. This should allow you to find a<br />
Euro symbol for most typographic requirements.<br />
To enter a Euro symbol from the keyboard, press -E for the font specific version, or<br />
-164 for the standard Euro symbol.<br />
Year 2000 compliance<br />
As supplied, RISC OS 4 is fully year 2000 (Y2K) compliant.<br />
Should an application (particularly internet software) show "This application is not<br />
Millennium compliant" then you should contact the application's manufacturer and request<br />
an update.<br />
72
Appendix B: Write-protecting your configuration<br />
IMPORTANT: Take care to observe anti-static precautions if you are<br />
to open the computer's casing and ensure (for your own safety's sake)<br />
that you disconnect from the mains first !<br />
Once you have set your computer's configuration and are happy with those settings, you<br />
might choose to protect those settings by breaking the link which the RED jumper makes (<br />
you can leave the jumper attached to just one pin without it making the connection). In order<br />
to do this, it will mean opening the computer's case to access the jumper which is located on<br />
the motherboard as illustrated. Once this method of configuration protection has been<br />
implemented it means that even when submitted to a<br />
+Power-on 'Hard reset' you compuer will not lose its configuration settings. In order<br />
for you to make alterations to the computer's configuration, the jumper will have to be<br />
replaced. There is only one RED jumper (all the others are black).<br />
73
Appendix C: Virus protection<br />
Your <strong>RiscStation</strong> computer is protected against attack by computer viruses by a program<br />
which is constantly on the alert for viruses.<br />
This program, VPROTECT (by Pineapple Software) is loaded automatically as part of the<br />
boot sequence whenever you switch on your computer.<br />
Normally, you will not notice the virus protection, it simply runs in the background.<br />
However, if you were about to inadvertently load a virus, VPROTECT stops that action from<br />
proceeding and brings up a warning such as that shown here:<br />
As with all viruses, new ones are being created all the time so you must regularly update<br />
your protection software to maintain a comprehansive level of protection.<br />
Warning: The virus will not enter your computer, but will still be on the<br />
floppy disc (or other media). Additional software is required to remove a<br />
virus; you should not attempt this manually yourself because there may be<br />
malicious side-effects triggered by deleting the files.<br />
Two shareware applications which will eradicate viruses can be found on your hard disc (and<br />
also on the accompanying CD) or you might wish to obtain the latest versions or subscribe to<br />
a system whereby you can receive regular updates to tackle new viruses which might appear<br />
from time to time.<br />
If you discover a virus which VPROTECT fails to detect, or wish or need to obtain software<br />
to remove an existing virus, contact your suppier or refer to the <strong>RiscStation</strong> website for<br />
further advice.<br />
74
Appendix D: ASCII character codes<br />
Hold down either key and type in the corresponding ASCII character codes on the<br />
numeric keypad on the right-hand side of the keyboard. The following are shown using<br />
Trinity.Medium font.<br />
75
These characters can either be entered via the keyboard or selected using the mouse from the !<br />
Chars application located in Apps on the Icon Bar.<br />
The chosen character will be entered into a document or writable icon at the carat.<br />
76
Appendix E: Glossary of terms<br />
The following is a GLOSSARY OF FREQUENTLY USED ACRONYMS AND<br />
TERMINOLOGY (not all of these are present in this <strong>Welcome</strong> <strong>Guide</strong> but you might find<br />
their inclusion useful). This glossary details the more frequently used industry acronyms and<br />
terminology<br />
Application Software which performs a particular function for a user e.g.<br />
word processing, database management.<br />
ARM Acronym for Advanced RISC Machines.<br />
ASCII American Standard Code for Information Interchange. Standard<br />
ASCII assigns the numbers 0-127 to different alphabetic and<br />
control characters. Extended ASCII extends this character set to<br />
256 to include non-English and graphic characters.<br />
Baud A measure of speed in digital communications.<br />
Bit Short for "Binary Digit", the bit is the basic data element of<br />
digital computers and digital communications. A bit may have a<br />
value of zero or one.<br />
Bit rate The rate at which data is transferred (usually in megabits per<br />
second or kilobits persecond).<br />
Bus A path over which digital information is transferred from any of<br />
several sources to any of several destinations. The sources and<br />
destinations may be inside or utside the computer.<br />
Byte A group of eight bits. A byte is usually used to represent single<br />
character or digit.<br />
Cache Very fast memory made from SRAM chips, used to "feed"<br />
microprocessors data at their maximum rate (DRAM memory is<br />
too slow).<br />
Chip A chip is a single, flat piece of silicon on which a specific<br />
semiconductor element or circuit has been fabricated. Most chips<br />
are placed into larger packages that provide protection and<br />
facilitate connection of the chip to the system.<br />
CISC Acronym for Complex Instruction Set Computing Device. A<br />
highly flexible but not very efficient device containing a number<br />
of instructions for specific applications in a microprocessor<br />
CLI Acronym for Command Line Interpreter.<br />
Clock Sends of signals that are processed by the microprocessor. Clock<br />
speed cycles are measured in megahertz (MHz)<br />
77
CMOS Acronym for Complimentary Metal Oxide Silicon. A variety of MOS<br />
technology. CMOS (Complementary MOS). This retains some<br />
configuration details about the computer.<br />
Compression A method of digitally encoding audio and/or video through a variety of<br />
computer algorithms and other techniques to reduce the amount of data<br />
required to accurately represent the content, and thus the space<br />
required to store the content.<br />
Coprocessor A logic device that operates in association with a microprocessor to<br />
enhance system performance. Coprocessors are not capable of<br />
independent operation.<br />
CPU Acronym for Central Processing Unit. Central unit of a computer with<br />
arithmetic and control units. The CPU of a microcomputer is usually a<br />
microprocessor.<br />
Data Information.<br />
Digital Indicates the representation of data by a series of bits or discrete<br />
values, such as "1"s and "0"s.<br />
Desktop A WIMP GUI.<br />
DRAM Dynamic Random Access Memory, a storage device which<br />
requires data to be continually regenerated.<br />
DSP Acronym for Digital Signal Processor - a high speed, general purpose<br />
arithmetic unit used for performing complex mathematical operations<br />
such as Fourier transforms.<br />
EIDE Enhanced IDE (see also IDE, SCSI).<br />
Ethernet A cable-based communications network designed to link office<br />
equipment, originated by Xerox Corporation.<br />
FPU Acronym for Floating Point Unit. A high-speed mathematics<br />
coprocessor for a microprocessor.<br />
Frequency The number of times per second an alternating current goes through a<br />
complete cycle. Formerly expressed in cycles per second, now<br />
expressed in Hertz (Hz).<br />
Gigabyte 1024 magabytes (often abbreviated to G or GB)<br />
GUI Acronym for Graphical User Interface. A visual system allowing the<br />
user to control the computer.<br />
Hardware Electronics and their associated boards, connectors, and mechanical<br />
packaging.<br />
IDE Acronym for Independent Drive Electronics. A term usually associated<br />
with hard discs and CD ROM drives (amongst other devices) denoting<br />
their method of communicaton with the computer. (see also EIDE,<br />
SCSI).<br />
78
I/O Acronym for Input/Output. A term used to describe the external<br />
connections to a chip or electronic system.<br />
ISDN Acronym for Integrated Services Digital Network. A set of<br />
world-wide communications network standards aimed at<br />
providing standardised interconnections for all types of voice<br />
and data communications.<br />
IP Acronym for Internet Prorocol. The standardised language by<br />
which computers communicate over networks and the Internet.<br />
IT Acronym for Information Technology. The science of the<br />
representation, transmission, and processing of information,<br />
specifically processing with computers.<br />
ICT Acronym for Information Communication Technology. A term<br />
commonly used in Educaton encompassing IT (as above) but<br />
also including the use of IT to enable and enhance<br />
communication (using devices such as modems, systems such as<br />
the Internet, and tools such as email and web browsing<br />
software).<br />
JPEG Acronym for Joint Photographic Experts Group. A universal<br />
standard for the digital compression and decompression of still<br />
images for use in computer systems<br />
Kilobit 1,024 bits (often abbreviated to Kb)<br />
Kilobyte 1,024 bytes (often abbreviated to KB)<br />
LAN Acronym for Local Area Network. A communications network<br />
whereby computers can transfer data amongst themselves.<br />
LED Acronym for Light Emitting Diode. A diode that emits light<br />
when current flows through it.<br />
LFAU Acronym for Large File Allocation Unit.<br />
Logic The part of the computer that does the arithmetic or makes<br />
decisions.<br />
Joystick A device for controlling the input/control of the computer<br />
emulating the pilot's flight control as found in aeroplanes (<br />
usually associated with Games software).<br />
MDF Acronym for Monitor Definition File. MDFs hold information<br />
on what different combinations of screen size and colour deptch<br />
are possible with any given make and model of monitor.<br />
Megabit 1024 kilobits (often abbreviated to Mb)<br />
Megabyte 1024 kilobytes (often abbreviated to MB)<br />
Memory Stores needed data, along with instructions on what to do with<br />
them and when. Each memory component stores a number of<br />
bits of binary data normally denoted in multiples of kilobytes.<br />
79
Memory The part of a computer that controls data storage so that the computer<br />
Management primarily accesses its high-performance cache memory<br />
rather than its Unit (MMU) slower main memory. Often abbreviated to<br />
MMU<br />
Microprocessor The central control unit that directs the processing of data (arithmetic<br />
and logic functions) in computer systems by directing the flow of<br />
electrical impulses, thereby co-ordinating the efforts of other parts of<br />
the machine. When the microprocessor receives an instruction, it<br />
interprets the instruction and tells the other parts of the computer (disc<br />
drives, video display etc) what they should do<br />
MIDI Acronym for Musical Instrument Digital Interface. The stardard<br />
method by which musical electronic instrument (such as keyboards)<br />
communicate with computers or other musical instruments).<br />
Modem Modulator/Demodulator. A device that converts audio signals to<br />
digital signals back into audio.<br />
Monitor The screen which displays the computer's graphical user interface and<br />
output. (see also VDU).<br />
MPEG Acronym for Moving Picture Experts Group. A standard for the digital<br />
compression and decompression of motion video/audio for use in<br />
computer systems.<br />
Multimedia The combination of text, graphics, audio, and video.<br />
Nanosecond (ns) One billionth of a second. In this time, electrical pulses travel<br />
approximately 12 inches.<br />
OEM Acronym for Original Equipment Manufacturer. A company that<br />
designs, develops, and produces or simply assembles electronic<br />
hardware.<br />
Operating Computer software that enables a computer and its peripheral systems<br />
System to work together as a unit.<br />
Parallel port The connection, or port, which allows data to be transferred (usually bidirectionally)<br />
in streams of data running in parallel (see also Serial).<br />
PDF Acronym for Portable Document Format (from Adobe). A type of<br />
electronic file format providing a faithful replica of a document and<br />
allowing it to be understood across different computer platforms using<br />
an appropriate PDF reader application.<br />
PDF Acronym for Printer Definition File. An acronym colloquial to the<br />
RISC OS computer platform. The RISC OS software which<br />
communicates with Printers is, in essence, non-descript and generic -an<br />
appropriate PDF (printer definition file) provides it witht the correct<br />
information for communicating with a particular make and model of<br />
printer.<br />
80
Peripheral Equipment that is connected to a computer, such as printers, terminals,<br />
and disc drives.<br />
Platform A generic type of computer system categorised according to its<br />
operating system software (such as Windows, Mac OS, RISC OS,<br />
Amiga, Atari, Unix etc.)<br />
Printer A device which converts documents or data in digital or electronic<br />
format from the computer to hard copy on paper (usually).<br />
Printer port Where the printer connects to the computer (see also Parallel port).<br />
PROM Acronym for Programmable ROM. A ROM which is programmable<br />
by the user.<br />
Protocol A formal definition of the input and output conventions for<br />
communications between two computer systems. Thus the X400<br />
protocol defines electronic mail communication standards.<br />
RAM Acronym for Random Access Memory, which stores digital<br />
information temporarily and can be changed by the user. It constitutes<br />
the basic storage element in computer terminals and has replaced<br />
magnetic core memories in main frame computers.<br />
RISC Acronym for Reduced Instruction Set Computer. A device where the<br />
number of instructions a microprocessor runs for a specific application<br />
are reduced from a general purpose Complex Instruction Set<br />
Computing (CISC) device to create a more efficient operating system<br />
(see also CISC).<br />
RISC OS The name of the computer operating system originally designed by<br />
Acorn Computers for use exclusively with ARM RISC processors.<br />
ROM Acronym for Read Only Memory which stores information used<br />
repeatedly such as tables of data, characters for electronic displays,<br />
etc. Unlike RAM, ROM cannot be altered.<br />
SCSI Acronym for Small Computer Systems Interface. A term usually<br />
associated with hard discs, CD ROM drives, and scanners (amongst<br />
other devices) denoting their method of communicaton with the<br />
computer (see also IDE, EIDE).<br />
Sector On hard discs, this is a portion of track on a disc which normally holds<br />
512 bytes of data. Anything up to 63 sectors can make up a normal<br />
hard disc track. On ADFS-formatted floppy discs 1k is used per<br />
sector.<br />
Serial The connection, or port, which allows data to be transferred (bidirectionally)<br />
in streams of data running serially (see also Parallel).<br />
SVGA Acronym for Super Video Graphics Adaptor (see also SVGA).<br />
81
UNIX A computer operating system developed by AT&T. Unix works<br />
across a wide range of computers, from mainframes and<br />
workstations to personal computers in various forms (e.g. Linux<br />
and BSD)<br />
VDU Acronym for Visual Display Unit (see also Monitor).<br />
VGA Acronym for Video Graphics Adaptor (see also, SVGA).<br />
WIMP Acronym for Windows, Icons, Menu, Pointer - the operational<br />
features of the Desktop.<br />
82
Appendix F: External connectors:<br />
Both the keyboard and mouse share the same fused supply and are powered at all times,<br />
even when the computer is in standby mode. This allows a programmable keyboard<br />
sequence to typed to turn the system power on. It does not matter which way round the<br />
keyboard and mouse are connected, but the "wake-on-keypress" feature will only work if the<br />
keyboard is plugged into the lower socket.<br />
Keyboard - lower 6 pin Mini-DIN socket:<br />
Pin Function<br />
1 Keyboard data in/out<br />
2 NC<br />
3 GND<br />
4 +5V Supply (250mA FUSED)<br />
5 Keyboard clock in<br />
6 NC<br />
PS/2 MOUSE - Upper 6 pin Mini-DIN socket:<br />
Pin Function<br />
1 Mouse data in/out<br />
2 NC<br />
3 GND<br />
4 +5V Supply (250mA FUSED)<br />
5 Mouse clock in<br />
6 NC<br />
10 BaseT Ethernet connector:<br />
83
This connector allows direct connection to any 10baseT ethernet network via its RJ-45<br />
locking connector. Two diagnostic LEDs are provided, one orange and one green. When lit,<br />
the green LED indicates that the LINK is good and that the network cable and hub are<br />
capable of transferring data. The Orange LED will light every time data is detected on the<br />
cable. This can be used to verify that network traffic is present. The LED will light for any<br />
data passing by, even that which is intended for other computers on the network. The front<br />
panel HD LED, used for both hard disk and network activity, will light when data intended<br />
for your computer is received.<br />
External Serial port:<br />
This port implements a standard RS232 interface, using ±12V switching.<br />
The standard MALE 9 way "D" type plug connector has the following pinout:<br />
Pin Function<br />
1 DCD in<br />
2 RX in<br />
3 TX out<br />
4 DTR out<br />
5 GND<br />
6 DSR in<br />
7 RTS out<br />
8 CTS in<br />
9 RI in<br />
As with the internal serial port, an active (positive) signal will trigger a wake-up serial event.<br />
If enabled and the machine is in standby, the power management unit will automatically<br />
switch on the machine. This can be used to turn on your computer remotely by dialling in to<br />
a connected<br />
modem.<br />
84
VGA Video connector:<br />
This port outputs the computers video signals, various control lines and a +5V supply to<br />
power an external modulator. The 15 pin high density D female socket connector allows<br />
direct connection to most SVGA monitors and has the following pinout:<br />
Pin Function<br />
1 RED (0.7v peak to peak VIDEO)<br />
2 GREEN<br />
3 BLUE<br />
4 NC<br />
5 GND<br />
6 GND red return<br />
7 GND green return<br />
8 GND blue return<br />
9 +5V supply (200mA fused)<br />
10 GND<br />
11 ID(0) in/out<br />
12 DDC data/10v scart slow switching (see LK14) in/out OR 10v out<br />
13 HSYNC out<br />
14 VSYNC/CSYNC out<br />
15 DDC clock in/out<br />
Should a SCART type monitor need to be driven, the jumper cap on LK14 should be set to<br />
position 1-2 to route the high voltage to pin 12 of the video connector that is required for<br />
correct SCART switching.<br />
85
PARALLEL - IEE1284 compliant printer port:<br />
The parallel port supports both standard, EPP and ECP modes of operation.<br />
The 25 way female "D" type socket has the following pinout:<br />
Pin Function<br />
1 *STROBE out<br />
2 D(0) in/out<br />
3 D(1) in/out<br />
4 D(2) in/out<br />
5 D(3) in/out<br />
6 D(4) in/out<br />
7 D(5) in/out<br />
8 D(6) in/out<br />
9 D(7) in/out<br />
10 *ACKNOWLEDGE in<br />
11 BUSY in<br />
12 PAPER END in<br />
13 SELECT in<br />
14 *AUTO FEED out<br />
15 *ERROR in<br />
16 *RESET out<br />
17 *SELECT IN out<br />
Pins 18-25 are all GND<br />
86
Audio connectors:<br />
There are three 3.5mm jack sockets mounted beneath the Joystick/MIDI connector. Starting<br />
on the left is the Stereo Line-out (headphones), middle is Stereo Line-in, and on the far right<br />
is the Mono MIC socket. The line-out output has sufficient drive to be able to fully drive<br />
70mW into a standard 32 Ohm pair of stereo headphones while still maintaining correct<br />
voltage levels when driving into a high impedance "line-in" of an external amplifier. The<br />
Line-in input feeds stereo audio from an external sound source to the Audio codec where it<br />
may be sampled or mixed with the other sound sources. The Mic input will drive either a<br />
mono electret, carbon or moving-coil microphone and feed it's input to the input Audio<br />
codec for sampling or mixing. When using a carbon or moving-coil mic, the extra<br />
microphone gain stage may need to be enabled to compensate for the lower signal levels of<br />
these types of microphone.<br />
The sockets take standard 3.5mm jackplugs with the following pinout:<br />
LINE-OUT / HEADPHONES<br />
Tip Left Audio out<br />
Ring Right Audio out<br />
Sleeve GROUND<br />
LINE-IN<br />
Tip Left Audio in<br />
Ring Right Audio in<br />
Sleeve GROUND<br />
87
MIC<br />
TIP Phantom feed/Mic in<br />
Ring Mic bias<br />
Sleeve GROUND<br />
MIDI / Joystick connector:<br />
88
I can't see the picture on my monitor.<br />
Appendix G: Troubleshooting<br />
If you, or a program (some games, typically), try to change the screen size and colour depth<br />
to a combination outside of the monitor's capability you might be presented with either a<br />
black/blank screen or with a fuzzy/rolling picture. The computer is still functional - it is<br />
simply that the display setting need to be changed back to something more friendly. In theory<br />
you could do this using the mouse and changing the display manager in the Desktop in the<br />
usual way, but it it likely that you you might not be able to see the Desktop to do this.<br />
Alternatively you can enter the CLI (Command Line Interpreter) by pressing and type<br />
in an instruction to return to a generally accepted screen mode. At the commant line you<br />
should type "Wimpmode 27" then press twice (once to enter the instruction,<br />
then again to return to the Desktop). Since you might not be able to see the display when you<br />
enter the CLI, we have simplified the procedure by associating the above instruction to the<br />
Print Scrn key (f0) so if you need to return the display to a generic screen mode simply press<br />
, .<br />
There's no sound coming out of my speakers.<br />
Are your speakers switched on ? Some speakers use mains power so you must ensure they<br />
are switched on before any sound will be produced. Make sure your speakers are plugged in<br />
and switched on. Do the speakers have a volume control ? If so, make sure the volume knob<br />
is turned up enough to allow you to hear sound coming from the computer. Also, check at the<br />
back of the computer to make sure the audio connection has been made to the correct socket.<br />
There are three audio sockets at the back of the computer. These are labelled headphones,<br />
line-in, and mic. The headphone connection, the one right next to the monitor connection, is<br />
where you should connect your speaker cable.<br />
The keyboard has stopped working.<br />
If, after using the computer for a while, everything functions correctly except for the<br />
keyboard alone, simply unplug the keyboard, wait a few seconds, then plug it back in again.<br />
Some keyboards cause a fuse on the motherboard to trip and this reconnection resets the fuse.<br />
Remember, although you can connect the mouse and keyboard into either PS2 connection, it<br />
is recommended that the keyboard is plugged into the lower connection, whilst the mouse<br />
uses the upper socket, for those who wish to use "wake-on-keypress" functionality.<br />
If you have any other difficulties getting to grips with your new <strong>RiscStation</strong> <strong>R7500</strong><br />
computer, please contact your supplier who will be happy to help and offer friendly<br />
assistance.<br />
89


