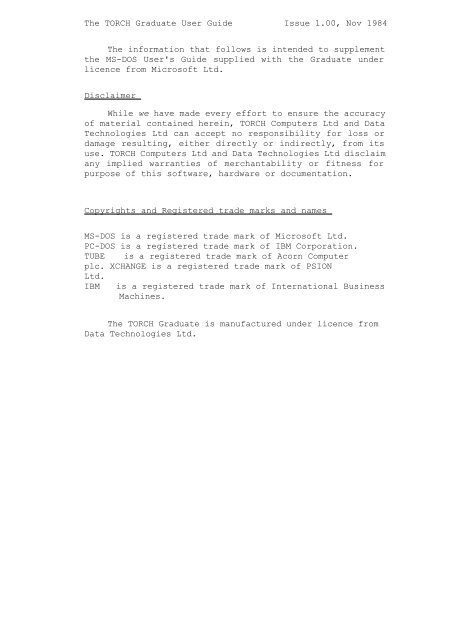
The TORCH Graduate User Guide Issue 1.00, Nov 1984 The ...
The TORCH Graduate User Guide Issue 1.00, Nov 1984 The ...
The TORCH Graduate User Guide Issue 1.00, Nov 1984 The ...
You also want an ePaper? Increase the reach of your titles
YUMPU automatically turns print PDFs into web optimized ePapers that Google loves.
<strong>The</strong> <strong>TORCH</strong> <strong>Graduate</strong> <strong>User</strong> <strong>Guide</strong> <strong>Issue</strong> <strong>1.00</strong>, <strong>Nov</strong> <strong>1984</strong><br />
<strong>The</strong> information that follows is intended to supplement<br />
the MS-DOS <strong>User</strong>'s <strong>Guide</strong> supplied with the <strong>Graduate</strong> under<br />
licence from Microsoft Ltd.<br />
Disclaimer<br />
While we have made every effort to ensure the accuracy<br />
of material contained herein, <strong>TORCH</strong> Computers Ltd and Data<br />
Technologies Ltd can accept no responsibility for loss or<br />
damage resulting, either directly or indirectly, from its<br />
use. <strong>TORCH</strong> Computers Ltd and Data Technologies Ltd disclaim<br />
any implied warranties of merchantability or fitness for<br />
purpose of this software, hardware or documentation.<br />
Copyrights and Registered trade marks and names<br />
MS-DOS is a registered trade mark of Microsoft Ltd.<br />
PC-DOS is a registered trade mark of IBM Corporation.<br />
TUBE is a registered trade mark of Acorn Computer<br />
plc. XCHANGE is a registered trade mark of PSION<br />
Ltd.<br />
IBM is a registered trade mark of International Business<br />
Machines.<br />
<strong>The</strong> <strong>TORCH</strong> <strong>Graduate</strong> is manufactured under licence from<br />
Data Technologies Ltd.
<strong>The</strong> <strong>TORCH</strong> <strong>Graduate</strong> <strong>User</strong> <strong>Guide</strong> <strong>Issue</strong> 1 00,<strong>Nov</strong> <strong>1984</strong><br />
Contents<br />
Unpacking ................................... 1<br />
Getting started (<strong>Graduate</strong> MS-DOS) ........... 2<br />
Getting started (<strong>Graduate</strong> GDFS) ............. 6<br />
Using the <strong>Graduate</strong> disc drives .............. 8<br />
<strong>The</strong> keyboard - usage in MS-DOS .............. 9<br />
<strong>The</strong> keyboard - differences to the IBM PC ... 11<br />
Graphics modes ............................. 12<br />
IBM systems discs .......................... 12<br />
Incompatibilities with PC-DOS .............. 13<br />
Description of MS-DOS commands ............. 15<br />
<strong>The</strong> <strong>Graduate</strong> Disc Filing System (GDFS) . ... 20<br />
Maintenance ................................ 34<br />
Fitting Expansion cards .................... 34<br />
Glossary ................................... 35<br />
Bibliography ...............................<br />
40
<strong>The</strong> <strong>TORCH</strong> <strong>Graduate</strong> <strong>User</strong> <strong>Guide</strong> <strong>Issue</strong> <strong>1.00</strong>, <strong>Nov</strong> <strong>1984</strong><br />
UNPACKING :<br />
Please check that you have the following. Keep the original<br />
packing to protect the system in case you have to ship it somewhere.<br />
Item check<br />
<strong>Graduate</strong> Main Unit .......................<br />
<strong>Graduate</strong> MS-DOS <strong>User</strong>'s <strong>Guide</strong> and Technical<br />
Manual. (this manual) ...................<br />
<strong>Graduate</strong> MS-DOS 2.11 System disc . . . ..<br />
<strong>Graduate</strong> BBC microcomputer compatible disc<br />
filing system (GDFS) disc . . .<br />
Mains lead with moulded 13A plug . . . .<br />
Packing including disc transit cards . .<br />
Xchange business software (one manual and<br />
three discs)<br />
At this stage, check the unit for obvious damage sustained in<br />
transit. Worthy of special attention are :<br />
Ribbon cable on the main unit<br />
Corners of main unit<br />
Diskettes<br />
If you are unsure about removal of the transit cards, leave<br />
these until you have read on to the relevant section on disc drives.<br />
(page 8)<br />
1
<strong>The</strong> <strong>TORCH</strong> <strong>Graduate</strong> <strong>User</strong> <strong>Guide</strong> <strong>Issue</strong> <strong>1.00</strong>, <strong>Nov</strong> <strong>1984</strong><br />
GETTING STARTED - GRADUATE MS-DOS<br />
In checking the goods supplied against the checklist earlier<br />
you will have identified which bits are which. <strong>The</strong>re is a minimum<br />
selection of items you will need in front of you to get a working<br />
and usable system:<br />
<strong>Graduate</strong> main unit<br />
<strong>Graduate</strong> MS-DOS systems disc<br />
Power lead for the <strong>Graduate</strong><br />
BBC microcomputer model 'B' with or without BBC/Acorn DFS<br />
Monitor or television for the BBC micro<br />
Mains supply outlets for all three items<br />
(1) With all units powered off and unplugged from the mains supply,<br />
take the ribbon cable trailing from the <strong>Graduate</strong> main unit and<br />
carefully plug it into the 1MHz bus expansion socket of the BBC<br />
microcomputer. Note that this is the second socket from the righthand<br />
side next to the TUBE socket. Make sure the locating notch on<br />
the side of the plug fits into the corresponding slot in the side<br />
of the socket.<br />
(2) Connect the <strong>Graduate</strong> to the mains supply and switch it on by<br />
using the switch at the rear of the unit.<br />
(3) Connect the BBC microcomputer and the monitor to the mains<br />
supply. Ensure that the monitor is attached to the BBC<br />
microcomputer in the usual way and is switched on.<br />
(4) Insert your <strong>Graduate</strong> MS-DOS System Disk in the (top) drive,<br />
called drive A, and press the button to lock the disc in. (Refer to<br />
the section on how to insert discs on page 8)<br />
(5) Switch on the BBC micro, or if it was already switched on then<br />
press (Break].<br />
After a short moment in which the <strong>Graduate</strong> tests its memory and<br />
other components, the disc drives will start to whirr. <strong>The</strong> red light<br />
on the top disc drive will come on and the MS-DOS system will be<br />
loaded into the computer's memory from the disc you have inserted<br />
into drive A.<br />
2<br />
<strong>The</strong> following should appear on the screen :<br />
Torch GRADUATE version XXX<br />
MSDOS version XXX<br />
Copyright 1981, 1982 Microsoft Corp.<br />
Command v. XXX<br />
Current date is Mon 01-01-1981<br />
Enter new date:_
<strong>The</strong> <strong>TORCH</strong> <strong>Graduate</strong> <strong>User</strong> <strong>Guide</strong> <strong>Issue</strong> <strong>1.00</strong>, <strong>Nov</strong> <strong>1984</strong><br />
Where XXX is the version number of the software you are using.<br />
If this fails to appear, check the following points :<br />
Check that any network feature of the BBC Computer is<br />
not being used and is totally unplugged.<br />
Check that the GRADUATE is connected properly to the<br />
1Mhz Bus socket on the underside of the BBC computer.<br />
Check that the correct MS-DOS system disc is in the top<br />
drive and is properly inserted and locked in.<br />
Check that the GRADUATE is properly connected to a 240V<br />
50 Hz. AC mains outlet.<br />
Press BREAK to try loading the system from disc again.<br />
If the message 'BBC Computer' appears as usual then there is<br />
likely to be one of the following faults with the system :<br />
<strong>The</strong> <strong>Graduate</strong> is not connected to the BBC Microcomputer<br />
correctly<br />
<strong>The</strong> <strong>Graduate</strong> is not connected properly to its power<br />
outlet or there may be blown fuses.<br />
<strong>The</strong>re may be a fault in the BBC microcomputer 1MHz bus<br />
interface logic. If you have any other peripherals which use<br />
this bus check the BBC microcomputer is functioning correctly<br />
with them. If all is OK with them there may still be a fault<br />
in the interface but it is much less likely. Consult your BBC<br />
dealer/supplier if you have such a problem.<br />
If the message 'Data Technologies DFS' appears at the top of<br />
the screen, then you have inserted the wrong system disc to run the<br />
MS-DOS system.<br />
If the system still fails to 'BOOT', then there may be an<br />
internal fault on either the BBC microcomputer or the <strong>Graduate</strong> unit<br />
and you should contact your local dealer/supplier.<br />
3
<strong>The</strong> <strong>TORCH</strong> <strong>Graduate</strong> <strong>User</strong> <strong>Guide</strong> <strong>Issue</strong> <strong>1.00</strong>, <strong>Nov</strong> <strong>1984</strong><br />
When the prompt appears, you can enter the date in the format<br />
MM-DD-YY and then press RETURN. If you enter a date that does not<br />
exist the system will respond with<br />
Invalid date<br />
and prompt you for a valid date. If you are happy with the date<br />
the system currently displays and don't wish to change it then<br />
simply hit RETURN at the prompt.<br />
A quick word here about the importance of the time and date.<br />
Files stored on disc are all time and date stamped automatically by<br />
the system so you can always tell which file is the newest or<br />
oldest or whatever. If you neglect the date and time then you are<br />
simply making things more difficult for yourself. (See also the DATE<br />
and TIME commands, page 16 onwards)<br />
Having got the date out of the way, the system will then<br />
prompt you for the time :<br />
Current time is xx:xx:xx<br />
Enter new time:_<br />
You can now enter the time in the format HH:MM:SS and then<br />
press RETURN. If you enter a bad time, the system will respond with<br />
Invalid time<br />
and prompt you again. If you are happy with the time displayed<br />
and don't want to change it then simply hit RETURN at the prompt.<br />
<strong>The</strong> system will then respond with its standard prompt :<br />
A>_<br />
<strong>The</strong> 'A' means that when you enter a command, the system will<br />
look on the first drive (the top one) for a file. This is the<br />
DEFAULT drive. <strong>The</strong> angle bracket '>' means that MSDOS is ready to<br />
accept a command.<br />
<strong>The</strong> first thing you should do now is make a copy of the<br />
systems disc.<br />
4<br />
At the 'A>' prompt, type<br />
format b:<br />
then press return. <strong>The</strong> system will respond :<br />
Insert new diskette in drive B:<br />
Press any key when ready
<strong>The</strong> <strong>TORCH</strong> <strong>Graduate</strong> <strong>User</strong> <strong>Guide</strong> <strong>Issue</strong> <strong>1.00</strong>, <strong>Nov</strong> <strong>1984</strong><br />
Insert a blank disc in drive B: and press a key. <strong>The</strong> system<br />
will respond<br />
Formatting...<br />
When finished, the system will prompt :<br />
Format complete<br />
362496 bytes total disc space<br />
362496 bytes free<br />
Format another (Y/N) ?<br />
Press 'N' and the 'A>' prompt will appear. Type the following :<br />
diskcopy a: b:<br />
<strong>The</strong>n press RETURN. the system will respond :<br />
Insert source diskette in drive A:<br />
Insert formatted target diskette in drive B:<br />
Press any key when ready...<br />
As the discs are already in the drives the system requires<br />
just press a key. <strong>The</strong> system will respond:<br />
Copying<br />
When the copy is complete, the system will prompt :<br />
Copy complete<br />
Copy another (Y/N) ?<br />
Press 'N' and the 'A>' prompt will appear.<br />
Remove the original systems disc and store it in a safe ?lace.<br />
Do not use it for day to day use, but only for creating copies. For<br />
day to day use, use the new disc you have just created.<br />
For further information on the commands FORMAT and DISKCOPY,<br />
refer to the appropriate section in the MS-DOS USERS GUIDE.<br />
5
<strong>The</strong> <strong>TORCH</strong> <strong>Graduate</strong> <strong>User</strong> <strong>Guide</strong> <strong>Issue</strong> <strong>1.00</strong>, <strong>Nov</strong> <strong>1984</strong><br />
Getting Started - Using BBC Basic with the <strong>Graduate</strong> DFS.<br />
To use the GRADUATE as a BBC Microcomputer with <strong>Graduate</strong> DFS (<br />
GDFS), insert your GDFS SYSTEMS DISK in the (top) drive and press<br />
BREAK. <strong>The</strong> screen will appear :-<br />
Data Technologies DFS<br />
BBC Computer<br />
BASIC<br />
>_<br />
<strong>The</strong> <strong>Graduate</strong> DFS may be activated by *GDFS (refer to the DFS<br />
section in this manual)<br />
Note that on pressing BREAK, the memory inside the BBC is not<br />
corrupted, so pressing BREAK again will not destroy your program<br />
unless it would have done so without the <strong>Graduate</strong> connected to the<br />
BBC.<br />
Using the BBC without the <strong>Graduate</strong><br />
To use the BBC on its own simply turn off the <strong>Graduate</strong> or<br />
leave the system on but without a disc in drive A. After a pause<br />
while the <strong>Graduate</strong> checks for a disc in drive A the BBC Micro will<br />
go through the same startup as it would without the <strong>Graduate</strong> fitted<br />
which is usually to display the 'BBC Computer' and other messages<br />
on screen.<br />
Copying the GDFS Systems Disk<br />
<strong>The</strong> <strong>Graduate</strong> DFS Systems Disk is a double-density single sided<br />
disc and cannot be read by the DFS. To make a copy, use the<br />
following procedure:<br />
Boot your system into MS-DOS (insert the MS-DOS system disc<br />
or a copy in the top drive and press BREAK).<br />
6<br />
With the MS-DOS SYSTEMS DISK in drive A:, type<br />
format b:/1<br />
and press RETURN. <strong>The</strong> system will prompt :<br />
Insert new disc in drive B:<br />
Press any key when ready...<br />
Insert a blank disc in drive B: and press a key.
<strong>The</strong> <strong>TORCH</strong> <strong>Graduate</strong> <strong>User</strong> <strong>Guide</strong> <strong>Issue</strong> <strong>1.00</strong>, <strong>Nov</strong> <strong>1984</strong><br />
When finished, the GRADUATE will prompt :<br />
Format complete<br />
179712 bytes total disc space<br />
179712 bytes available on disc<br />
Format another (Y/N)?<br />
Press 'N'. <strong>The</strong> 'A>' prompt will appear. Type the following<br />
diskcopy a: b:<br />
and press RETURN. <strong>The</strong> system will prompt:<br />
Insert source diskette in drive A:<br />
Insert formatted target diskette in drive B:<br />
Remove the MS-DOS systems disc from the top drive and insert<br />
the DFS SYSTEMS DISK. <strong>The</strong> new disc is already in drive B: Press a<br />
key. <strong>The</strong> system will respond:<br />
Copying...<br />
When finished, the system will prompt :<br />
Copy complete<br />
Copy another (Y/N)?<br />
Reply 'N' and the 'A>' prompt will re-appear.<br />
Remove the original DFS SYSTEMS disc and store it in a safe<br />
place. Do not use it for day to day use, but only for making<br />
copies in emergencies. Always use the copy you have made. You may<br />
make as many copies as you like.<br />
7
<strong>The</strong> <strong>TORCH</strong> <strong>Graduate</strong> <strong>User</strong> <strong>Guide</strong> <strong>Issue</strong> <strong>1.00</strong>, <strong>Nov</strong> <strong>1984</strong><br />
THE GRADUATE DISK DRIVES<br />
Drive A: is the top drive, and drive B: the lower one.<br />
To insert a disc in a drive, hold the disc by the label area,<br />
with the label uppermost, remove it from the protective<br />
jacket and slide into the slot.<br />
When the disc is flush with the front of the drive, push the<br />
buttn just above the slot in until it clicks. Note that the button<br />
stays in almost flush with the facia.<br />
When the drive is in use, the small red select light will be<br />
on, and you will not be able to remove the disc.<br />
When finished, the select light will go out, and you will be<br />
able to remove the disc by pressing the button again. <strong>The</strong> disc<br />
will eject itself about one inch, allowing you to remove it.<br />
8
<strong>The</strong> <strong>TORCH</strong> <strong>Graduate</strong> <strong>User</strong> <strong>Guide</strong> <strong>Issue</strong> <strong>1.00</strong>, <strong>Nov</strong> <strong>1984</strong><br />
THE KEYBOARD - USAGE IN MS-DOS<br />
<strong>User</strong>s who are familiar with the BBC Micro will not find much<br />
difficulty in adapting to its new functions, the most striking of<br />
which is the lack of split cursor editing. MS-DOS will only accept<br />
data written on the current command line, although use of the<br />
function keys enables the previous command entered to be<br />
manipulated on the new line. This is explained in detail in the MS-<br />
DOS user guide. Here is a brief description.<br />
ESCAPE This key cancels the line you have just typed<br />
and lets you start afresh. A backslash is<br />
printed where the cursor was, and the cursor is<br />
moved to a fresh line.<br />
CONTROL + ESCAPE This cancels whatever is happening and returns<br />
you to the DOS prompt (A>). ^C appears on the<br />
screen where the cursor was. This combination is<br />
only effective when DOS is either writing to the<br />
screen or waiting for a key. It may be enabled<br />
at other times by use of the BREAK command (<br />
refer to DOS COMMANDS)<br />
DELETE Pressing this key erases the character to the<br />
left of the cursor and moves the cursor back one<br />
space.<br />
fl This moves one character from the last command<br />
line nto the current one. Hold this key down and<br />
the entire line will be repeated.<br />
f2 This copies all characters of the last line up<br />
to the next character typed. e.g. if the last<br />
command entered was ABCDEFG and you press f2<br />
then E, ABCD will appear on this line.<br />
f3 This copies the entire line previously entered<br />
on to the current line.<br />
COPY This is the INSERT key. It allows you to type a<br />
command without destroying the previous one. e.<br />
g. if the last command was ABC, and you press<br />
COPY, then EFG, then f3, EFGABC will appear on<br />
the command line.<br />
Cursor Left On the command line, this is similar to f1.<br />
9
<strong>The</strong> <strong>TORCH</strong> <strong>Graduate</strong> <strong>User</strong> <strong>Guide</strong> <strong>Issue</strong> <strong>1.00</strong>, <strong>Nov</strong> <strong>1984</strong><br />
CAPS LOCK Press this key once, and all alphabetic<br />
characters will appear in upper case. Press<br />
it again and they will be in lower case.<br />
SHIFT LOCK Press this key once, and ALL KEYS will be<br />
in upper case. Press it again and they will<br />
be in lower case.<br />
CONTROL + CURSOR RIGHT Pressing this combination causes the<br />
computer to suspend writing to the screen<br />
until another key is pressed. This is very<br />
useful when listing a long file on the<br />
screen.<br />
"KEYPAD ENTRIES" It is possible with the GRADUATE to enter<br />
any ASCII value into the program in the<br />
range 0 to 255. To do this, hold SHIFT and<br />
CONTROL down, and type a number, for<br />
example, 65 . Release SHIFT and CONTROL,<br />
and press any key. In the case of 65, a<br />
capital A will appear at the current cursor<br />
position.<br />
BREAK...................Pressing this key ALWAYS causes the system<br />
to reboot itself. Both the processors are<br />
reset and any data not saved on disc will<br />
be lost. It is equivalent to turning the<br />
system off and then on again.<br />
10
<strong>The</strong> <strong>TORCH</strong> <strong>Graduate</strong> <strong>User</strong> <strong>Guide</strong> <strong>Issue</strong> <strong>1.00</strong>, <strong>Nov</strong> <strong>1984</strong><br />
THE KEYBOARD - DIFFERENCES BETWEEN GRADUATE AND IBM PC<br />
<strong>The</strong> <strong>Graduate</strong> requires the use of a BBC Micro for its keyboard,<br />
and while this is quite adequate, there is a complication in that<br />
some keys found on the IBM PC are not on the BBC Micro. All the PC<br />
keys not on the BBC can be made available by the use of a<br />
combination of keys. Most of these involve the use of SHIFT or<br />
CONTROL or both. <strong>The</strong> following table shows how the extra keys may<br />
be obtained.<br />
PC Key <strong>Graduate</strong> key<br />
ill f0<br />
ALT Control & Shift<br />
CTRL-BREAK Control & Escape<br />
CTRL-ALT-DEL Control & Break<br />
CTRL-NUM LOCK Control & Cursor right<br />
Backspace Delete<br />
Delete Shift & Delete<br />
Insert Copy<br />
Page up Shift & Cursor up<br />
Page down Shift & Cursor down<br />
Home Shift & Cursor left<br />
End Shift & Cursor right<br />
Scroll Lock Control & Copy<br />
Print Screen Shift & copy<br />
Plus Control & Cursor Up<br />
Minus Control & Cursor Down<br />
NOTE: Plus and minus are those found on the right-hand side of an<br />
IBM-PC keyboard.<br />
11
<strong>The</strong> <strong>TORCH</strong> <strong>Graduate</strong> <strong>User</strong> <strong>Guide</strong> <strong>Issue</strong> <strong>1.00</strong>, <strong>Nov</strong> <strong>1984</strong><br />
Extended Character Codes<br />
It is possible to obtain any one of the 256 characters in the<br />
character set by use of the keyboard directly. To do this, hold the<br />
SHIFT and CONTROL key down, then type the decimal value of the<br />
required code on the numeric keys. Press any other key to enter the<br />
value. e.g., to get a capital A, hold control and shift down, type<br />
6 then 5 (65 being the ASCII value of capital A), then any other<br />
non numeric key.<br />
Caps Lock and Num Lock<br />
<strong>The</strong> CAPS LOCK and NUM LOCK keys on the BBC Micro work in the<br />
same ways as those on the IBM-PC but with the following<br />
differences:-<br />
While CAPS LOCK is engaged, lowercase letters cannot be<br />
obtained by pressing a shift key. CAPS LOCK must be off to get<br />
lowercase characters<br />
NUM LOCK forces all keys to their shifted state and has no<br />
effect on the cursor keys.<br />
<strong>The</strong> effect of these keys within programs will be the same as a<br />
PC, except that the GRADUATE only recognises a change in the state<br />
of these keys when a normal character key is pressed.<br />
GRAPHICS MODES<br />
<strong>The</strong> following screen modes may be selected using the MODE<br />
command (refer to the MODE command later in the manual)<br />
80 x 25 Text Green characters on black background<br />
40 x 25 Text Green, Red, Blue and Black<br />
640 x 200 Graphics Green on black<br />
320 x 200 Graphics Green, red, blue and black<br />
Compatibility with IBM SYSTEM DISKS<br />
<strong>The</strong> GRADUATE is capable of booting from an IBM SYSTEM DISK of<br />
version 2.00 or later. However, if there is an AUTOEXEC.BAT file,<br />
it should not contain the command KEYBUK. This would cause the<br />
keyboard to be locked out completely. <strong>The</strong>re is no need for KEYBUK<br />
because the BBC MICRO has a U.K. standard keyboard.<br />
12
<strong>The</strong> <strong>TORCH</strong> <strong>Graduate</strong> <strong>User</strong> <strong>Guide</strong> <strong>Issue</strong> <strong>1.00</strong>, <strong>Nov</strong> <strong>1984</strong><br />
Incompatibilities with PC-DOS<br />
Although the <strong>Graduate</strong> provides a system which will run programs<br />
designed for the IBM Personal Computer, there are some areas in<br />
which compatibility is not possible. This is due to some basic<br />
differences in the design of the machine. <strong>The</strong> following list<br />
explains these differences and how they would be avoided by<br />
programmers.<br />
1. <strong>The</strong> Keyboard<br />
<strong>The</strong>re are two main areas where compatibility may prove a<br />
problem. Firstly there are less keys on the BBC Micro, and the<br />
missing keys are emulated with a combination of keystrokes.<br />
Secondly, the BBC Micro keyboard is not connected to the same<br />
interface device as a IBM-PC's keyboard is. Hence programs which<br />
look directly at the keyboard hardware will not run (KEYBUK is a<br />
good example of this which causes the machine to hang). It is<br />
possible to test whether a program does not run for this reason.<br />
After loading the program, hold the CONTROL key down and press the<br />
"@" key. If the speaker fails to produce a short tone then this is<br />
the most likely reason.<br />
2. Colours<br />
<strong>User</strong>s of the BBC Micro will be aware that in 80 column screen<br />
modes, there are only two colours available, normally black and<br />
white. <strong>User</strong>s of the IBM PC have sixteen colours at their disposal.<br />
This will not normally cause problems as attributes are chosen to<br />
produce displayed characters whatever colour they would be on a PC.<br />
In 40 column modes, there are four colours available.<br />
3. <strong>The</strong> CRT Controller<br />
<strong>The</strong>re is no CRT controller inside the GRADUATE. <strong>The</strong> display is<br />
produced by the 6845 LSI chip inside the BBC Micro. This will not<br />
cause any problems with programs which use the ROM routines to<br />
display text/graphics, but any program which expects to find a 6845<br />
somewhere in memory cannot be handled.<br />
4. <strong>The</strong> Disk controller<br />
<strong>The</strong> IBM PC uses an NEC u765 disc controller. <strong>The</strong> GRADUATE uses<br />
a Western Digital 1770 disc controller. Most programs use the ROM<br />
routines for reading and writing discs, but some, notably physical<br />
disc copy programs, actually access this chip directly. Such<br />
programs are unlikely to work.<br />
13
<strong>The</strong> <strong>TORCH</strong> <strong>Graduate</strong> <strong>User</strong> <strong>Guide</strong> <strong>Issue</strong> <strong>1.00</strong>, <strong>Nov</strong> <strong>1984</strong><br />
5. <strong>The</strong> Serial and Parallel Ports<br />
Since the BBC Micro comes with both serial and a parallel<br />
ports readily available, these have been implemented for use in<br />
MSDOS and will always be the last devices in the IjO list. Thus if<br />
a RS232 expansion card is fitted, it will have the device<br />
designation COM1 and the BBC micro's serial port will become COM2.<br />
Note that some baud rates are not available to the user (see<br />
page 18) and that some of the control signals associated with the<br />
back of a PC expansion card are not present on the serial and<br />
parallel ports. You will find that programs using serial IjO work<br />
a lot better if output to the screen is turned off (e.g. use print<br />
rather than TYPE with "P). This is primarily caused by the BBC<br />
microcomputer spending most of its time updating the display when<br />
any screen activity occurs.<br />
If you are using a program that makes heavy use of the ports<br />
or uses serial lines not available on the BBC then the use of an<br />
IBM expansion card is recommended.<br />
14
<strong>The</strong> <strong>TORCH</strong> <strong>Graduate</strong> <strong>User</strong> <strong>Guide</strong> <strong>Issue</strong> <strong>1.00</strong>, <strong>Nov</strong> <strong>1984</strong><br />
Description of MS-DOS COMMANDS<br />
Most of the commands are described in detail in the MS-DOS<br />
manual and reference to that should be made to appreciate all the<br />
options available. <strong>The</strong>y are described briefly here to help users<br />
become familiar with the system. <strong>The</strong> MODE, TREE and ASSIGN commands<br />
are described in detail here as they have been added for extra<br />
compatibility with the IBM PC.<br />
<strong>The</strong> syntax of commands is described in the following way :-<br />
Parameters j characters not in brackets are always required<br />
Parameters / characters in square brackets are optional<br />
Parameters j characters separated by the 1 symbol means that at<br />
least one of the parameters must be<br />
entered.<br />
To set or read the date - DATE<br />
Syntax: date [mm-dd-yy]<br />
Example: date 10-22-84<br />
To set or read the time of day - TIME<br />
Syntax: time [[[hh]:mm]:ss]<br />
Example: time 22:15<br />
To find out what files are on a disc - DIR<br />
Syntax: dir [drive]<br />
If the drive is not specified, the files on the<br />
disc in the default drive are displayed.<br />
Example: To see what is on the disc in drive B<br />
dir b:<br />
note that the colon is necessary for reasons which<br />
will be obvious when reference is made to the full<br />
MS-DOS section.<br />
15
<strong>The</strong> <strong>TORCH</strong> <strong>Graduate</strong> <strong>User</strong> <strong>Guide</strong> <strong>Issue</strong> <strong>1.00</strong>, <strong>Nov</strong> <strong>1984</strong><br />
To format a disc - FORMAT<br />
Syntax: format [drive][/1][/8][/s][/v]<br />
Example: format b:/s/v<br />
To copy a file - COPY<br />
If DRIVE is not specified, the default drive is used<br />
If j1 is used, the disc is formatted as a single<br />
sided disc<br />
If j8 is used, there will only be 8 sectors on<br />
each track as opposed to the usual nine.<br />
If jS is used, the system files IO.SYS, MSDOS.SYS<br />
and COMMAND.COM are copied onto the new disc, thus<br />
making it bootable.<br />
If /V is used, FORMAT will prompt you for a name<br />
to label the entire disc.<br />
This will format the disc in drive B:, copy the<br />
system files onto it, and ask you for a name to<br />
label the entire disc. <strong>The</strong> name is displayed by the<br />
DIR command as the volume name.<br />
Syntax: copy [drivel]filenamel [drive2][filename2]<br />
If drivel is missing, copy looks for a file on the<br />
default drive.<br />
If drive2 is missing, copy will make a new copy of<br />
the file on the same disc (drivel)<br />
If filename2 is missing, copy will give the new<br />
file the same name as the old file.<br />
Copy does not erase the file you are copying from.<br />
Example: copy a:fred.lst b:jim.prn<br />
16<br />
This command copies the file called FRED.LST on<br />
drive A: and copies it to a new file called JIM.PRN<br />
on drive B:
<strong>The</strong> <strong>TORCH</strong> <strong>Graduate</strong> <strong>User</strong> <strong>Guide</strong> <strong>Issue</strong> <strong>1.00</strong>, <strong>Nov</strong> <strong>1984</strong><br />
To delete a file - ERASE or DEL<br />
Syntax: erase (drive filename<br />
If drive is missing, the file is deleted from the<br />
default drive<br />
Example: erase a:old.fil<br />
To clear the screen - CLS<br />
Syntax: cls<br />
To re-assign drives - ASSIGN<br />
This command erases the file OLD.FIL from the disc<br />
in drive A:<br />
<strong>The</strong> screen is cleared, the cursor returns to the<br />
top left<br />
Syntax: assign (drive1=drive21<br />
Example: assign a=b<br />
Drivel is the new drive letter where all accesses<br />
will be made when drivel is asked for. If no<br />
parameters are entered, all re-assignments are<br />
reset to their initial state.<br />
This command would cause all accesses to drive A<br />
to go to drive B.<br />
To display directory paths - TREE<br />
Syntax: tree [drive:][/F]<br />
This command allows all directory paths found on<br />
the specified drive to be displayed and optionally<br />
allows the files at each sub-directory to be<br />
displayed. For each directory found it's full<br />
pathname will be displayed with all sub-directories<br />
associated with that directory. If the jF option is<br />
selected, then the names of all files in a<br />
directory will also be displayed. If no drive is<br />
specified, the default drive is assumed.<br />
17
<strong>The</strong> <strong>TORCH</strong> <strong>Graduate</strong> <strong>User</strong> <strong>Guide</strong> <strong>Issue</strong> <strong>1.00</strong>, <strong>Nov</strong> <strong>1984</strong><br />
Example: tree b:<br />
Displays all directory paths on drive B<br />
Refer to commands CHDIR, MKDIR in the MS-DOS<br />
manual.<br />
To select RS232 parameters. - MODE<br />
Syntax: mode device_name:[baud_rate[,parity[,word_length (<br />
,stopbits[,retry]]]]]<br />
This command allows you to select the conditions<br />
for serial input and output RS232 device(s).<br />
Device name must be specified as COM1: COM2: or<br />
COM3:<br />
baud_rate may be 96 for 9600 baud, 48 for 4800<br />
baud, 24 for 2400 baud, 12 for 1200 baud, 6 for<br />
600, 3 for 300<br />
parity may be N for no parity, E for even parity,<br />
or 0 for odd parity.<br />
word_length selects how many bits there are in<br />
each byte sent. You may select 8, 7, 6 or 5.<br />
Stop bits selects the number of stop bits added<br />
after each byte sent/received. Valid numbers are 1<br />
or 2<br />
Retry selects whether the computer would keep<br />
trying to send characters or return an error<br />
message when the device receiving data stops<br />
listening. This is used for printers and should be<br />
P for retry, blank for errors.<br />
Example: mode com1:96,n,8,2,p<br />
18<br />
This sets up COM1 as a serial printer output with<br />
9600 baud, no parity, eight bit words and two stop<br />
bits.
<strong>The</strong> <strong>TORCH</strong> <strong>Graduate</strong> <strong>User</strong> <strong>Guide</strong> <strong>Issue</strong> <strong>1.00</strong>, <strong>Nov</strong> <strong>1984</strong><br />
To re-assign devices - MODE<br />
Syntax: mode devicel:=device2<br />
Example: mode Ipt1:=coml<br />
To change screen width - MODE<br />
Syntax: mode 40|80<br />
Example: mode 40<br />
This command allows you to re-direct input or<br />
output for one device to/from another. Device 1 is<br />
the device where output or input would normally<br />
come from/go to, and device 2 is where you want<br />
the output/input to come from/go to.<br />
This command re-routes output intended for a<br />
parallel printer to the RS232 device COM1. This is<br />
useful if you have a serial printer. Note that you<br />
must set the RS232 device up using MODE COM1: for<br />
the correct baud rates etc.<br />
This command allows you to change between 40 and<br />
80 column screen mode.<br />
Changes to 40 column screen mode, useful if you<br />
have a television rather than a monitor connected,<br />
as 80 column output is not very clear on<br />
televisions due to the lack of horizontal<br />
resolution.<br />
19
<strong>The</strong> <strong>TORCH</strong> <strong>Graduate</strong> <strong>User</strong> <strong>Guide</strong> <strong>Issue</strong> <strong>1.00</strong>, <strong>Nov</strong> <strong>1984</strong><br />
GRADUATE DFS<br />
OVERVIEW:<br />
<strong>The</strong> <strong>Graduate</strong> Disk Filing System (GDFS) allows you to use the<br />
<strong>Graduate</strong> disk drives from BBC Basic at the file level. This means<br />
that using a <strong>Graduate</strong> with a standard model 'B' BBC microcomputer<br />
you can load and save program and data files to and from floppy<br />
disc. Commands are also provided to maintain and backup files on<br />
the disc.<br />
<strong>The</strong> GDFS has the advantage that you do not have to spend any<br />
more money on a disc interface and extra ROMs to provide a disc<br />
filing system for your BBC. <strong>The</strong> hardware of the <strong>Graduate</strong> provides<br />
all the interfaces and drive(s) necessary without the need to<br />
remove the lid of the BBC microcomputer. Ali that is required is<br />
to plug the disc drives into the 1MHz bus socket.<br />
<strong>The</strong>re are many other advantages in using the GDFS with your<br />
BBC microcomputer including :<br />
* the GDFS takes up a maximum of 3 pages of the BBC micro's<br />
RAM whereas other disc filing systems take up to 11 pages<br />
of memory.<br />
* a spare ROM socket is available inside the BBC<br />
microcomputer which would normally have been occupied by<br />
a disc filing system ROM.<br />
* If you wish to run 80 track drives from your BBC micro<br />
then you can fit a standard disc interface and DFS to do<br />
this but still have access to the 40 track drives<br />
provided by the <strong>Graduate</strong> just by using one command to<br />
switch between the two.<br />
* GDFS is loaded from disc and is mostly resident in the<br />
<strong>Graduate</strong>'s memory. This leaves as much free memory as<br />
possible in the BBC microcomputer without sacrificing<br />
performance.<br />
* Disk access is controlled by the <strong>Graduate</strong> giving best<br />
performancejflexibility trade off.<br />
It should be noted at this point that the GDFS is not an exact<br />
reproduction of Acorn DFS. Because of lack of space some commands<br />
and operating system calls which are standard in Acorn DFS had to be<br />
omitted from GDFS.<br />
GDFS discs are compatible with Acorn DFS 40 track discs so<br />
discs produced using DFS can be directly read by the <strong>Graduate</strong> and<br />
vice-versa. However, some specially protected programs from<br />
commercial suppliers on 40 track Acorn format discs may not run or<br />
may produce strange errors.<br />
20
<strong>The</strong> <strong>TORCH</strong> <strong>Graduate</strong> <strong>User</strong> <strong>Guide</strong> <strong>Issue</strong> <strong>1.00</strong>, <strong>Nov</strong> <strong>1984</strong><br />
This is because many of the protection systems rely on being<br />
able to 'talk' directly to the BBC micro 8271 disc controller chip.<br />
As described earlier the <strong>Graduate</strong> does not require this to be fitted<br />
and does not use it to operate GDFS and thus cannot be affected by<br />
any software that programs it directly.<br />
START UP:<br />
This section covers the first steps to take when starting to<br />
use the GDFS. Another, briefer, introduction to using the GDFS and<br />
backing up the GDFS system disc appears earlier in this manual.<br />
Please make sure that you also read this section.<br />
To use your BBC micro with the GDFS, first put the GDFS System<br />
Disc into drive A of the <strong>Graduate</strong> (the top drive if you are using a<br />
G800) and press on the BBC Micro. When the usual 'BBC<br />
Computer' banner appears on the screen you will notice that the top<br />
line of the screen now says<br />
Data Technologies DFS<br />
<strong>The</strong> next thing to do is to type in<br />
*GDFS <br />
This will 'wake up' the GDFS so that it is ready to start using<br />
the <strong>Graduate</strong> discs with the BBC microcomputer. Please note that each<br />
time you press on the BBC you must have the GDFS System Disc<br />
in drive A and, to ensure that the GDFS is the active filing system<br />
after pressing , you must also type<br />
*GDFS <br />
Commands available<br />
<strong>The</strong> commands that are supported by the GDFS are as far as is<br />
possible compatible with the Acorn DFS. Here is a list of commands<br />
which are supported by the GDFS.<br />
LOAD and SAVE (from inside BASIC and most other languages)<br />
*LOAD, *SAVE and *RUN<br />
*CAT or *. (the standard abbreviation for this command)<br />
*INFO<br />
*DRIVE and *DIR<br />
*ENABLE and *BACKUP<br />
*FORMAT and *VERIFY<br />
*DELETE<br />
*COMPACT<br />
*TITLE<br />
Commands can be abbreviated in the usual way by giving the<br />
first few letters of the command's name followed by a full stop.<br />
For example *FORMAT can be abbreviated *FORM.<br />
21
<strong>The</strong> <strong>TORCH</strong> <strong>Graduate</strong> <strong>User</strong> <strong>Guide</strong> <strong>Issue</strong> <strong>1.00</strong>, <strong>Nov</strong> <strong>1984</strong><br />
SYNTAX and FILENAMES<br />
<strong>The</strong> general form of a command is . <strong>The</strong><br />
command is one of your choice from the list available and this is<br />
followed by the necessary parameters. Generally the parameters will<br />
include at least one filename. In GDFS, filenames conform to the<br />
standard Acorn DFS format shown below:<br />
:..<br />
where is a drive number<br />
is a directory character<br />
is a sequence of up to seven characters<br />
If the drive number is specified then it must be preceded by<br />
a colon and followed by a dot. <strong>The</strong> drives are split into a top and<br />
bottom surface on each disc drive. Drive numbers are allocated in<br />
the standard Acorn DFS manner:<br />
Top surface of top drive is drive 0<br />
Bottom surface of top drive is drive 2<br />
Top surface of bottom drive is drive 1<br />
Bottom surface of bottom drive is drive 3<br />
Any operation which accesses a drive but does not specify<br />
which one will use the 'default drive'. <strong>The</strong> default drive is<br />
initially set up to be drive 0 but can be changed using the *DRIVE<br />
command (which is described fully later on).<br />
<strong>The</strong> next part of a filename is a single character 'directory'<br />
. This can be used to divide files into groups by putting them into<br />
a particular directory or to store two files on the disc with the<br />
same name but in different directories.<br />
<strong>The</strong> directory character is optional but if used can be any<br />
printable character except space (in other words any character with<br />
an ASCI1 code between 33 and 126) and must be followed by a dot. As<br />
with the drive number if the directory is not specified then the<br />
default directory is used. This is set up to be '$' initially and<br />
can be changed using the *DIR command (also described later).<br />
<strong>The</strong> main part is the name itself. This must be between one<br />
and seven characters long and can contain any 'legal' printable<br />
characters except space. Dots and colons cannot be used as the<br />
first character of the name because of their special meanings when<br />
used with drive numbers and directory letters as described above.<br />
Filenames less than 7 characters long are filled out<br />
automatically with spaces by GDFS before being stored on disc. If a<br />
filename is longer than 7 characters only the first 7 will be used<br />
when GDFS looks for the file.<br />
22
<strong>The</strong> <strong>TORCH</strong> <strong>Graduate</strong> <strong>User</strong> <strong>Guide</strong> <strong>Issue</strong> <strong>1.00</strong>, <strong>Nov</strong> <strong>1984</strong><br />
It is best to use filenames that either relate to the<br />
contents of the file (so that if you forget what exactly is in a<br />
file the title will give you a clue) or, if several people use one<br />
disc, a filename that relates the program back to the owner or<br />
originator. (This is where different directories come in handy to<br />
store several different programs each marked with your name).<br />
Some examples of valid names (the various DFS commands will<br />
be described in detail later):<br />
LOAD"IAN" (Load Ian's program in the default directory<br />
on the default drive)<br />
*DELETE A.PAYDAT (Delete the payroll data file in directory A<br />
on the default drive)<br />
*INFO :3.C.STACEY (Get information on the program in directory<br />
C on drive 3)<br />
Some examples of invalid names:<br />
*INFO CATHERINE (Name longer than seven characters - only<br />
CATHERI would be used)<br />
SAVE"1.A.SNOOKER" (No colon in front of the drive number)<br />
*DELETE "J.TAYLOR (Missing closing quotes. If quotes are used<br />
around a filename in a 'star' command they<br />
must match)<br />
LOAD":TABLE" (Only a drive number can follow a colon)<br />
If you break any of the rules for naming a file the GDFS will<br />
report an error, usually one of 'Bad filename', 'Bad drive no.' or<br />
'Bad directory'. If this happens check the relevant part of the<br />
filename for mistakes and try again. (<strong>The</strong>re is more information on<br />
GDFS error messages in a section later on in this manual).<br />
<strong>The</strong> complete filename, including any default disc and<br />
directory fields is very often called a file specification,<br />
abbreviated to in many manuals. Sometimes it is useful to<br />
have an ambiguous file specification () so that more than one<br />
file name may be found on the disc to match the file specification.<br />
For example, if there are 16 files on a disc in drive 1 called:<br />
$.TAGIRQP $.TAGGUT &.GRADPAD G.TAGDFS<br />
A.GAME A.SNOOKER $.TABLE T.TAGON<br />
B.BOGGLE C.MARK S.TONY O.GRAHAM<br />
W.ALAN T.RICHARD $.MARTIN S.MIKE<br />
and you wish to get information on all those files whose name<br />
begins with TAG. This is where 'wildcards' come in. <strong>The</strong>re are two<br />
types of wildcards which can be used. <strong>The</strong> first type is the hash '<br />
#'; when this is used as a character in a file specification it<br />
behaves as a match for any letter in that position.<br />
23
<strong>The</strong> <strong>TORCH</strong> <strong>Graduate</strong> <strong>User</strong> <strong>Guide</strong> <strong>Issue</strong> <strong>1.00</strong>, <strong>Nov</strong> <strong>1984</strong><br />
<strong>The</strong> second is the star '*'. <strong>The</strong> star behaves as if it were any<br />
number of hashes so that it matches a variable number of any<br />
characters. Thus *.* will match any or all files on the disc. Here<br />
is an example of the use of wildcards (the use of the *INFO command<br />
is described fully later on):<br />
1) *INFO :1.#.TAG####<br />
2) *INFO :1.#.TAG*<br />
3) *INFO :1.*.TAG*<br />
All three of the above are different variations of wildcard<br />
characters which do a similar job. <strong>The</strong> first one matches the<br />
character of the directory with any directory, then compares the<br />
first three letters of the filename with TAG and the next four<br />
characters, being 'wild', always match.<br />
In the second example the hash also matches any directory<br />
character, compares the first three characters of the filename with<br />
TAG and then the final star matches any number of any characters.<br />
<strong>The</strong> third example works in exactly the same way. A star has the<br />
same effect as a hash directory character and will match any<br />
directory.<br />
So any of the above would give information on these files:<br />
$.TAGIRQP $.TAGGUT G.TAGDFS T.TAGON<br />
Whereas if you were to simply enter:<br />
*INFO :1.#.TAG##<br />
the only information displayed would be for T.TAGON.<br />
This powerful feature is implemented fully on both the GDFS<br />
and the BBCjAcorn DFS. It is something which is very easy to grasp<br />
and can make your file management a lot easier.<br />
GDFS COMMANDS<br />
<strong>The</strong> next section describes each command and tries to give an<br />
indication of where errors may occur and how to deal with them.<br />
Each command has a description of its function followed by a<br />
description of the syntax of the command (in other words, what you<br />
need to type in to make the command work) with any parameters (such<br />
as filenames, drive numbers etc) that are needed shown in angle<br />
brackets. If a parameter is optional it will have square brackets<br />
surrounding it. For example in the statement<br />
*LOAD [)<br />
an ambiguous or unambiguous filename (the part) must be<br />
given but an address to load the file at is optional. Any memory<br />
addresses given to any of the 'star' commands must be in hexadecimal<br />
numbers.<br />
24
<strong>The</strong> <strong>TORCH</strong> <strong>Graduate</strong> <strong>User</strong> <strong>Guide</strong> <strong>Issue</strong> <strong>1.00</strong>, <strong>Nov</strong> <strong>1984</strong><br />
LOAD<br />
This command is used from within BASIC to load a BASIC<br />
program and works as it normally would with cassette tape. You<br />
must specify a filename and the GDFS will search for it on the<br />
disc. (A full description of this command is given on page 292 of<br />
the BBC Micro <strong>User</strong> <strong>Guide</strong>).<br />
As described earlier, if only the name is specified then the<br />
default directory and drive are assumed. Alternatively you may<br />
specify extra parts of the filename such as the directory or drive<br />
if required.<br />
Syntax: LOAD""<br />
Example: LOAD"M*" loads the first file it finds with a name<br />
beginning with M on the default drive in the default<br />
directory.<br />
<strong>The</strong> most likely errors to occur are 'File not found' or the<br />
errors associated with incorrect filenames; 'Bad filename', 'Bad<br />
directory' or 'Bad drive no.'. If this happens check the name and<br />
try again.<br />
SAVE<br />
This command is used from within BASIC and is used (not<br />
unexpectedly) to save BASIC programs on disc. This command also<br />
works as it would normally and is described in detail on page 344<br />
of the BBC Micro <strong>User</strong> <strong>Guide</strong>. An unambiguous file name must be<br />
used. If an ambiguous filename is given the GDFS will report a '<br />
Bad filename' error.<br />
As with LOAD (and all other commands) only the name can be<br />
given (in which case the usual defaults will be assumed) or the<br />
drive andjor directory can be specified.<br />
Syntax: SAVE""<br />
Example: SAVE"S.TONY" saves a program called TONY in directory S.<br />
If there is not enough space left on the disc for the program<br />
you are trying to save GDFS will produce a 'Disc full' error<br />
message will to tell you this. You can then try to free some space<br />
on disc using *COMPACT and try again (*COMPACT is fully described<br />
later on in this guide).<br />
Note that the GDFS (unlike some other disc filing systems)<br />
will not affect memory in the BBC while it is compacting the disc<br />
so you will not lose your program if you do this.<br />
Saving a program with the same name as one already on the<br />
disc will save that program 'on top' of of the old file. If the new<br />
program is much longer than the old one then you will get a 'Cant<br />
extend file' message.<br />
25
<strong>The</strong> <strong>TORCH</strong> <strong>Graduate</strong> <strong>User</strong> <strong>Guide</strong> <strong>Issue</strong> <strong>1.00</strong>, <strong>Nov</strong> <strong>1984</strong><br />
This error means that there is not enough space available in<br />
that part of the disc to save the new, larger, copy of the<br />
program. If this happens save the program again using a different<br />
name or delete the original copy and save it again.<br />
*LOAD<br />
This is used to load a file from disc directly into an area<br />
of memory.<br />
Syntax: *LOAD []<br />
This is identical to the normal operation of *LOAD when used<br />
with cassette tape as described in the BBC Micro <strong>User</strong>s <strong>Guide</strong> on<br />
page 393.<br />
Example: *LOAD SCREEN 7C00 loads a file into MODE 7 screen memory.<br />
<strong>The</strong> errors etc that are likely to be produced are the same<br />
as for LOAD in BASIC as described above.<br />
*SAVE<br />
This saves an area of memory to disc.<br />
Syntax: *SAVE ,,,[],[]<br />
This command also works in the same way as it normally does<br />
when using cassette tape on the BBC Micro. See the BBC Micro <strong>User</strong>s<br />
<strong>Guide</strong> page 392 for details.<br />
Example: *SAVE SCREEN 7C00 7FFF saves a copy of a MODE 7 screen.<br />
<strong>The</strong> errors etc that may be produced are the same as for SAVE<br />
above with the addition of the message 'Start address greater than<br />
end address' which will be displayed if you try to save an area of<br />
memory with a negative size. If this happens re-check your figures<br />
and try again.<br />
*CAT<br />
This command gives a catalogue (or List) of the files on the<br />
disc drive given. If no drive number is given the default drive is<br />
used. For example, if *CAT 0 is entered a display will be shown<br />
like this:<br />
TITLE (42)<br />
Drive: 0 Option: 0 (OFF)<br />
Directory: S Library: S<br />
followed by a list of files in the order they were saved on<br />
disc. <strong>The</strong> drive and directory remind you of the current setting of<br />
*DRIVE and *DIR (these commands are described later).<br />
26
<strong>The</strong> <strong>TORCH</strong> <strong>Graduate</strong> <strong>User</strong> <strong>Guide</strong> <strong>Issue</strong> <strong>1.00</strong>, <strong>Nov</strong> <strong>1984</strong><br />
<strong>The</strong> title at the top of the catalogue can be changed using the<br />
*TITLE command (also described later). <strong>The</strong> number in brackets after<br />
the title is the number of times the contents of the disc have been<br />
changed (e.g. files saved, deleted, etc) and turns back to 00 when<br />
it reaches 99.<br />
Syntax: *CAT []<br />
Example: *CAT gives a list of files on the current default drive<br />
*CAT 1 gives a list of files on drive 1<br />
*INFO<br />
This lists various details about a single file (or a group of<br />
files if an is given). When run a set of headings will be<br />
displayed on the screen showing what the various figures mean. <strong>The</strong><br />
meaning of most of the information is obvious. <strong>The</strong> start sector is<br />
the position on disc at which that file starts.<br />
Syntax: *INFO <br />
Example: *INFO S.* gives information on all files in directory S<br />
thus:<br />
File Load Exec File St<br />
Name Address Address Length Sec<br />
S.TONY 00002000 00002010 28FF 004<br />
S.MIKE 00001900 0000801F 5C9 09A<br />
If you give a filename or which is not on the disc GDFS<br />
will report a 'File not found' error.<br />
*DRIVE<br />
This command is used to change the default disc drive, in other<br />
words the disc drive that GDFS looks on if no drive number is given<br />
in the filename. This command is very useful for G800 users as it<br />
enables the user to set the defaut drive to 1 and leave the GDFS<br />
System Disc in drive 0.<br />
Syntax: *DRIVE <br />
Example: *DRIVE 1 followed by LOAD"GARY" loads the program GARY from<br />
drive 1. If LOAD":0.GARY" is used GARY will still be loaded<br />
from drive 0.<br />
If a drive is given that is not one of the digits 0, 1, 2 or 3<br />
GDFS will produce a 'Bad drive no.' error.<br />
27
<strong>The</strong> <strong>TORCH</strong> <strong>Graduate</strong> <strong>User</strong> <strong>Guide</strong> <strong>Issue</strong> <strong>1.00</strong>, <strong>Nov</strong> <strong>1984</strong><br />
*DIR<br />
This command is used to change the default directory used.<br />
<strong>The</strong> directory character can be any 'legal' character except a<br />
space. (<strong>The</strong> normal default is $).<br />
Syntax: *DIR <br />
Example: *DIR A followed by *SAVE GAME 2000 +28FF 2010 would save<br />
GAME in directory A as A.GAME on disc. Using SAVE°S.TABLE"<br />
will still save TABLE in directory $ (the normal default<br />
directory).<br />
If a directory character is given that is outside the<br />
allowed range a 'Bad directory' error will be given by GDFS.<br />
*BACKUP<br />
This command makes a duplicate copy of a disc on to another<br />
disc. <strong>The</strong> disc you are copying on to must already have been<br />
formatted and BACKUP will overwrite any data present on the disc<br />
being copied to, so use it with care.<br />
Because there is a danger you might accidentally copy over a<br />
disc that you wanted to keep a special safety switch has been<br />
incorporated with this command. In order to make it work the<br />
command *ENABLE must be used immediately before *BACKUP. If this<br />
is not done the message 'Not enabled' will be displayed to remind<br />
you.<br />
As mentioned in the other parts of this manual it is a good<br />
idea to take regular BACKUPs of your discs especially if you have<br />
important files on the disc because it is then possible to recover<br />
your data from an old copy of the disc if your files become<br />
corrupted or are lost.<br />
Syntax: *BACKUP (drive 1 must be be different to<br />
drive 2)<br />
Example: *BACKUP 0 1 copies the whole of the contents of the disc<br />
in drive 0 on top of the disc in drive 1.<br />
Apart from the 'Not enabled' message the only other message<br />
likely is 'Bad drive no.' which will be displayed if you enter the<br />
same number for both drives (e.g. *BACKUP 1 1).<br />
28
<strong>The</strong> <strong>TORCH</strong> <strong>Graduate</strong> <strong>User</strong> <strong>Guide</strong> <strong>Issue</strong> <strong>1.00</strong>, <strong>Nov</strong> <strong>1984</strong><br />
*DELETE<br />
This command is used to erase a single file from a disc and<br />
expects an unambiguous filename. WARNING the computer will not<br />
check with you before deleting the file so ensure that you only<br />
enter the names of files that you are sure you no longer want.<br />
Once a file has been deleted it has gone forever (!).<br />
Syntax: *DELETE <br />
Example: *DELETE B.BOGGLE will remove B.BOGGLE forever<br />
*FORMAT<br />
Before a new disc can be used it must be formatted. *FORMAT<br />
is used for this purpose. WARNING formatting a disc completely<br />
destroys any information already on the disc so, if you are reformatting<br />
an old disc make sure you do not need any of the files<br />
on it.<br />
Because of this *FORMAT will check with you by asking 'Are<br />
you sure (YjN)' before formatting the disc. If you answer anything<br />
other than 'Y' GDFS will not format the disc. As each of the 40<br />
tracks on disc is formatted GDFS will display its number.<br />
Syntax: *FORMAT []<br />
Example: *FORMAT formats the disc in the current default drive<br />
If an invalid drive number is given a 'Bad drive no.' error<br />
will be produced by GDFS. If a disc error is discovered during<br />
formatting one of the standard 'Disk fault' messages or the<br />
message 'Error - disk may be unusable' will be displayed. If this<br />
happens try formatting the disc again. If the errors persist you<br />
may have a faulty diskette.<br />
*VERIFY<br />
This command will read an entire disc and verify that the<br />
information on it is still readable. This can useful after power<br />
failures etc may have damaged the information on disc.<br />
Syntax: *VERIFY []<br />
Example: *VERIFY 3 checks the disc in drive 3<br />
If the message 'Error - disc is unusable' is displayed a data<br />
fault has been found. Recover as much information as possible and<br />
then re-format the disc.<br />
*RUN<br />
This command works as it normally does on cassette tape and<br />
loads and executes a 6502 machine code program.<br />
29
<strong>The</strong> <strong>TORCH</strong> <strong>Graduate</strong> <strong>User</strong> <strong>Guide</strong> <strong>Issue</strong> <strong>1.00</strong>, <strong>Nov</strong> <strong>1984</strong><br />
Syntax: *RUN <br />
Example: *RUN TAGIRQP will load and execute the program $.TAGIRQP (<br />
assuming the default directory is still set to be $).<br />
*COMPACT<br />
GDFS will only save a program or file if there is sufficent<br />
space available as one continuous block on disc to do so. If<br />
several files have been deleted and re-saved the space may be still<br />
be available but in areas too small to be re-used. If this is the<br />
case *COMPACT can be used to move all the empty space on disc into<br />
one continuous block.<br />
When *COMPACT is called up the message 'Compacting...' is<br />
shown. After a short time the following information is displayed:<br />
xxx sectors freed<br />
yyy sectors available<br />
If the number of sectors available is shown as 0 the disc is<br />
full.<br />
Syntax: *COMPACT []<br />
Example: *COMPACT will compact the disc in the current default<br />
drive.<br />
*COMPACT 1 will compact the disc in drive 1.<br />
*COMPACT also checks the disc while working and may report '<br />
Error - disc may be unusable'. This means you have either run<br />
*COMPACT on a disc with no files on it or there is an error on the<br />
disc. If this happens recover as much information as possible and<br />
then re-format the disc.<br />
*TITLE<br />
Each disc you use can be given a title using the *TITLE<br />
command to help remind you what files are contained on the disc.<br />
<strong>The</strong> title is the first thing displayed at the top of the catalogue<br />
listings from *CAT.<br />
A title may be a maximum of 12 characters long. Any extra<br />
characters will be ignored by GDFS. If a space is to be included in<br />
a title the text must be inside quotation marks. *TITLE only puts<br />
titles on the current drive so *DRIVE may be needed before using it<br />
if the disc you want to title is in another drive.<br />
Syntax: *TITLE <br />
Example: *TITLE MALCOLM gives the disc in the current default<br />
drive the title MALCOLM.<br />
*TITLE "DAVID'S DISC" gives the current default disc the<br />
title DAVID'S DISC.<br />
30
<strong>The</strong> <strong>TORCH</strong> <strong>Graduate</strong> <strong>User</strong> <strong>Guide</strong> <strong>Issue</strong> <strong>1.00</strong>, <strong>Nov</strong> <strong>1984</strong><br />
ERROR MESSAGES<br />
Disc errors can occur at any time and are of the general<br />
format:<br />
(Error number 199) Disc fault NN, track tt, sector ss.<br />
Track tt, sector ss shows exactly where on the disc the error<br />
has occured. <strong>The</strong> type of error is given by the fault number 'NN'<br />
and will be one of those listed below.<br />
Fault no Probable meaning<br />
80 Time Out. <strong>The</strong>re is probably no disc in the drive. <strong>The</strong><br />
drive may also not be shut correctly or the disc may be<br />
the wrong format.<br />
40 Bad Seek. <strong>The</strong> disc has bad address marks - probably not<br />
formatted or incorrectly formatted.<br />
20 Controller Failed. <strong>The</strong>re is a hardware problem in the<br />
disc controller.<br />
10 CRC Error. <strong>The</strong> data on disc has been 'scrambled' in some<br />
way. <strong>The</strong> data may not have been written to the disc<br />
correctly or the disc may have become corrupted. Retreive<br />
the data from a backup copy of the disc.<br />
08 DMA Controller Failed. Hardware fault.<br />
04 RecordjSector not found. <strong>The</strong> disk is probably the wrong<br />
format or has been formatted incorrectly.<br />
03 Write Protected Disk. <strong>The</strong> notch on the left of the disk<br />
has a write protect sticker over it or may have<br />
accidentally had the label stuck over it. If you are sure<br />
you want to write to the disk remove the sticker.<br />
02 Bad Address Mark. <strong>The</strong> disc is probably the wrong format (<br />
most likely a <strong>Graduate</strong> MS-DOS double density disc).<br />
Summary of Other GDFS Error Messages<br />
This section describes some of the other error messages you<br />
may get and their meanings. Each message also has a corresponding<br />
error number which is shown in brackets beside the message.<br />
(198) Disc full:<br />
<strong>The</strong>re are.no more spaces left on disc which are large enough<br />
to store your programs. Try using *COMPACT which may create enough<br />
space or use another disc.<br />
31
<strong>The</strong> <strong>TORCH</strong> <strong>Graduate</strong> <strong>User</strong> <strong>Guide</strong> <strong>Issue</strong> <strong>1.00</strong>, <strong>Nov</strong> <strong>1984</strong><br />
(190) Catalogue full:<br />
A maximum of 31 files can be stored on one drive. This<br />
message will be produced if you try to SAVE more programs or files<br />
than this. Delete any files you don't want and try again or save<br />
the file on to another disc.<br />
(204) Bad filename,(205) Bad drive no.,(206) Bad directory:<br />
One or more parts of the filename have been specified<br />
incorrectly. Read the sections on syntax and filenames and<br />
ambiguous filenames for more details of exactly what you are<br />
allowed to use and recheck your typing of the filename. A 'Bad<br />
filename' error may also be given if you try to use SAVE or *SAVE<br />
with an ambiguous filename. 'Bad drive no.' can also be caused by<br />
using the same drive number twice in the *BACKUP command (e.g.<br />
*BACKUP 2 2).<br />
(214) File not found:<br />
<strong>The</strong> file you are looking for was not on the disc. You could<br />
be looking on the wrong drive or have the name of the file or the<br />
default directory wrong. This message can also be caused by<br />
entering the name of a 'star' command that GDFS does not recognise<br />
because it will then try to *RUN a program with that name on disc.<br />
If this happens check the spelling of the command you entered and<br />
try again.<br />
(201) Disc write protected:<br />
This means exactly the same thing as disc fault 03. See the<br />
description of that error given above for more details.<br />
(130) Start address greater than end address:<br />
A *SAVE command has been used with a set of addresses which,<br />
if used, would try to save a block of memory of negative length (H.<br />
Recheck the addresses and try again.<br />
(189) Not enabled:<br />
You have tried to use *BACKUP without using *ENABLE. If you<br />
are sure you want to overwrite the disc you are backing up on to<br />
enter *ENABLE and repeat the *BACKUP command.<br />
(253) Bad string, (254) Bad command:<br />
<strong>The</strong> quotation marks in a filename have been mismatched (e.g.<br />
*LOAD "O.GRAHAM (no closing quotes) or some parameters have been<br />
omitted from *SAVE or a similar command.<br />
(191) Cant extend file:<br />
GDFS will only save a file if there is enough free space for<br />
it. See the explanation in the description of SAVE for details.<br />
32
<strong>The</strong> <strong>TORCH</strong> <strong>Graduate</strong> <strong>User</strong> <strong>Guide</strong> <strong>Issue</strong> <strong>1.00</strong>, <strong>Nov</strong> <strong>1984</strong><br />
(129) Command not implemented:<br />
GDFS does not allow this function to be used. Read the '<br />
implementation details' section for more information.<br />
IMPLEMENTATION DETAILS<br />
As mentioned before, because of lack of space in the <strong>Graduate</strong><br />
ROMs some features of Acorn DFS have been omitted from the GDFS.<br />
<strong>The</strong> most notable of these is that no byte access to files is<br />
allowed so the BASIC commands OPENIN, OPENOUT and OPENUP will<br />
produce a 'Command not implemented' message. *SPOOL and *EXEC will<br />
do the same. You will have to replace any files that are normally<br />
*EXECed by typing in the corresponding instructions by hand or<br />
writing a small BASIC program to do the same thing.<br />
This also means that any applications programs (or paged ROMs)<br />
that use byte access to files will not work or may only work in a<br />
limited manner. In practice most programs such as extra languages<br />
and wordprocessors tend to use *SAVE and *LOAD and so will still<br />
work.<br />
Shift and BREAK will not run the !BOOT file. You will have to<br />
duplicate this from the command line manually. Many of the 'star'<br />
commands normally found in Acorn DFS have not been implemented.<br />
<strong>The</strong> most important of these is *COPY. *LOAD and *SAVE can be used<br />
instead.<br />
Because GDFS is not held in a standard BBC Micro 'sideways<br />
ROM' it cannot adhere exactly to the correct protocols required for<br />
these ROMs. Most notably it will always use three pages of<br />
workspace from &E00 to &12FF so ROMs that do not treat this as<br />
public workspace may cause problems. As a result the GDFS cannot<br />
be guaranteed to work with paged ROMs.<br />
Finally as mentioned before, since the GDFS does not use the<br />
BBC Micro's disc controller any program (or ROM) that programs it<br />
directly will not work.<br />
Programmers using GDFS from assembler should know that OSFILE<br />
has been implemented for A=0 and A=&FF only, OSFSC is complete but<br />
calls with A=0, A=l and A=7 are ignored and OSARGS, OSBGET,<br />
OSBPUT, OSGBPB, OSFIND and the DFS OSWORD calls have not been<br />
implemented. Apart from the usual workspace areas GDFS also uses<br />
the IND3 vector (at 5234 and &235) to chain OSCLI so beware if<br />
changing these locations.<br />
33
<strong>The</strong> <strong>TORCH</strong> <strong>Graduate</strong> <strong>User</strong> <strong>Guide</strong> <strong>Issue</strong> <strong>1.00</strong>, <strong>Nov</strong> <strong>1984</strong><br />
MAINTENANCE<br />
<strong>The</strong>re are no user serviceable parts within the <strong>Graduate</strong>. <strong>The</strong><br />
disc drives, especially, should not be tampered with.<br />
<strong>The</strong> cooling fan dust filter should be cleaned occasionally at<br />
intervals of, say, a month, or more often in very severe<br />
environments. This can be done by removal of the two clamp plate<br />
fixing screws which should release the piece of foam filter<br />
material. Clean this by rinsing in warm soapy water several times<br />
Thoroughly dry before reassembly which is done using the reverse of<br />
the procedure above. Ensure that the metal grill is placed next to<br />
the fan.<br />
It is not a good idea to operate the machine without its dust<br />
filter since damage to the disc drive mechanisms or your discs may<br />
result.<br />
<strong>The</strong> single external mains fuse may be found on the back panel<br />
between the onjoff switch and mains input socket and may be levered<br />
out with a coin, or similar implement, when the mains plug has been<br />
removed from the unit. Note that there is a position for a spare<br />
fuse in the fuse holder so take care to replace the fuse correctly.<br />
Should the fuse replacement become necessary, a 20 millimetre<br />
2A/250V quick blow cartridge type should be used.<br />
FITTING EXPANSION CARDS<br />
WARNING - Disconnect mains before removing covers. **********<br />
To fit IBM compatible expansion cards release the top cover<br />
by removing the four fixing screws. Once the top cover is removed<br />
one, or both, of the rear blanking plates may be removed to<br />
accommodate the expansion board's back panel. Fix the expansion<br />
board with one of the blanking plate screws. (Note that these<br />
screws are not interchangeable with those supplied for a similar<br />
purpose on an IBM-PC). Take care to align the connector fingers<br />
with the edge connector.<br />
If a memory card is being fitted remember to correctly set<br />
any base address switches to accommodate the existing 128K bytes or<br />
256K bytes already inside the <strong>Graduate</strong>. Any other expansion board<br />
configuration requirements should be explained in documentation<br />
supplied with the product.<br />
34<br />
*** Refit top cover before powering up ***
<strong>The</strong> <strong>TORCH</strong> <strong>Graduate</strong> <strong>User</strong> <strong>Guide</strong> <strong>Issue</strong> <strong>1.00</strong>, <strong>Nov</strong> <strong>1984</strong><br />
GLOSSARY<br />
application program<br />
- one which carries out a specific user function (<br />
e.g. financial planning). Application programs may<br />
be specially written for users or provided as a<br />
standard software package.<br />
bit a single piece of binary information which<br />
can only be either 1 or 0 (also sometimes referred<br />
to by terms such as on/off, true/false, high/low).<br />
Bits are grouped into bytes which can also be<br />
grouped in words.<br />
boot derived from phrase "to pull yourself up by your<br />
own bootstraps(laces)". Refers to computer's<br />
ability to use a few key initial instructions ("<br />
triggered" by the keyboard or from power switches)<br />
and use them to load the rest of a required<br />
routine (such as the operating system) into<br />
memory.<br />
byte a group of 8 bits of information. <strong>The</strong> capacity of<br />
storage media is usually quoted in either<br />
thousands of bytes (Kbytes) or millions of bytes (<br />
Mbytes). Note that these are not the normal<br />
decimal terms but are binary 'round numbers' which<br />
are close equivalents.Thus K = 1024, M = 1,048,576<br />
(see "character").<br />
character a single screen-displayed letter, digit or special<br />
symbol, represented by a byte of memory within the<br />
computer. <strong>The</strong>re can be up to 256 different<br />
characters because there are 256 different ways of<br />
arranging the 8 bits which make up a byte. <strong>The</strong><br />
<strong>Graduate</strong> uses the industry-standard ASCII<br />
character set.<br />
command keyed-in instruction which can be understood and<br />
immediately acted upon by the operating system.<br />
<strong>The</strong> precise effect of commands varies between<br />
different operating systems but in general their<br />
main use is to allow the user to access<br />
information stored on disc (e.g. a directory<br />
listing of filenames). In addition, a command is<br />
always provided to pass control from the operating<br />
system to an application program.<br />
35
<strong>The</strong> <strong>TORCH</strong> <strong>Graduate</strong> <strong>User</strong> <strong>Guide</strong> <strong>Issue</strong> <strong>1.00</strong>, <strong>Nov</strong> <strong>1984</strong><br />
command line<br />
- a distinctive form of the prompt which indicates<br />
that the MS-DOS operating system is ready to receive<br />
a typed-in command. <strong>The</strong> command line prompt will<br />
look something like this:<br />
A>.<br />
compiler a specialised program converts a set of program<br />
instructions from form which can be written by a<br />
programmer - the source code - into a form which can<br />
be read by the processor - the object code.<br />
cursor the cursor can take the form of a "flashing" line<br />
which appears directly beneath the point at which<br />
the next character will appear. Anything typed in at<br />
the keyboard will appear on the screen at the point<br />
marked by the cursor.<br />
data information which can be processed by a computer<br />
program.<br />
disable when switches or codes are "set" in such a way that a<br />
device will not accept interrupt. See enable.<br />
disc(disk) the primary medium n which information (both data and<br />
programs) is stored. <strong>The</strong> <strong>Graduate</strong> uses 'floppy'<br />
discs which have their surfaces covered with a thin<br />
layer of magnetic material which holds the<br />
information in a binary form.<br />
disc drive(1) from a hardware point of view a disc drive is a<br />
device that is used to read information from, and<br />
write information to, a disc. A read/write head is<br />
provided for each physical surface of the disc. <strong>The</strong><br />
drive rotates the disc at a constant speed and moves<br />
the readjwrite heads in and out across the disc<br />
surfaces in order to access any part of the disc.<br />
<strong>The</strong> heads store information on the disc by<br />
magnetising or demagnetising small pieces of the<br />
disc's surface; each piece representing a bit. <strong>The</strong><br />
bits are read by detecting their magnetic influence<br />
as they rotate past the drive heads.<br />
36
<strong>The</strong> <strong>TORCH</strong> <strong>Graduate</strong> <strong>User</strong> <strong>Guide</strong> <strong>Issue</strong> <strong>1.00</strong>, <strong>Nov</strong> <strong>1984</strong><br />
disc drive(2) as defined within the operating system a disc drive<br />
is 'seen' to be the disc that the disc drive<br />
contains. <strong>The</strong> current disc drive is the one being<br />
referenced via the corresponding drive letter in<br />
the command line prompt or specified in a command<br />
or program.<br />
extension the optional "second half" of a MS-DOS filename<br />
which follows the "."(dot). This allows files to be<br />
grouped, or indicates the nature of the contents of<br />
the file (see command and graphics).<br />
file a logical 'block' of information that has been<br />
placed on a storage medium (e.g. disc). Files are<br />
used to store both programs and data.<br />
filename a means of referring to a file.<br />
firmware a term which describes all software held in ROM.<br />
floppy a flexible disc (q.v.) with its own protective<br />
jacket which can be moved between drives (q.v.).<br />
hardware a term used to describe all the physical parts of<br />
a computer.<br />
interrupt a temporary halt in executing a program during which<br />
control is transferred to the operating system.<br />
memory any solid state device which stores information.<br />
<strong>The</strong> processor can access information in its memory<br />
much faster than information stored in any other<br />
media.<br />
object code any program in a form that can be understood by the<br />
processor.<br />
operating system<br />
- a 'supervisor' program (MS-DOS on the <strong>Graduate</strong>)<br />
which looks after the files on the discs and also<br />
controls the inputjoutput (Ij0) requests to the<br />
other peripherals. It contains a command<br />
interpreter to understand the commands entered by<br />
the computer user, plus a set of Ij0 routines that<br />
provide a standard interface with other programs.<br />
<strong>The</strong> operating system is initially loaded into<br />
memory and used by the processor as its initial (<br />
base) program. It will then wait for commands from<br />
the user. If requested it will load another program<br />
(into a different part of memory) and pass control<br />
to it. However, the operating system will then '<br />
wait' in the background to carry out the I/0<br />
requests from the program and to retake control<br />
when this program finishes.<br />
37
<strong>The</strong> <strong>TORCH</strong> <strong>Graduate</strong> <strong>User</strong> <strong>Guide</strong> <strong>Issue</strong> <strong>1.00</strong>, <strong>Nov</strong> <strong>1984</strong><br />
peripheral usually refers to a device that is physically<br />
separate from the basic computer (e.g. a printer).<br />
However when describing a computer's functionality<br />
it is often used to cover all devices that are<br />
linked to the processor, whether inside the same box<br />
or not. Thus a disc drive can be a peripheral even<br />
when inside the main processor box.<br />
ports general term for the interfaces between peripherals<br />
- such as printers - and the computer.<br />
processor the solid state device which acts as the 'brains' of<br />
the computer. It operates on data according to the<br />
current set of instructions (program).<br />
program a set of logically ordered instructions which tell<br />
the processor how to perform a task or series of<br />
tasks.<br />
prompt Takes various forms (see command line) but always<br />
ends in an arrow (">") n the screen. Everything<br />
typed in at the keyboard will appear immediately<br />
beneath its point and above the cursor (q.v).<br />
RAM Random Access Memory (also known as readjwrite<br />
memory). This memory is used to hold the programs<br />
and data. All data is lost when the power is<br />
switched off.<br />
ROM Read Only Memory. Information stored in ROM is fixed<br />
and not lost when power to the computer is switched<br />
off.<br />
software a term that encompasses all the various types of<br />
programs: applications, utilities, compilers, etc.<br />
surface when referring to a disc its meaning is the same as<br />
disc drive (q.v.).<br />
source code program written in an easily understood way but<br />
needing to be "compiled" into an object code for the<br />
processor.<br />
text data that can be read by the user when displayed on<br />
the screen or printed. A file containing text may be<br />
indicated by the extension ".TXT".<br />
toggle switching between two alternative "states" using the<br />
same device (i.e. first action is "on", second is "<br />
off", third is "on" - and so on).<br />
38
<strong>The</strong> <strong>TORCH</strong> <strong>Graduate</strong> <strong>User</strong> <strong>Guide</strong> <strong>Issue</strong> <strong>1.00</strong>, <strong>Nov</strong> <strong>1984</strong><br />
utility a program which performs some kind of general<br />
purpose "housekeeping" or administrative function<br />
for the computer user - usually improving the<br />
efficiency or maintaining the system in some way.<br />
For example, a utility is provided with your <strong>TORCH</strong><br />
computer which will create and display titles for<br />
each user number.<br />
word a group of bytes which can be handled directly by<br />
the processor. Words are of different lengths for<br />
different processors and purposes.<br />
39
<strong>The</strong> <strong>TORCH</strong> <strong>Graduate</strong> <strong>User</strong> <strong>Guide</strong> <strong>Issue</strong> <strong>1.00</strong>, <strong>Nov</strong> <strong>1984</strong><br />
Bibliography<br />
[1] BBC Microcomputer System <strong>User</strong> <strong>Guide</strong> by John Coll<br />
(BBC Publications)<br />
[2] <strong>The</strong> Advanced <strong>User</strong> <strong>Guide</strong> for the BBC Micro by Andrew Bray,<br />
Adrian Dickens and Mark Holmes<br />
(Cambridge Microcomputer Centre)<br />
[3] Acorn 1MHz bus application ncte by Kim Spence-Jones<br />
(Acorn Computer)<br />
[4] BBC Microcomputer System Disc System <strong>User</strong> <strong>Guide</strong> by Brian Ward<br />
(Acorn Computer)<br />
[5] Microsoft MS-DOS 2.11 implementation guide (Microsoft Ltd.)<br />
[6] IBM PC technical manual (IBM)<br />
[7] Western Digital Corporatin <strong>1984</strong> Storage Management Products<br />
Handbook<br />
[8] Intel Microsystem Components Handbook Vol. 1 <strong>1984</strong><br />
[9] <strong>The</strong> IBM PC-DOS Handbook by Richard Allen King (Sybex)<br />
[10] IBM PC-DOS Disk Operating System manual (IBM)<br />
40
<strong>The</strong> <strong>TORCH</strong> <strong>Graduate</strong> <strong>User</strong> <strong>Guide</strong> <strong>Issue</strong> <strong>1.00</strong>, <strong>Nov</strong> <strong>1984</strong><br />
Using the <strong>Graduate</strong> with BBC Micros fitted with <strong>TORCH</strong> Z80s<br />
To use your <strong>TORCH</strong> Z80 processor simply leave the <strong>Graduate</strong><br />
switched off and MCP or CPN will display their usual startup<br />
messages and operate as usual.<br />
Some versions of <strong>TORCH</strong> MCP may fail to display a prompt<br />
initially. If this happens leave the <strong>Graduate</strong> turned on but with<br />
no disc in drive A until the MCP prompt is displayed then turn it<br />
off.<br />
If using GDFS remember that, as with all BBC Micro programs,<br />
a must be done before use. <strong>The</strong> best order to do this<br />
is: turn on BBC Micro, do a + , turn n <strong>Graduate</strong> and put<br />
GDFS Systems Disc in drive A, press to activate GDFS.<br />
A further + may be needed after some games have<br />
been run. If this is the case make sure you hold down until the<br />
'BBC Computer' message appears on the screen. GDFS will not run<br />
with the <strong>TORCH</strong> CPN operating system.<br />
41
<strong>The</strong> <strong>TORCH</strong> <strong>Graduate</strong> <strong>User</strong> <strong>Guide</strong> <strong>Issue</strong> 1.30, <strong>Nov</strong> <strong>1984</strong><br />
YOUR COMMENTS ARE WELCOME!<br />
<strong>TORCH</strong> Computers Ltd takes every effort to provide complete and<br />
accurate documentation of its products. Your observations and<br />
suggestions can help us to do so in the way that best suits your<br />
requirements.<br />
Please spare a few minutes of your time to fill in and return this<br />
form.<br />
Please circle your answers to the following questions:<br />
1. Have you found this guide useful? YES NO<br />
2. Have you found this guide accurate? YES NO<br />
3. Is the style of writing easy to read? YES NO<br />
4. Do you like the style and size of the text? YES NO<br />
5. Do you like the style and size of the guide? YES NO<br />
If you have had to answer NO to any of the above questions, or wish<br />
to make any other point, please write your comments below. If there<br />
is not enough space use the back of this sheet or attach additional<br />
pages.<br />
Name: Telephone number:<br />
Address:<br />
Please return to: <strong>TORCH</strong> Computers Ltd.,<br />
Abberley House, Great<br />
Shelford, Cambridge,<br />
CB2 50Q.<br />
GRA1
To re-assign colours - COLOUR<br />
Syntax: Colour logical-colour, actual colour<br />
Where in 80 column modes:<br />
Logical colour 1 is foreground<br />
Logical colour 0 is background<br />
and in 40 column nodes:<br />
Logical colour 3 is foreground<br />
Logical colour 2 and 1 are intermediate<br />
Logical colour 0 is background<br />
Actual colour is given by:<br />
0 = Black<br />
1 = Red<br />
2 = Green<br />
3 = Yellow<br />
4 = Blue<br />
5 = Magenta<br />
6 = Cyan<br />
7 = White<br />
8 = Flashing Black-White<br />
9 = Flashing Red-Cyan<br />
10 = Flashing Green-Magenta<br />
11 = Flashing Yellow-Blue<br />
12 = Flashing Blue-Yellow<br />
13 = Flashing Magenta-Green<br />
14 = Flashing Cyan-Red<br />
15 = Flashing White-Black<br />
Example: Colour 1, 5<br />
In 80 column node, sets foreground colour to magenta.


