Dr. Abdullah Bakhoum - Steam
Dr. Abdullah Bakhoum - Steam
Dr. Abdullah Bakhoum - Steam
Create successful ePaper yourself
Turn your PDF publications into a flip-book with our unique Google optimized e-Paper software.
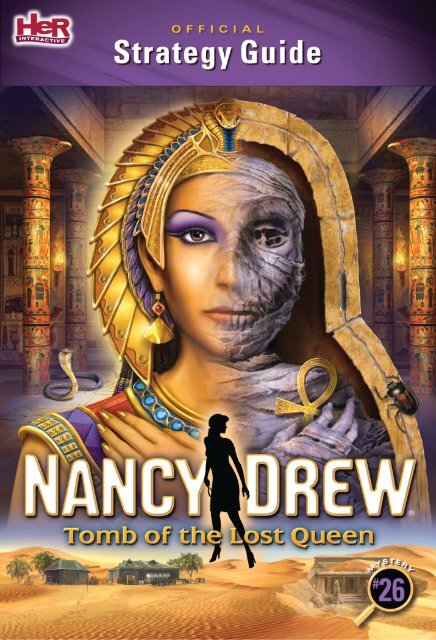
Her Interactive, Inc.<br />
Copyright Her Interactive, Inc., 2012<br />
No part of this booklet may be reproduced, transmitted, or adapted<br />
in any form without the written consent of Her Interactive Inc.<br />
Copyright ©2012 Her Interactive, Inc. HER INTERACTIVE, the HER INTERACTIVE<br />
logo and DARE TO PLAY are trademarks of Her Interactive, Inc. NANCY DREW is<br />
a trademark of Simon & Schuster, Inc. and is used under license. Copyright in<br />
the NANCY DREW books and character is owned by Simon & Schuster, Inc. All<br />
rights reserved. Licensed by permission of Simon & Schuster, Inc. Other brands or<br />
product names are trademarks of their respective holders.<br />
Written by: Terry Munson<br />
Design by: Sonja Morris<br />
Cover Design by: Mark Tolleshaug<br />
Made in the USA<br />
Her Interactive, Inc.<br />
1150 - 114th Ave. S. E., Suite 200<br />
Bellevue, WA 98004<br />
www.HerInteractive.com
2<br />
Table of Contents<br />
An Archaeological Breakthrough? ..........3<br />
Wait! Don't Run Off into<br />
the Desert Yet! ............................................3<br />
Into the Storm ................................................4<br />
Your Digs at the Dig Site ..............................4<br />
Your Move .........................................................4<br />
Camp Tent .................................................. 5<br />
Lily Crewe ........................................................5<br />
Play to Win ......................................................6<br />
Review Jon's Notes ......................................6<br />
The Antiquities Tent .....................................6<br />
Antiquities Tent ....................................... 7<br />
Underground Essentials ..............................7<br />
<strong>Dr</strong>. <strong>Abdullah</strong> <strong>Bakhoum</strong> ..................................8<br />
"Grapes are eaten one by one." ................8<br />
Explore the Tomb ...........................................8<br />
Tomb ............................................................ 9<br />
Slider Puzzle ....................................................10<br />
Break the Seal ................................................10<br />
Curses ...............................................................10<br />
Restoring Lost Art ........................................11<br />
The Site Grid Book ........................................11<br />
A Guided Tour ..................................................11<br />
Dylan Carter ....................................................12<br />
Oil and Water ..................................................12<br />
Aliens Built the Pyramids ...........................12<br />
Jamila El-Dine .................................................13<br />
Pick it Out .........................................................13<br />
An Illuminating Study ...................................13<br />
Weighty Matters ..........................................14<br />
"Mistakes drive away<br />
the unteachable." .......................................14<br />
Four Medallions? ...........................................14<br />
A Curse Upon You ...........................................14<br />
Talk to <strong>Abdullah</strong> ..............................................15<br />
Found in Translation ......................................15<br />
What Lies Inside ............................................15<br />
Slashed..............................................................16<br />
A Good Word Unheard..................................16<br />
The Eye of Horus............................................16<br />
Apocalypse Purse .........................................17<br />
Scarab Spiders ...............................................17<br />
Decode the Past ............................................18<br />
International Man of Mystery? ...............18<br />
Lily's Belongings ............................................18<br />
<strong>Abdullah</strong>'s Assets .........................................19<br />
The Cat's Meow .............................................19<br />
Move the Columns ........................................19<br />
Out on a Ledge ................................................20<br />
Great Expectations ......................................20<br />
Order of the Gods ..........................................20<br />
A Coffin Inside a Coffin ................................22<br />
Talk to Dylan ....................................................22<br />
Call Beatrice ....................................................22<br />
Spell it Out .......................................................23<br />
Piecing Papyrus Together ...........................23<br />
A Little Walk and Talk ..................................24<br />
Everything in its Place .................................24<br />
Dig Around ........................................................24<br />
Unscramble......................................................25<br />
Excavate ...........................................................25<br />
"What comes easily is lost easily." .........26<br />
Make a Few Calls ...........................................26<br />
Turn on the Lights ..........................................26<br />
While the Cat is Away… .............................27<br />
Slithering to a Solution ................................27<br />
Confront Your Destiny .................................27<br />
An Unwelcome Guest ..................................28<br />
"The dreams of cats are all mice." ...........28<br />
A Fake Mummy? ............................................28<br />
Gold… and a Gate ...........................................29<br />
Time for a Distraction ..................................29<br />
For the Birds ....................................................29<br />
Open Up .............................................................29<br />
Place a Call .......................................................30<br />
Crack it Open ...................................................30<br />
An Audience with the Queen ....................30<br />
Dial M for Mummy .........................................31<br />
"Malice drinketh its own poison." ............31<br />
Sassy Detective Awards ............................32
An Archaeological<br />
Breakthrough?<br />
Far beyond Egypt's Valley of the Kings is a barren place where sandstorms sculpt the<br />
desert and few humans have ventured for countless centuries. Sixty years ago severe<br />
weather exposed the entrance of an undiscovered tomb. When a British archaeological<br />
team embarked across the desert to confirm the site location, the group disappeared. Now<br />
a modern team of archaeologists from Kingston University are on the verge of a historic<br />
breakthrough, but they're plagued by accidents and internal strife. Until recently team leader<br />
<strong>Dr</strong>. Jon Boyle kept these egos and tempers focused on the archaeological excavations, but a<br />
suspicious accident left him injured and bedridden in a Cairo hospital. Is someone attempting<br />
to shut down the project, or is the entire Kingston University team plagued by an ancient<br />
curse? <strong>Dr</strong>. Boyle has asked you, Detective Nancy <strong>Dr</strong>ew to investigate the site and find the<br />
persons behind all the trouble inside the unexplored tomb.<br />
Wait! Don't Run Off into the Desert Yet!<br />
There is something important you need to know about this guide before you begin your<br />
game. While these pages reveal tips, steps and solutions for completing this mystery on<br />
Amateur and Master Sleuth levels, we don't reveal the culprit. That's a secret you need to<br />
uncover for yourself as you investigate the tomb of the lost queen! We're going to assume that<br />
you already know about basic game functions, like how to move, interrogate and use items<br />
in your inventory. If you decide to play at the Amateur Sleuth difficulty level, some of the<br />
steps in this guide are not necessary. Because this Nancy <strong>Dr</strong>ew mystery features a redesigned<br />
interface, we included an array of helpful tips to make the most of your<br />
Egyptian adventure:<br />
• On the right side of the new interface are two tabs with arrows: Tasks and Journal. The Task list is a great<br />
way to remind yourself of immediate and distant goals throughout your investigation. When you complete<br />
a task, check it off so you know exactly what you need to do next. The Journal menu summarizes your<br />
discoveries and interactions with other suspects at the dig site. Be sure to consult your journal when you<br />
need to reference an Egyptian name.<br />
• At the bottom of the screen is a display of items in your inventory. At a glance you can see ten to eleven<br />
inventory items at a time, but don't panic if you don't see what you need. Directly above your inventory is<br />
a slider tab that you can click on and move from left to right. As you move this slider tab, you'll see the<br />
rest of the items in your inventory. If you move (or hover) the cursor arrow over an inventory item, you'll<br />
see the name of the item that the cursor arrow is over.<br />
• Early in your adventure you'll find a map in the antiquities tent. At first it doesn't look like much, but as<br />
you explore and open new passages and rooms inside the tomb, these locations will appear on your map.<br />
You'll also find that this guide refers to these locations as "Tunnel 2" or "Tunnel 3." If you're not sure what<br />
the guide is referring to, pull out your map and these landmarks will make sense.<br />
• Remember <strong>Dr</strong>. Boyle's warning about the dig site: Don't trust anyone. If you need advice or help, use your<br />
cellular phone to call Professor Beatrice Hotchkiss or <strong>Dr</strong>. Boyle. These two resources are not at the site, so<br />
you can ask them sensitive questions without jeopardizing your cover. Also remember that the thick stone<br />
walls inside the tomb block cellular phone signals. Exit the tomb before you attempt to place a call.<br />
• Depending on how you play the game, you might find that you can complete parts of this case in a<br />
sequence that's completely different from the steps outlined in this guide. If you find yourself stuck<br />
later and need to refer to this booklet, pay close attention to your interactions and what you examined.<br />
Sometimes examining seemingly insignificant items or asking an innocent or innocuous question pays off<br />
with a huge break in the case. We encourage you to try the extra tasks and assignments outside of the<br />
steps in this guidebook. We wrote this guide to cover the basic steps for completing the game, but you'll<br />
have more fun discovering undocumented surprises and background information on your own.<br />
3
4<br />
Into the Storm<br />
Your adventure begins with a brief history of<br />
the dig site. As the storm approaches you see<br />
lightning and hear a scream. The scene fades<br />
away and you're on the phone with<br />
Jon Boyle—the archaeological team leader. He<br />
mentions that the doctors at the hospital are<br />
concerned about the two blows on the back<br />
of his head. Apparently whatever hit him<br />
struck the same location twice with similar<br />
force. Jon asks you to investigate, but orders<br />
you not to accuse anyone of attacking him. He<br />
thinks that is too risky.<br />
Your Digs at the Dig Site<br />
Snoop around the tent without drawing attention to yourself from Lily Crewe. It's easier to search<br />
places when she's not around. Jon suggested that you find his notes, but his bed and belongings<br />
appear to be adjacent to Lily. Start on your side of the tent—your bed is the first on the right.<br />
Pick up the book on the nightstand and read about the lost queens. Note the phone number for<br />
Professor Beatrice Hotchkiss. Now open your footlocker and take the hieroglyph practice book<br />
and hieroglyph dictionary. You will need these later when you venture underground.<br />
Your Move<br />
At the center of the room is a table with a<br />
game board that appears to be well-used.<br />
Step up and take a look, but don't worry<br />
about playing it right now. Walk over to the<br />
bed and partition in the back left corner<br />
of the tent. This looks like Jon's bed and<br />
footlocker. Lily confirms this when you try<br />
to take his notes. Ms. Crewe asserts herself<br />
as your supervisor during this temporary<br />
power vacuum at the dig site, but if you ask<br />
her about the board game, you can turn this<br />
awkward and potentially sour moment into a<br />
positive exchange.
camp tent<br />
jon’s<br />
bunk<br />
lily’s<br />
bunk<br />
senet game<br />
abdullah’s<br />
bunk<br />
nancy’s<br />
bunk<br />
Lily Crewe<br />
With Jon's departure, Lily Crewe is the only other<br />
American remaining on the dig's archaeological<br />
team. While Lily implies that your shared<br />
nationality offers some sort of kinship with her,<br />
she is quick to remind you that she has seniority<br />
and authority over you while <strong>Dr</strong>. Boyle is in the<br />
hospital. This brazen assumption and Lily's need<br />
for power and leverage on the team is probably<br />
one of the reasons others do not care for her.<br />
Aside from playing Senet, Lily doesn't want you<br />
doing much around the dig site and she forbids<br />
you from looking through <strong>Dr</strong>. Boyle's notes. Jon<br />
Boyle warned you not to trust anyone here, but it's difficult to determine if Lily is afraid that<br />
you'll uncover something incriminating or that you'll upend her efforts to gain recognition and<br />
seniority on the dig team.<br />
5
6<br />
Play to Win<br />
Ask Lily if you can play a game of Senet. It's not difficult to beat her if you focus on a blocking<br />
strategy and leave her pawns behind your game pieces. Unless Lily is extremely lucky, you<br />
should be able to keep two or even three of her pawns blocked behind a pair or trio of your<br />
game pieces—especially if you also use pieces to occupy "safe" squares. If you play carefully,<br />
thoughtfully and keep most of Lily's pieces behind you, she will run out of opportunities to<br />
roll past you before you exit all your pawns from the game board.<br />
Review Jon's Notes<br />
Return to Jon's bed and take his notebook next to the bedside lamp. Now open his footlocker<br />
and examine the contents. There is a reference letter about you from Franklin Rose at the<br />
Beech Hill Museum—that's the place where you solved the secret of the Scarlet Hand. Look<br />
around in the folded clothes and you'll also see a lighter. You might need this for dark spaces,<br />
so add it to your inventory.<br />
The Antiquities Tent<br />
Leave the camp tent, walk forward and turn<br />
to your right. You'll see another tent, this is<br />
the antiquities tent, a place protected from<br />
the sun and sand where the scientists can<br />
study the artifacts found inside the tomb.<br />
Enter this tent and look around. Besides<br />
looking for clues, search the contents here for<br />
important items that you can use later when<br />
you're underground. While there are tables<br />
on both sides of the antiquities tent, start<br />
searching on the left side.
antiquities tent<br />
bird<br />
tile<br />
map<br />
flashlight<br />
dig book<br />
amulet<br />
box<br />
dig<br />
tools<br />
cat amulet<br />
Underground Essentials<br />
There is a yellow flashlight recharging on the table near the left side of the antiquities tent.<br />
Add it to your inventory and then locate the unfinished tomb map. Did <strong>Dr</strong>. Boyle draw this?<br />
Take the map and then step back from the table. You should see a book to the right. Add it to<br />
your inventory then examine the pages about relics. There is also an old tile here. Is it a piece<br />
to a larger puzzle? Add the tile to your inventory, then exit the antiquities tent and follow the<br />
carefully marked path leading down to the tomb entrance.<br />
7
8<br />
<strong>Dr</strong>. <strong>Abdullah</strong> <strong>Bakhoum</strong><br />
While Lily Crewe struggles to attain recognition<br />
and seniority among the Kingston University<br />
team, <strong>Dr</strong>. <strong>Abdullah</strong> <strong>Bakhoum</strong> assumed authority<br />
the moment <strong>Dr</strong>. Boyle hit the floor. He's a<br />
logical successor considering his prestige as<br />
a recognized Egyptologist, but his outspoken<br />
desires for additional fame—along with his<br />
abrasive mannerisms—undermine his efforts to<br />
gain admiration around the dig site. <strong>Abdullah</strong><br />
taunts you at times, but he's more than willing to<br />
assign you to minor tasks surrounding his work.<br />
This could mean that he's testing your abilities<br />
as an aspiring Egyptologist, but it probably has more to do with the fact that people detest<br />
him and don't want to work around him. <strong>Dr</strong>. <strong>Bakhoum</strong> appears too absorbed in work to create<br />
accidents, but remember <strong>Dr</strong>. Boyle's warning: Don't trust anyone.<br />
"Grapes are eaten one by one."<br />
Step inside the first room of the tomb and<br />
turn around. The walls are covered with<br />
colorful ancient hieroglyphs! There is a man<br />
working beneath some scaffolding. Introduce<br />
yourself to <strong>Dr</strong>. <strong>Bakhoum</strong>. Ask him what he<br />
is working on and he'll ask you to assist him<br />
with translating hieroglyphs. If the guy is as<br />
good as he asserts he probably could translate<br />
everything at a glance, so he's either testing<br />
or taunting you. Climb the ladder and use<br />
your dictionary to translate the hieroglyphs<br />
below the Anubis painting.<br />
Explore the Tomb<br />
Step back down the scaffolding ladder and walk to the table in the middle of the room.<br />
On the table you'll see a folding shovel. Pick up the shovel and add it to your inventory. <strong>Dr</strong>.<br />
<strong>Bakhoum</strong> and the others on the Kingston dig team probably scrutinized most of this area, so<br />
try exploring another region inside the tomb. Look for the passage between Horus (the man<br />
with a blue falcon-like head) column and the Osiris column—you can check out the picture<br />
below—and follow the hall to the next series of dusty rooms.
the tomb<br />
jamila<br />
(location 1)<br />
inner<br />
tomb<br />
tunnel<br />
4<br />
tunnel<br />
5<br />
tunnel<br />
2<br />
slider<br />
puzzle<br />
tunnel<br />
6<br />
tomb<br />
jamila<br />
(location 2)<br />
cat tomb<br />
cobra<br />
puzzle<br />
canopic<br />
jars<br />
column puzzle<br />
tunnel<br />
3<br />
scarab puzzle<br />
tunnel<br />
1<br />
abdullah<br />
9
10<br />
Slider Puzzle<br />
Follow the passage until you come to a room where someone has left a light on a tripod.<br />
Directly to the left is a puzzle on the wall, but the red scarab is missing. Continue past the<br />
light and through the next room until you find a dead end. On the left is another puzzle that<br />
seems to be something that <strong>Dr</strong>. Boyle mentioned in his notes. You can use his notes to spell<br />
out the solution or check out one of the two answers found in the photos below.<br />
Amateur Sleuth Master Sleuth<br />
Break the Seal<br />
After you solve the puzzle a panel slides away on the right. Turn and examine the double<br />
doors with the seal across the handles. Break the seal, equip your flashlight and step inside<br />
the chamber. Other members of the dig team arrive to explore this new room, but your<br />
flashlight battery suddenly fails. Wasn't it fully recharged inside the antiquities tent? <strong>Dr</strong>.<br />
<strong>Bakhoum</strong> orders everyone out of the tomb.<br />
Curses<br />
Ask Lily what she thinks of the newly<br />
discovered room and she tells you that<br />
something didn't feel right. It's hard to tell<br />
if she is frightened or if this is an attempt to<br />
scare you. She orders you not to return to<br />
the room. Ask her about the curse and she<br />
admits to believing in curses, which seems<br />
strange for an archaeologist working in<br />
Egypt. Considering that curses are a part of<br />
Egyptology, why would Lily choose this sort<br />
of profession? It doesn't make sense unless it's<br />
a ruse to scare you away.
Restoring Lost Art<br />
Perhaps your faulty flashlight needs a quick recharge. Return to the antiquities tent and insert<br />
the flashlight inside the recharger on the desk. What is up with the sparks and smoke? Did<br />
someone tamper with the recharger cord? Both positive and negative wires are twisted and<br />
exposed. Examine the rest of the desk. Read the crumpled paper next to the lamp. Smooth<br />
out the paper and read about Sonny Joon's alien seminar. Turn around and examine the other<br />
desk. Take the pick and the brush before reassembling the green amulet. You can identify<br />
pieces of the cat's tail and leg, but all the other green pieces need to be sorted and rotated<br />
according to shapes. It's almost complete except for a missing piece. Did someone on the<br />
team lose or conceal this final piece?<br />
Amateur Sleuth Master Sleuth<br />
The Site Grid Book<br />
Archaeologists keep meticulous records about<br />
artifact locations at dig sites, so someone on<br />
the dig team recorded where the cat amulet<br />
pieces were discovered. Examine the shelves<br />
at the back of the antiquities tent and pull out<br />
the leather-bound site grid book. Inside you'll<br />
find a tomb map divided up into squares. The<br />
cat amulet had a tag marked "N13E2." There is<br />
a box at the top of the grid map with the same<br />
number. This was where the cat amulet was<br />
found—and where you need to investigate.<br />
A Guided Tour<br />
A young gentleman is relaxing in front of the<br />
antiquities tent. Introduce yourself to Dylan<br />
Carter. Ask him what he is doing at the site and<br />
then what exactly it is that he does. He explains<br />
that he is a tour guide. Business must be slow<br />
this far from the other popular sites at the Valley<br />
of the Kings outside Cairo. Dylan isn't cleared to<br />
enter the tomb and this setback will inevitably<br />
disappoint tourists who travel sixty miles from<br />
Cairo. Ask Dylan if he has any information about<br />
Egyptology. He gives you a chart that outlines a<br />
pantheon of Egyptian gods and goddesses.<br />
11
12<br />
Dylan Carter<br />
Tourism is an important business in Egypt and<br />
most tour operators assign guides to the biggest<br />
attractions—like the Great Pyramids. That's why<br />
it seems more than a little strange that Dylan<br />
Carter is so far away from the most profitable<br />
ancient monuments, especially when the Kingston<br />
University dig team forbids him to enter the<br />
tomb. What sort of tourist would travel across<br />
the desert just to stare at a hole in the sand?<br />
Any profit-minded guide would have packed his<br />
brochures and returned to the crowds at the<br />
Valley of the Kings. Carter claims that tourists<br />
will come to the tomb when they hear about the curse, which might imply that he is betting<br />
his financial future on more misfortune for the team. If Carter can't bank on a natural accident,<br />
would he go to the trouble of creating one?<br />
Oil and Water<br />
Wrap up your conversation with Dylan and<br />
stroll over to the water truck. The big plastic<br />
tank on the flatbed is the reservoir for the<br />
camp water supply. You can pour yourself<br />
a cup of water, but take a moment to locate<br />
the bottle of lamp oil on the right side of<br />
the truck. Pick up the lamp oil and add it to<br />
your inventory. If you can find a lamp inside<br />
the tomb, you could use it as a light source.<br />
It might not be as bright as a flashlight, but<br />
a glowing lamp would allow you to explore<br />
new spaces.<br />
Aliens Built the Pyramids<br />
Leave Dylan to his suntan and return to the<br />
tomb. The site grid book inside the antiquities<br />
tent indicated that the cat amulet location—<br />
N13E2—was at the north end of the tomb.<br />
You entered the tomb from the south, so keep<br />
walking straight past the rows of columns<br />
and then follow the passage north. Along the<br />
way you see a young woman examining the<br />
walls. Is this another dig team member? You<br />
saw her once before when you opened the<br />
queen's chamber. Stop and ask her what she is<br />
doing inside the tomb.
Jamila El-Dine<br />
If you believe in first impressions more than<br />
curses Jamila El-Dine is the strongest primary<br />
suspect at the dig site. Jamila tells you that she<br />
is a follower of Sonny Joon's alien-intervention<br />
theories. That's why she's searching for<br />
otherworldly proof among the dust-covered<br />
artifacts throughout the tomb. The Kingston<br />
University team lumps Jamila in with Dylan<br />
Carter: She's not welcome underground despite<br />
signing on as a local volunteer. That's why<br />
Jamila spends much of her time sneaking around<br />
in the shadows. Jamila insists that she doesn't<br />
believe in the curse and that her only concern is finding evidence that refutes <strong>Dr</strong>. <strong>Bakhoum</strong>'s<br />
Egyptology theories. If this is true, how far would she go to stop <strong>Abdullah</strong>? Staging accidents<br />
might be an effective way to scare off the remaining archaeologists.<br />
Pick It Out<br />
Ask Jamila about aliens. She won't make you a believer, but it's interesting to catch up on<br />
this latest installment of Sonny Joon's business ventures. It seems like only yesterday you<br />
were cleaning up the chaos he created during his stint at the Beech Hill Museum. Finish your<br />
conversation and continue to the wall at the end of the passage. According to the site map,<br />
this is where the team found the cat amulet. Use your pick to search the sand and find the<br />
missing piece. There is a bird tile in the painting. Use the pick on the wall to remove the tile.<br />
Add the tile to your inventory.<br />
An Illuminating Study<br />
Walk back to the antechamber and then<br />
follow Tunnel 3 to the new room where<br />
you broke the seal on the door. Without<br />
your flashlight it's almost impossible to see<br />
much, but if you walk into the room and<br />
turn around, you should see something in<br />
the upper right corner. Examine the object<br />
and you'll discover that it's an ancient lamp.<br />
Use the oil and the lighter on the lamp to<br />
illuminate the room. Illuminate the room by<br />
repositioning the mirrors according to the<br />
solution in the photo to the right.<br />
13
14<br />
Weighty Matters<br />
Examine the sarcophagus at the other end of<br />
the chamber. The massive dimensions and<br />
ornately carved stone lid probably weigh more<br />
than the water truck parked next to the tent.<br />
Try opening the lid. It's clear that the lid is<br />
too heavy for you and the rest of the team to<br />
move, but there is a large chip where a pole<br />
could be inserted and used as a lever to move<br />
the lid. You hear a crash when you try to open<br />
the sarcophagus. The noise reverberates off<br />
the stone walls, but it's clear that something<br />
happened near the tomb entrance.<br />
"Mistakes drive away the unteachable."<br />
Turn around and look along the left side of<br />
the room. There are broken spears here.<br />
These relics are old and it's doubtful that the<br />
wood shafts alone are strong enough to still<br />
function as a lever. Look closely at the wall<br />
where you found the spears and you'll see a<br />
tile with an etched circular design. You can't<br />
do anything with it right now, but perhaps<br />
there is another artifact somewhere else<br />
in the tomb that can help you unlock this<br />
unusual puzzle.<br />
Four Medallions?<br />
Insert the spears into the hole in the<br />
sarcophagus lid and give it a nudge. This<br />
makeshift lever isn't strong enough to remove<br />
the lid. Turn around again and examine<br />
the stone chest in the corner of the room.<br />
Thankfully you don't need another lever<br />
to open this lid. Inside the chest are four<br />
jars. Open each jar and add the medallions<br />
to your inventory. Are these circular discs<br />
valuable treasure or important puzzle pieces<br />
that could potentially unlock another hidden<br />
chamber somewhere inside the tomb?<br />
A Curse Upon You<br />
When you rearranged the mirrors around the<br />
lamp you created enough light to illuminate<br />
the artwork and writing on the chamber<br />
walls. Just above the lamp is a message... or<br />
a warning. Use your dictionary to translate<br />
the hieroglyphs. The last part of the message<br />
doesn't make sense at all. Take a closer look<br />
at the bottom section and try decoding the<br />
message by hand—first try using vowels like<br />
O, E and A in the script. If you need help, the<br />
solution to this gloomy threat is spelled out in<br />
the photograph to the right.
Talk to <strong>Abdullah</strong><br />
Return to the antechamber and talk to<br />
<strong>Dr</strong>. <strong>Bakhoum</strong>. Apparently the scaffolding<br />
collapsed but he doesn't seem too upset.<br />
Ask him about the scaffolding and the<br />
hieroglyphs. Change the subject to the curse<br />
and Jamila. Mentioning Jamila stirs up hostile<br />
emotions. <strong>Dr</strong>. <strong>Bakhoum</strong> suddenly departs in<br />
an attempt to chase Jamila out of the tomb.<br />
Found in Translation<br />
<strong>Dr</strong>. <strong>Bakhoum</strong>'s hasty exit left you with an important opportunity to investigate the area<br />
around the scaffolding and the remaining hieroglyphs. Add the thick—and significantly<br />
sturdy—scaffolding wood to your inventory. Use your dictionary on the hieroglyphs and<br />
you'll find that a portion doesn't translate. Examine the last part of the message. To decode<br />
this final section, substitute vowels in certain areas along with the letter T. The photo below<br />
shows the solution. Did <strong>Dr</strong>. <strong>Bakhoum</strong> already decode this message?<br />
What Lies Inside<br />
Carry the piece of scaffolding plank back to the burial chamber where you translated the<br />
curse. Jamila apparently eluded <strong>Dr</strong>. <strong>Bakhoum</strong> because she is studying the inscriptions on<br />
a wall. Wedge the spears and the scaffolding board together inside the notch in the stone<br />
lid and the lid slides off. There is a puzzle here that you can't unlock until you figure out<br />
the hieroglyphs so decode the message across the coffin. If you need help, the photo in the<br />
corner reveals the answer.<br />
15
16<br />
Slashed<br />
Exit the tomb and glance over at the water<br />
truck as you reach the top of the stairs. The<br />
sand surrounding the vehicle appears damp.<br />
Did the tank spring a leak? Someone slashed<br />
the water tank with a metal shard. Pick up<br />
the piece of metal and examine it. You can<br />
make out the words "visitors from the skies."<br />
Question Dylan about the water tank and<br />
then ask him if he'll help you distract Lily.<br />
He agrees to go along with your ruse if you<br />
convince <strong>Dr</strong>. <strong>Bakhoum</strong> that Mr. Carter is<br />
completely trustworthy.<br />
A Good Word Unheard<br />
Return to <strong>Dr</strong>. <strong>Bakhoum</strong> and discuss Dylan.<br />
No matter what you say, <strong>Abdullah</strong> isn't<br />
convinced. He has a strong bias against guides<br />
and tourists in Egypt because he thinks<br />
these outsiders often steal small pieces of<br />
the pyramids and other important artifacts.<br />
<strong>Abdullah</strong> seems like the sort of person who<br />
has difficulty changing his opinions. Make<br />
your way back up the northernmost passage<br />
to look for Jamila. She is gone but a red tile<br />
appeared near the pile of sand in the corner.<br />
Pick up the missing red scarab tile. Add it to<br />
your inventory and then find Jamila in the<br />
east half—Tunnel 3 on your map—of the<br />
tomb. She'll leave when you mention that you opened the sarcophagus.<br />
The Eye of Horus<br />
Jamila was in such a hurry to see the coffin<br />
that she left her handbag unattended. At least<br />
she had the sense to lock the latch. Deduce<br />
the correct combination by reviewing the<br />
space pamphlet and the relic book. To open<br />
the handbag latch you need to press certain<br />
parts of the Horus eye in a specific order.<br />
You could randomly press the pieces until it<br />
opens, but this might waste precious time. If<br />
you're still locked out, press the lock pieces<br />
in the numeric order shown in the photo on<br />
the right.<br />
4<br />
1<br />
2<br />
3
Apocalypse Purse<br />
Snoop around inside the unlocked bag. All this clutter suggests that Jamila isn't the type<br />
of person who travels light. There are metal spaceship toys with a metallic edge that looks<br />
exactly like the piece of metal used to puncture the water tank. Near the top of the bag are<br />
two books. One is an archaeological textbook covered in handwritten notes. The other is a<br />
book about the Annunaki written by Sonny Joon. On the left side of the handbag is a scrap of<br />
paper containing grids and letters. Is this a combination? Add the paper to your inventory.<br />
Scarab Sliders<br />
Make your way back toward the entrance but<br />
stop at the scarab puzzle on the wall. Insert<br />
the red scarab tile and solve the puzzle. For<br />
Amateur level, slide green right, up and left.<br />
Now slide black up, white up, right, up and<br />
right. Slide red up, right and down. Slide<br />
white down, black left, down and right. For<br />
Master level, slide green right, black up, left.<br />
Now slide green up and then left. Slide red<br />
up, green right, down. Slide black right and<br />
then down. Now slide white right, down,<br />
and then left. Slide green left and then black<br />
down and then left. Slide green up, right,<br />
down, left, up, left and finally up.<br />
Master Sleuth<br />
Amateur Sleuth<br />
17
18<br />
Decode the Past<br />
A panel slides away and reveals a second<br />
puzzle. Step up and look at it. You can't solve<br />
this yet, but there is a clue you can decode<br />
from the hieroglyphs written on the right side<br />
of the door: "Come ye hither, gods in the train<br />
of Horus. And let the steps ascend. We are the<br />
four of Horus. I am the air that sweeps up the<br />
Nile. I am the hunter who faces to greet the<br />
new day. I am Imsety, protector of the south.<br />
I am the cry that soars toward the setting sun.<br />
Together we, the gods in the train of Horus,<br />
guard the corners."<br />
International Man of Mystery?<br />
Leave the slider puzzle for now and exit the<br />
tomb. Judging from Dylan's reaction to your<br />
news about <strong>Dr</strong>. <strong>Bakhoum</strong>, he's not surprised<br />
that <strong>Abdullah</strong> won't trust him. Despite<br />
your failure to convince <strong>Dr</strong>. <strong>Bakhoum</strong> that<br />
Dylan is trustworthy, Dylan is still willing to<br />
distract Lily for you. Wait until he leaves and<br />
then search through the contents inside the<br />
backpack next to his chair. What is Dylan<br />
doing with a snake handling bag and why<br />
does he have so many guide certifications<br />
throughout the world?<br />
Lily's Belongings<br />
Snoop through Lily's side of the tent. It looks<br />
like she added an electronic lock to her<br />
footlocker, but she dropped the lock manual on<br />
the floor. Read the manual. Unfortunately there<br />
isn't a combination transparency anywhere.<br />
There is a book about curses on her bed.<br />
Considering the accidents lately, this grim<br />
reading doesn't offer any reassurances. Check<br />
out the sunglasses next to her bed. A decorative<br />
stone or gem is missing near the hinge. You<br />
don't have a lot of time to snoop, so make your<br />
way to <strong>Dr</strong>. <strong>Bakhoum</strong>'s side of the tent.
<strong>Abdullah</strong>'s Assets<br />
<strong>Dr</strong>. <strong>Bakhoum</strong> left a dirty plate on the floor next to his bed. He doesn't have a high-tech lock<br />
on his footlocker like Lily, but opening the padlock is just as impossible without a key. Your<br />
search of Lily's and <strong>Bakhoum</strong>'s spaces doesn't yield much, but take advantage of the solitude<br />
and call Beatrice Hotchkiss. Her phone number was inside your copy of The Lost Queens<br />
of Egypt. Ask her about the canopic jars that you found inside the stone chest. She vaguely<br />
identifies the four canopic gods for you.<br />
The Cat's Meow<br />
Beatrice can't help you with all the answers,<br />
so politely conclude your phone call. Exit the<br />
vacant tent and walk over to the antiquities<br />
tent. Attach the missing piece of the cat<br />
amulet to the figurine and add the intact cat<br />
amulet to your inventory. It's time to return<br />
to the tomb.<br />
Move the Columns<br />
Return to the passage where you solved the slider puzzle. Using the deciphered text, the<br />
relics book and information from Beatrice, it looks like you need to place the four medallions<br />
in the panel in the correct locations. Clockwise from the top of the panel, insert the baboon,<br />
jackal, human and falcon medallions. You hear something click behind the panel, but nothing<br />
else happens. There is a second step to this puzzle: Rotate the medallions in this order:<br />
falcon, falcon, falcon, baboon, human. If you're stuck, check out the photos below.<br />
19
20<br />
Out on a Ledge<br />
Rotating the medallions in the panel altered the columns in the antechamber. Climb the<br />
scaffolding ladder and turn around. The rearranged pillars formed a row of high stepping<br />
stones! Trust your balance and jump from pillar to pillar until you reach the distant ledge.<br />
Explore the room and read the lost letter. There is a clue here about a second exit. Look at the<br />
mural on the wall and note the positions of the Egyptian gods. Turn around and eavesdrop on<br />
the conversation between Lily and <strong>Abdullah</strong>.<br />
Amateur Sleuth Master Sleuth<br />
Great Expectations<br />
Return to the antechamber near the entrance and talk to <strong>Dr</strong>. <strong>Bakhoum</strong> about the columns<br />
and Lily. He appreciates your opinions on alien technology, although he might be acting civil<br />
because he needs a new assistant. <strong>Abdullah</strong> confesses that he sees the younger version of<br />
himself whenever he is around Lily. Perhaps he'll reconsider and give her another chance.<br />
Order of the Gods<br />
Return to the burial chamber and examine<br />
the square puzzle on top of the coffin. If<br />
you combine the information about the<br />
Egyptian pantheon that Dylan gave you and<br />
the order of the gods shown in the mural<br />
(look at the photo on this page) you should<br />
be able to sort out this puzzle, but if you're<br />
stuck, try rearranging the puzzle vertically<br />
and horizontally row-by-row, starting at<br />
the bottom and working your way up. The<br />
solutions are on the next page.
Amateur Sleuth<br />
Master Sleuth<br />
21
22<br />
A Coffin Inside a Coffin<br />
It's not surprising that there is a coffin inside a coffin—ancient Egyptians often used a series<br />
of coffins inside sarcophagi. If you use your dictionary on the upper plate, nothing seems<br />
to make sense. Try decoding the upper plate on your own or use the solution in the photo<br />
below. Is it a reference to the queen's children? Examine the lower plate. If you knew about<br />
the seven children, you might be able to open this coffin. It's unlikely that <strong>Dr</strong>. <strong>Bakhoum</strong> will<br />
offer assistance, so your best option is to call Beatrice Hotchkiss.<br />
Talk to Dylan<br />
Return to the surface. Dylan Carter is back<br />
in his lounge chair, so stop and talk to him.<br />
He mentions that he has "proof that space<br />
girl is batty" so he must be talking about<br />
Jamila. He gives you a scrap of paper with<br />
some sort of code. Ask Dylan how he found<br />
the dig site and he'll start telling an awkward<br />
lie. As you press for details it's clear that he's<br />
uncomfortable being dishonest with you.<br />
He asks you to drop the conversation. You<br />
might need his help later so go along with his<br />
suggestion… for now.<br />
Call Beatrice<br />
Take out your phone and call Beatrice<br />
Hotchkiss. Ask her about the details<br />
surrounding Queen Nefertari's children.<br />
She'll begin by talking about the boys. Note<br />
their names. Now ask her about Queen<br />
Nefertari's daughters. Beatrice mentions her<br />
ongoing book research and wants to know<br />
which Egyptian goddess is pictured above the<br />
doors in the tomb's antechamber. Tell her it is<br />
Ma'at and ask her for the names of Nefertari's<br />
daughters then she'll give you the names.<br />
Don't worry about writing it down—these<br />
names appear in your journal.
Spell It Out<br />
Return to the lock puzzle on the inner coffin. Combining the information in <strong>Dr</strong>. Boyle's notes,<br />
your hieroglyph practice book, the Egyptian Pantheon from Dylan, the lost letter and your<br />
journal notes from Beatrice you should be able to rearrange the tiles to spell out the names<br />
from oldest to youngest child. If you're stuck, the photo below shows the correct solution.<br />
Piecing Papyrus Together<br />
You hear a click as you spell out the seven names on the puzzle. Push back the coffin lid.<br />
It's empty! There are torn pieces of papyrus here. Assemble the parchment by rotating<br />
the fragments until every piece with script is upright. Now match the pieces according to<br />
shape. Depending on your difficulty level there are two messages, but pay close attention<br />
to everything after the second sentence: "Begin with gold to honor, amethyst for royalty<br />
and a pause to remember. Step ahead to rejuvenate in emerald, knowledge abounds in lapis<br />
and protection from evil in carnelian." (Amateur Sleuth.) "Begin with emerald, then a pause<br />
to remember. Step ahead to honor in gold, and protect from evil in carnelian. Knowledge<br />
abounds in lapis, while amethyst marks her royal." (Master Sleuth.)<br />
23
24<br />
A Little Walk and Talk<br />
Return to camp and talk to Lily in the tent. She doesn't want to discuss her run-in with <strong>Dr</strong>.<br />
<strong>Bakhoum</strong> in any detail, but she asks you to sort out the amulets in the antiquities tent. Enter<br />
the antiquities tent and listen to the discussion Jamila is having with someone. Is she talking<br />
on a cellular phone? If so, who is on the line and what is Jamila up to?<br />
Everything in its Place<br />
As you enter the antiquities tent you should see a closed wood box on the right table. Open<br />
this box and you'll see 17 empty compartments. Sort the amulets by type according to the<br />
Relics book in your inventory. If you need help, look at the solution in the photograph below.<br />
While there are 17 compartments, there are only 16 amulets. You're missing the jackal—the<br />
guardian of the dead. Was it left somewhere on the table? As you close the box you'll see a<br />
tear in the tent fabric. Did someone cut the tarp and take the jackal amulet?<br />
Dig Around<br />
Leave the antiquities tent and walk around the exterior until you find the cut in the fabric.<br />
It's next to a stack of wood crates. This is a great location for a thief who wanted to take<br />
something from the tent without been seen or detected. Use your shovel and dig around in<br />
the sand beneath the crates until you find a note. The exact location of the note is random,<br />
so keep digging from left to right. The note details payment conditions to an offshore bank<br />
account for a jackal amulet. Is someone selling Egyptian artifacts as souvenirs?
Unscramble<br />
Look in your inventory and take out the piece of paper that Dylan gave you and pair it with<br />
the torn note containing the grids and letters that you found in Jamila's handbag. Depending<br />
on which difficulty level you're playing, there are two sets of solutions, but we show both<br />
in the photographs below. No matter how you go about filling in the answer, you'll need to<br />
unscramble the same four words: CAT, BLUE, TOMB and OPENS. Now rearrange the four words<br />
in a brief sentence by clicking and dragging each completed word to the bottom of the page.<br />
When you do everything right, you should see the following message: BLUE CAT OPENS TOMB.<br />
Amateur Sleuth Master Sleuth<br />
Excavate<br />
Return to the tomb and follow "Tunnel 1" on your map. If you're not sure which tunnel<br />
you need to find, it's the one that has remained largely unexplored—and this guide hasn't<br />
mentioned it much... yet. From the stairs leading into the antechamber, take a left and follow<br />
the passage. You reach a dead end where a mural with a blue cat is concealed by centuries of<br />
accumulated sand. Use your pick and then your brush to clear away the caked sand. Take the<br />
cat amulet from your inventory and place it in the indentation at the center of the mural.<br />
25
26<br />
"What comes easily is lost easily."<br />
The door opens when you place the cat amulet in the wall, but Dylan walks into the opening<br />
before you can react. It's too dark to see anything and as he stumbles around in the blackness<br />
he triggers a cave-in! You can save this injured guide if you avert another cave-in during your<br />
rescue. Pull out one rock at a time in the pattern shown in the photographs below.<br />
Make a Few Calls<br />
Talk to <strong>Dr</strong>. Boyle about the accident and ask<br />
him any questions you think could help your<br />
investigation. Now call Dylan at the hospital<br />
and ask him if he remembers anything<br />
unusual prior to his accident. He mentions<br />
that Jamila's handbag seemed unusual, but<br />
Dylan isn't lucid enough to offer specific<br />
details. Conclude the phone call and go<br />
outside the tent to the water truck. The back<br />
of the vehicle is covered in locusts. How<br />
could these insects travel this far across the<br />
desert? Return to the tomb.<br />
Turn on the Lights<br />
Retrace your steps back through Tunnel 1<br />
on the map to the room where Dylan had his<br />
accident. The rocks and broken rubble are<br />
gone so you can see a little further into the<br />
chamber, but you need more light to proceed.<br />
Look for the lamp in the wall, add oil and<br />
then use the lighter that you found in <strong>Dr</strong>.<br />
Boyle's footlocker. Now arrange the mirrors<br />
so that light reaches the orb on the left and<br />
illuminates the entire room. If you're in the<br />
dark, check out the photo on the right.
While the Cat is Away…<br />
Examine the cat coffin at the center of the<br />
room. Open it and remove the scarab-shaped<br />
tag from the cat's collar. Look up at the<br />
ceiling. Is this where the bird tile that you<br />
found in the antiquities tent goes? What is<br />
up with all the mummified mice? Don't start<br />
pawing around with these feline-themed<br />
puzzles because the cat's scarab-shaped tag<br />
will help you unlock something in the other<br />
burial chamber where you found the empty<br />
coffin. Retrace your steps back to the end of<br />
Tunnel 3 on your map.<br />
Slithering To a Solution<br />
There is a panel in the burial chamber wall where you found the old spears. Return here and<br />
insert the cat's scarab-shaped tag. Now twist it to open the panel. There are two solutions<br />
to this cobra-sliding puzzle. For Amateur Sleuth, slide red, purple, gold, green, blue, gold,<br />
purple, red, blue, green, purple, gold, red, blue and finally green. For Master Sleuth, slide red,<br />
blue, green, red, blue, purple, green, purple, blue, red and finally gold.<br />
Amateur Sleuth Master Sleuth<br />
Confront Your Destiny<br />
This room glows with a strange light as you<br />
enter it. In the distance you can see a gold<br />
coffin but the connecting passage is paved<br />
with rocks covered in hieroglyphs. Examine<br />
the statues on the left and the right. You can<br />
translate the message on the right wall with<br />
your dictionary, but you must decode the<br />
message on the left. Considering the other<br />
tricks and traps in this place, it's a fairly safe<br />
assumption that the treacherous passage<br />
ahead conceals a trap. Perhaps there are other<br />
resources on the surface that can help you.<br />
27
28<br />
An Unwelcome Guest<br />
Return to the tent. Where is that hissing sound coming from? Glance over at the cobra on<br />
your bed. Quickly move the trash bin close to the snake and then pick up the stick and use it<br />
to move the snake into the trash bin. Add the trash bin to your inventory and take it outside.<br />
Next to the tent is another trash bucket. Dump the trash bin containing the snake (the one in<br />
your inventory) inside this bucket. It's unlikely that anyone else was inside the tent with the<br />
cobra slithering around, so take out your phone and ask Beatrice Hotchkiss for help.<br />
"The dreams of cats are all mice."<br />
Ask Beatrice Hotchkiss about the riddle involving<br />
the translation of "the path lies in destiny." She<br />
explains that Queen Nefertari's cat was named<br />
"Destiny." Return to the cat's chamber and<br />
examine the mummified mice puzzle. Decode<br />
the hieroglyphs on the panel below the puzzle:<br />
"In the hall of two truths they shall be judged.<br />
Only the one found to be as light as the feather of<br />
Ma'at, unburdened as the others, shall open the<br />
threshold." One mouse is slightly lighter than the<br />
rest. You have three chances to find it and place<br />
it in the mouse hole before you must reset the<br />
puzzle and start over.<br />
A Fake Mummy?<br />
A hidden compartment opens when you place the lightest mouse in the mouse hole. You<br />
learn that the cat's name was Meskhenet. There are also old journal pages here, too. Return<br />
to the false burial chamber and examine the sarcophagus. Open the coffin. Someone added<br />
a mummy to the coffin! Why? Spell out Meskhenet in hieroglyphs (see below) on the stones<br />
across the floor. Walk across the narrow bridge and approach the gold coffin.
Gold… and a Gate<br />
Examine the gold coffin in the inner tomb. It's locked, but the red symbols on the coffin<br />
resemble the same symbols found on the Senet board in the tent. Could Lily help you figure<br />
out the combination? There is another ceiling tile resting next to the coffin. Pick up the<br />
tile and a door opens. Follow the tunnel and you'll see a padlocked gate. Where does this<br />
lead? It's locked, but maybe you'll find a key later. Keep moving until you see a door with a<br />
handprint next to it. Touch the handprint and you'll find yourself back in Tunnel 2.<br />
Time for a Distraction<br />
Return to the antechamber. There is a silver key on a keychain hanging from the scaffolding,<br />
but you know better than to grab it while <strong>Dr</strong>. <strong>Bakhoum</strong> is standing right there. Tell him about<br />
the gold coffin and he'll leave the room to check it out for himself. Now take the key, add it to<br />
your inventory and return to the cat burial chamber at the end of Tunnel 1.<br />
For the Birds<br />
Look up at the ceiling inside the cat burial<br />
chamber and replace the missing tiles.<br />
Something might happen if you press the bird<br />
tiles in a specific order. The journal pages and<br />
cat mural hint at the order you need to press,<br />
2 7<br />
or you can follow the correct sequence shown<br />
in the photo on the right. If you press the tiles<br />
correctly, a door will open. Follow the passage<br />
6 1<br />
and pick up the paper and the rhinestone.<br />
There are footprints here. In the next passage,<br />
pick up another old journal entry and touch the<br />
handprint to open the door. Return to camp<br />
and ask Lily about the symbols in the Senet<br />
game board.<br />
Open Up<br />
The key that you found on the scaffolding<br />
opens <strong>Dr</strong>. <strong>Bakhoum</strong>'s footlocker, but you need<br />
to convince Lily to leave. Tell her that <strong>Dr</strong>.<br />
<strong>Bakhoum</strong> wants to see her, and then open his<br />
locker. Read the correspondence from Sonny<br />
Joon and the letter from Kingston University.<br />
Return to the tomb and ask Jamila about<br />
the aliens and her real reason for loitering<br />
at the dig site. Now mention that you found<br />
something strange near the tomb. She leaves<br />
to investigate. Read the article hidden in the<br />
bottom of her handbag.<br />
5 3 8 4<br />
29
30<br />
Place a Call<br />
Return to the surface and call <strong>Dr</strong>. Jon Boyle<br />
on your cellular phone. Ask him about<br />
Jamila, <strong>Dr</strong>. <strong>Bakhoum</strong> and the Daughters of<br />
Nefertari. <strong>Dr</strong>. Boyle is vague about the last<br />
subject. Return to Jamila in the tomb and ask<br />
her about the Daughters of Nefertari and <strong>Dr</strong>.<br />
<strong>Bakhoum</strong>. Press her for more details on why<br />
she is here in the tomb. She'll eventually give<br />
you a scrap of paper that matches the one<br />
you found near the footprints. What do the<br />
numbers on these two pieces of paper have to<br />
do with Lily?<br />
Crack it Open<br />
Return to the surface and enter the tent. If Lily has returned, tell her <strong>Abdullah</strong> needs her.<br />
Decode the lock on Lily's footlocker. If you're stuck, don't forget to review the lock instruction<br />
manual on the floor next to her bed. You can extend color boxes from both sides of the<br />
numbered square areas in vertical columns or horizontal rows, but you cannot create colored<br />
areas that are both vertical and horizontal. The Amateur and Master solutions are below.<br />
Amateur Sleuth Master Sleuth<br />
An Audience with the Queen<br />
Review the contents of Lily's locker, take the<br />
piece of Jon's missing notes and exit the tent.<br />
A sandstorm is kicking up! Considering the<br />
force of the wind, the safest refuge from this<br />
weather is probably inside the tomb. Return<br />
to the gold coffin and press the red emblems<br />
in the order found in Jon's missing notes and<br />
your journal notes from talking with Lily<br />
about Senet. The solution is in the photo on<br />
the right. Push the coffin lid aside. Is this<br />
Nefertari? Who followed you into the tomb?<br />
It's a cave in! Run and find Jamila.<br />
5<br />
3<br />
2<br />
1<br />
4
Dial M for Mummy<br />
The cave-in blocked the stairway leading<br />
down into the tomb. Find Jamila in Tunnel<br />
3 and ask her about getting help. She gives<br />
you a beacon, a key and a slip of paper with<br />
a riddle. Return to Tunnel 4 and use the key<br />
that she gave you on the gate. Climb up the<br />
stairs. You're up on a ledge! Use the riddle,<br />
the old journal and the pantheon brochure<br />
to turn the dial and match the correct heads<br />
with the body on the disc. Now press the<br />
center of the disc to extend the ledge across<br />
the room. The solutions are below.<br />
Dial 1 Dial 2 Dial 3 Dial 4<br />
"Malice drinketh its own poison."<br />
Enter the passage on the other side of the<br />
fully extended ledge. Follow the halls until<br />
you spot the real culprit! You'll need to<br />
rotate the pillars until the colors on each<br />
column match and form a line of platforms.<br />
The object is to create a path of platforms<br />
from the ledge in the lower left corner of the<br />
room to the center ledge near the top of your<br />
screen. If you're stuck, the final solution is in<br />
the photo to the right!<br />
Senebti!<br />
31
32<br />
Sassy Detective Awards<br />
Outlined below are the award titles and a tip for earning them. As with other guides, the<br />
Easter Egg award remains a secret for the most persistent and adventurous detectives!<br />
Camelback <strong>Dr</strong>ink at least six cups of water from the water tank.<br />
Code Breaker Manually decode all the special hieroglyphs in the game.<br />
Curses! Witness all the strange curse events in the game!<br />
Egyptologist Read every text and brochure in the game.<br />
Easter Egg Find a secret surprise hidden in the game.<br />
Feathered Friend Press the hoopoe at least seven times in a row.<br />
Gamer Play Senet at least five times.<br />
Lights Out Plug in the rechargeable flashlight and watch it go up<br />
in smoke.<br />
Research Assistant Correctly answer all eight of Professor Hotchkiss'<br />
questions.<br />
Scarab Slide Move the scarab pieces at least 40 times while solving<br />
the puzzle.<br />
Translator Translate eight phrases with your dictionary.<br />
Trivia Tamer Correctly answer the final trivia question at the end of<br />
the case.


