Making Wood Countertops - WEST SYSTEM Epoxy
Making Wood Countertops - WEST SYSTEM Epoxy
Making Wood Countertops - WEST SYSTEM Epoxy
Create successful ePaper yourself
Turn your PDF publications into a flip-book with our unique Google optimized e-Paper software.
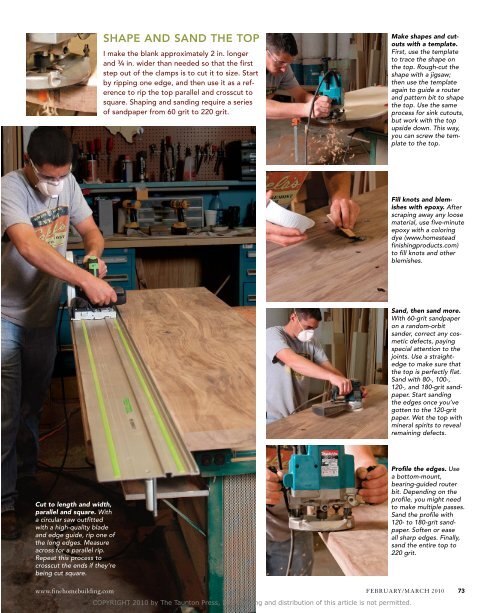
Cut to length and width,<br />
parallel and square. With<br />
a circular saw outfitted<br />
with a high-quality blade<br />
and edge guide, rip one of<br />
the long edges. Measure<br />
across for a parallel rip.<br />
Repeat this process to<br />
crosscut the ends if they’re<br />
being cut square.<br />
Shape and Sand the top<br />
I make the blank approximately 2 in. longer<br />
and 3 ⁄4 in. wider than needed so that the first<br />
step out of the clamps is to cut it to size. Start<br />
by ripping one edge, and then use it as a reference<br />
to rip the top parallel and crosscut to<br />
square. Shaping and sanding require a series<br />
of sandpaper from 60 grit to 220 grit.<br />
Make shapes and cutouts<br />
with a template.<br />
First, use the template<br />
to trace the shape on<br />
the top. Rough-cut the<br />
shape with a jigsaw;<br />
then use the template<br />
again to guide a router<br />
and pattern bit to shape<br />
the top. Use the same<br />
process for sink cutouts,<br />
but work with the top<br />
upside down. This way,<br />
you can screw the template<br />
to the top.<br />
Fill knots and blemishes<br />
with epoxy. After<br />
scraping away any loose<br />
material, use five-minute<br />
epoxy with a coloring<br />
dye (www.homestead<br />
finishingproducts.com)<br />
to fill knots and other<br />
blemishes.<br />
Sand, then sand more.<br />
With 60-grit sandpaper<br />
on a random-orbit<br />
sander, correct any cosmetic<br />
defects, paying<br />
special attention to the<br />
joints. Use a straightedge<br />
to make sure that<br />
the top is perfectly flat.<br />
Sand with 80-, 100-,<br />
120-, and 180-grit sandpaper.<br />
Start sanding<br />
the edges once you’ve<br />
gotten to the 120-grit<br />
paper. Wet the top with<br />
mineral spirits to reveal<br />
remaining defects.<br />
Profile the edges. Use<br />
a bottom-mount,<br />
bearing-guided router<br />
bit. Depending on the<br />
profile, you might need<br />
to make multiple passes.<br />
Sand the profile with<br />
120- to 180-grit sandpaper.<br />
Soften or ease<br />
all sharp edges. Finally,<br />
sand the entire top to<br />
220 grit.<br />
www.finehomebuilding.com february/march 2010 73<br />
COPYRIGHT 2010 by The Taunton Press, Inc. Copying and distribution of this article is not permitted.


