Lab 7.4.1: Basic DHCP and NAT Configuration
Lab 7.4.1: Basic DHCP and NAT Configuration
Lab 7.4.1: Basic DHCP and NAT Configuration

Create successful ePaper yourself
Turn your PDF publications into a flip-book with our unique Google optimized e-Paper software.
CCNA Exploration<br />
Accessing the WAN: IP Addressing Services <strong>Lab</strong> <strong>7.4.1</strong>: <strong>Basic</strong> <strong>DHCP</strong> <strong>and</strong> <strong>NAT</strong> <strong>Configuration</strong><br />
Task 1: Prepare the Network<br />
Step 1: Cable a network that is similar to the one in the topology diagram.<br />
Step 2: Clear all existing configurations on the routers.<br />
Task 2: Perform <strong>Basic</strong> Router <strong>Configuration</strong>s<br />
Configure the R1, R2, <strong>and</strong> ISP routers according to the following guidelines:<br />
• Configure the device hostname.<br />
• Disable DNS lookup.<br />
• Configure a privileged EXEC mode password.<br />
• Configure a message-of-the-day banner.<br />
• Configure a password for the console connections.<br />
• Configure a password for all vty connections.<br />
• Configure IP addresses on all routers. The PCs receive IP addressing from <strong>DHCP</strong> later in the lab.<br />
• Enable OSPF with process ID 1 on R1 <strong>and</strong> R2. Do not advertise the 209.165.200.224/27<br />
network.<br />
Note: Instead of attaching a server to R2, you can configure a loopback interface on R2 to use the IP<br />
address 192.168.20.254/24. If you do this, you do not need to configure the Fast Ethernet interface.<br />
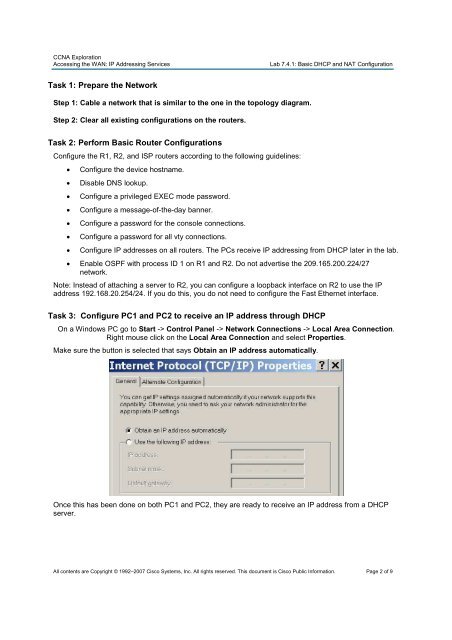
Task 3: Configure PC1 <strong>and</strong> PC2 to receive an IP address through <strong>DHCP</strong><br />
On a Windows PC go to Start -> Control Panel -> Network Connections -> Local Area Connection.<br />
Right mouse click on the Local Area Connection <strong>and</strong> select Properties.<br />
Make sure the button is selected that says Obtain an IP address automatically.<br />
Once this has been done on both PC1 <strong>and</strong> PC2, they are ready to receive an IP address from a <strong>DHCP</strong><br />
server.<br />
All contents are Copyright © 1992–2007 Cisco Systems, Inc. All rights reserved. This document is Cisco Public Information. Page 2 of 9